Tutorial  Updated

WiiFlow Lite Setup Full Tutorial

1.png

2.png


Initial Setup:Main Setup:Graphic Setup:Troubleshooting:Other Languages:


  1. Initial Setup:
    Step 1:

    To start off I am assuming you guys have already have been able to install the Homebrew Channel onto your Wii or vWii using your method of choice. If not, refer to here. Here is a newer guide I found that is a quick rundown how to properly hack your Wii. You MUST have Homebrew in order for this to work!

    Also I am assuming that you already loaded the IOS to the back USB port so that the Wii or Wii U can read your USB. if not you can find how to here (Wii and vWii have different CIOS, make sure to download the correct one!)

    You must have an SD card and/or an external drive of some sort. Can be a Hard drive, flash drive(reported to have issues but I have used a 256 GB flash drive on my vWii and hasn't given me any issues. I used this tutorial on how to load the CIO'S for your drive), SSD, you name it. For this purpose I will be using my 64 GB SD card and 256 GB Flash drive. You MUST have CIOS's if you are loading from a USB or HDD.

    Make sure both drives are FAT32 format. If drive is too big, download a software that will force format your SD into FAT32.

    In my case, my USB Drive will hold all my games (Your own copies) and SD card to hold all my other files.

    Step 2:

    Download WiiFlow Lite here and click and drag both files into the root of your SD (DO NOT DOWNLOAD if you are using the master pack, also If you already have an apps folder, open it and place the folder inside).
    Screenshot_1.png
    Download Abz Master Piece Pack from here. (It's advised to NOT use it due to being outdated! Use at own risk!)
    Here is my Danimalz Masterpiece Pack (v5.4) (If you want the original theme, Download from Tetsu's Rhapsodii Shima then replace!)

    Once downloaded, Navigate to ROOT://WiiFlow folder and extract plugins, settings, and source_menu.
    Copy and paste into WiiFlow Lite folder.
    Screenshot_2.png

    5.png

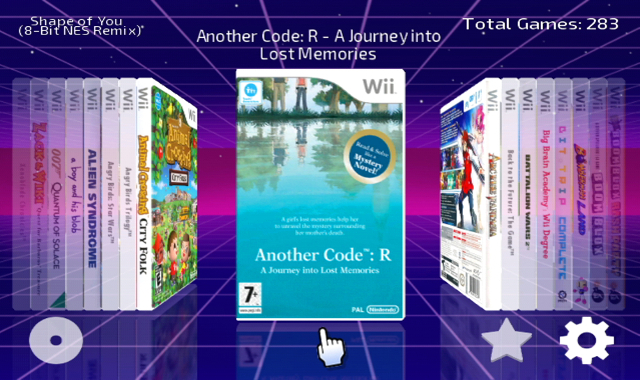
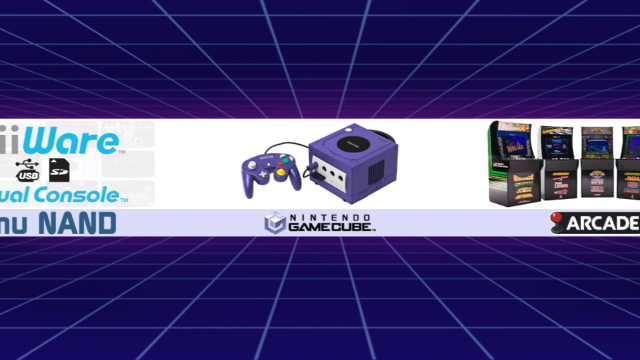
    This will create the source menu when you press on B(on the Wii remote) in the Wiiflow app(This is the source_menu from Abz, If you like it like this, make sure to download the Abz Masterpiece Pack and extract his source_menu folder, however, with Danimalz Master Pack it will look like the hyperspin.

    6.png

    17.jpg
    18.jpg
    Now you have the shell of wiiflow installed.

  2. Main Setup:
    Step 3:

    The next step is to download the home brew applications to run and test your Wii ISO'S and GameCube ISO'S. I would recommend for Wii to use Configurable USB Loader and for GameCube games, to use Nintendont (configurable USB loader is needed to be downloaded if you want to test your ISO's, if you don't need the test, disregard downloading but Nintendont MUST be downloaded in order to play GameCube games)

    Follow the same steps of downloading and dragging and dropping the contents of apps folder into your SD card apps folder and the main files into the ROOT of the SD.

    On your USB, make it nice and organized. Split your emulators by their intended systems. For gamecube, do ROOT://games/GAMENAME/game
    Picture5.png
    For Wii Games I would use Wii Backup Manager. All you have to do is drag your legitimate ISO and have it transfer and format the games for you so it is readable and playable by the Wii or vWii.

    The backup manager will convert your ISO's into .wbfs files, and it will put it into a format that is readable by wiiFlow.

    These two names can most likely be changed, but for sake of simplicity, I would keep them at these names.

    Now plugging the USB into the system, you notice that it is not reading any files. As default, WiiFlow scans for files on the SD card. In WiiFlow, On the bottom right hand corner, press the gear icon to enter the settings menu, and select game partitions. From here set Wii Partition GameCube and plugin(this allows all your other games from other emulators to run from USB) partition to USB1.

    Then go to your GameCube section, and choose a game, press on the gear icon located to the right. Select for GameCube Loader Nintendont, widescreen patch on, Wii U (If this applies to you) on, and Emulate MemCard Enabled.
    10.jpg
    11.jpg
    12.jpg
    13.jpg
    14.jpg
    For Wii Games, some games might not run due to the ISO being from another country, so make sure to select the patch country strings to on in the settings of the Wii ISO'S.

    The nice part about Wii and GameCube games, is that you can just download all the banners. When you see the cover flow, press the gear icon on the bottom right, select Go on Download covers and banners (WARNING make sure that you are connected to WiFi) and select Download for each option.
    15.jpg
    16.jpg
    Congrats! your Wii games should be displayed here and working and your GameCube games! There are some settings you can play around with inside of the Homebrew app Nintendont. From here now it depends on what type of emulator you would like to use and a bit more configuration. Abz and Danimal Masterpiece come pre-loaded with many different plugins for your choosing, but many that are not found there like Game & Watch, you must find custom .dol's for.

    Step 4:

    Now I will show you how to add emulators from plugins that can be found already located in the plugins file.

    For instance, lets do the NES emulator. Each plugin has attached to itself a magic number. The magic number is important so that wiiflow can call that specific file, location, and other files in order to execute the program specifically intended for in this example NES. Currently, I am using the application FCEUGX to emulate my NES games. Using Notepad++ right click the fcegx.ini file, and edit it.
    fce.png
    This is how my file is setup. A rundown, the displayname is the name of the application you are using and what the name of the emulator you are using. The magic is the specific number associated to this specific emulator. The coverfolder is the location of your box art (All covers for different emulators, you will have to download by hand and upload for each title!), I will get more into it a bit later. The .dol file should be kept the same but this is the file in the same folder in which wiiflow uses to boot from when you select the game. Filetypes is associated with the extension of the file of your rom/game. For ex: metroid.nes The file extension is .nes in this case. The console cover id is set to Nintendo but I don't mess with this. The cover color changes the color of the box covers. Bannersound sounds are files that are used by wiiflow to use when the game boots up. Its that sweet jingle of the system when you select the game (Later I will show how to make custom ones). Arguments is a default that should not be messed with, but it allows wiiflow the basics of finding the locations of your files so it provides the specific path format.

    For romdir, we must first create a location for our files to be read from. In my case, my roms are located on my USB drive. On the ROOT of the USB create a new folder. In my case, I named this folder to fceugx. Then I upload all my .nes files into a folder I created called roms, so all of my roms directly associated with this emulator. I also added the saves files so that the games can be saved there. The romdir in this case would be fceugx/roms and this allows wiiflow the path and the location of the rom files needed for this specific plugin.
    root.png
    Here I changed the names to what I want to see on the wiiflow side of the titles on the flow. ***WARNING*** some emulators like PS1, NEOGEO, MAME, etc. changing the file name will not allow the game to be played, so if you notice the game isn't playable, just change the name back (It is advised to change the names in the custom_titles.ini file tutorial here or using the titles found in databases in the ROOT://wiiflow/plugins_data folder).

    Now wiiflow looks for the displayed title first in custom_titles.ini then in .xml and finally the actual filename not including the extension.

    The naming of file will be important for cover/box art. You must find all box art and cover art online here. There is a large collection on here but if you do not find the one you need, just download paint.net, photoshop, or paint, and just download a random one and edit it to your liking. (Make sure to look around on the comments of the thread, some people have linked more files, they just haven't been uploaded to the master list like for example Game&Watch)

    In order for the cover art to be read, you must specify the location where it is located, and the name must match exactly to the rom name and including its extension.
    box.png

    As you can see from earlier, the coverfolder was set to NES so the folder I am using is called NES. From there each image has the name of the game + the extension. For example, Duck Hunt is the game name but it has to be "Duck Hunt.nes.png"(Not including the "") to be readable as a cover. The .nes extension of the rom MUST be included in order for wiiflow to read it!

    Now go to wiiflow, press the home button on the Wii remote, and press reload cache. This will update the covers and cache it so that it loads much quicker next time you log on.

    If you change a file image just go to the cache folder and delete the cache image that you are changing, and the image located in the covers, then reload cache in wiiflow.

    Step 5:

    For some games, there is no game associated with a plugin like Game & Watch. In this case, we need to find a custom .dol online. In these cases, finding a .dol through Retroarch is your best bet. Retroarch uses cores in order for it to run specific games, and many emulators are being pushed onto Retroarch due to the great outcome for games working on the platform.

    We have to find our .dol files online for instance gw_libretro_wii.dol, which can be found here with many other files. We must now create a .ini file for it respectively and edit the file using HXD. A well created explanation of how to do this trick can be found on Wiimpathy's page (THIS ONLY WORKS for Retroarch .dol files!)

    When you edit the file, you can place the file into SD:\wiiflow\plugins\retroarch-wii\ folder and wiiflow will call these .dol files in the .ini file from here.

    Each .dol file needs a corresponding configurable file. To make an configurable file, I would copy and paste an already used one, and rename it to whatever you renamed the retroarch.cfg to. From there you must create a custom magic number that is not being used by any system (Use a Text to Hexadecimal Converter Ex: 4e444453 converted to text is NDDS for Nintendo DS.) Also a custom .ogg can be created and linked here so that you hear the start up. Both the .ogg file and .ini need to be located in SD:\\wiiflow\plugins\
    ogg.png
    As you can see:
    gw.png
    my custom magic number is 59876549. I created this one to only be used for this this specific emulator. It is advised to use the next magic number from the last one. Meaning increment from the before one ex: 1000 to the next value to be 1001. With simplicity this allows for easier troubleshooting when problems arise. In my case, I chose a random number and it can cause issues in the future if I do not keep track. A better hex to use would have been 4726574E which in text value expresses G&WN for Game & Watch Nintendo.

    You can use a converter to convert a YouTube video into .mp3, then convert the .mp3 file to .ogg using this website.

    Clip the audio file to your liking using audacity.

    Make sure to change your ROM directory to match what it will be on your USB and same process with uploading cover art.

    One last step is to edit the platform.ini file located in SD:\wiiflow\plugins_data

    You must open this file and as seen:
    place the magic number equal to the system. You must also set a specific cover flow (some cover flows can be sideways, long ways etc.) as seen:
    GAMEand-Watch.png

    Now your emulator is set to be able to be used!

    Step 6:

    Setting up cores for MAME can be quiet difficult and a pain to handle. But, Wiimpathy has made it easy for us to download cores A-G here and H here. The reason why we have so many cores comes down to where each game has a specific core to where it needs to be tied to in order to work. Here you can check each games compatibility list and connect the correct core to each one(WARNING! Some games are not listed here, you will have to find which core it works in!)

    To setup, make sure to place all mame2003core#.dol into ROOT:\\wiiflow\plugins\retroarch-wii folder, and place all core#.ini into the ROOT:\\wiiflow\plugins folder. From here each core has a specific magic number assigned to it.

    I found it best to name on the root MAME, then inside that folder to name ROMS, then separate folders for each core (I added my csp1 and csp2 here as well) as seen:
    cores.png
    Now from there place your ROMS into the indicated folder. From there, like how I wanted all my games to be located in the same arcade section, when adding a button, I added multiple magic numbers seen:
    multiple-magic.png
    Separation through commas, allows you to add multiple magic numbers per button, and when you check it out on the system end, all the games will be located in 1 library titled "MAME" yet when played, the corresponding core is selected.

    CSP1, CSP2, and FBA can all be found in the retroarch folder downloaded earlier.

  3. Graphic Setup:
    Step 7:

    Now its time to edit the source_menu.ini to have your custom buttons (if you want a cool theme with different button styles skip to step 9)

    From here download the source menu editor.
    source%20screenie.JPG
    When you run the java file, select your wiiflow folder in your SD card. From there a gui will show you how your buttons look. You can change the button locations, delete some, add some etc. In order for the buttons to work, make sure to link the specific magic number associated with each specific emulator(WARNING! Do not use this method on sourcemenu's if you are using hyperspin)

    Step 8:

    Editing coverflows can be a pain but are best done on the Wii or vWii side. When you change the coverflow in the settings, it will change the settings for all the emulators in that same style. For example, you edit the cover flow layout of Wii, it will change gamecube and any other emulator that is equal to _sourceflow in platform.ini. In order to change it make sure to turn off locking sourceflow in the settings option on the Wii, then on the top left corner, clip on the 1 to change it to the next flow. Now changing this flow and keeping it specifically for that emulator will only change that one.

    Here you have the power to change the titles, how they flip, how everything looks, moves etc.

    Step 9:

    Make sure to cache all your covers from each system, this allows the covers to boot up as quickly as possible.

    You can also change or add background music to your wiiflow background. Make sure to dump your music file that is .ogg into the music folder located in SD://wiiflow/music
    music.png

    If you find any games you do not want you can simply delete them by pressing on the game, then pressing the 'X' icon and confirming deleting the game. It will only delete the one you have selected.
    IMG-1792.jpg
    Some emulators like NeoGeo for instance, has a bios file called neogeo, and it can be read by wiiflow as if it is a game and appear in your library. The simplest way of getting ride of it is by going to your categories and placing all files you want to be invisible into category one. Then click on the the categories 1 check box twice until you see a red 'X' then close out of it. All files placed into this category will have disappeared. Do not fear! They are safe and still there. If you want to see them again, simply go back into the settings and uncheck the box and it should be back.
    WARNING!! Your categories might just be: Category 1, Category 2..... etc. Still works the same way!
    IMG-1793.jpg
    Step 10:

    Themes are a great addition to where you are able to upload pre-made or your own themes to make your wiiflow to look nicer, smoother, or add a bit of fun.

    My current theme is Rhapsodii Shima by Tetsuo Shima (v5.4) It is a very nice slick, clean cover flow that makes everything look beautiful and elegant. You can look around and find many on the forum and upload them by following their specific setup. Make sure to change your theme from default to "theme" you want in the settings.

    ***WARNING*** Some themes will be broken if you use the sourceflow editor downloaded from WiiFlow Wiki. Make sure you edit the files. For instance for Shima's theme, there are .ini files located in ROOT:\\Wiiflow\source_menu\(file).ini These .ini files are the locations for each button present in each category for example arcade.ini refers to all the arcade systems you see sliding in the arcade menu:
    arcadeini.png
    Here you can remove buttons so you have less, or even add more via editing the .ini file using Notepad++. If you are creating a new button make sure you increment by the next button (i.e: last button is Button_0 next would be Button_1) and update the photos of the image, the magic, source location (usually plugin), etc.
    aracdeiniiiii.png
    The images will be pulled from the same location as your .ini file. So either make one, or find the corresponding .png file to your system.

    List:
    • Hakaishi Rhapsodii link
    Rhapsodii_Feature_Display1.jpg
    rhapsodii-shima-screenshot.png
    • Tetsu Shima Rhapsodii Shima link (v5.4 1.1)
    190658-875d7b2abc9433b2f29f97fdb20961df.jpg
    197566-2834d294b28462851d3dbc00c8ca9466.jpg
    197574-e8b8cc17e63f3dd1b4b5c7025397bb86.jpg
    197568-5aff7680fecea01dd7cc82bb01fb4cdb.jpg
    190659-9570a02f308f8e067781628d66b3dfd5.jpg
    190660-8b3197c4a45d8e0df9695ad3f3a1a26e.jpg
    197563-6a1cd6e178035f4392d50b9be9408c15.jpg
    197564-cc497ba97532ddc878f4e299a508c6d0.jpg
    190668-be11338d9746cef21bb56ab2eb184893.jpg
    190670-9f75abb90838dafc548cbfe9162abf46.jpg
    190671-35a71f9199eba646b14f0577f981df85.jpg
    197573-3ecec9c4d6674245cd6a048f6b368212.jpg
    [/ATTACH]

    • Fledge 8bit playground, orchid, violet, carbonik, and carbonik Abz link (USE at your own RISK!! Highly incompatible!!)
    Screenshot-1.png

    Step 11:

    A feature, lost and has not been really used, are Trailers. Trailers can be accessed using the '-' button on the Wii remote(IF you have a trailer for that specific game). Trailers are located in the ROOT:\\wiiflow\trailers folder.

    In this location, you should have 2 files for each game. The audio file, .OGG and the video file, in .THP. A database for trailers is being compiled, the current ones can be found here. For Wii games and GameCube games, it is advised to use the [NAM3] associated with it. For instance, if Mario Party Cool [MP45W] was call like this, both of your files should be called MP45W.ogg and MP45W.thp.

    Most likely, for Wii games and GameCube games, the files go into that folder. It depends on the coverfolder location you set in the wiiflow plugins .ini folder. The setup should mirror the same setup as your boxcovers. Meaning if NEOGEO is in a folder called NEOGEO, then you must have a folder called NEOGEO with the NEOGEO trailers in it.

    For all other roms, the naming of the file will be the same as before. The full name of the game, the extension, and the end one. For example, metroid prime.nes would be "metroid prime.nes.ogg and metroid prime.nes.thp". You can make your own trailers as well! Just go onto YouTube, find your video, copy the link, download it from here (make sure to select .mp4), upload it to this website and trim it to your desired length. From here download the .ogg converter and .thp converter from here.

    Open the .thp converter, and upload the file into it, then when it is done, click and drag the .thp file of your game onto the WiiflowVideoConverter and a command prompt will appear. type '3' then press enter. It will create a .ogg file for you once the process completes. Then press 'enter' to exit. Now you have your own trailer created! More information can be found on the database page.

    Step 12:

    Last but not least are Channel Forwarders. Looking online you can find a channel forwarder for Wii and vWii. Here is the vWii forwarder These forwarders can be installed using a WAD manager here or others will work.
    IMG-1794.jpg
    IMG-1795.jpg

  4. Common Issues Troubleshooting:
    Refer to step 1, many issues of USB not being read can be the CIOS isn't properly installed make sure you follow the specific steps for Wii or vWii. Another solution can be that you did not set the partition in wiiflow correctly. Name sure the partition options are set to USB1 if you are using the USB!
    UPDATE to beta 14!! This should fix the issue present in all other betas. If not, try this out. This will be the solution for the time being until a fix is found. make sure to report on here or wiiflow lite thread. This is an issue I have experienced and wouldn't be surprised if others have it. I fixed this problem by copying and pasting over the apps folder from SD card to the USB. Also copy the wiiflow folder from the root onto USB. Then allow a new wiiflow_lite.ini file to generate in the ROOT:\\apps\wiiflow folder, and it should be working again. MUST REGENERATE .ini FILE!! Specifically in apps you MUST bring over nintendont, and bring over wiiflow or else GameCube games will not load, nor will the wiiflow run.
    Wii files are very specific and can make it a challenge to setup. Make sure emuNAND is set to off in the wii settings, vipatch is off, 480 patch is off. The problem can arise that the default IOS doesn't work with the corresponding video mode. I had to start at 250, then change video mode, test, see if it runs, doesn't, unplug wii/wiiu, then restart with a different mode until I find the correct mode. If not found, change IOS and do the same thing with gamemode. Should either be 250/251, unless you find one working on 249.
    Refer to step 2, I would download my Master Piece Pack also located in Recommend packs section.
    Refer to step 3, common problems is that you do not have a GameCube ISO loader. I would choose nintendont, install to apps, and in wiiflow select nintnedont as your loader, emu mem card enabled, etc. a couple of times it might mess up, but just reload.
    Refer to step 3, make sure you use Wii backup manager. The files will be converted to .wbfs files and put in a format readable by wiiflow. I would download configurable USB Loader to test to see if the .wbfs file works. If it works, settings on wiiflow are what are not allowing the game to be run, then refer to "Every time I run a Wii game, it black screens!" to find how to make them work. Also make sure they are your system, if not, for instance a pal .wbfs, make sure to set patch country on as well and find video mode.
    Refer to step 4. If it is GameCube or Wii games, make sure to just download them through the wiiflow settings. This will be the easiest way for them to work. For all other systems, make sure you are putting all your files in a specific folder for the specific rom. Meaning if for instance, SuperMario.nes you have this ROM you want a box cover for. Make sure the fceugx.ini file (unless you use a different loader) and in the boxcovers="blahblahblah" you set the correct destination. meaning boxcovers root folder is boxcovers located in ROOT:\wiiflow\boxcovers. From here lets say you create another folder called NES, then boxcovers="NES". The system reads for the NES folder located in the boxcovers folder in wiiflow. From here make sure your .png file is named correctly. The proper name for this games .png file would be "SuperMario.nes.png" This file name will allow wiiflow to link the .png to the specific game. Make sure also delete the cached cover in the ROOT:\\wiiflow\cache\nes\supermario.nes.png.wfc or your ROM specific file. The cache MUST be deleted or it will not update to new cover!
    Use Notepad++ its a free editor that keeps it clean and neat and will let you know if format is incorrect.
    Either name it back to what it was before, or re-download. Some ROMS will not work if file name is changed, sorry!
    Refer to step 5 and 6. These are not that easy to setup. You must have multiple cores created for a group of retroarch ROMS. Thanks to Wiimpathy, we have many cores that work great with ROMS. Thanks to Tetsu and Mastershoes, they compiled a compatibility list of known working ROMS in which core.
    Refer to step 5. You will have to edit retroarch-wii .dol files to create a .cfg file that will be read and played like for ex. my game&watch.dol file.
    Refer to step 5. Make sure you are calling the correct file in the .ini file. The file must be converted to .ogg. make sure the .ogg file is located in the ROOT:\\wiiflow\plugins folder.
    Either A: you have to find the correct sized and laid out format in mastershoes cover collection, or B: edit the cover art using photoshop or paint.net(free) and dimension the .png so it fits perfectly, or C: make your own! You can find countless covers online, use them to your advantage!
    Refer to step 10 to find a new theme. If you are leaving the hyperspin style and want buttons, make sure to download ABZ wiiflow\source_menu in order to make it to buttons again(if you are using the Danimal Master Piece) WARNING! Some themes will not be supported, overlapping can occur and this will not be fixed unless the owner does, or you do.
    Well make sure you throw all of it onto one device, and edit all paths in wiiflow, edit all partition locations in wiiflow, etc. A lot of files ROOT locations ie sd:] mut be changed to usb1:\ or vice versa.
    Refer to step 11. You cannot use vWii forwarder on Wii or Wii forwarder on vWii. Each .wad must be specific to which system you own. I included a vWii forwarder that looks nice, simple, and works ONLY for vWii.
    You can check out fledge68's thread of wiiflow Lite, or checkout the wiiflow wiki included in the links section.
    Make sure go into wiiflow's main settings, and cache covers. This will allow your covers to load up quickly!
    Don't be shy, ask away! Create an account, and ask on here. Currently I am really active and I believe that many are more than happy to help out :) ITS A THREAD FOR A REASON!!

  5. Other Languages:
    List:


Thank you:
  • Thank you to @fledge68 for this great homebrew application and the constant updates!
  • Thank you to @Wiimpathy for the trick to edit retroarch .dol files to work with wiiflow and uploading so many cores for us as a community to use.
  • Thank you to @Tetsuo Shima for the custom theme, very smooth and elegant, and for the compatibility list for MAME cores!
  • Thank you to @mastershoes for the large compilation of cover art and box cover for wiiflow, really makes it a masterpiece in the end, and the compatibility list for MAME cores!
Links:
Here is the wiiflow wiki that is the same to wiiflow lite (which is a fork that is up-to-date. Support is gone for the original wiiflow)

Read up upon Fledge68's wiiflow lite support, updates, and general information here.

Youtube Video:

Here is an entire YouTube video dedicated to this thread, hope it helps and enjoy click here.
Recommended Packs:
Many retroarch cores and missing systems compiled by Wiimpathy here, here, here, and here

I am attaching my personal SD + USB/HDD files for wiiflow and other apps. Most of what someone wants as in basics are all here + a little extras. I am using Tetsuo Shima's theme, I modified some .pngs as well. If you dislike the modded themes by me, just re download Tetsuo's theme from his page, and replace everything that comes in the pack. My file is located here Danimal Master Piece (here the hyper-spin source_menu is used, this all must be edited within the .ini files, CANNOT use source_menu editor on this! it will break!)

Questions:
Feel free to asks question and asking for help on here. More than happy to help! What can really help is if you download SysCheck here ,throw it into your apps folder and run it in Homebrew channel, and include all the information presented in there with your question, the best solutions will be provided knowing some information about your system.

v3.1 | 03/12/20 - Uploaded YouTube video that follows this thread!
v3.0 | 03/02/20 - Re-uploaded all images, updated broken links, and added new version (5.4) into the mix.
v2.2 | 11/21/19 - Added trailer tutorial onto this page and linked the database thread to step 11.
v2.1 | 11/17/19 - v5.3.0 beta 14 is out! Updated the Danimal Master Piece pack to have beta 14 included.
v2.0 | 11/13/19 - Fixed grammar, added tabs, added a new title, took all the here links for photos, uploaded into the page, added more visuals, and previews of themes!
v1.8 | 11/12/19 - Fixed grammar, added visuals, and added a new troubleshooting section for common problems, added versions for each update!
v1.7 | 11/11/19 - Fixed grammar, color coded for easier visualization as well ass updated YouTube video date.
v1.6 | 11/06/19 - Fixed grammar, updated with more information, and added some important side notes.
v1.5 | 11/05/19 - Updated New section called MAME core Setup, compatibility list + cores, as well as, updated the thank you section to reflect everyone who made this possible.
v1.4 | 11/04/19 - Updated the Danimal Master Piece Pack, file size shrunk from 1.34 GB to 353 MB.
v1.3 | 11/01/19 - Changed wiiflow to one word.
v1.2 | 10/24/19 - Updated general information on retroarch and changing names of files, and other
v1.1 | 10/23/19 - Minor spelling errors.
v1.0 | 10/22/19 - Created thread.
 
Last edited by x65943,

SSJ5 Goku

Member
Newcomer
Joined
Apr 24, 2015
Messages
12
Trophies
0
Age
39
XP
195
Country
United States
Everytime I copy the WiiFlow directory to the SD Card THAT happens. It is a weird combo of shifting & shuffling of the buttons. They go left & right in a semi-rigid pattern. But they do shuffle around somewhat when you shift it to the left or right. Plz HELP!

--------------------- MERGED ---------------------------

Oh, & I'm currently using the default theme. Any theme other than the 2 Rhapsodii themes work as they just cause the buttons to form a straight sort of strip you would just then scroll either left or right for rhe plugin buttons. I've since deleted those 2 themes.
 

Attachments

  • IMG_3031[1].JPG
    IMG_3031[1].JPG
    800.6 KB · Views: 316

Danimalzpwn3

Well-Known Member
OP
Member
Joined
Oct 12, 2019
Messages
154
Trophies
0
Age
26
Location
America
XP
479
Country
United States
So I'm assuming your trying to get the hyperspin feature to work? As in, these images should be all laid out with a background? What version of wii flow are you on? Im assuming, for at least of what I understand, is if you go to the main menu, and track to one of the last pages, should be something called sourceflow, enable that, and then you can edit it to where you can choose boxed, bordered, small boxes, etc. choose the one that fits for you. Also if you used rahpsodii, then hyperspin is enabled as the source menu, but if you want the regular one, then u MUST download the regular source menu found in the wiki
 
Last edited by Danimalzpwn3,

SSJ5 Goku

Member
Newcomer
Joined
Apr 24, 2015
Messages
12
Trophies
0
Age
39
XP
195
Country
United States
Also I'm on WiiFlow 5.3.0 Beta 14. It's the same one U included in Ur pack.

--------------------- MERGED ---------------------------

And no, I don,t care about hyperspin, whatever that is. It's mainly because I want to be able to use the source menu editor.
 

Danimalzpwn3

Well-Known Member
OP
Member
Joined
Oct 12, 2019
Messages
154
Trophies
0
Age
26
Location
America
XP
479
Country
United States
Here is the wiki. But yes, if you are using my source_menu, it will make it a hyper spin (all info of what it is and where to go and what to do is in the thread, I’d advise reading it) but yours most likely broke once you tried to edit the hyper spin with source menu editor which doesn’t allow that. Once you use that, it breaks it. You have to edit manually each button (have a tutorial of how to do it published in thread) if you want the regular buttons like Abz, then, Yes you have to download the original one. My pack is optimized more for the Rhapsodii theme. If your trying to go with basic, I’d advise going with the basic theme, and abz source menu. This will create the b button style menu and nothing more, and able to use the editor to edit the source menu to your liking. Also I’d use Abz platform.ini as well. (Link to his pack is working in my thread!) Also with the new update of wiiflow, the problem will arise that buttons are overlaying one another and not properly working. I found that v5.2.0 does the trick with the theme and source menu, and is as basic as it gets. V5.3.0 beta 11 I believe was the same. But 14 WILL give you an overlapped theme of buttons.
 
Last edited by Danimalzpwn3,

SSJ5 Goku

Member
Newcomer
Joined
Apr 24, 2015
Messages
12
Trophies
0
Age
39
XP
195
Country
United States
Could U give me a working link to 5.3.0 beta 11? I tried googling it, but to no avail. Also, I have no idea what file(s)/folder(s) are responsible for the 4x3 button ratio WITH page setup. I know the source_menu.ini file is responsible for the order, titles pics & things of that nature. I'm afraid that's the limit of my knowledge tho. I need more info. Plz help.
 

Danimalzpwn3

Well-Known Member
OP
Member
Joined
Oct 12, 2019
Messages
154
Trophies
0
Age
26
Location
America
XP
479
Country
United States
hmmm...... I don't think there is a download for it and fledge would NOT recommend downloading the older one. I would download. As I said before please take a look at this thread, it talks about the entirety and importance of each section and how to get it to work, even troublehooting page. The surce_menu.ini is the menu that you use associating with wiiflow lite. I would, delete the contents of the source_menu you have, download Abz (copy his source_menu folder and paste it into yours) and let it run. Then see how it looks, delete all the buttons you do not need with source_menu editor. (I have a walk through in the thread please reefer to it) It should fix your problem and have buttons setup how you see on most systems. I think carboniks is the basic theme that comes loaded into wiiflow so I would stick with it.
 

SSJ5 Goku

Member
Newcomer
Joined
Apr 24, 2015
Messages
12
Trophies
0
Age
39
XP
195
Country
United States
The source_menu.ini wasn't the problem after all! After trying what U said & still nothing, it occured to me... I forgot to delete the WiiFlow save file in Wii Settings after each install. Silly Me! Everything works the way I want as far as the source menu is concerned now. Thnx for the help & I'll keep U posted on any updates or if I need help in general.
 
  • Like
Reactions: Danimalzpwn3

SSJ5 Goku

Member
Newcomer
Joined
Apr 24, 2015
Messages
12
Trophies
0
Age
39
XP
195
Country
United States
Also, I don't want overlapping themes. I have this SICK Orange Theme for my friend whose Wii I'm Modding & guess what? Her favorite color happens to be orange. It also has this grunge aesthetic that she REALLY digs! That's why I wanted 5.2.0 or the beta I mentioned earlier to keep the overlapping from happening. Any help would be appreciated.
 

Danimalzpwn3

Well-Known Member
OP
Member
Joined
Oct 12, 2019
Messages
154
Trophies
0
Age
26
Location
America
XP
479
Country
United States
Wiiflow creates a save file to save certain settings on. Sometimes deleting this will fix issues for example, accidentally changing IOS then Wiiflow crashing constantly. Your theme could most likely be compatible with old Wii Flow which isn't recommended to use, and will have issues with. If your theme worked on a previous version that you used, then go and use that one. I cannot provide a link to older versions, because I don't have them. I'm still waiting on an update for the theme I use. If you really want your theme to work, request for the author to make an update. If not, make your own.
 

Danimalzpwn3

Well-Known Member
OP
Member
Joined
Oct 12, 2019
Messages
154
Trophies
0
Age
26
Location
America
XP
479
Country
United States
I don’t know what was the issue with that, it’s blocked on my end too.... I’m going to message an admin to see why it is like that. I’ll notify you once it’s fixed
 

Tico_ociT

Member
Newcomer
Joined
Nov 28, 2019
Messages
8
Trophies
0
Age
44
XP
90
Country
Brazil
Hi, there!
This is my little contribution to the community. A translation of @Danimalzpwn3's tutorial to Brazilian Portuguese. I tried to keep the layout the same as the original post, so people can refer to the source material as needed. And I will try to keep it updated.

I hope more people can access this tutorial and, doing so, can contribute to this wonderful WiiFlow project!

Thanks again @Danimalzpwn3 for the hard work!

Tico

Configuração inicial:Configuração principal:Configuração gráfica:Resolvendo problemas:


  1. Configuração inicial:
    Passo 1:

    Pra começar, assumo que você já tenho instalado o Homebrew Channel no seu Wii ou vWii usando um método qualquer. Se ainda não instalou, vá aqui. E aqui tem outro guia mais novo que eu encontrei, que é um resumo rápido de como hackear corretamente seu Wii. Você PRECISA ter o Homebrew para que o resto funcione!

    Eu também assumo que você já carregou o IOS para a porta USB traseira, para que o seu Wii ou Wii U possa ler o USB. Se ainda não, você pode saber como fazer aqui (Wii e vWii usam CIOS diferentes, tenha certeza de que você baixou o correto!)

    Você deve ter um cartão SD e/ou algum tipo de drive externo [para ligar na porta USB]. Pode ser um disco rígido, pendrive (pode dar problemas, mas eu tenho usado um pendrive de 256GB no meu vWii que não tem dado nenhum problema. Eu usei este tutorial para carregar o CIOS do drive), SSD, ou qualquer outro tipo. Para este tutorial, eu usarei meu cartão SD de 64GB e um pendrive de 256GB. Você
    PRECISA ter os CIOS se você for carregar pela porta USB/HDD.

    Tenha certeza de que ambos os discos estão formatados como FAT32. Se o disco é muito grande, baixe um software que formatará forçadamente seu cartão SD em FAT32.


    No meu caso, ligado no USB está o meu disco rígido com todos os meus jogos (suas cópias dos jogos) e no cartão SD ficarão todos os outros arquivos.

    Passo 2:

    Baixe o WiiFlow Lite aqui, clique e arraste ambos os arquivos para a raiz do seu cartão SD (se você já tem uma pasta "apps", abra e coloque os arquivos lá).
    screenshot_1-png.200749
    Baixe o arquivo Abz Master Piece Pack daqui. (É aconselhável
    NÃO utilizá-lo, pois não está atualizado! Use por sua própria conta e risco! Aqui está o meu Masterpiece Pack atualizado para a v5.4) (Se você quiser o tema original, faça o download e substitua pelo tema Tetsu's Rhapsodii Shima!)

    Uma vez baixados os arquivos, abra a pasta SD://wiiflow/ e extraia plugins, settings e source_menu.
    screenshot_2-png.200751
    Copie cole dentro da pasta WiiFlow Lite.
    5-png.192786
    Isto criará o source menu quando você pressionar B (no Wii remote) ao usar o WiiFlow (Este é um source_menu do pacote Abz. Se você gostar, certifique-se de que baixou o Abz Masterpiece Pack e que extraiu a pasta source_menu.
    Orchid%20Source%20Menu.png
    17-jpg.192796
    18-jpg.192797
    Pronto, você instalou o "esqueleto" do Wiiflow.


  2. Configuração principal:
    Passo 3:

    O próximo passo é baixar os aplicativos homebrew para testar os arquivos ISO do Wii e os arquivos ISO do GameCube. Para o Wii, eu recomendaria o Configurable USB Loader, e para jogos do GameCube, o Nintendont (o Configurable USB Loader não precisa ser baixado se você não quiser fazer os testes, mas o Nintendont É OBRIGATÓRIO
    para se jogar GameCube).

    Siga os mesmos passos para baixar, arrastar e copiar os conteúdos das pastas "app" para a pasta "apps" do seu cartão SD, e as pastas e arquivos principais para a RAIZ do cartão SD.

    Mantenha seu USB limpo e organizado. Separe os jogos dos emuladores de acordo com os sistemas emulados. Para o GameCube com jogos carregados pelo USB, o caminho correto é usb://games/Nome-do-Jogo/jogo.iso

    picture5-png.192788

    Para os jogos do Wii, eu utilizaria o Wii Backup Manager [Gerenciador de Cópias de Segurança para Wii]. Tudo o que você precisa fazer é arrastar para o aplicativo seu legítimo arquivo ISO e transferi-lo para o drive USB num formato que seja lido pelo Wii ou vWii.

    O gerenciador de backup converterá seu arquivo ISO para um arquivo .wbfs, colocando-o num formato que pode ser compreendido pelo WiiFlow.

    Agora conecte o drive USB no sistema. Você perceberá que nenhum arquivo será lido. Por padrão, o WiiFlow faz a varredura de arquivos no cartão SD. No WiiFlow, no canto inferior direito , clique no ícone da engrenagem para entrar no menu de configurações e escolha a partição dos jogos. Deste ponto, determine a partição para USB1, para os jogos do Wii, GameCube e plugins (este último permitirá que todos jogos dos outros emuladores sejam rodados pelo USB).


    Vá então para a seção GameCube e escolha um jogo, clique no ícone da engrenagem localizado à direita. Selecione Nintendont como o loader [carregador de jogos] de GameCube e as opções: widescreen patch on [correção de tela estendida], Wii U on (se esta opção se aplicar a você) e Emulate MemCard Enabled [emular o cartão de memória].
    10-jpg.192789
    11-jpg.192790
    12-jpg.192791
    13-jpg.192792
    14-jpg.192793

    Alguns jogos de Wii podem não funcionar devido ao arquivo ISO ser de outro país. Tenha certeza de ter selecionado o patch country on [correção de país] nas configurações de cada jogo ISO do Wii.

    A parte legal dos jogos de Wii e GameCube é que você pode baixar facilmente todas as artes. Quando você ver o coverflow [visualização de capas em fluxo], clique no ícone de engrenagem no canto inferior direito, clique em Download covers and banners [Baixar capas e animações] (CUIDADO
    , tenha certeza de que está conectado ao WIFI) e selecione Download para cada opção.
    15-jpg.192794
    16-jpg.192795

    Parabéns! Seus jogos de Wii e de GameCube devem aparecer e funcionar! Há algumas configurações do Nintendont que você pode mexer. De agora em diante só dependerá de que tipos de emulador você gostaria de usar e algumas configurações mais. Os pacotes Abz e Danimal Masterpiece já vêm pré-carregados com muitos e diferentes plugins para sua escolha. Porém, para plugins que não estão ali, como o Game & Watch, você deve encontrar os arquivos .dol customizados.


    Passo 4:


    Agora vou mostrar como adicionar os emuladores através dos plugins que já estão localizados na pasta de plugins.

    Por exemplo, vamos arrumar o emulador do NES. Para cada plugin fica vinculado um número mágico [magic number]. O número mágico é importante para que o WiiFlow possa carregar o arquivo específico, a localização e outros arquivos de determinado emulador. Eu atualmente estou usando o aplicativo FCEUGX para emular meus jogos de NES. Usando o Notepad++, abra o arquivo fcegx.ini e edite-o.


    fce-png.192798

    Meu arquivo está configurado desta forma: displayname é o nome do aplicativo, ou seja, do emulador que você está usando. Magic é o número mágico exclusivo que está associado a este emulador. Coverfolder é a localização da arte das capas (você precisará baixar manualmente e copiar, uma a uma, todas as capas para cada jogo! - entrarei em detalhes adiante). O arquivo .dol deve ser mantido, este é o arquivo que o WiiFlow usa para iniciar o jogo. Filetypes [tipos de arquivo] é a extensão dos arquivos de seus ROMs/jogos. Por exempo: metroid.nes - a extensão do arquivo é .nes. O console cover id [identidade da capa do console] está marcado como Nintendo, mas eu não mexo nisso. Cover color muda a cor das capas. Os sons do Bannersound são arquivos usados pelo WiiFlow quando o jogo inicia. É aquela musiquinha do sistema quando você seleciona um jogo (posteriormente eu mostrarei como fazer músicas customizadas). Arguments não deve ser modificado, mas permite que o WiiFlow encontre a localização de arquivos através de um caminho específico.

    Em romdir, nós devemos indicar o local onde os arquivos de jogos serão carregados. No meu caso, meus ROMs estão localizados no meu drive USB. Na RAIZ do USB, crie uma nova pasta. Eu dei o nome de fceugx. Dentro dela eu criei a pasta roms, e ali eu copiei todos os meus arquivos .nes. Eu também copiei todos os save files junto com os jogos. O romdir, neste caso, ficou como fceugx/roms, permitindo que o WiiFlow saiba o caminho dos arquivos ROMs necessário para este plugin específico.
    root-png.192799

    Agora eu modifico os nomes dos arquivos para como eu quero que apareça ao lado dos títulos, na visualização em fluxo do WiiFlow. ***CUIDADO*** alguns emuladores como PS1, NeoGeo, MAME, etc., não aceitam a mudança do nome do arquivo. Assim, se perceber que o jogo não funciona, retorne ao nome anterior (Avisaram no fórum que a mudança de nomes deve ser feita no arquivo custom_titles.ini, neste tutorial
    aqui, ou utilizando-se os títulos encontrados no banco de dados na pasta SD://wiiflow/plugins_data).

    Agora o WiiFlow procura pelo nome a ser mostrado primeiramente no arquivo custom_titles.ini, depois no arquivo .xml e finalmente o nome do arquivo em si, excluindo a extensão.

    O nome do arquivo é importante para a arte da capa/caixa. Você pode encontrar as artes de caixa e de capa aqui. É uma coleção gigante, mas se não encontrar o que procura, baixe o paint.net, photoshop ou paint, baixe uma imagem e edite-a de acordo com seu gosto (Certifique-se de que deu uma olhada nos comentários do fórum, algumas pessoas têm enviado arquivos, mas não fizeram upload na lista principal, como o caso do Game&Watch).

    Para que a arte de capa seja carregada, você deve indicar sua localização. E o nome deve ser exatamente o mesmo do nome do arquivo ROM, incluindo sua extensão.
    box-png.192800

    Como você pode ver acima, o coverfolder foi fixado em NES, então a pasta que eu estou usando chama-se NES. Ali, cada imagem tem o nome do jogo + a extensão. Por exemplo, Duck Hunt é o nome do jogo, mas tive que renomear para Duck Hunt.nes.png para que a capa fosse lida. A extensão .nes do arquivo ROM DEVE ser incluída no nome do arquivo da imagem para que o WiiFlow consiga carregá-la!
    Agora vá para o WiiFlow, pressione o botão home do Wii remote, e pressione reload cache [recarregar cache]. Isto atualizará as capas e o cache, de modo que o carregamento ficará bem mais rápido da próxima vez.

    Se você alterar um arquivo de imagem, vá até a pasta do cache e apague a imagem do cache que foi alterada. Recarregue o cache (reload cache) no WiiFlow.


    Passo 5:


    Para alguns jogos, não há associação com um plugin, como o Game & Watch. Nestes casos, devemos encontrar um arquivo .dol customizado, e o Retroarch é sua melhor aposta. O Retroarch usa cores para rodar jogos específicos, e muitos emuladores estão sendo inseridos no Retroarch devido aos bons resultados da plataforma.

    Então temos que encontrar online os arquivos .dol, por exemplo, gw_libretro_wii.dol, que pode ser achado aqui junto a muitos outros arquivos. Devemos agora criar um arquivo .ini para ele, e editar o arquivo usando o HXD. Uma explicação muito bem feita sobre como fazer este truque pode ser encontrada nesta página do @Wiimpathy (ISTO SOMENTE FUNCIONA com os arquivos .dol do Retroarch!)


    Quando você editar o arquivo, você pode colocar o arquivo na pasta SD:\wiiflow\plugins\retroarch-wii\ e o WiiFlow poderá carregar os arquivos .dol e .ini de lá.

    Cada arquivo .dol precisa de um arquivo de configuração correspondente. Para fazer um arquivo de configuração, eu copiaria um arquivo já existente e o renomearia de acordo com o que fez no arquivo retroarch.cfg. A seguir, você deve criar um número mágico [magic number] que não esteja sendo usado por nenhum sistema (utilize um conversor de texto para hexadecimal; por exemplo, 4e444453 convertido para texto vira NDDS, sigla para o Nintendo DS). Também aqui pode-se criar e vincular um arquivo .ogg, que toque ao iniciar. Tanto o arquivo .ogg quanto o arquivo .ini devem estar localizados na pasta SD:\wiiflow\plugins\
    ogg-png.192801

    Como você pode ver:

    gw-png.192802

    Meu número mágico customizado é 59876549. Eu o criei exclusivamente para ser usado com este emulador. Sugere-se que se use o próximo número mágico de acordo com o último criado, ou seja, incrementando o valor; como de 1000 para 1001. Esta forma simples permite uma mais fácil resolução de problemas. No meu caso, eu escolhi um número aleatório e isto pode causar problemas no futuro se eu não cuidar dos registros. Um número hexadecimal melhor poderia ser 4726574E, que convertido ao formato texto expressaria G&WN para Game & Watch Nintendo.


    Você pode usar um converter para transformar um vídeo do YouTube em um arquivo .mp3, e então converter o arquivo .mp3 para .ogg usando este website. Corte o arquivo de áudio de acordo com suas preferências usando o Audacity.

    Certifique-se de que alterou o diretório de ROMs de acordo com o que está no drive USB, fazendo o mesmo quando copiar as artes das capas.

    Um último passo é editar o arquivo platform.ini que está localizado em SD:\wiiflow\plugins_data

    Coloque o número mágico [magic number] correspondente ao sistema emulado. Você também deve determinar um coverflow específico (alguns coverflows podem ser laterais, alongados, etc.), como visto aqui:


    GAMEand-Watch.png

    Agora seu emulador está pronto para ser utilizado!


    Passo 6:


    Configurar os cores do MAME pode ser bem complicado e um saco para fazer manutenção. Contudo, @Wiimpathy facilitou para todos o download dos cores A-G aqui e H aqui. O motivo de existirem tantos cores é que alguns jogos precisam de cores específicos para funcionar. Aqui você pode verificar a lista de compatibilidade dos jogos e assim vincular cada jogo ao seu core correto (ATENÇÃO! Alguns jogos não estão listados ali, você terá que descobrir qual o core correspondente ao jogo!)


    Para configurar, certifique-se de que colocou todos os arquivos mame2003core#.dol na pasta SD:\\wiiflow\plugins\retroarch-wii . Cada core tem um respectivo número mágico [magic number] associado.


    Eu achei melhor criar uma pasta geral chamada MAME, e dentro dela outra pasta chamada ROMS e, dentro desta, pastas separadas para cada core (eu adicionei também csp1 e csp2), como pode ser visto:

    cores.png

    Agora coloque suas ROMS dentro das pastas indicadas. Como eu quis que todos os meus jogos estivessem dentro de uma seção arcade, quando adicionei um botão, também adicionei múltiplos números mágicos, desta forma:

    multiple-magic.png

    Separando por vírgulas, é possível adicionar diversos números mágicos para um mesmo botão. Quando verificar no sistema, todos os jogos estarão localizados numa mesma biblioteca chamada "MAME". Contudo, quando for jogá-los, o core correspondente será selecionado.


    CPS1, CPS2 e FBA podem ser todos encontrados na pasta retroarch que foi baixada anteriormente.


  3. Configuração gráfica:
    Passo 7:

    Agora é o momento de editar o arquivo source_menu.ini para criar seus botões customizados (se você deseja um tema legal com diferentes estilos de botões, pule para o passo 9).


    Faça o download aqui do editor do source menu.
    source%20screenie.JPG

    Quando você rodar o arquivo java, selecione a pasta do WiiFlow do seu cartão SD. A seguir, a interface mostrará seus botões atuais. Você pode alterar a ordem dos botões, apagar alguns, adicionar outros, etc. Para que seus botões funcionem corretamente, certifique-se de que o cada número mágico [magic number] está associado ao emulador correspondente (ATENÇÃO! Não utilize este método de source menu se estiver usando o hyperspin).


    Passo 8:


    Fazer a edição de coverflows [modo de apresentação de capas em fluxo] pode ser bem chato, mas a melhor forma é fazê-la diretamente no Wii ou vWii. Quando você altera o coverflow nas configurações, todos os outros emuladores serão modificados para o mesmo estilo. Por exemplo, se você editar o coverflow do Wii, também serão modificados o coverflow do GameCube e dos outros emuladores, igual ao _sourceflow no arquivo platform.ini. Para fazer a modificação, certifique-se de ter desligado a trava [turn off locking] do sourceflow nas configurações do Wii, vá ao canto superior esquerdo e pressione 1 para mudar para a próximo flow. Deste modo, a alteração do flow ficará mantida para este emulador apenas.


    Aqui você também tem a opção de alterar os títulos, como eles giram, como mudar a aparência, movimentações, etc.

    Passo 9:


    Certifique-se de que atualizou o cache de todas as suas capas, em todos os sistemas, pois isto permitirá que as capas iniciem o mais rápido possível.

    Você também pode alterar ou adicionar uma música de fundo no seu WiiFlow. Assegure-se de que o arquivo seja .ogg e que ele foi copiado para a pasta SD://wiiflow/music

    music.png
    Se você encontrar algum jogo que não queira mais, você pode apagá-lo de uma forma simples. Selecione o jogo, pressione o ícone X e confirme a exclusão. Somente será apagado o jogo selecionado.

    IMG-1792.jpg
    Alguns emuladores precisam de um arquivo BIOS, como o NeoGeo e o arquivo neogeo.bios, que acaba sendo lido pelo WiiFlow e aparecendo na sua biblioteca como se fosse um jogo. A forma mais fácil de se livrar desse problema é configurar Categorias e colocar todos esses arquivos que você quer deixar invisíveis numa mesma categoria. Então clique duas vezes na caixa de seleção da categoria, até que apareça um X, e feche. Todos os arquivos que estejam sob esta categoria desaparecerão. Não tenha medo! Eles estão seguros e ainda lá. Se desejar vê-los novamente, simplesmente volte às configurações e desmarque a caixa de seleção.


    ATENÇÃO!! Suas categorias podem ser nomeadas simplesmente: Categoria 1, Categoria 2..... etc. Funcionará da mesma forma!
    IMG-1793.jpg

    Passo 10:


    Os temas são uma ótima contribuição, sejam aqueles já prontos, sejam seus próprios temas, e fazem o WiiFlow ficar mais bonito, suave e mais divertido.

    Meu tema atual é o Rhapsodii Shima do
    @Tetsuo Shima (a versão WiiFlow 5.2.0 não suporta este tema completamente. Não aparecerão os fundos customizados para cada console, nem capas de tamanho customizado. Certifique-se de que esteja na versão 5.3.0 beta 14 para utilizar o tema mais atualizado). É um tema bem refinado, com um coverflow limpo, que deixa tudo muito bonito e elegante. Você pode dar uma procurada por aí para encontrar muitos outros temas no fórum, carregando-os com suas configurações específicas. Certifique-se de que alterou a opção de tema de default [padrão] para o tema que deseja, nas configurações.

    ***ATENÇÃO*** Alguns temas poderão quebrar se você usar o editor do sourceflow que pode ser baixado do Wiki do WiiFlow. Certifique-se de que editou os arquivos. Por exemplo, para o tema do Shima, existem arquivos .ini localizados em SD:\\wiiflow\source_menu\(arquivo).ini . Estes arquivos .ini determinam a localização de cada botão presente em cada categoria; por exemplo, o arquivo arcade.ini se refere a todos os sistemas de arcade que você vê ao deslizar o menu arcade:

    arcadeini.png
    Aqui você pode remover ou adicionar novos botões editando o arquivo .ini com o Notepad++. Se você estiver criando um botão, certifique-se de que seja o incremento do último botão existente (ou seja, se o último botão é o Button_0, o próximo será Button_1). Atualize as imagens, o número mágico, a localização do source (geralmente um plugin), etc.

    aracdeiniiiii.png
    As imagens serão carregadas da mesma localização do seu arquivo .ini. Assim, ou crie um arquivo de imagem seu, ou encontre um arquivo .png correspondente do sistema em questão.

    cooooo.png


    Lista:

    • @Hakaisha Rhapsodii link
      Rhapsodii_Feature_Display1.jpg
      rhapsodii-shima-screenshot.png
    • @Tetsuo Shima Rhapsodii Shima link (o Danimal Master Pack refere-se ao WiiFlow v5.3.0 beta 14. Atualize para a versão beta do Wiiflow para usar o tema de forma completa)
      190658-875d7b2abc9433b2f29f97fdb20961df.jpg
      197566-2834d294b28462851d3dbc00c8ca9466.jpg
      197574-e8b8cc17e63f3dd1b4b5c7025397bb86.jpg
      197568-5aff7680fecea01dd7cc82bb01fb4cdb.jpg
      190659-9570a02f308f8e067781628d66b3dfd5.jpg
      190660-8b3197c4a45d8e0df9695ad3f3a1a26e.jpg
      197563-6a1cd6e178035f4392d50b9be9408c15.jpg
      197564-cc497ba97532ddc878f4e299a508c6d0.jpg
      190668-be11338d9746cef21bb56ab2eb184893.jpg
      190670-9f75abb90838dafc548cbfe9162abf46.jpg
      190671-35a71f9199eba646b14f0577f981df85.jpg
      197573-3ecec9c4d6674245cd6a048f6b368212.jpg
    • @fledge68 8bit playground, orchid, violet, carbonik, and carbonik Abz link
      Screenshot-1.png


    Passo 11:

    Uma funcionalidade que não tem sido muito utilizada é a Trailers. Os trailers podem ser acessados apertando o botão '-' no Wii remote (SE já existir um trailer para este jogo). Os trailers ficam localizados na pasta
    SD:\\wiiflow\trailers e é composto por 2 arquivos. O arquivo de áudio .OGG e o arquivo de vídeo .THP. Um banco de dados de trailers está sendo compilado, e está disponível aqui.

    Para jogos de Wii e GameCube, sugere-se que se use a identificação [NAM3] associado ao jogo. Por exemplo, se for o jogo Mario Party Cool [MP45W], ambos os arquivos devem ser nomeados como MP45W.ogg e MP45W.thp. Geralmente, para jogos Wii e GameCube, utiliza-se a pasta acima, mas isto depende da localização coverfolder que você inseriu no arquivo .ini da pasta de plugins do WiiFlow. A configuração deve espelhar o que foi determinado para as artes de capa. Ou seja, se o sistema é o NeoGeo, numa pasta de mesmo nome, os trailers devem ficar lá também. Os nomes de arquivo devem seguir o nome da ROM. Por exemplo, para o jogo metroid prime.nes, os arquivos ficariam metroid prime.nes.ogg e metroid prime.nes.thp.


    Você também pode fazer seus próprios trailers! Vá ao YouTube, encontre seu vídeo, copie o link, faça o download daqui (certifique-se de que selecionou .mp4), faça o upload para este website e recorte-o de acordo com suas preferências. O conversor para .ogg pode ser baixado daqui, e o conversor de .thp pode ser baixado daqui. Abra o conversor de .thp carregue o arquivo nele e, ao terminar, arraste o arquivo .thp para o WiiflowVideoConverter [conversor de vídeo do WiiFlow]. Ao aparecer a entrada para um comando, digite '3' e pressione enter. Isto criará um arquivo .ogg. Pressione enter para sair. Pronto, você acabou de criar seu próprio trailer! Mais informações podem ser obtidas na página do banco de dados de trailers.


    Passo 12:


    Por fim, mas não menos importante, estão os Channel Forwarders [canais do sistema do Wii/vWii que funcionam como atalhos para aplicativos]. Se procurar online você encontra um channel forwarder para o Wii e vWii. Aqui está o do vWii. Os forwarders podem ser instalados utilizando-se este gerenciador de Wad ou outro qualquer.

    IMG-1794.jpg
    IMG-1795.jpg


  4. Veja o passo 1, muitos problemas com a leitura do USB são causadas por uma instalação incorreta do CIOS. Certifique-se de que seguiu corretamente as instruções específicas para Wii ou vWii. Outra solução poderá ser você determinar corretamente a partição no WiiFlow. Certifique-se de que você selecionou USB1 nas opções de partição.
    ATUALIZE para o beta 14!! Isto vai corrigir um problema que está presente em todas as outras versões beta. Caso contrário, tente isto até que uma correção seja feita, não esquecendo de postar no fórum do WiiFlow Lite: eu resolvi o problema, copiando e colando a pasta apps do cartão SD para o drive USB. Também copiei a pasta wiiflow da raiz do cartão SD para o USB. Desse modo, será criado um novo arquivo wiiflow_lite.ini, gerado na pasta SD:\\apps\wiiflow, o que acabará com o problema. VOCÊ DEVE GERAR NOVAMENTE O ARQUIVO .ini! Especialmente sobre a pasta apps, você DEVE copiar e colar sobre o nintendont e wiiflow, senão os jogos do GameCube não carregarão, e nem o WiiFlow rodará.
    Arquivos Wii são muito específicos e podem trazer desafios para serem configurados. Certifique-se de que emuNAND está marcado como off nas configurações do Wii, vipatch também em off, 480 patch em off. O problema aparece porque o IOS padrão não trabalha com o modo de vídeo correspondente. Eu tive que iniciar com 250, e então alterar o modo de vídeo, testar, verificar se funcionou, não funcionou, desconectei o Wii/WiiU, e reiniciei com um modo diferente até encontrar o modo correto. Se não encontrar, altere o IOS e faça o mesmo com o modo de jogo. Deverá ficar entre 250/251, a menos que você encontre algum que funcione no 249.
    Veja o passo 2. Eu baixaria meu Master Piece Pack, que está localizado na seção Pacotes recomendados.
    Veja o passo 3. Um problema comum é que você não tem um loader [carregador] de ISO de GameCube. Eu escolheria o Nintendont; instale-o na pasta apps, e no WiiFlow selecione Nintendont como seu loader, e as opções emu mem card enabled, etc. Algumas vezes pode bagunçar, apenas recarregue.
    Veja o passo 3. Certifique-se de que usa um gerenciador de cópia de segurança do Wii [Wii backup manager]. Os arquivos serão convertidos para .wbfs e colocados num formato que pode ser lido pelo WiiFlow. Eu baixaria o configurable USB Loader para testar se o arquivo .wbfs funciona. Se deu certo, são as configurações do WiiFlow que não estão permitindo que o jogo funcione; leia então a solução "Toda vez que rodo um jogo de Wii, a tela fica preta!". Verifique também, por exemplo, se o arquivo .wbfs é PAL, e marque a opção patch country para on, como também a opção de modo de vídeo.
    Verifique o passo 4. Se for um jogo de Wii ou GameCube, basta apenas baixar a capa através das configurações do WiiFlow. Esta é a forma mais fácil de resolver a situação. Para todos os outros sistemas, certifique-se de que todos os arquivos estão numa pasta específica para ROMs do mesmo tipo. Ou seja, para a ROM SuperMario.nes, veja se o arquivo fceugx.ini (ou o arquivo de outro emulador) está com o destino correto na opção boxcovers=caminho_das_roms; a pasta raiz de todos os arquivos de capa é por padrão SD:\wiiflow\boxcovers . Como o arquivo é de NES, então a opção fica boxcovers="NES". O sistema lê a pasta que foi colocada na opção, que está dentro do caminho padrão [isto é, o caminho torna-se, então, SD:\wiiflow\boxcovers\NES]. Verifique também se o arquivo .png foi nomeado corretamente. Para o jogo em vista, o arquivo .png seria SuperMario.nes.png. Deste modo, o nome do arquivo permite que o WiiFlow vincule o arquivo .png com o jogo correto. Certifique-se, por fim, de ter apagado o cache de capas [cache cover] em SD:\\wiiflow\cache\nes\supermario.nes.png.wfc , ou que tenha apagado o arquivo de imagem da respectiva ROM. O cache DEVE ser apagado ou a atualização da nova capa não funcionará!
    Use o Notepad++, é um editor gratuito que manterá a edição clara e concisa, e te dirá se o formato é incorreto.
    Renomeie com o nome antigo ou faça o download novamente. Algumas ROMs não funcionam se o nome é alterado, desculpe!
    Veja os passos 5 e 6. Isto não é fácil de configurar. Você deve ter múltiplos cores criados para um grupo de ROMs do RetroArch. Graças ao @Wiimpathy, nós temos muitos cores que funcionam muito bem com as ROMs. Graças ao @Tetsuo e @mastershoes, temos uma lista de compatibilidade sobre as ROMs que funcionam com cada core.
    Veja o passo 5. Você terá que editar os arquivos .dol do retroarch-wii para criar um arquivo .cfg; por exemplo, meu arquivo game&watch.dol.
    Veja o passo 5. Certifique-se de que você está carregando o arquivo correto no arquivo .ini. O arquivo de som deve estar convertido para .ogg e localizado na pasta SD:\\wiiflow\plugins .
    Caso A: você deve encontrar a capa de tamanho e formato correto na coleção de capas do @mastershoes; caso B: edite a arte da capa usando o Photoshop ou Paint.net (grátis), e dimensione o arquivo .png para que caiba corretamente; caso C: faça a sua própria! Você pode encontrar inúmeras capas online, use-as como quiser!
    Veja o passo 10 para encontrar um novo tema. Se está deixando o estilo hyperspin e quer mais botões, certifique-se de que baixou o ABZ wiiflow\source_menu para que os botões apareçam de volta (se estiver usando o Danimal Master Piece). CUIDADO! Alguns temas não são suportados, a sobreposição poderá causar problemas que só o criador ou você poderão resolver.
    Bem, certifique-se de que moveu todos os arquivos para o drive, edite todos os caminhos no WiiFlow, edite as localizações de partição no WiiFlow, etc. Muitas localizações padrão, isto é sd:\, devem ser alteradas para usb1:\, e vice-versa.
    Veja o passo 11. Você não pode usar um forwarder do Wii no vWii, ou um forwarder do vWii no Wii. Cada .wad deve ser exclusivo de cada sistema. Eu incluí um forwarder do vWii que é bonito, simples e funciona SOMENTE com vWii.
    Você pode verificar o fórum do @fledge68 sobre o WiiFlow Lite, ou o wiki do WiiFlow que foi incluído na seção de links.
    Certifique-se de que foi nas configurações principais do WiiFlow, e acionou o cache covers. Isto permitirá que as capas carreguem rapidamente!
    Não tenha vergonha, pergunte! Crie uma conta e pergunte. Eu estou muito ativo no fórum atualmente e acredite, muitas pessoas ficarão felizes em ajudar :) É UM FÓRUM DE DISCUSSÃO JUSTAMENTE PARA ISSO!!


Agradecimentos:
  • Obrigado a @fledge68 por este grande aplicativo homebrew e pelas constantes atualizações!
  • Obrigado a @Wiimpathy pelo truque para editar os arquivos .dol do Retroarch para que funcionem com o Wiiflow, e por fazer o upload de tantos cores para uso pela comunidade.
  • Obrigado a @Tetsuo Shima pelo tema customizado, muito suave e elegante, e pela lista de compatibilidade dos cores de MAME!
  • Obrigado a @mastershoes pela grande compilação de artes de capas e caixas para o Wiiflow, é realmente uma obra esplêndida, e pela lista de compatibilidade dos cores do MAME!
Links:
Aqui está o wiki do Wiiflow, que é o mesmo do Wiiflow lite (que é uma ramificação atualizada. Não há mais suporte para o Wiiflow original).

Leia aqui o suporte, atualizações e informações gerais do Wiiflow lite do @fledge68.

Vídeo do Youtube:
Aqui está um vídeo inteiro no YouTube dedicado a esta discussão, espero que ajude. Clique aqui.

Pacotes recomendados:
Muitos cores do Retroarch e de sistemas ausentes foram compilados pelo @Wiimpathy aqui, aqui, aqui e aqui.

Estou anexando meus arquivos pessoais do SD + USB/HDD para o Wiiflow e outros aplicativos. Tudo o que a maioria dos usuários precisa de básico está aqui + algumas coisas extras. Estou usando o tema do @Tetsuo Shima, eu modifiquei alguns .pngs também. Se você não gostou dos temas modificados por mim, baixe novamente o tema do Tetsuo da página dele, e substitua tudo o que veio no pacote. Meu arquivo está localizado aqui Danimal Master Piece (nele é utilizado o hyper-spin source_menu, tudo deve ser editado dentro de arquivos .ini, NÃO USE o editor de source_menu! Vai zuar!)


Perguntas:
Sinta-se à vontade para fazer perguntas e pedir por ajuda aqui. Fico mais do que feliz em ajudar! Uma coisa que pode ajudar em muito é baixar o SysCheck aqui, colocá-lo na pasta de apps e rodá-lo pelo canal Homebrew. Inclua todas as informações apresentadas na sua pergunta, a melhor solução será providenciada se soubermos um pouco mais sobre seu sistema.

Tradução:
Este post foi traduzido por @Tico_ociT.
versão do post original | data do post original [data da tradução] - modificação do post original
original post's version | original post's date [translation's date] - changes on the original post

v3.1 | 12/mar/20 [17/mar/2020] - Upload do vídeo no YouTube que acompanha esta discussão.
v3.0 | 02/mar/20 [17/mar/2020] - Todas as imagens recarregadas, links quebrados atualizados, adicinada nova versão (5.4).
v2.2 | 21/nov/19 [17/dez/19] - Adicionado o tutorial de trailer e linkado à discussão do banco de dados no passo 11.
v---- | -------------- [12/dez/19] - Trabalho de tradução iniciado.
 
Last edited by Tico_ociT,

Danimalzpwn3

Well-Known Member
OP
Member
Joined
Oct 12, 2019
Messages
154
Trophies
0
Age
26
Location
America
XP
479
Country
United States
This is really fantastic! Looks great! Wish. I could read it but sadly I do not understand haha! But looks fantastic! I will make another tab called “languages” to link to your thread and to many others who would like to contribute to translating, and it can be accessed by all!
 

Tico_ociT

Member
Newcomer
Joined
Nov 28, 2019
Messages
8
Trophies
0
Age
44
XP
90
Country
Brazil
This is really fantastic! Looks great! Wish. I could read it but sadly I do not understand haha! But looks fantastic! I will make another tab called “languages” to link to your thread and to many others who would like to contribute to translating, and it can be accessed by all!

Nothing different from what you did, I tried to keep even the layout the same.

I agree with you about the "languages" tab. You could also create a section/tab about how people can collaborate with the WiiFlow project (translations, bug hunting, etc.). Linking some examples could help to motivate people.

Again, all thanks to you for this tutorial, @Danimalzpwn3 !
 
  • Like
Reactions: banjo2

Site & Scene News

Popular threads in this forum

General chit-chat
Help Users
    PandaPandel @ PandaPandel: fathers day is really rough for me I hope everyone else is doing ok