It looks like you have deleted the bottom of each card. Use a layer mask instead.
Place each full card on separate layers. Apply a layer mask to the top layer. Use the gradient tool to draw a small gradient to form the blend. If you need instruction on how to use any of those tools I think looking up video tutorials would be easier then me explaining it.
The other option is to put them sideways. You will have to recreate the crop marks though as the ones on the images will get shrunk and off placed. However, depending on how you are doing this you might not need the crop marks. Regardless copying the crop marks is pretty easy.
Rotate the images 90 degrees. Place the outer edge along the edge of the document and then uniformly scale the image down until the inside crop marks line up with the exact middle of the document. This will leave the center bleed sections over lapping you can either just cut off the bleed sections and have a straight horizontal seam or I've also found cutting on an angle looks decent. Again I would stick to using layer masks for this instead of deleting parts of the image. That way you can always go back and modify it easily. Its "non-destructive" editing.
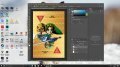
Here are some examples. I have darkened the parts of the card that will be getting cut off.
View attachment 84186
Edit: Actually I would align the corner crop marks too. (while keeping the center crop marks on the center of the document). This way you know none of the logos or text is going to get cut off or appear to close to the edge of the card. The bleed gets smaller but that's what its there for.
View attachment 84189
They really look good... Im definitely not going to go waste my money on a id card printer. lmao. What brand of label paper did you use, and what fixative did you use? Also are you saying you used a nail file on the edges of the label paper? Wouldn't that fray the edges?