UDPIH: USB Host Stack exploit + Recovery Menu
It's been a while without any major exploits in the Wii U scene, so I present to you:
The write-up can be found here!
Note that you'll need to insert the module again after rebooting the Zero. You will need 2 USB cables, one for powering the Zero and one which can be connected to the Wii U.
Continue with "Booting the recovery_menu" below.

Allows changing the current title the console boots to.
Useful for unbricking CBHC bricks.
Possible options are:
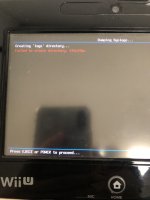
Copies all system logs to a logs folder on the root of the SD Card.
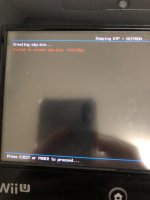
Dump OTP + SEEPROM
Dumps the OTP and SEEPROM to otp.bin and seeprom.bin on the root of the SD Card.
Start wupserver
Starts wupserver which allows connecting to the console from a PC using wupclient.
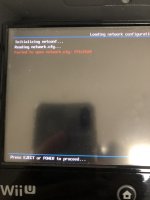
Load Network Configuration
Loads a network configuration from the SD, and temporarily applies it to use wupserver.
The configurations will be loaded from a network.cfg file on the root of your SD.
For using the ethernet adapter, the file should look like this:
For using wifi:
Pair Gamepad
Displays the Gamepad Pin and allows pairing a Gamepad to the system. Also bypasses any region checks while pairing.
The numeric values represent the following symbols: ♠ = 0, ♥ = 1, ♦ = 2, ♣ = 3.
Note that rebooting the system might be required to use the newly paired gamepad.
Install WUP
Installs a valid signed WUP from the install folder on the root of your SD Card.
Don't place the WUP into any subfolders.
Edit Parental Controls
Displays the current Parental Controls pin configuration.
Allows disabling Parental Controls.
Debug System Region
Fixes bricks caused by setting productArea and/or gameRegion to an invalid value. Symptoms include being unable to launch System Settings or other in-region titles.
System Information
Displays info about several parts of the system.
Including serial number, manufacturing date, console type, regions, memory devices...
USB Descriptor Parsing Is Hard (UDPIH)
An exploit for the Wii U's USB Host Stack. Pronounced like "mud pie" without the M.The write-up can be found here!
What does this mean?
Since the USB Stack is running before anything on the PPC side of the Wii U is booted, this allows unbricking things like CBHC bricks without any soldering!Requirements
- A Wii U
- One of the devices listed below
Note: Any other linux device capable of USB device emulation should work as well.
Prebuilt releases are only available for the Pico and Zero.
I will add more devices below which are confirmed to work.
Supported devices:
- A Raspberry Pi Pico or Zero
- A Nintendo Switch capable of running udpih_nxpayload
Instructions
Pico
- Download the latest
udpih.uf2from the releases page. - Hold down the
BOOTSELbutton on the board and connect the Pico to your PC.
Your PC will detect the Pi as a storage device. - Copy the
.uf2file to the Pico. It will disconnect after a few seconds.
Raspberry Pi Zero (Linux)
- Install the required dependencies:
Bash:sudo apt install build-essential raspberrypi-kernel-headers - Clone the repo:
-
Bash:
git clone https://github.com/GaryOderNichts/udpih.git cd udpih - Download the latest arm_kernel.bin.h from the releases page and copy it to the arm_kernel directory.
- Now build the kernel module:
-
Bash:
cd linux make - You can now run
sudo insmod udpih.koto insert the kernel module into the kernel.
Note that you'll need to insert the module again after rebooting the Zero. You will need 2 USB cables, one for powering the Zero and one which can be connected to the Wii U.
Continue with "Booting the recovery_menu" below.
Booting the recovery_menu
Important notes for this to work:
- Make sure no other USB Devices are attached to the console.
- Only use USB ports on the front of the console, the back ports will not work.
- If your console has standby mode enabled, pull the power plug and turn it on from a full coldboot state.
- Copy the latest release of the recovery_menu to the root of your FAT32 formatted SD Card.
- Insert the SD Card into the console and power it on.
- As soon as you see the "Wii U" logo on the TV or Gamepad plug in your Zero/Pico.
This timing is important. If you're already in the menu, the exploit won't work.. - After a few seconds you should be in the recovery menu.

Wii U Recovery Menu
A simple recovery menu running on the IOSU for unbricking.Options
Set Coldboot TitleAllows changing the current title the console boots to.
Useful for unbricking CBHC bricks.
Possible options are:
- Wii U Menu (JPN) - 00050010-10040000
- Wii U Menu (USA) - 00050010-10040100
- Wii U Menu (EUR) - 00050010-10040200
- System Config Tool - 00050010-1F700500
- DEVMENU (pre-2.09) - 00050010-1F7001FF
- Kiosk Menu - 00050010-1FA81000
Copies all system logs to a logs folder on the root of the SD Card.
Dump OTP + SEEPROM
Dumps the OTP and SEEPROM to otp.bin and seeprom.bin on the root of the SD Card.
Start wupserver
Starts wupserver which allows connecting to the console from a PC using wupclient.
Load Network Configuration
Loads a network configuration from the SD, and temporarily applies it to use wupserver.
The configurations will be loaded from a network.cfg file on the root of your SD.
For using the ethernet adapter, the file should look like this:
Code:
type=ethFor using wifi:
Code:
type=wifi
ssid=ssidhere
key=wifikeyhere
key_type=WPA2_PSK_AES
Pair Gamepad
Displays the Gamepad Pin and allows pairing a Gamepad to the system. Also bypasses any region checks while pairing.
The numeric values represent the following symbols: ♠ = 0, ♥ = 1, ♦ = 2, ♣ = 3.
Note that rebooting the system might be required to use the newly paired gamepad.
Install WUP
Installs a valid signed WUP from the install folder on the root of your SD Card.
Don't place the WUP into any subfolders.
Edit Parental Controls
Displays the current Parental Controls pin configuration.
Allows disabling Parental Controls.
Debug System Region
Fixes bricks caused by setting productArea and/or gameRegion to an invalid value. Symptoms include being unable to launch System Settings or other in-region titles.
System Information
Displays info about several parts of the system.
Including serial number, manufacturing date, console type, regions, memory devices...
Credits
- @Maschell for the network configuration types
- @dimok789 for mocha
- @hexkyz for hexFW
- @rw-r-r-0644 for the lolserial code
Last edited by GaryOderNichts,


