Tutorial  Updated

How To: Upgrading / Rebuilding Wii U Internal Memory (MLC)

Warning

This tutorial is only for advanced users and has a serious risk of bricking the console. Make sure you read it completely before executing any step and that you understand every step and its implications. With de_Fuse everything should be unbrickable if you know how.

You should at least have a backup of SLC and SLCCMPT, as we can’t rebuild them at the moment. (can be done in minute_minute, so there is no excuse). We had two cases where the SLC corrupted for an unknown reason, so a backup is essential.

What is this for?

This tutorial goes into rebuilding the MLC from scratch on a clean media. This can become useful, if
  • the MLC (eMMC) chip died or corrupted the filesystem
  • the SCFM (SLC cache for MLC) became inconsistent
  • you want to upgrade the capacity of the internal storage.
  • you want to set up a redNAND without SCFM
If you have a bad eMMC chip, but the recovery still works (which is most likely), then there are also ways to fix it without a complete reformat.
If the LED is blinking blue, you have a SLC problem and not a MLC problem, so this tutorial won't help with that.

It will format your MLC, so all data on the internal Wii U memory will be lost.

Update

13.03.2024 - The wafel_setup_mlc.ipx now uses a built in IOSU function to create system folders, that should make sure the permissions are right, which caused problems with game updates in the past. It will also recreate the update folder (so system updates won't be blocked by that)

Prerequisites

Backing up save games


Do a backup of what you want to preserve, like savegames and Miis.
For Backing up Save games, it is recommended to use SaveMii. That requires that you have Tiramisu or Aroma running.
You can also move your savgames (or whole games) to USB, which should still be readable. When recreating the users after the rebuild, you just have to be carefull to create the users in the right order, to make the ID’s match. A backup by other means (Like savemii) is still recommended.
If you are using this tutorial to fix a failing eMMC you might not be able to use the other Backup options. In that case use the Dump MLC option in the Recovery. You can extract your data from there using wfs-extract.

Storage Options

The Wii U has two ways of connecting internal memory, each with its own drawbacks:
  • SDIO – On retail consoles the internal memory is a eMMC chip connected through an internal SDIO bus to the Latte chip. This SDIO bus can also use SD cards (hence the name SD IO). Access to media connected on the SDIO is cached through a file on the SLC, presumably to reduce writes on the MLC. This cache is called SCFM and it is the reason why you always need to backup / restore SLC and MLC together and doesn’t allow easy swapping of multiple SDs.
    IOSU also only supports 3 sizes of media on this bus: <=8GB, 32GB and 64GB. The size will be limited to the biggest it fits, the rest is unusable. This bus is limited to 26MB/s (4bit@52Mhz). For replacing the eMMC with an micro SD you can use MLC2SD or a similar Interposer. Soldering and micro SD adapter using wires, works too.
    It is recommended to use a 64GB Sandisk Max Endurance card (But similar card should also be fine), since the Wii U is known for writing much.

  • SATA – The Disc drive is connected through SATA, the connectors are different but the electrical signals are still the same. Some Kiosk consoles used this Interface to connect to a HDD. The type of the SATA device can be configured in the SEEPROM, so we can configure our retail consoles to also use a SATA HDD / SSD.
    NOTE: @QuarkTheAwesome is building an SATA adapter for that purpose, available soon™.

    The advantage of using this interface is, that the size isn’t limited (well WFS is limited to 2TB) and it doesn’t use SCFM, which makes some things easier and improves performance in some circumstances. The obvious disadvantage is that you can’t use your disc drive anymore. Without the Disc Drive vWii System Menu doesn't work. vWii Injectes / Wii VC from the eShop can still be used, but only when installed to USB. Also you still might need to disable the MLC on the SDIO bus, or else the wii u might still use the SDIO one if the SATA device takes too long to init.

  • redNAND – redirects the read / writes to one or more of the internal storage devices to paritions on the SD card. You can create an arbitrary size MLC partition on the SD card and set it up using this tutorial. SCFM can be easily disabled for the redNAND. The 64GB limit does not exist for redNAND if the SCFM is disabled. For redNAND we have a dedicated Tutorial here: https://gbatemp.net/threads/fixing-...-soldering-using-rednand-with-isfshax.642268/

Does that mean we can’t get more than 64GB on the SDIO bus? No, BUT it requires ISFShax / defuse to boot the console every time. @GaryOderNichts created a patch to remove the limits and always use the maximum size of the SDIO media and it also disables SCFM, because SCFM doesn’t work with more than 64GB and disabling SCFM improves performance and reduces wear on the SLC, at the cost of increasing wear of the MLC media. I packaged this patch in wafel_unlimit_mlc.

Rebuilding the MLC

Now that you decided what media you want to use as MLC, we can start with the actual process:
  1. Download all the mlc system titles for your region from NUS. This can be done conveniently with MLCRestorerDownloader by @Xpl0itU. Copy the otp.bin from the SD to the folder with the MLCRestorer Downloader so it can get the common key from there.

    You will get the output/MLC/{region} directory, which then contains a directory for each title. In total there should be 52 titles totaling ~1.1GiB.

    If your console has an old firmware it might also be necessary to get the latest SLC titles.

  2. On the root of your SD card (the one that will go in the front slot, not the MLC replacement) create a folder wafel_install. Then copy all 52 titles to the wafel_install folder, so it now contains the 52 subfolders, one for each title. If you want to reinstall / update SLC titles, you would also put them there.

  3. Attach your MLC media of choice. (If you are using SATA got to Backup and Restore, then at Set SATA Device in SEEPROM select GEN2-HDD (Kiosk CAT-I with HDD)).
    For installing MLC2SD look here: https://gbatemp.net/threads/using-n...emmc-fix-160-0103-system-memory-error.636361/ at the Soldering section.

  4. If you install to eMMC / MLC2SD, got to Backup and Restore and select Erase MLC and Delete scfm.img. If the Erase MLC fails, you can ignore that if it wasn't formatted as MLC before (from a failed install or so).

  5. Put the wafel_setup_mlc.ipx on the SD card in /wiiu/ios_plugins. If you want more than 64GB on SDIO you also need to put the wafel_unlimit_mlc.ipx there. If you install with wafel_unlimit_mlc.ipx, it will be permanently required and therefore also permanently requires ISFShax or defuse.

  6. [Optional, only when using defuse] Open the serial monitor on the PC (Putty / minicom) for defuse to see the setup progress. There will be no display output in the Wii U itself. I attached the whole serial log of a successfull install as a reference.

  7. Select Patch (sd) and boot IOS (slc) in minute to start the setup of your fresh MLC.During the setup you won't see anything on the screen. You have to go by the power led.
    The power LED will flash blue, while it is installing the titles.
    if something goes wrong the LED will turn orange, but it will continue as long as it is blinking.
    The LED will become static once it finished. You can now power off the console.
    If the led is blinking red, something fatal happend. Ask for help.
    During the setup a short log gets written to the SD: wafel_setup_mlc.log.
    In the end it will enable the initial setup on the next boot.

  8. Remove the wafel_setup_mlc.ipx from /wiiu/ios_plugins on the SD.

  9. Boot the console. Patch (sd) and boot IOS (slc)

  10. If everything worked, the initial setup should launch.

ISFShax only: Finalizing

If you are using the wafel_unlimit_mlc.ipx you need to keep ISFShax installed. If you haven't done already complete the "Booting without SD" step form the ISFShax tutorial but also add the wafel_unlimit_mlc.ipx renamed to 9unlimit.ipx to the /storage_slc/sys/hax/ios_plugins directory.
If you are not using the wafel_unlimit_mlc.ipx you can either uninstall ISFShax or keep it as a brick protection. If you keep it complete the "Booting without SD" step form the ISFShax tutorial.
The Wii U should now boot automatically if you don't have an SD in.
You probably also want to enable the autobooting now.

See Also

https://gbatemp.net/threads/wii-u-internal-storage-upgrades-are-possible.635629/

Pictures

512 GB SD card:
img_20230702_021647-jpg.381270


@QuarkTheAwesome 120 GB SSD:
img_2709-jpg.381271


Thanks


Attachments

  • serial-log.txt
    87.6 KB · Views: 50
Last edited by SDIO,

SDIO

Well-Known Member
OP
Member
Joined
Feb 13, 2023
Messages
2,276
Trophies
0
Age
28
XP
1,393
Country
Germany
It's doing the same thing as the first option?
Maybe something on the SD corrupted. Maybe format it and copy the stuff back again
 

Tuner357

Well-Known Member
Newcomer
Joined
Aug 10, 2023
Messages
95
Trophies
0
Age
31
XP
188
Country
Canada
It's doing the same thing as the first option?
Maybe something on the SD corrupted. Maybe format it and copy the stuff back again
oh nope second option. should i try the first option?

would i have to rename the ios_orig.img file?
 

SDIO

Well-Known Member
OP
Member
Joined
Feb 13, 2023
Messages
2,276
Trophies
0
Age
28
XP
1,393
Country
Germany
Try the first option, it is using the IOSU, that is installed on the SLC. You don't have to rename anything for that
 

Tuner357

Well-Known Member
Newcomer
Joined
Aug 10, 2023
Messages
95
Trophies
0
Age
31
XP
188
Country
Canada
looks like you don't have the correct otp
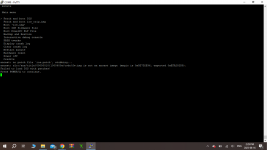
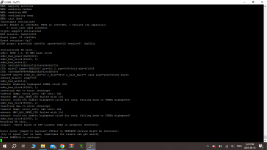
so i tried to dump the otp using prshhax and this is what i get. The otp is supposed to be on the root of the sd card right? i tried to use the de_fuse_otp.bin one, and just rename it to otp.bin but it didnt work
 

Attachments

  • Screenshot (31).png
    Screenshot (31).png
    117.5 KB · Views: 22

SDIO

Well-Known Member
OP
Member
Joined
Feb 13, 2023
Messages
2,276
Trophies
0
Age
28
XP
1,393
Country
Germany
If you boot without defuse (just disconnect power from the pico), what is the LED doing? blinking blue or does it stay blue?
 

SDIO

Well-Known Member
OP
Member
Joined
Feb 13, 2023
Messages
2,276
Trophies
0
Age
28
XP
1,393
Country
Germany
hm so boot1 should be working. Then I don't understand why it isn't working.
Can you copy the whole output from the terminal from the point where you started the otp dump?
 

Tuner357

Well-Known Member
Newcomer
Joined
Aug 10, 2023
Messages
95
Trophies
0
Age
31
XP
188
Country
Canada
hm so boot1 should be working. Then I don't understand why it isn't working.
Can you copy the whole output from the terminal from the point where you started the otp dump?
Code:
9254f7bf 8f14dbd2
505276c9 505276c9
Guessing key based on boot1 header type 2
  --> prod key
Dumping OTP using boot1 prod v8377, and offset 0x0d40ac6d...
WARNING: SEEPROM boot1 version v21274 does not match NAND version v8377!
         Exploit might not work!

If this is the first time you're dumping otp.bin, ignore this message.
However, if you reflashed boot1, you might have to guess which boot1
version was originally on NAND and will match the SEEPROM version.
GPU clocked at: 544.999877MHz
Unmounting SLC...
Shutting down MLC...
sdhc_bus_power(0x0)
Shutting down SD card...
sdhc_bus_power(0x0)
Shutting down interrupts...
Shutting down caches and MMU...
Resetting (prshhax)...
U▒U▒U▒U▒U▒[Pico] Console requested prshhax prshhax reset...
[pico] Changed state: WIIU_STATE_MONITORING -> WIIU_STATE_NEEDS_DEFUSE
Starting... 3224
Results:
Winner! 0xf368
01
02
03
04
05
08
09
0a
0b
0c
0d
0e
13
14
15
18
1b
1c
1d
1e
1f
25
88
89
8a
0f
8f
0f
00
80
01
81
00
80
01
81
00
80
01
81
00
80
01
81
0f
8f
0f
00
01
81
00
80
01
81
00
80
01
81
00
80
01
81
00
80
0f
8f
0f
00
80
01
81
00
80
01
81
00
80
01
81
00
80
01
81
0f
8f
0f
00
01
81
00
80
01
81
00
80
01
81
00
80
01
81
00
80
0f
8f
0f
00
80
01
81
00
80
01
81
00
80
01
81
00
80
01
81
0f
8f
0f
00
01
81
00
80
01
81
00
80
01
81
00
80
01
81
00
80
0f
8f
0f
00
80
01
81
00
80
01
81
00
80
01
81
00
80
01
81
0f
8f
0f
00
01
81
00
80
01
81
00
80
01
81
00
80
01
81
00
80
0f
8f
0f
00
80
01
81
00
80
01
81
00
80
01
81
00
80
01
81
0f
8f
0f
00
01
81
00
80
01
81
00
80
01
81
00
80
01
81
00
80
0f
8f
0f
00
80
01
81
00
80
01
81
00
80
01
81
00
80
01
81
0f
8f
0f
00
01
81
00
80
00
01
81
00
80
01
81
00
80
[pico] Changed state: WIIU_STATE_NEEDS_DEFUSE -> WIIU_STATE_DEFUSED
[pico] Changed state: WIIU_STATE_DEFUSED -> WIIU_STATE_MONITORING
0203!CF&10(MEM2MEM0PRSH]]01]]02a0efa282d9010210010210]]04f00f[Pico] Switching to text mode...
cafff00fcafaU▒U▒U▒U▒f00fcafeGPU TV addr: 17500001
GPU DRC addr: 00000000
minute loading
minute was loaded from boot1 context!
Initializing exceptions...
Configuring caches and MMU...
MEM: cleaning up
MEM: unprotecting memory
MEM: mapping sections
MEM: enabling caches
MEM: enabling MMU
MEM: configuring heap
MEM: init done
Interrupts initialized
prsh: Header at 10005a54, PRST at 10007ff0, 1 entries (32 capacity):
    0: boot_info 0x58 10008000
crypto support initialized
BSP version: 0x26100028
Board type: CF (0x4346)
Board revision: 0x17
DDR props: size=2GiB (0x0800) speed=0x0002 vendor=U! (0x5521)

Initializing SD card...
sdhc: SDHC 1.0, 48 MHz base clock
sdhc_bus_power(0x300000)
sdhc_bus_clock(25000, 0)
sdhc_bus_width(1)
CID: 96001D0C00B020473230445348502700
CID: mid=27 name='PHSD02G' prv=32.11 psn=00000c1d mdt=6/2009
CSD: 00808A8FFFFFFFBAA35A5F32005E0000
taac=94 nsac=0 read_bl_len=10 c_size=3819 c_size_mult=7 card size=2002780160 bytes
sdcard_select: resp=700
sdhc_bus_width(4)
sdcard: enabling highspeed 52MHz clock (32)
sdhc_bus_clock(52000, 1)
resetting due to error interrupt
timeout dump: error_intr: 0x0 intr: 0x2
sdcard: MMC_ALL_SEND_CID failed with 116
sdcard: could not enable highspeed clock for card, falling back to 48MHz highspeed?
sdhc_bus_clock(48000, 1)
resetting due to error interrupt
timeout dump: error_intr: 0x0 intr: 0x2
sdcard: MMC_ALL_SEND_CID failed with 116
sdcard: could not enable highspeed clock for card, falling back to 25MHz highspeed?
sdhc_bus_clock(25000, 1)
Mounting SD card...
crypto: ~0x000 bytes of OTP loaded; JTAG is disabled (000000e1)

boot1 never jumped to payload! Offset or SEEPROM version might be incorrect.
(try it again just in case, sometimes the resets can get weird)
Press POWER/Q to continue.
 
Last edited by Tuner357,

Tuner357

Well-Known Member
Newcomer
Joined
Aug 10, 2023
Messages
95
Trophies
0
Age
31
XP
188
Country
Canada
At this point it has nothing to do with the region
Alright!

Just to make sure im doing this right, Im using 2 2gb sd cards. The first one has the boot1,img to initially boot into minute and also used it to try and dump the otp since it has boot1.img on it. The second one has the mlc titles and slc titles on it since they were 1.1gb and wouldnt fit on the other card.

It did all work on the last wii u, so not to sure what i did differently lol
 

SDIO

Well-Known Member
OP
Member
Joined
Feb 13, 2023
Messages
2,276
Trophies
0
Age
28
XP
1,393
Country
Germany
And the console was not able to run UDPIH anymore with the original eMMC and without defuse? Because that would be another way to dump otp. (sorry if I mix things up, there was a similar case)
 

fringle

Well-Known Member
Member
Joined
Apr 16, 2009
Messages
704
Trophies
1
XP
1,107
Country
Canada
Alright!

Just to make sure im doing this right, Im using 2 2gb sd cards. The first one has the boot1,img to initially boot into minute and also used it to try and dump the otp since it has boot1.img on it. The second one has the mlc titles and slc titles on it since they were 1.1gb and wouldnt fit on the other card.

It did all work on the last wii u, so not to sure what i did differently lol
I don't think you're getting a proper otp dump since you removed the emmc from this console before attempting to dump it. It states on the de_fuse git that you need a valid emmc/nandaid/sd adapter with a valid image installed to dump the otp with prshax.

Edit: Actually it's not on the git but it's in this article he wrote.
https://douevenknow.us/post/714056575412764672/defuse-the-one-true-pwn
 
Last edited by fringle,
  • Like
Reactions: Tuner357

Tuner357

Well-Known Member
Newcomer
Joined
Aug 10, 2023
Messages
95
Trophies
0
Age
31
XP
188
Country
Canada
And the console was not able to run UDPIH anymore with the original eMMC and without defuse? Because that would be another way to dump otp. (sorry if I mix things up, there was a similar case)
Nah your good. So I never tried dumping the otp before installing the nand aid and defuse. It was working fine before I decided to do the 64gb. Now looking back, probably should have dumped everything to have on hand just incase before attempting, but was confident after the last one worked haha. That one had no emmc chip and no backups as well.

Also now with the nandaid installed I removed the resistors to the emmc chip as I find it easier to install the nandaid that way
Post automatically merged:

I don't think you're getting a proper otp dump since you removed the emmc from this console before attempting to dump it. It states on the de_fuse git that you need a valid emmc/nandaid/sd adapter with a valid image installed to dump the otp with prshax.

It's definitely not dumping using prshax. I can use the first option, that dumps otp. It'll spit out a de_fuse_otp.bin file. I tried renaming that to otp.bin and putting it on the root of the sd card that has the title folders on it, and still didn't work
 

SDIO

Well-Known Member
OP
Member
Joined
Feb 13, 2023
Messages
2,276
Trophies
0
Age
28
XP
1,393
Country
Germany
then I would suggest you connect the eMMC back, you don't need the resistors, but can just bridge the pads. This should allow you to run at least the recovery, if not even the nanddumper payload using the browser exploit. Then dump otp and seeprom with that.
 

fringle

Well-Known Member
Member
Joined
Apr 16, 2009
Messages
704
Trophies
1
XP
1,107
Country
Canada
Nah your good. So I never tried dumping the otp before installing the nand aid and defuse. It was working fine before I decided to do the 64gb. Now looking back, probably should have dumped everything to have on hand just incase before attempting, but was confident after the last one worked haha. That one had no emmc chip and no backups as well.

Also now with the nandaid installed I removed the resistors to the emmc chip as I find it easier to install the nandaid that way
Post automatically merged:


It's definitely not dumping using prshax. I can use the first option, that dumps otp. It'll spit out a de_fuse_otp.bin file. I tried renaming that to otp.bin and putting it on the root of the sd card that has the title folders on it, and still didn't work
What might work, but first dump your SLC and put it on your PC. Is to flash your nand backup from your other console to a 32gb sd card, and write the slc from that console to this one. (you will get some errors during the write) Attempt to dump your otp via PRSHhax. Then flash the original SLC from this console back once you've dumped the otp. Once the original SLC is written back use the dumped otp and attempt to boot ios and see if it works.

I've written the wrong slc to a console and it's fine as long as you have the original backup that you can use to overwrite it again so this much is recoverable if it doesn't work at least. I'm thinking that it may just trick the wii u enough that it at least sees a valid image and allows you to dump the proper otp.
 
Last edited by fringle,
  • Like
Reactions: Tuner357

shinyquagsire23

SALT/Sm4sh Leak Guy
Member
Joined
Nov 18, 2012
Messages
1,977
Trophies
2
Age
26
Location
Las Vegas
XP
3,765
Country
United States
9254f7bf 8f14dbd2
505276c9 505276c9
Guessing key based on boot1 header type 2
--> prod key
Dumping OTP using boot1 prod v8377, and offset 0x0d40ac6d...
WARNING: SEEPROM boot1 version v21274 does not match NAND version v8377!
Exploit might not work!

If this is the first time you're dumping otp.bin, ignore this message.
However, if you reflashed boot1, you might have to guess which boot1
version was originally on NAND and will match the SEEPROM version.
GPU clocked at: 544.999877MHz
Unmounting SLC...
Shutting down MLC...
sdhc_bus_power(0x0)
Shutting down SD card...
sdhc_bus_power(0x0)
Shutting down interrupts...
Shutting down caches and MMU...
Resetting (prshhax)...
U▒U▒U▒U▒U▒[Pico] Console requested prshhax prshhax reset...
[pico] Changed state: WIIU_STATE_MONITORING -> WIIU_STATE_NEEDS_DEFUSE
Starting... 3224
Results:
Winner! 0xf368
01
02
03
04
05
08
09
0a
0b
0c
0d
0e
13
14
15
18
1b
1c
1d
1e
1f
25
88
89
8a
0f
8f
0f
00
80
01
81
00
80
01
81
00
80
01
81
00
80
01
81
0f
8f
0f
00
01
81
00
80
01
81
00
80
01
81
00
80
01
81
00
80
0f
8f
0f
00
80
01
81
00
80
01
81
00
80
01
81
00
80
01
81
0f
8f
0f
00
01
81
00
80
01
81
00
80
01
81
00
80
01
81
00
80
0f
8f
0f
00
80
01
81
00
80
01
81
00
80
01
81
00
80
01
81
0f
8f
0f
00
01
81
00
80
01
81
00
80
01
81
00
80
01
81
00
80
0f
8f
0f
00
80
01
81
00
80
01
81
00
80
01
81
00
80
01
81
0f
8f
0f
00
01
81
00
80
01
81
00
80
01
81
00
80
01
81
00
80
0f
8f
0f
00
80
01
81
00
80
01
81
00
80
01
81
00
80
01
81
0f
8f
0f
00
01
81
00
80
01
81
00
80
01
81
00
80
01
81
00
80
0f
8f
0f
00
80
01
81
00
80
01
81
00
80
01
81
00
80
01
81
0f
8f
0f
00
01
81
00
80
00
01
81
00
80
01
81
00
80
[pico] Changed state: WIIU_STATE_NEEDS_DEFUSE -> WIIU_STATE_DEFUSED
[pico] Changed state: WIIU_STATE_DEFUSED -> WIIU_STATE_MONITORING
0203!CF&10(MEM2MEM0PRSH]]01]]02a0efa282d9010210010210]]04f00f[Pico] Switching to text mode...
cafff00fcafaU▒U▒U▒U▒f00fcafeGPU TV addr: 17500001
GPU DRC addr: 00000000
minute loading
minute was loaded from boot1 context!
Initializing exceptions...
Configuring caches and MMU...
MEM: cleaning up
MEM: unprotecting memory
MEM: mapping sections
MEM: enabling caches
MEM: enabling MMU
MEM: configuring heap
MEM: init done
Interrupts initialized
prsh: Header at 10005a54, PRST at 10007ff0, 1 entries (32 capacity):
0: boot_info 0x58 10008000
crypto support initialized
BSP version: 0x26100028
Board type: CF (0x4346)
Board revision: 0x17
DDR props: size=2GiB (0x0800) speed=0x0002 vendor=U! (0x5521)

Initializing SD card...
sdhc: SDHC 1.0, 48 MHz base clock
sdhc_bus_power(0x300000)
sdhc_bus_clock(25000, 0)
sdhc_bus_width(1)
CID: 96001D0C00B020473230445348502700
CID: mid=27 name='PHSD02G' prv=32.11 psn=00000c1d mdt=6/2009
CSD: 00808A8FFFFFFFBAA35A5F32005E0000
taac=94 nsac=0 read_bl_len=10 c_size=3819 c_size_mult=7 card size=2002780160 bytes
sdcard_select: resp=700
sdhc_bus_width(4)
sdcard: enabling highspeed 52MHz clock (32)
sdhc_bus_clock(52000, 1)
resetting due to error interrupt
timeout dump: error_intr: 0x0 intr: 0x2
sdcard: MMC_ALL_SEND_CID failed with 116
sdcard: could not enable highspeed clock for card, falling back to 48MHz highspeed?
sdhc_bus_clock(48000, 1)
resetting due to error interrupt
timeout dump: error_intr: 0x0 intr: 0x2
sdcard: MMC_ALL_SEND_CID failed with 116
sdcard: could not enable highspeed clock for card, falling back to 25MHz highspeed?
sdhc_bus_clock(25000, 1)
Mounting SD card...
crypto: ~0x000 bytes of OTP loaded; JTAG is disabled (000000e1)

boot1 never jumped to payload! Offset or SEEPROM version might be incorrect.
(try it again just in case, sometimes the resets can get weird)
Press POWER/Q to continue.
Maybe try this release? It will require re-flashing your Pico. https://github.com/shinyquagsire23/wii_u_modchip/releases/tag/v0.8

There was a theoretical edge case on the PRSHhax reset where it could get stuck in a de_Fused state, and your console seems to be a bit weird with its timing.
crypto: ~0x000 bytes of OTP loaded; JTAG is disabled (000000e1)
is pretty unusual since I specifically target 0x7F bytes de_Fused to try and keep the vWii OTP bank intact.
 
  • Like
Reactions: Valery0p

Site & Scene News

Popular threads in this forum

General chit-chat
Help Users
  • No one is chatting at the moment.
    Sonic Angel Knight @ Sonic Angel Knight: :ninja: