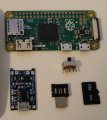
Hacking fusée (à la) framboise - A portable RPi Fusée Gelée rig

NO_ob

Well-Known Member
Member
Joined
Apr 16, 2017
Messages
155
Trophies
0
Age
25
XP
306
Country
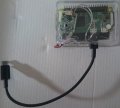
works great with my raspberry Pi Zero!
I attached a battery holder and a switch on it + a USB-A to USB-C connector.
When I need to boot into CFW, I just boot my Switch into RCM, turn on my Pi Zero and connect it to Switch.
My Switch loads into the payload then!

Love it. It's better than SX <3


Next goal:
Add two or three buttons (every button boots a different Payload)
View attachment 131820
i tried adding buttons to mine lel i spent like 10 minutes making a hole in the case with a knife and the button wasn't tall enough to stick out lel
 
Last edited by NO_ob,
  • Like
Reactions: xXDungeon_CrawlerXx

studio1b

Well-Known Member
Member
Joined
Mar 14, 2009
Messages
146
Trophies
1
Age
43
Location
NEW YORK CITY
XP
444
Country
United States
Hello everyone

Just wanted to say thanks for the info, I have a Pi1 and a Pi3 i decided to try and see if the pi1 worked with this and it does with no problems.
I downloaded the zip and flashed the img to a 2GB sd card , you might ask why a 2GB card why not i have a bunch of 2GB cards laying around why not use them for something.
The 2GB card lets formatted to 1.81GB and the size of the image is 1.76GB so this is great for running the PAYLOADER , the payloaders are super small and i never see using more then a 2GB card.

I just wanted to post this to let everyone know that a pi1 can be used to :)
pi1modelb.jpeg
kGDyByV

kGDyByV
 
Last edited by studio1b,

Ghostoni

New Member
Newbie
Joined
Jun 27, 2018
Messages
3
Trophies
0
Age
29
XP
51
Country
United States
Easy method to configure payload
Another method that I used was to cd into /etc/fusee-launcher then use wget " address to payload.bin download ", remove the original fusee.bin and rename the payload.bin to fusee.bin. Just throwing it out there to feel special
 
  • Like
Reactions: Calevala

_gianno

Well-Known Member
Newcomer
Joined
Jun 28, 2018
Messages
82
Trophies
0
Age
28
XP
556
Country
Italy
Hi I cannot let it works. I boot in RCM before plug in switch to raspberry pi 0 w. It doesn't reboot but it also doesn't recognize switch! Is there a way to print some error_log for more informations?

EDIT: I've tried launching directly ./fusee-launcher.py fusee.bin and it echo No TegraRCM device found?

That's strange because if I plug my switch to my mac and try again with the same fusee it works like a charm...
 
Last edited by _gianno,

HePpaz

Member
Newcomer
Joined
May 15, 2018
Messages
5
Trophies
0
Age
55
XP
72
Country
United Kingdom
I made one built into a 3D printed NES case with rechargeable battery that I salvaged from a broken bluetooth speaker
I cant post pictures for some reason but here it is:
oi65.tinypic(dot)com/98g1oy.jpg
oi63.tinypic.(dot)com/2nhn3uv.jpg

Works great!
 

Nazosan

Well-Known Member
Member
Joined
May 12, 2009
Messages
576
Trophies
1
XP
1,090
Country
United States
I do want to second the idea of keeping the payload on the boot partition. The boot partition is normally not to be used, but it's not going to hurt anything if it is. Mostly it just generally isn't user account accessible once mounted for security reasons and of course the amount of free space on it is pitiful (but a payload is a matter of less than a couple hundred kilobytes versus more than 20MB free with this current setup, so a payload won't even make a noticeable difference.) Not all RPi models have built-in WiFi anyway (the cheaper RPi Zero might make the most sense for this particular setup anyway,) and even then it's a pain to configure networking on a headless device (basically you must connect it to a screen once anyway and you have to know what to run and everything. But IMO there's no real reason this particular thing shouldn't more or less just work "out of the box" for most. Eg it should be able to basically work for anyone.) I already edited the modchip.sh on mine to point to /boot/payload.bin and as far as I can tell it works just fine (I've tested a few times and it seems ok so far at least.) IMO this is simpler and cleaner than networking anyway and thus basically all networking stuff could be disabled (and DHCP at least does seem to have a delay to it even if nothing else does, but also that would mean less stuff would be going on, less memory used, etc etc, which may be beneficial in such a minimal setup.)

BTW, I have had filesystem damage on a RPi before from power losses. Actually it has happened to me several times and this last time I decided just to actually image the flash drive to a backup file so I could just restore it if it happened again. Basically I have one in another room just acting as a dedicated server to do various things including sharing an external drive across the network. I really want to bring up the idea of going to a read-only design. You can surely get ideas from Knoppix and the much simpler Finnix Linux live rescue systems that are built to run from an optical disc (and thus boot from a read-only filesystem.) They use some form of RAM filesystem overlay (eg like a "ramdrive" in DOS/Windows) so logs and such can write but the entire core is entirely read-only. (Knoppix is kind of commercial, so I don't know if they are as open as they should be, but Finnix was always free and open, plus it's smaller and simpler with the original design intended to fit on those card-shaped CDRs, so it is probably a better one to look at.) This is not a gaming setup or anything like that, so you can even take more RAM from the GPU to dedicated to system use (I think the default is something like 32MiB to the GPU? We probably only need something like 8 just for plugging it into a screen with normal resolutions and it only doing text.) Alternately, if it's simpler, perhaps just more partitions with core system files on a read-only filesystem and stuff that needs writing symlinking (or hardlinking if it's strictly necessary, but surely not) to a separate read/write partition. Not much should really be needed as most things that do writing can be disabled or outright removed. In fact, I imagine the greater majority of writing going on normally is just in the logs? I won't lie -- I've never done anything like trying to make a Linux system's core read-only, so I'm not sure what all needs to be accommodated, but I know a lot of people have done this, so the work is already done and the info is out there. (And honestly I think that much is beyond me. I can do a little bit in Linux, but not something like that. Otherwise I'd go ahead and just share my work here.)

Linux and its modern journalizing filesystems are great at handling power failures in general, but there are limits on what even those things can do and if it's being shut off in the middle of operations often enough that could do it. I wouldn't count on it to be 100% guaranteed to remain intact.

Alternately, perhaps it could automatically do a system shutdown after a successful payload delivery? You'd have to power cycle to use it again so this could be a bit bothersome to some, but it would be ready for power loss within mere seconds after being used rather than technically never. In most cases you only want to deliver a payload once every so often anyway (even if you do it again it would usually be long enough to reboot.) You'd still need to wait just a bit before cutting the power supply to be safe, but overall it would be a lot safer.

@moriczgergo I apologize if it's been asked before, but have you tried buildroot or minibian? They would probably cut down the boot time drastically
Oh, I'd like to second this idea too. We don't need a fully featured OS here after all. And generally you want to keep it off except when you're using it. Boot time as it is right now is positively horrendous. I'm thinking of figuring out how to add a LED to indicate when it's ready or something as things stand right now... But then right now it's a full fledged OS rather than a specialized setup (and what we're doing here is just about as specialized as it gets. Frankly I'm actually more surprised I couldn't find a ton of people doing this with an Arduino type device as it doesn't even need an OS to do all this. (I saw the tinker thing, but it's meant to go inside with some major soldering and is as "test phase" as it gets... There's no technical reason someone couldn't rig up something with one of the many Arduino-style devices out there with USB, but unfortunately that sort of coding is far beyond my ability.)


EDIT: Ok, I said all that about being unable to do it myself and... Well, ok, I wasn't wrong. But anyway, I did google up a lot of various guides and did what I could. I removed a bunch of stuff (honestly a heck of a lot more can go, but I don't know enough to tell what.) I did what I could to make it read-only too. I definitely didn't do it right, but, well, the system runs and it sends the payload, so whatever I guess. It looks like I completely broke systemd, so I'm not sure why it does work, lol. Regardless, it now boots up very very fast. I also found out how to control the activity LED, so I put a command to blink it at a specific rate once modchip.sh begins running to indicate that it is "ready" -- however, it seems it will still be a few seconds after this point before the payload actually gets delivered, so it's apparently running too soon (guess I could have added a sleep to the start of the script of approximately the right time, but oh well. Adding a sleep 4 before the loop in the /usr/bin/blinkact I threw together seemed to time it almost exactly right.) This way it could somehow indicate readiness without actually soldering in an LED or anything like that. I also edited modchip.sh to point to /boot/payload.bin instead with no ill effects. All networking stuff is gone and basically broken at this point, so with this setup you have to do it that way, but it's quick and easy IMO. And to make things worse, for some reason I absolutely could not shrink the filesystem. I have no clue why. (Resize2fs would keep insisting it was already the minimum size and apparently gparted and everything else use resize2fs...) I told resize2fs to force a resize and it still works, but this doesn't fix the partition table (I'm not quite sure how to do that.) So anyway, it won't actually fit on a 2GB card, but if written until it breaks I think it should actually be fine (all actual data should be physically before 1.3GB or so.) Anyway, all this mess aside, it functions and that is good enough for now I guess.

I'll go ahead and share it here. I'm afraid I can't link to the guides or say exactly what all I did because it was a long process googling all sorts of things and a bunch of sites. Anyway, anyone is welcome to do whatever they want with this including deleting it and starting over from scratch: https://www43.zippyshare.com/v/lZ27NP34/file.html


will try that the next days, thanks a lot!
Probably we could have a workaround for the need of the usb hub by direct soldering a usb socket with a current limiting resistor (100 ohm would do its job) in series to 5V....
I'm actually considering rigging up something a little more permanent myself which would mean no hub. The idea I have in mind is to stuff a RPi Zero into a simple box with a really simple power supply (probably a really small battery -- maybe even something for a drone) and glue a type-c connector on one end so it can be just plugged in as needed kind of like how I presume the SX "modchip" works. The other end of the connector's very short cable would just be soldered into the USB port for maximum simplicity. So I'd like to ask for more specifics. First, is that actually on the +5V output as this implies, and second, how big of a resistor is needed? Namely, is a 1/4 watt enough or does it have to be better than that? (Some people might even want to use SMD, but I'm keeping this simple and where it can be undone later if something like perhaps ReBug's internal thing works out and I eventually change over to something like that.) It seems my current hub doesn't prevent the reboot causing surge anyway.
 
Last edited by Nazosan,

Nazosan

Well-Known Member
Member
Joined
May 12, 2009
Messages
576
Trophies
1
XP
1,090
Country
United States
So here is my stage two setup:
Fusee_Pi.jpg
Stage one was, of course, just a RPi + everything loosely plugged in and no soldering. The DC-DC converter is from one of those cheap USB power banks because these are some of the smallest DC-DC converters already plus they have chargers integrated whereas you won't find many you can buy separately that actually have both together (and it seemed like a real pain to integrate some other means of charging.) It's a tad annoying that it uses a momentary toggle switch for power, but since these are intended for USB power banks it's entirely possible that those which don't require a button to activate might not like the battery suddenly "going to zero" (eg a full toggle switch disconnecting it) since they basically have to implement their own battery protection circuits. (Well, at least all the 18650 based ones seem to. I'm not sure about LiPo ones as it's probably ridiculously hard to even find a LiPo pack without a protector already coming with it from any reasonable source. Those likely use the same basic setups out of sheer lazy cheapness though.)

Stage three was to be redone a bit with the DC-DC converter placed better (perhaps an external switch, but I was feeling a bit lazy on that) and a smaller battery that could fit inside as well as the cable cut and a resistor placed in so it could be plugged and unplugged at will. However, I think stage three won't happen. At first I thought ReBug's chip couldn't ship to my area because it simply said there were no shipping options when I first tried it and thus I thought it could be a very long time until I could get one. However, it let me make an order a short while ago, so I guess it won't be so long after all. Since it's basically a super minimal more Arduino-like device (eg no OS or any of that stuff, just instantly on and ready,) internal, and using so little power it should be able to easily run from the Switch directly with probably no measurable effect on battery life at all I guess I'll just not bother with all the work involved in implementing stage three.

BTW, I have no idea where the person I got that case from got it, but an 18650 battery case designed to hold two is only just slightly larger so might be a really good starting point if anyone wants to do something like this in a case and needs something cheap to start from. Of course you'd have to break out the little bits designed to hold the batteries still, but pliers and a bit of bending and twisting should get those out pretty quickly.

From what I've read online I think soldering power directly to the header pins is actually generally a bad idea because it bypasses the protections. A DC-DC converter should, of course, not have excessive surges or anything -- though I have seen very momentary spikes one way or the other at various times depending on load -- but this still seems like a bad idea without much real benefit anyway (basically this is generally only useful for those external power source addons that implement their own protection circuits.) If you look on the board right under where the micro-usb power connector is there are two large contacts that are actually the + and - power -- and this goes through all the protection circuits and etc pretty much straight from the connector as if you had plugged something into it normally. I don't want to pull mine apart right now, but if I recall the negative was towards the edge of the board and the positive away from it (you can test by just plugging a USB power source in and then reading those points with a voltmeter.)
 
Last edited by Nazosan,

mogery

Well-Known Member
OP
Member
Joined
Dec 28, 2016
Messages
161
Trophies
0
Location
Hungary
XP
490
Country
Hungary
I do want to second the idea of keeping the payload on the boot partition. The boot partition is normally not to be used, but it's not going to hurt anything if it is. Mostly it just generally isn't user account accessible once mounted for security reasons and of course the amount of free space on it is pitiful (but a payload is a matter of less than a couple hundred kilobytes versus more than 20MB free with this current setup, so a payload won't even make a noticeable difference.) Not all RPi models have built-in WiFi anyway (the cheaper RPi Zero might make the most sense for this particular setup anyway,) and even then it's a pain to configure networking on a headless device (basically you must connect it to a screen once anyway and you have to know what to run and everything. But IMO there's no real reason this particular thing shouldn't more or less just work "out of the box" for most. Eg it should be able to basically work for anyone.) I already edited the modchip.sh on mine to point to /boot/payload.bin and as far as I can tell it works just fine (I've tested a few times and it seems ok so far at least.) IMO this is simpler and cleaner than networking anyway and thus basically all networking stuff could be disabled (and DHCP at least does seem to have a delay to it even if nothing else does, but also that would mean less stuff would be going on, less memory used, etc etc, which may be beneficial in such a minimal setup.)

BTW, I have had filesystem damage on a RPi before from power losses. Actually it has happened to me several times and this last time I decided just to actually image the flash drive to a backup file so I could just restore it if it happened again. Basically I have one in another room just acting as a dedicated server to do various things including sharing an external drive across the network. I really want to bring up the idea of going to a read-only design. You can surely get ideas from Knoppix and the much simpler Finnix Linux live rescue systems that are built to run from an optical disc (and thus boot from a read-only filesystem.) They use some form of RAM filesystem overlay (eg like a "ramdrive" in DOS/Windows) so logs and such can write but the entire core is entirely read-only. (Knoppix is kind of commercial, so I don't know if they are as open as they should be, but Finnix was always free and open, plus it's smaller and simpler with the original design intended to fit on those card-shaped CDRs, so it is probably a better one to look at.) This is not a gaming setup or anything like that, so you can even take more RAM from the GPU to dedicated to system use (I think the default is something like 32MiB to the GPU? We probably only need something like 8 just for plugging it into a screen with normal resolutions and it only doing text.) Alternately, if it's simpler, perhaps just more partitions with core system files on a read-only filesystem and stuff that needs writing symlinking (or hardlinking if it's strictly necessary, but surely not) to a separate read/write partition. Not much should really be needed as most things that do writing can be disabled or outright removed. In fact, I imagine the greater majority of writing going on normally is just in the logs? I won't lie -- I've never done anything like trying to make a Linux system's core read-only, so I'm not sure what all needs to be accommodated, but I know a lot of people have done this, so the work is already done and the info is out there. (And honestly I think that much is beyond me. I can do a little bit in Linux, but not something like that. Otherwise I'd go ahead and just share my work here.)

Linux and its modern journalizing filesystems are great at handling power failures in general, but there are limits on what even those things can do and if it's being shut off in the middle of operations often enough that could do it. I wouldn't count on it to be 100% guaranteed to remain intact.

Alternately, perhaps it could automatically do a system shutdown after a successful payload delivery? You'd have to power cycle to use it again so this could be a bit bothersome to some, but it would be ready for power loss within mere seconds after being used rather than technically never. In most cases you only want to deliver a payload once every so often anyway (even if you do it again it would usually be long enough to reboot.) You'd still need to wait just a bit before cutting the power supply to be safe, but overall it would be a lot safer.


Oh, I'd like to second this idea too. We don't need a fully featured OS here after all. And generally you want to keep it off except when you're using it. Boot time as it is right now is positively horrendous. I'm thinking of figuring out how to add a LED to indicate when it's ready or something as things stand right now... But then right now it's a full fledged OS rather than a specialized setup (and what we're doing here is just about as specialized as it gets. Frankly I'm actually more surprised I couldn't find a ton of people doing this with an Arduino type device as it doesn't even need an OS to do all this. (I saw the tinker thing, but it's meant to go inside with some major soldering and is as "test phase" as it gets... There's no technical reason someone couldn't rig up something with one of the many Arduino-style devices out there with USB, but unfortunately that sort of coding is far beyond my ability.)


EDIT: Ok, I said all that about being unable to do it myself and... Well, ok, I wasn't wrong. But anyway, I did google up a lot of various guides and did what I could. I removed a bunch of stuff (honestly a heck of a lot more can go, but I don't know enough to tell what.) I did what I could to make it read-only too. I definitely didn't do it right, but, well, the system runs and it sends the payload, so whatever I guess. It looks like I completely broke systemd, so I'm not sure why it does work, lol. Regardless, it now boots up very very fast. I also found out how to control the activity LED, so I put a command to blink it at a specific rate once modchip.sh begins running to indicate that it is "ready" -- however, it seems it will still be a few seconds after this point before the payload actually gets delivered, so it's apparently running too soon (guess I could have added a sleep to the start of the script of approximately the right time, but oh well. Adding a sleep 4 before the loop in the /usr/bin/blinkact I threw together seemed to time it almost exactly right.) This way it could somehow indicate readiness without actually soldering in an LED or anything like that. I also edited modchip.sh to point to /boot/payload.bin instead with no ill effects. All networking stuff is gone and basically broken at this point, so with this setup you have to do it that way, but it's quick and easy IMO. And to make things worse, for some reason I absolutely could not shrink the filesystem. I have no clue why. (Resize2fs would keep insisting it was already the minimum size and apparently gparted and everything else use resize2fs...) I told resize2fs to force a resize and it still works, but this doesn't fix the partition table (I'm not quite sure how to do that.) So anyway, it won't actually fit on a 2GB card, but if written until it breaks I think it should actually be fine (all actual data should be physically before 1.3GB or so.) Anyway, all this mess aside, it functions and that is good enough for now I guess.

I'll go ahead and share it here. I'm afraid I can't link to the guides or say exactly what all I did because it was a long process googling all sorts of things and a bunch of sites. Anyway, anyone is welcome to do whatever they want with this including deleting it and starting over from scratch: https://www43.zippyshare.com/v/lZ27NP34/file.html


I'm actually considering rigging up something a little more permanent myself which would mean no hub. The idea I have in mind is to stuff a RPi Zero into a simple box with a really simple power supply (probably a really small battery -- maybe even something for a drone) and glue a type-c connector on one end so it can be just plugged in as needed kind of like how I presume the SX "modchip" works. The other end of the connector's very short cable would just be soldered into the USB port for maximum simplicity. So I'd like to ask for more specifics. First, is that actually on the +5V output as this implies, and second, how big of a resistor is needed? Namely, is a 1/4 watt enough or does it have to be better than that? (Some people might even want to use SMD, but I'm keeping this simple and where it can be undone later if something like perhaps ReBug's internal thing works out and I eventually change over to something like that.) It seems my current hub doesn't prevent the reboot causing surge anyway.

For shutting down the device safely, you could wire in a powerblock: https://blog.petrockblock.com/2015/07/04/powerblock-another-power-switch-for-the-raspberry-pi/
 

midstor

Well-Known Member
Member
Joined
Aug 1, 2018
Messages
299
Trophies
0
Age
25
XP
797
Country
United States
fusée (à la) framboise
A portable RPi Fusée Gelée rig.
.​

About
fusée framboise is a custom bare-bones Raspbian image that has a systemd Unit that loops modshipd.sh of fusee-launcher.

How-to

Ingredients
  • A Raspberry Pi Zero (any RPi works, but the Zero tends to run off of any power bank)
  • A power bank (for powering the RPi)
  • A non-powered USB hub (why?)
  • A USB-A to C cable (don't get a no-brand one: it may not have a needed resistor, and it may wreck your Switch or your USB source)
  • A USB-A to Micro cable (for RPi power)
  • A USB Micro to USB-A Female cable (only for the RPi Zero: for plugging in the USB hub)

SD Setup
  1. Download a fusee-framboise image.
  2. Flash it to your RPi's SD card. (If you don't have a flasher software installed, I recommend Etcher.)

Cables!
  • Plug the USB Micro to USB-A Female cable into the RPi. (only for RPi Zero)
  • Plug in the USB hub into the USB-A Female cable.
  • Plug in the USB-A to C cable into the USB hub.
  • Plug in the USB-A to Micro cable into the USB hub, and into the RPi.

Usage
You should just be able to plug in your Switch, put it into RCM, and the payload should automatically launch.

Replacing the payload
To replace the payload, you have two methods: (both need sudo)
  • Replace fusee.bin in /etc/fusee-launcher/ with another payload. (recommended)
  • Copy another payload into /etc/fusee-launcher/, change modchipd.sh to point to it, and restart the fusee-launcher service, or reboot.

Networking
You can change the payload over the air. Here's how to do it: (your RPi needs wireless, and you'll need a mobile/normal hotspot to do this)
  • Set a root password with "sudo passwd", and take note of it.
  • Change your default pi user's password from "raspberry". (optional, recommended)
  • Turn on SSH: it's in Interfacing Options of raspi-confiig.
  • Configure your Pi to connect to your phone's network.
  • Reboot to connect to it, run ifconfig, and take note of the settings.
  • Set a static IP based on your ifconfig data.
  • Take note of your static IP. (you should probably take note of it on your phone)
  • Use an app that supports SFTP to connect to your RPi with the new root password. (iOS)


I am trying to access this via ssh and i can't, when i try to network scan (because i don't have a keyboard) it finds 0 raspberry pi devices. I have it connected to the internet.
 

flower99

Active Member
Newcomer
Joined
Apr 12, 2016
Messages
44
Trophies
0
Age
44
XP
206
Country
Malaysia
hi just bought the raspberry Pi Zero
ive been download the image_2018-04-30-Fusee_Framboise-lite.zip
the question is how to change the payload to latest like reinx or henkate payload.bin
Is that flash the image_2018-04-30-Fusee_Framboise-lite into sd card and put the sd card into ubuntu system to change the payload (by sudo)?
 

Slimper

New Member
Newbie
Joined
Aug 4, 2018
Messages
4
Trophies
0
Age
36
XP
112
Country
Russia
hi just bought the raspberry Pi Zero
ive been download the image_2018-04-30-Fusee_Framboise-lite.zip
the question is how to change the payload to latest like reinx or henkate payload.bin
Is that flash the image_2018-04-30-Fusee_Framboise-lite into sd card and put the sd card into ubuntu system to change the payload (by sudo)?
Change it by ssh connected to rpi zero (if not W-version connect usb-wifi) and make it over root user (change config for allow root over ssh).
 

eluder

Member
Newcomer
Joined
Jun 11, 2006
Messages
8
Trophies
0
XP
72
Country
Canada
Works perfect with an Anker 10000mAh 3.7v 3A power block and a Pi1 (B+)
About 45secs from cold boot to payload sent to switch


Edit: I have AutoRCM activated
Thanks!
 
Last edited by eluder,

Nazosan

Well-Known Member
Member
Joined
May 12, 2009
Messages
576
Trophies
1
XP
1,090
Country
United States
One thing you can also do is just use ln to make a symbolic link to a file on the /boot partition (for instance, /boot/payload.bin.) Then you can change the payload just by popping the memory card into any computer. I've already done this on the image I put up if that's any more convenient. I'm afraid I don't know enough of how these source code systems work to make a patch for that (or any of the other stuff I did) however.

Honestly this should be standard because it's just too easy this way not to. (You can even still use wifi or whatever -- though I suppose permissions might need to change a bit to allow this -- so it's kind of the best of both worlds there.)

Works perfect with an Anker 10000mAh 3.7v 3A power block and a Pi1 (B+)
About 45secs from cold boot to payload sent to switch


Edit: I have AutoRCM activated
Thanks!

For what it's worth if you use the image I put up it's roughly half the time. Also, if you want to keep using this particular method you might want to look at the Raspberry Pi Zero as a smaller option that's more convenient too (it also uses less power for various reasons including lack of an ethernet port.) No need even to go as extreme as 10,000mAh though. One of those little generic Chinese 2600mAh (single 18650 -- probably actually 2400mAh, but sometimes they'll lie and advertise them as a lot more) packs is sufficient for this. Which is to say that's yet another thing that can be smaller and more convenient. Yes, even with the RPi1 (it may use more than a Zero, but not that much more, and it only has to be on for a fairly short period of time.)
 
Last edited by Nazosan,
  • Like
Reactions: olixus and eluder

eluder

Member
Newcomer
Joined
Jun 11, 2006
Messages
8
Trophies
0
XP
72
Country
Canada
For what it's worth if you use the image I put up it's roughly half the time.
I will check this out.

Also, if you want to keep using this particular method you might want to look at the Raspberry Pi Zero as a smaller option that's more convenient too (it also uses less power for various reasons including lack of an ethernet port.) No need even to go as extreme as 10,000mAh though. One of those little generic Chinese 2600mAh (single 18650 -- probably actually 2400mAh, but sometimes they'll lie and advertise them as a lot more) packs is sufficient for this. Which is to say that's yet another thing that can be smaller and more convenient. Yes, even with the RPi1 (it may use more than a Zero, but not that much more, and it only has to be on for a fairly short period of time.)

I already had all the parts at home doing nothing and wanted to give it a try.
 
Last edited by eluder,

Calevala

Active Member
Newcomer
Joined
Jun 13, 2018
Messages
37
Trophies
0
Age
34
XP
212
Country
Russia
Moriczgergo, can you please change default payload to Hekate 4.2?
It can load/autoload any other payload so this solution will be noob-friendly.
 

Site & Scene News

Popular threads in this forum

General chit-chat
Help Users
  • No one is chatting at the moment.
    ZeroT21 @ ZeroT21: only ps5 updated to latest firmware can go on psn, jailbroken ones just don't use psn or they...