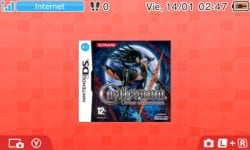
v1.0.0
YANBF (Yet Another nds-bootstrap Forwarder) is a forwarder structure for nds-bootstrap.
Features:
Features:
- "forwarders" are referred to placeholder icons that will shortcut to a particular application (in this case, [nds-bootstrap](https://github.com/DS-Homebrew/nds-bootstrap))
- Skip the [second menu](https://github.com/DS-Homebrew/TWiLightMenu) and just directly launch
- Launches from 3DS-mode.
- The other implementation by @RocketRobz and @Olmectron, https://gbatemp.net/threads/426174/, is DSiWare, which means you are limited to only 40 titles. This works great on the DSi, it does not work great on the 3DS.
- This means you can now install as many icons as you want until you max out the HOME menu icon space!
- A pre-existing forwarder template exists: https://gbatemp.net/threads/426174/
- This uses a DSiWare template, copies the icon and title and the ROM path, and then installed as a CIA. The CIA, when launched, will boot `sdcard.nds` which will do all the nds-bootstrap setup.
- I instead opted to create an `sdcard.nds` bootloader, and then a 3DS-mode app that launches said bootloader
- you can't launch `.nds` files from 3DS-mode. So a bootloader is required.
- the bootloader does the same thing as the DSiWare template, in actuality.
- Go to https://github.com/YANBForwarder/YANBF/releases, and download the appropriate zip file for your PC OS
- Go to https://github.com/RocketRobz/NTR_Forwarder/releases, and download the zip file that is not the source code
- Extract the zip files
- From the DS Game Forwarder Pack, copy everything in the for SD card root folder to your SD card root
- From YANBF, copy bootstrap.cia to the `sd:/cias` folder
- If this folder doesn't exist, make one
- Download the latest TWiLight Menu++ version [here](https://github.com/DS-Homebrew/TWiLightMenu/releases). Only get the `3DS.7z` file
- In the 7z file, go to `_nds`, `TWiLightMenu`, and `extras`
- Drag the `apfix.pck` and `widescreen.pck` file to `sd:/_nds/ntr-forwarder/`
- Using the command-line program
- Open a terminal or command prompt and cd inside the generator folder
- Run `generator <path to ROM on your SD card>`
- Make sure to replace `<path to ROM on your SD card>` with the full path to your ROM
- If you do not have your SD card inserted in your computer, you must provide a custom ROM path using -p <ROM path on SD>
- This ROM path must follow POSIX standards
- i.e. if your ROM on SD card is at "sd:/ROMs/ROM.nds", pass -p "/ROMs/ROM.nds"
- This ROM path must follow POSIX standards
- The resulting CIA will be generated in this same folder. Copy this to the sd:/cias folder
- Boot your 3DS and install both CIAs using FBI
- Using the graphical user interface
- Open the `generator` folder, then:
- Windows: Open YANBF-GUI.exe
- macOS:
- Open YANBF-GUI.dmg
- Install YANBFGenerator app
- Linux: Open YANBF-GUI.AppImage
- Set the generator directory to the path of your `generator` folder. A file browser icon next to the input can help with this
- Drag and drop as many ROMs as you need on your SD card to the app.
- If you do not have your SD card inserted in your computer, you must provide a custom ROM path in the drop-down options
- This ROM path must follow POSIX standards
- i.e. if your ROM on SD card is at "sd:/ROMs/ROM.nds", write "/ROMs/ROM.nds"
- This ROM path must follow POSIX standards
- If you do not have your SD card inserted in your computer, you must provide a custom ROM path in the drop-down options
- Click the Download button to start the generation process
- The resulting CIA will be generated in this same folder. Copy this to the sd:/cias folder
- Boot your 3DS and install all CIAs using FBI
- Open the `generator` folder, then:
- Using Universal-Updater
- Open Universal-Updater on your 3DS
- You can download it here: https://github.com/Universal-Team/Universal-Updater/releases
- Navigate to `YANBF`, then install the YANBF Forwarder Pack
- Open Universal-Updater on your 3DS
- Manually
- Re-follow steps 1-8 in the "How to use" section
- For a quick tutorial, refer to @Yrouel's post here: https://gbatemp.net/threads/609242/
- Technical definitions (for those who know their stuff):
- Image must be in PNG format. It must be 256x128. You can center your image accordingly, but the resulting file must be that size or it will fail to generate.
- Sound must be in WAV format, 16-bit, and shorter than 3 seconds. Otherwise, the 3DS will fail to render the banner entirely.
- Want to share? See https://github.com/YANBForwarder/assets#contribution-guidelines
- Images are mandatory. Sound is optional.
- devkitPro for their toolchain
- @RocketRobz for the TWLNAND bootstrap code
- @Pk11 for bannergif.py and testing
- @Olmectron for the initial GUI wrapper
- @spitzeqc for continued support on the GUI wrapper
Last edited by lifehackerhansol,


