Tutorial  Updated

How to flash the HWFLY Clone chips

See below for updates.

IF YOU BREAK YOUR BOOT0 PIN. DO NOT DM ME ASKING FOR HELP. THAT'S IT. YOU BREAK THAT PIN AND YOU CANT FLASH. YOUR CHIP IS STUCK WITH WHATEVER HWFLY PUT ON IT


Pre-requisites:


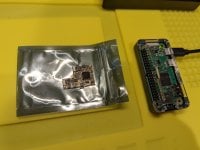
  • Raspberry Pi Zero W
    • You may use another flasher if you desire.
  • Pinout Diagram
  • Modchip Diagram
  • FULL_CHIP_STOCK.bin
  • Modchip Diagram, find the PA9(TX) and the PA10(RX) pins on your modchip, and do the following:
    • Connect GPIO14(TX) on your Raspberry Pi Zero W to the PA10(RX) pin on your modchip.
    • Connect GPIO15(RX) on your Raspberry Pi Zero W to the PA9(TX) pin on your modchip.

  1. Solder a wire to each of the following pinouts on the Raspberry Pi Zero W:
    • 3.3V
    • Ground
    • GPIO 14 (UART TX)
    • GPIO 15 (UART RX)
  2. Do the following to prepare the modchip:
    1. Lift pin 44 (also known as BOOT0).
    2. You will need a way to power the chip, so you need to find two 3.3v points. It can be on a MOSFET, but it will differ based on the revision of the modchip.
    3. Connect Ground on your Raspberry Pi Zero W to the Ground pin on your modchip.
    4. Check the Modchip Diagram, find the PA9(TX) and the PA10(RX) pins on your modchip, and do the following:
      • Connect GPIO14(TX) on your Raspberry Pi Zero W to the PA10(RX) pin on your modchip.
      • Connect GPIO15(RX) on your Raspberry Pi Zero W to the PA9(TX) pin on your modchip.
  3. Boot your Raspberry Pi Zero W and do the following:
    1. In the terminal, type the following command, and press enter:
      Bash:
      sudo nano /boot/config.txt
    2. Add the following line to the end of the file:
      INI:
      dtoverlay=pi3-miniuart-bt
    3. Press CTRL + X to save and exit the editor.
    4. In the terminal, type the following command, and press enter:
      Bash:
      sudo nano /boot/cmdline.txt
    5. Remove the following line from the file:
      INI:
      console=serial0,115200
    6. Press CTRL + X to save and exit the editor.
    7. Restart your Raspberry Pi with this command
      Bash:
      sudo /sbin/reboot
    8. In the terminal, type the following commands, and press enter after each command:

      Bash:
      git clone https://github.com/Pheeeeenom/stm32flash.git
      cd stm32flash
      sudo make install
  4. Now you will flash the modchip.
    Note: This will remove read protection, and the modchip will wipe itself (that is what we want).
    1. In the terminal, type the following command, and press enter:
      Bash:
      stm32flash -k /dev/serial0
    2. Now to flash Spacecraft-NX Version 0.2.0, type the following, and press enter:
      Bash:
      stm32flash -v -w ./FULL_CHIP_STOCK.bin /dev/serial0
  5. Once you're done flashing your modchip, remove the wiring from the modchip, and restore the 3.3v pin on the modchip to its original position.

Please post pictures of your work here to further the identification of the different board revisions!


UPDATE: So it seems like stitching the spacecraft bootloader and firmware together from the repo causes unstable glitching behaviors. For now, consistent glitching behavior works with this bootload/firmware combo.
This is the original file on the OLED variant chip which has 0.2.0 spacecraft. As for glitching, I'll figure it out, give me some time...unless someone else wants to hop in and reverse the differences.

For now, this at least solves the 0.1.0 HWFLY gen 3 issue. More to come.

UPDATE 2: This is only going to work on some HWFLY chips. Older ones use higher protection than the new revisions that seem to use the QFN FPGA.

UPDATE 3: This should fully work on OLED modchips with the QFN FPGA. https://github.com/Pheeeeenom/firmware
 
Last edited by Mena,

Mena

Well-Known Member
OP
Member
Joined
Oct 5, 2020
Messages
148
Trophies
0
Age
29
XP
1,032
Country
United States
There are some anomalies.

USB Debugging does not work, will figure out why
Sometimes there is infinite glitching, again due to FPGA code probably?
Since this removes all memory protections, you could just SWD this now probably? I can't check, I do not have a way to use SWD.
If you find any other weird shit, please post in this thread. Thanks.
 
  • Like
Reactions: Donnie-Burger

james194zt2

Well-Known Member
Newcomer
Joined
Jan 4, 2022
Messages
57
Trophies
0
Age
42
XP
165
Country
United Kingdom
I have a Pi 4+ sat next to me, presume no difference using that over a zero? I have a couple of them sat somewhere in a box if it needs to be a zero.
 

Donnie-Burger

Well-Known Member
Member
Joined
Oct 27, 2021
Messages
927
Trophies
0
Website
www.youtube.com
XP
1,773
Country
United States
Pre-requisites:


Setup:


  1. Solder a wire to each of the following pinouts on the Raspberry Pi Zero W:
    • 3.3V
    • Ground
    • GPIO 14 (UART TX)
    • GPIO 15 (UART RX)
  2. Do the following to prepare the modchip:
    1. Lift pin 44 (also known as BOOT0).
    2. You will need a way to power the chip, so you need to find two 3.3v points. It can be on a MOSFET, but it will differ based on the revision of the modchip.
    3. Connect Ground on your Raspberry Pi Zero W to the Ground pin on your modchip.
    4. Check the Modchip Diagram, find the PA9(TX) and the PA10(RX) pins on your modchip, and do the following:
      • Connect GPIO14(TX) on your Raspberry Pi Zero W to the PA10(RX) pin on your modchip.
      • Connect GPIO15(RX) on your Raspberry Pi Zero W to the PA9(TX) pin on your modchip.
  3. Boot your Raspberry Pi Zero W and do the following:
    1. In the terminal, type the following command, and press enter:

      Bash:
      sudo nano /boot/config.txt
    2. Add the following line to the end of the file:
      INI:
      dtoverlay=pi3-miniuart-bt
    3. Press CTRL + X to save and exit the editor.
    4. In the terminal, type the following command, and press enter:
      Bash:
      sudo nano /boot/cmdline.txt
    5. Remove the following line from the file:
      INI:
      console=serial0,115200
    6. Press CTRL + X to save and exit the editor.
    7. In the terminal, type the following commands, and press enter after each command:

      Bash:
      git clone https://github.com/Pheeeeenom/stm32flash.git
      cd stm32flash
      sudo make install
  4. Now you will flash the modchip.
    Note: This will remove read protection, and the modchip will wipe itself (that is what we want).
    1. In the terminal, type the following command, and press enter:
      Bash:
      stm32flash -k /dev/serial0
    2. Now to flash Spacecraft-NX Version 0.2.0, type the following, and press enter:
      Bash:
      stm32flash -v -w ./bootloader_and_firmware_full.bin /dev/serial0
  5. Once you're done flashing your modchip, remove the wiring from the modchip, and restore the 3.3v pin on the modchip to its original position.

Please post pictures of your work here to further the identification of the different board revisions!
Very Very nice.
 

Mena

Well-Known Member
OP
Member
Joined
Oct 5, 2020
Messages
148
Trophies
0
Age
29
XP
1,032
Country
United States
There is a revision of the HWFLY out in the wild btw that does not support Samsung eMMC's. It won't dump your boot0/1 and won't boot OFW. The FPGA has some weird issues. You cannot fix it by flashing the GD32.
 
  • Like
Reactions: Donnie-Burger

Vladjaye

Well-Known Member
Newcomer
Joined
Jan 11, 2021
Messages
48
Trophies
0
Age
28
XP
379
Country
United States
There is a revision of the HWFLY out in the wild btw that does not support Samsung eMMC's. It won't dump your boot0/1 and won't boot OFW. The FPGA has some weird issues. You cannot fix it by flashing the GD32.
Is the same applicable to the OLED chips? Thanks for your time and dedication! :)
 

Mena

Well-Known Member
OP
Member
Joined
Oct 5, 2020
Messages
148
Trophies
0
Age
29
XP
1,032
Country
United States
Is the same applicable to the OLED chips? Thanks for your time and dedication! :)
I'm not sure, I only know of this because I have a clone of the original clone. I am willing to *bet* that the code for the FPGA on the HWFLY Lite is identical to the SX Lite. I just don't have one to test.
 

james194zt2

Well-Known Member
Newcomer
Joined
Jan 4, 2022
Messages
57
Trophies
0
Age
42
XP
165
Country
United Kingdom
There is a revision of the HWFLY out in the wild btw that does not support Samsung eMMC's. It won't dump your boot0/1 and won't boot OFW. The FPGA has some weird issues. You cannot fix it by flashing the GD32.
I am sure that the FPGA is a half assed implementation of what is in the real TX chip, convinced as well that it doesn't go to sleep when commanded to either, and we know it doesn't work out the best glitch values for your console. I suspect they found a common set of working glitch values, then are just firing them one by one praying it works hence why occasionally it doesn't boot or takes more than a couple of seconds!

Would make sense, they likely logic analysed the original to work out a load of values, and with the firmware they could see how the GD32 needed to interface to it, they probably then implemented their own implementation of the FPGA.
 
  • Like
Reactions: 0x3000027E

Mena

Well-Known Member
OP
Member
Joined
Oct 5, 2020
Messages
148
Trophies
0
Age
29
XP
1,032
Country
United States
I am sure that the FPGA is a half assed implementation of what is in the real TX chip, convinced as well that it doesn't go to sleep when commanded to either, and we know it doesn't work out the best glitch values for your console. I suspect they found a common set of working glitch values, then are just firing them one by one praying it works hence why occasionally it doesn't boot or takes more than a couple of seconds!

Would make sense, they likely logic analysed the original to work out a load of values, and with the firmware they could see how the GD32 needed to interface to it, they probably then implemented their own implementation of the FPGA.
Likely, it's not that complex honestly. it's eMMC <-> FPGA <-> SPI <-> GD32 iirc. Some random bytes, some unique bytes (CID), some other nonsense. Don't wanna go into too much detail
 

Vladjaye

Well-Known Member
Newcomer
Joined
Jan 11, 2021
Messages
48
Trophies
0
Age
28
XP
379
Country
United States
There are some anomalies.

USB Debugging does not work, will figure out why
Sometimes there is infinite glitching, again due to FPGA code probably?
Since this removes all memory protections, you could just SWD this now probably? I can't check, I do not have a way to use SWD.
If you find any other weird shit, please post in this thread. Thanks.
So, the firmware .bin should work with every hwfly chip? What about the difference in pinouts of all the chip versions in the wild? Would not they require custom firmware files? The OLED variant also needs a hardware flashing before using SWD? Sorry for overwhelming with the questions - just trying to understand the whole picture.
 

Mena

Well-Known Member
OP
Member
Joined
Oct 5, 2020
Messages
148
Trophies
0
Age
29
XP
1,032
Country
United States
So, the firmware .bin should work with every hwfly chip? What about the difference in pinouts of all the chip versions in the wild? Would not they require custom firmware files? The OLED variant also needs a hardware flashing before using SWD? Sorry for overwhelming with the questions - just trying to understand the whole picture.
The one I attached? yeah. pinouts on the mcu don't change. i don't know about the oled chip because mine was unlocked from the start from factory
 

cashboxz01

Well-Known Member
Member
Joined
Sep 28, 2008
Messages
155
Trophies
1
XP
1,041
Country
United States
Lol wtf is wrong with the manufacturer? TX sold the same chip for $60-70 and as much as you might hate them for stealing open source code (LOL) for something meant for piracy, they actually did the R&D for it. TX's cost to make this was around $20-30 if they wanted to sell it for $60-70 and break even. These a-holes are selling it for 8-10x what it costs to make lol...and it isn't even ready to use. If you gotta pay $200 to buy it, and go through this tedious process before the insanely difficult process of installing it, and pay $350 for the OLED console...wtf is the point?

If you want to run retroarch on a powerful handheld, there's way easier and cheaper ways. It's BS to tell yourself you use these chips or Atmosphere for homebrew.

I honestly hope a software exploit is released for the switch...just to see these manufacturers fail.
 
Last edited by cashboxz01,

sean222

Well-Known Member
Newcomer
Joined
Sep 7, 2007
Messages
92
Trophies
1
XP
753
Country
Canada
Alright...let's give this a shot. Nothing to lose...I was going to throw out my HWFLY Lite rev 3 with SpaceCraftNX 0.1 on it anyways! Will report back in a couple hours or less.
 

Attachments

  • PXL_20220112_030947434.MOTION.jpg
    PXL_20220112_030947434.MOTION.jpg
    2.1 MB · Views: 228

Mena

Well-Known Member
OP
Member
Joined
Oct 5, 2020
Messages
148
Trophies
0
Age
29
XP
1,032
Country
United States
Alright...let's give this a shot. Nothing to lose...I was going to throw out my HWFLY Lite rev 3 with SpaceCraftNX 0.1 on it anyways! Will report back in a couple hours or less.
Please make extra sure you are connected to the right pins, etc. I have not done this on a lite. You will need to trace out points to solder to other than pins. If/When you find them, please take high resolution photos and mark them. Thank you.

Also, if you're willing to test something for me I would GREATLY appreciate it.
 

sean222

Well-Known Member
Newcomer
Joined
Sep 7, 2007
Messages
92
Trophies
1
XP
753
Country
Canada
Please make extra sure you are connected to the right pins, etc. I have not done this on a lite. You will need to trace out points to solder to other than pins. If/When you find them, please take high resolution photos and mark them. Thank you.

Also, if you're willing to test something for me I would GREATLY appreciate it.
I'll try my best :unsure: Private msg me what you want me to test.
 

Site & Scene News

Popular threads in this forum

General chit-chat
Help Users
  • No one is chatting at the moment.
    K3Nv2 @ K3Nv2: Sorry for accidentally bending over