Hacking Hardware Picofly - a HWFLY switch modchip

deeps

Well-Known Member
Member
Joined
Jul 3, 2007
Messages
454
Trophies
1
XP
1,272
Country
@Dee87 I don't see how those holders would work with the stencil you linked, though (I also have a multi-stencil for NSW but mine's lacking the emmc, thought I had one :sleep:)

There's always the 'ball approach', too:
*Edit, oof, didn't know it would make its own page here:

gist.github.com/dev-zzo/d0f468b40e2fe601c684cdb9c6590fa0

I fully believe the only thing(s) holding me back from accomplishing anything is having experience with the proper tools. Time to research\buy holder(s).
All you really need is a heat gun, 0.15mm BGA153 stencil and solder paste, some flux, a decent scraping tool to scrape paste into the holes, and a pair of tweezers to hold the stencil in place while scraping and applying heat. I reballed an EMMC recently just to try in case I'd have to at some point, see pic. I simply placed the emmc on a napkin for some movement resistance, then placed the stencil on top and aligned it, then held it in place with tweezers. I applied flux after melting the solder balls and applied low heat to melt the flux and loosen the chip from the stencil.
The holder and alignment kit linked above probably makes things easier and I would buy it if I were to do reballs every day, but as long as it's just occasionally then eh.
If you fail you can just wipe the emmc clean with solder wick and try again.
 

Attachments

  • 2020_0623_172218_002.JPG
    2020_0623_172218_002.JPG
    2.9 MB · Views: 33

Dee87

Well-Known Member
Member
Joined
Mar 19, 2023
Messages
1,139
Trophies
1
XP
1,589
Country
Germany
that looks nice , thanks for the links :-)
if i get into working more on switches ill def get a set of those :-)
Post automatically merged:

All you really need is a heat gun, 0.15mm BGA153 stencil and solder paste, some flux, a decent scraping tool to scrape paste into the holes, and a pair of tweezers to hold the stencil in place while scraping and applying heat. I reballed an EMMC recently just to try in case I'd have to at some point, see pic. I simply placed the emmc on a napkin for some movement resistance, then placed the stencil on top and aligned it, then held it in place with tweezers. I applied flux after melting the solder balls and applied low heat to melt the flux and loosen the chip from the stencil.
The holder and alignment kit linked above probably makes things easier and I would buy it if I were to do reballs every day, but as long as it's just occasionally then eh.
If you fail you can just wipe the emmc clean with solder wick and try again.
nice to hear yeah im waiting for my stuff to arrive and let u all see what i can get myself into :-)
 
  • Like
Reactions: Donnie-Burger

LogicalMadness

Well-Known Member
Member
Joined
Nov 3, 2014
Messages
287
Trophies
0
Age
41
XP
690
Country
United States
All you really need is a heat gun, 0.15mm BGA153 stencil and solder paste, some flux, a decent scraping tool to scrape paste into the holes, and a pair of tweezers to hold the stencil in place while scraping and applying heat. I reballed an EMMC recently just to try in case I'd have to at some point, see pic. I simply placed the emmc on a napkin for some movement resistance, then placed the stencil on top and aligned it, then held it in place with tweezers. I applied flux after melting the solder balls and applied low heat to melt the flux and loosen the chip from the stencil.
The holder and alignment kit linked above probably makes things easier and I would buy it if I were to do reballs every day, but as long as it's just occasionally then eh.
If you fail you can just wipe the emmc clean with solder wick and try again.

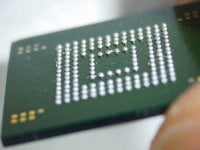
Maybe I'll give those PS4 SBs and NSW WiFi ICs another shot.
 
  • Like
Reactions: Dee87

R-Couto

Member
Newcomer
Joined
Mar 30, 2023
Messages
11
Trophies
0
Age
28
XP
57
Country
Brazil
Good evening everyone, I'm new to this picofly, I would like to clarify three doubts. of the CPU, I saw some videos but I couldn't see well if and in the 3rd or 4th point of the flex if anyone has an image thank you, and does the resistor in the rst need to be placed? I saw some mentioning him.
 
  • Like
Reactions: Donnie-Burger

deeps

Well-Known Member
Member
Joined
Jul 3, 2007
Messages
454
Trophies
1
XP
1,272
Country
Maybe I'll give those PS4 SBs and NSW WiFi ICs another shot.

There are a few "tricks of experience" that take a few tries and some fine tuning to get right:

- Solder paste is normally rather "wet" with flux. The flux will create a mess as it is pressed through the stencil holes. The paste needs to be dried out a bit before being applied into a stencil, either by leaving it exposed to air for a few days, or by putting the paste on a napkin and apply low heat to melt the flux and let the napkin absorb it. If you watch any reball video on youtube, the paste looks far more dry than normal, almost like a powder of sorts.

- It is very important to hold the stencil perfectly flat against the emmc. Any little distance, caused by even something as minor as a speck of dust or some left over solder on one of the edge points, creates enough room for solder paste to escape under and join balls together. At first I tried to hold the emmc in place with kapton tape, which didn't work at all because of the gap created by the tape.

- The emmc is very likely to get stuck together with the stencil. If this happens, you can add some flux on the balls and around the emmc chip, apply low heat to melt the flux, and let it lubricate the balls (lmao) while carefully poking the emmc to get it to come loose. You cannot pull the emmc off the stencil, it will result in balls coming off.

- Be sure to remove as much of the original solder as possible before reballing. The original solder is lead free which means a higher melting point, which means far harder to deal with, requiring higher temperatures which means higher risk of damaging the emmc.
 

Donnie-Burger

Well-Known Member
Member
Joined
Oct 27, 2021
Messages
927
Trophies
0
Website
www.youtube.com
XP
1,816
Country
United States
Good evening everyone, I'm new to this picofly, I would like to clarify three doubts. of the CPU, I saw some videos but I couldn't see well if and in the 3rd or 4th point of the flex if anyone has an image thank you, and does the resistor in the rst need to be placed? I saw some mentioning him.
Bridge 3+4 = this will eave 2 pins on the left and 2 pins on the right unsoldered. This is the way.
 

Dee87

Well-Known Member
Member
Joined
Mar 19, 2023
Messages
1,139
Trophies
1
XP
1,589
Country
Germany
There are a few "tricks of experience" that take a few tries and some fine tuning to get right:

- Solder paste is normally rather "wet" with flux. The flux will create a mess as it is pressed through the stencil holes. The paste needs to be dried out a bit before being applied into a stencil, either by leaving it exposed to air for a few days, or by putting the paste on a napkin and apply low heat to melt the flux and let the napkin absorb it. If you watch any reball video on youtube, the paste looks far more dry than normal, almost like a powder of sorts.

- It is very important to hold the stencil perfectly flat against the emmc. Any little distance, caused by even something as minor as a speck of dust or some left over solder on one of the edge points, creates enough room for solder paste to escape under and join balls together. At first I tried to hold the emmc in place with kapton tape, which didn't work at all because of the gap created by the tape.

- The emmc is very likely to get stuck together with the stencil. If this happens, you can add some flux on the balls and around the emmc chip, apply low heat to melt the flux, and let it lubricate the balls (lmao) while carefully poking the emmc to get it to come loose. You cannot pull the emmc off the stencil, it will result in balls coming off.

- Be sure to remove as much of the original solder as possible before reballing. The original solder is lead free which means a higher melting point, which means far harder to deal with, requiring higher temperatures which means higher risk of damaging the emmc.
thanks for the tips much appriciatet :-)

i do apply low melt solder to everything before i wick it away after that i always apply another round of low melt to get the rest of it wicked away

example from some test emmcs

View attachment 2022_0212_075513_008.JPG

View attachment 2022_0212_075459_007.JPG
 

Donnie-Burger

Well-Known Member
Member
Joined
Oct 27, 2021
Messages
927
Trophies
0
Website
www.youtube.com
XP
1,816
Country
United States
thanks for the tips much appriciatet :-)

i do apply low melt solder to everything before i wick it away after that i always apply another round of low melt to get the rest of it wicked away

example from some test emmcs

View attachment 362936

View attachment 362935
Emmc isnt to hard to reball, just be careful as they dont like to much heat and will kill them. If you have a nand backup you can work with more confidence - Pics look good. :)
 
  • Like
Reactions: Dee87

RexSonic

Well-Known Member
Newcomer
Joined
Dec 12, 2022
Messages
63
Trophies
0
XP
201
Country
Germany
The AIO thread says 8050, so that's what I searched:

Probably worth an edit to prevent future confusion.

Either way, thank you! Found this listing.
Post automatically merged:

Another question: what is the reason for removing the 3.3V regulator from the RP2040? If I'm to update the firmware later, wouldn't I need this?
Would also like to know
 

aramirez0425

Member
Newcomer
Joined
Mar 31, 2023
Messages
11
Trophies
0
Age
36
XP
73
Country
United States
yeah they arent made for those holders thats why eather goona try it first by handy and if that doesnt work im gonna cnc some holders :)

yeah i know about the ball approch but id rether not try to set every ball :-P even with the stencil id rather just use past :-)

thats why im gonna try with the stencil and paste first its gonna work some how all u need is a stencil hot air gun some past and try and learn Xd
Post automatically merged:


also a nice idea to do it , u have any issues with reballing the emmc ? just asking for a friend Xd
No issues, pretty straight foward. Use stencil, paste and tweezers. Not hard at all.
 

Site & Scene News

Popular threads in this forum

General chit-chat
Help Users
    Bunjolio @ Bunjolio: