

Tutorial
Updated
Tips and Tricks for hardmodding a 3ds
Hey guys, lately I've seen a lot of mishaps with people trying to hardmod their consoles and having issues that end up completely destroying their console. So, as someone who has had a lot of experience soldering and has done a few successful hardmods on the hardest console to do it on, I figured I'd pass some info on in hopes that we can reduce the number of fried motherboards ")
First, I'll talk about the materials
A lot of people also ask about pinouts, this information can be found over at 3dbrew.org, in the hardware section. I'll be posting the pictures here as well
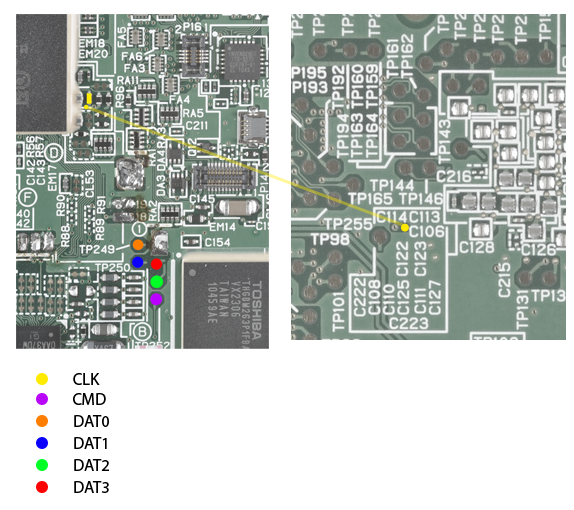
Original 3ds:
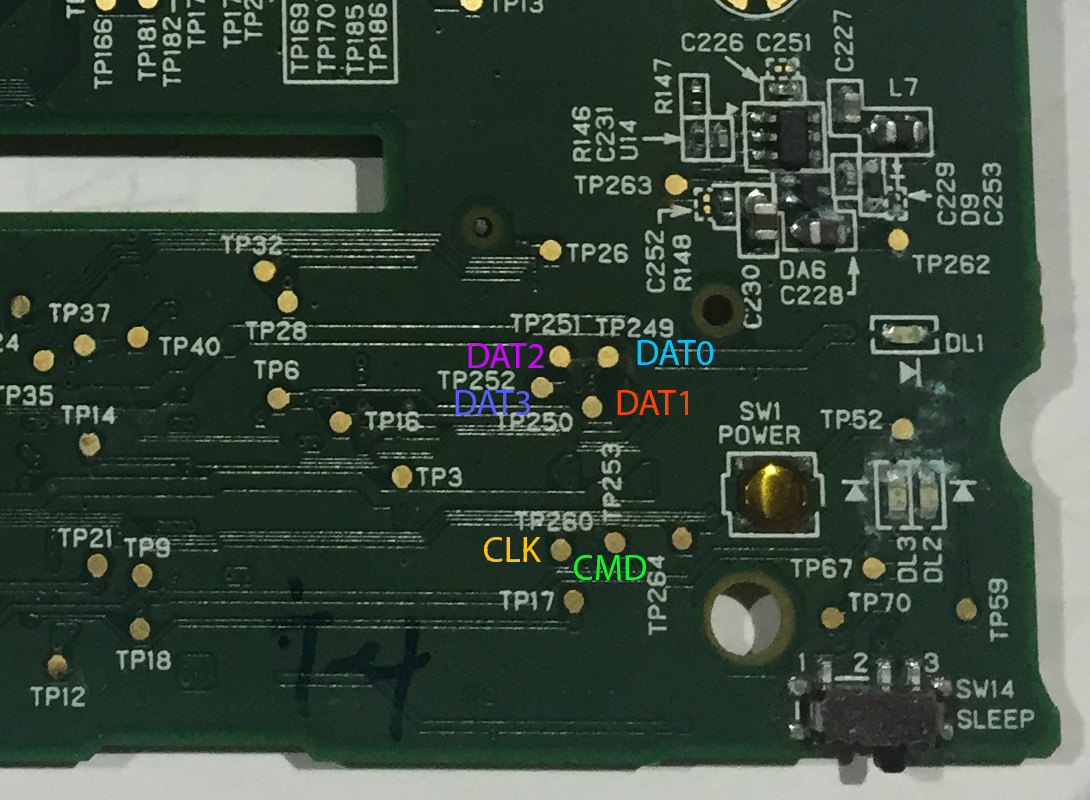
3DS XL/LL:

2DS:
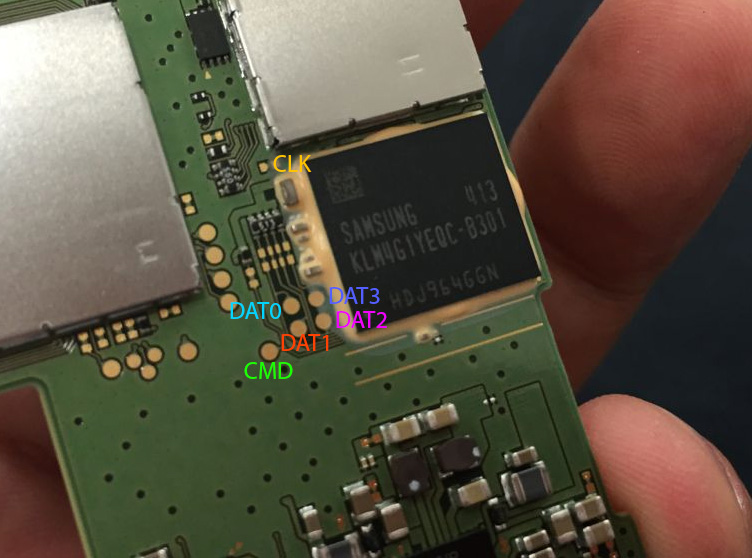
New 3DS:
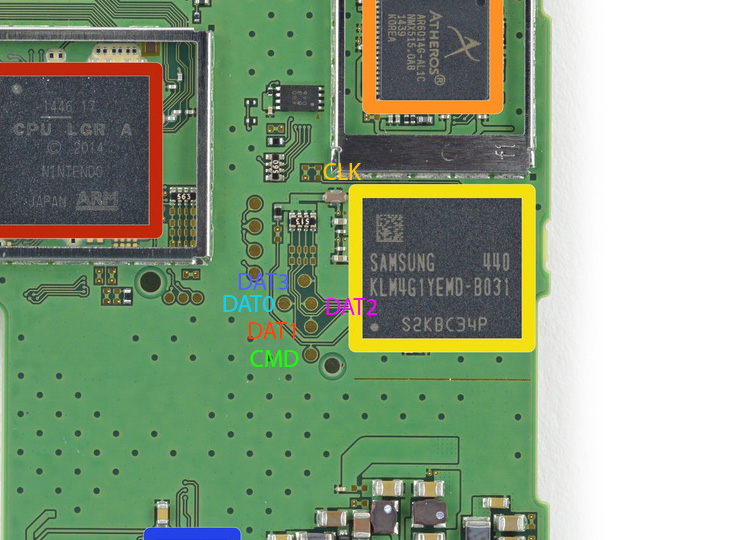
New 3DS XL/LL:
The SD card pinout is rather simple, just connect the matching signal names together:

First, I'll talk about the materials
- Soldering iron - a good one, the cheapest one you can find is most likely only going to cause you issues, you can get a fairly good one for ~$20-30 USD
- Solder - if it isn't obvious why you need this, then turn back now
- Wire - I recommend at least 26 gauge, though 28 is preferred, solid core. If you're doing an original 3ds (non XL) I highly recommend some 28 gauge magnet wire. - A good guideline for wire size if you have a bunch of random wire and don't know the sizes, the wire diamater should be at least less than half that of the diameter of the pads
- Port and connector - we need a way to connect the 3DS and SD adapter together, there are many options, do whatever suits your needs best.
- Micro SD to standard size SD adapter - this will connect to the card reader so we can backup and restore the NAND
- Card reader - to read and write the 3DS's NAND
- Solder wick - just in case you mess up, it's always good to have a way to remove solder
First and foremost, wire size. I can't tell you how many people I've had to help because they used giant wire and broke pads off. Why does it break pads off? Well the thicker wire has a lot more leverage on the small pads, so any flexing can cause pads to break off, this is why the materials list specifies the smaller wire, it's more likely to give and has a lot less leverage
Soldering techniques, too often I see and hear people who have splashed solder everywhere. I have a hard time understanding how in the world they do that, I mean you'd have to melt the solder over the board with a torch or something to do that usually... anyways, before I go off on a rant.... I bring this up because it can destroy components and can also be hard to remove later, and usually the way it happens has to do with the modder adding way too much solder onto the iron and not cleaning it off, most soldering stations come with a sponge or a brass wool cleaner, use it for christ's sake! Along with that, I see many people having a hard time soldering to the surface mount pads on the 3DS motherboard. If you do it right it's fairly easy to do, simply heat the pad with your soldering iron and put solder on the pad, without touching the solder to the iron, strip the wire you're using back and do the same thing to add solder to that too, then simply heat the solder on the pad until it melts and add the wire to it, the solder should melt together and you now have a properly soldered wire
(video demonstration here)
(video demonstration here)
A lot of people also ask about pinouts, this information can be found over at 3dbrew.org, in the hardware section. I'll be posting the pictures here as well
Original 3ds:
3DS XL/LL:
2DS:
New 3DS:
New 3DS XL/LL:
The SD card pinout is rather simple, just connect the matching signal names together:
Last edited by dark_samus3,


