Changing the logo from hekate's menu
This tutorial will show you how to change the menu logo to any desired picture.
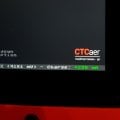
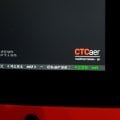
To avoid confusion, this is the logo I am talking about.
Requirements:
This is very straight forward, in MS Paint you do File > Save as, then select 24-Bit BMP as the type. The image I am using for the tutorial and what to select from the drop-down menu are below.
THE PAYLOAD SIZE LIMIT IS TIGHT, MAKE SURE YOUR IMAGE DOESN'T HAVE TOO MANY COLORS/TOO MUCH DETAIL

(Notice how it uses #1B1B1B (hex) / 27, 27, 27 (rgb) for blending in with the background and is 119x57)

Step 2 - Convert the image to raw pixels
This can be done easily with this online tool and it's called Convertio. Select bmp as source extension and rgb as destination extension. It claims to not only work with bmp's but from my experience, none of the other source formats work. Below you can see the detailed steps.

(Then select your bmp)


(then save the file)
Step 3 - Compress the rgb file
For this, you will need memloader. After downloading it (check requirements for the link), extract just the tools folder and put your .rgb file in there for easier access, then open a CMD window in that directory by typing cmd in the address bar and press enter and a window should appear. Once in it, type blzcomp.exe tutorial.rgb compressed.blz (replace tutorial.rgb with whatever your filename is).


As output you will get the source file size next to the compressed file size. The compressed one is different depending on how detailed the image you are using is (how many colors and their position). The source file size is constant and should be 20349. If it's not, that means you messed something up. Check initial resolution again and make sure you exported as a 24-bit bmp.
Step 4 - Exporting the compressed file as a byte array
For this you have to open HxD and drag and drop the file created (compressed.blz) and you should see some bytes appear. After that, do File > Export > C and save the file somewhere.

Step 5 - Replace the code then build hekate
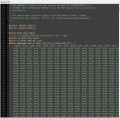
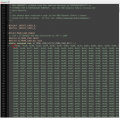
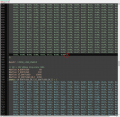
First off, you will need hekate's code. For this, you can go to the latest release (v4.6) on the github page and select Source code (zip). Extract it somewhere and you should end up with a hekate folder. Open the file called logos.h that can be found in hekate-v4.6/bootloader/gfx and the compressed.c file with the text editor of your choice (I'm using Notepad++). First thing you want to do is comment out the menu logo byte array (the first list at the top of the logos.h file, starts at the curly bracket). To do that, add a /* at the beginning and a */ at the end (NOT the end of the file, the end of the 1st list), like shown below. After that, copy the array length that is in between the square brackets to the value assigned to SZ_MENU_LOGO_BLZ. The last step before compiling is copying the bytes from compressed.c (just what is between curly brackets, not everything) and pasting that after the */ that you added at the bottom of the first list from logos.h. Don't forget to save! After that, all you want to do is go to the hekate-v4.6 folder, type CMD in the address bar, enter, and type make. If everything was done correctly, it shouldn't have any errors. After compiling make sure that the payload size is smaller than the max payload size. If it is not, your image was too detailed/too many colors. For this and for any other problem, to retry you have to type make clean and then try all over again.

After all of that, inject hekate.bin from the output folder. If it won't inject, the payload is bigger than max payload size most likely. Don't worry, your Switch won't brick, just try again.
To avoid confusion, this is the logo I am talking about.

Requirements:
- Setting up the dev environment (on Windows you just have to run the devkitPro updater that you can find on github, make sure to check the Switch development option, the other option doesn't matter)
- An image (119x57, changing the resolution is possible but too much to teach for this tutorial, use the color of hekate's background - #1B1B1B (RGB - 27, 27, 27) - for transparency)
- Image editing software that supports exporting as bmp, I will be using MS Paint for simplicity's sake
- HxD or any other hex editor that supports exporting as a byte array or some sort of script to do that
- memloader (v3 is the latest) for its built-in blz compression tool (not from github, from the switchtools site which will appear in Google search but is only one page that you have to scroll down on)
This is very straight forward, in MS Paint you do File > Save as, then select 24-Bit BMP as the type. The image I am using for the tutorial and what to select from the drop-down menu are below.
THE PAYLOAD SIZE LIMIT IS TIGHT, MAKE SURE YOUR IMAGE DOESN'T HAVE TOO MANY COLORS/TOO MUCH DETAIL

(Notice how it uses #1B1B1B (hex) / 27, 27, 27 (rgb) for blending in with the background and is 119x57)

Step 2 - Convert the image to raw pixels
This can be done easily with this online tool and it's called Convertio. Select bmp as source extension and rgb as destination extension. It claims to not only work with bmp's but from my experience, none of the other source formats work. Below you can see the detailed steps.

(Then select your bmp)


(then save the file)
Step 3 - Compress the rgb file
For this, you will need memloader. After downloading it (check requirements for the link), extract just the tools folder and put your .rgb file in there for easier access, then open a CMD window in that directory by typing cmd in the address bar and press enter and a window should appear. Once in it, type blzcomp.exe tutorial.rgb compressed.blz (replace tutorial.rgb with whatever your filename is).
As output you will get the source file size next to the compressed file size. The compressed one is different depending on how detailed the image you are using is (how many colors and their position). The source file size is constant and should be 20349. If it's not, that means you messed something up. Check initial resolution again and make sure you exported as a 24-bit bmp.
Step 4 - Exporting the compressed file as a byte array
For this you have to open HxD and drag and drop the file created (compressed.blz) and you should see some bytes appear. After that, do File > Export > C and save the file somewhere.

Step 5 - Replace the code then build hekate
First off, you will need hekate's code. For this, you can go to the latest release (v4.6) on the github page and select Source code (zip). Extract it somewhere and you should end up with a hekate folder. Open the file called logos.h that can be found in hekate-v4.6/bootloader/gfx and the compressed.c file with the text editor of your choice (I'm using Notepad++). First thing you want to do is comment out the menu logo byte array (the first list at the top of the logos.h file, starts at the curly bracket). To do that, add a /* at the beginning and a */ at the end (NOT the end of the file, the end of the 1st list), like shown below. After that, copy the array length that is in between the square brackets to the value assigned to SZ_MENU_LOGO_BLZ. The last step before compiling is copying the bytes from compressed.c (just what is between curly brackets, not everything) and pasting that after the */ that you added at the bottom of the first list from logos.h. Don't forget to save! After that, all you want to do is go to the hekate-v4.6 folder, type CMD in the address bar, enter, and type make. If everything was done correctly, it shouldn't have any errors. After compiling make sure that the payload size is smaller than the max payload size. If it is not, your image was too detailed/too many colors. For this and for any other problem, to retry you have to type make clean and then try all over again.


After all of that, inject hekate.bin from the output folder. If it won't inject, the payload is bigger than max payload size most likely. Don't worry, your Switch won't brick, just try again.
