Homebrew CaVE Database Manager - A SNES, NES, N64, Genesis Switch Online modding App

cbreezy210

Member
Newcomer
Joined
Nov 15, 2022
Messages
8
Trophies
0
Age
30
XP
111
Country
United States
Moving on and getting back on topic...

I am aware of the upcoming N64 NSO update.


I predict that this will be a minor update for me. Sadly, as mentioned with small caption text in that video, the game will not support the TransferPak. And thus... it will more or less just be a refined version over the DTZ that I have already made for the game.

The lack of any sort of TransferPak support seems to be a big issue with people. So... maybe with enough feedback Nintendo will support it later. But not now.


CaVE has been undergoing a code revamp. What that means is... There was a lot of old code that was getting band-aids applied in order for more recent changes to be added. It was a mess... So I started a new project from scratch, and have been transferring code over and re-writing it... slowly.

In the process I am doing my best to more properly handle errors and output usable information that can be provided back to me by users to help debug. But of course I'm also cleaning up the quality of my code in general to better avoid bugs at all.

Additionally, I am making many changes, improvements and adding features. Things like:

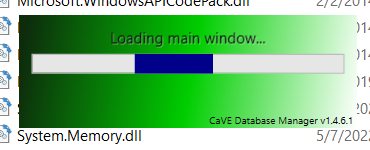
New, better working, loading splash window (partly added now I think...)​
Revamped main games list.​
  • Removed and condensed some columns.
  • Rearranged some settings/info.
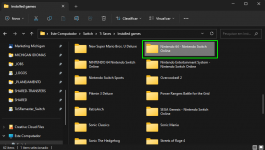
  • Added additional/optional buttons for selecting game "Files".
  • Stock games are now colored differently to be more distinct.
  • All usable options for a platform will now be listed, even if empty.
  • Such empty options will now display at least some text.
  • Stock games will now be listed first (if shown at all). Including those from manually adding.
Executable name shortened to CaVE.exe​
Renamed made old xtx.z resource pics to png.​
Database version numbers will now be tracked (again?)​
Identified and addressed issues with the Language option. Now "Default Language".​
Your Windows Locale will be detected on first boot, and you will be asked to set it to match your Switch's locale.​
You can use English or whatever language databases with the Japanese app (and vice versa).​
Database platform name, version and Language/Locale have been moved to the status bar.​
Added a Recent Databases menu. It lists the 6 most recently loaded databases for quick selection.​
Added a fun little Easter Egg game (Good luck finding it! Was at least fun for me to add!).​
And this is just what I have done so far! I have more on my TODO list!

No ETA on this... v1.5 revamp. V1.4 will remain and be updated as needed for now. Part of what Im doing with v1.5 is, taking all the time I could ask for to clean up my code and write things properly.

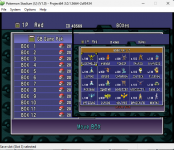
Here's a preview pic!

View attachment 363981


EDIT:

While there is nothing special changed in the general title info... Nintendo did change a lot in the strings.lng files. Enough that I am going to have to try and update a tricky part of my code. For that reason, I'll be working to update another part of the code that got broken... simply because Nintendo stopped being consistent and predictable with how they handle things.

No ETA for now.

EDIT2:

CaVE has been updated. It's just a database update. Same rar file. v1.4.6. Just redownload it.

Everything about this is a cheap workaround, just to get something available. No automatic update, and I havent changed any code. I just dont want to spend any time on the old code branch. Least of all, with the complex issues with this particular code. with the v1.5 branch, I will be working on this stuff. I will just be taking my time, which this update does not permit. Annoying that now of all times is when this stuff comes up...

The PlayerIcon, Background and Widescreen mods have been updated! As normal, when I release mod updates its because updating is MANDATORY! Do not post about issues (like the app not booting) if you have mods installed, and have not updated them!

I cannot get CaVE to open on my computer. I run the exe file and it pops up saying its loading main window, and then just closes out, i have uninstalled and reinstalled but same issue occurs. any help you can provide? Appreciate it in advance!
 

Attachments

  • Screenshot 2023-04-13 084057.png
    Screenshot 2023-04-13 084057.png
    22.8 KB · Views: 51

DarkAkuma

Well-Known Member
OP
Member
Joined
Sep 20, 2008
Messages
412
Trophies
1
XP
2,460
Country
United States
I cannot get CaVE to open on my computer. I run the exe file and it pops up saying its loading main window, and then just closes out, i have uninstalled and reinstalled but same issue occurs. any help you can provide? Appreciate it in advance!

The exe itself has not been updated. So I haven't seen anyone else with this issue. That likely means its one of 3 things. A locale issue (something I have seen in the past), you are running cave out of a Desktop sub folder or maybe a update check issue.

I can't help with the locale issue. All you could do is provide me info on what windows locale you use.

If you are running it out of a Desktop sub-folder... don't. It encounters permission issues that I don't think even running as Admin can help with.

For the update check. You can disable it by adding "disable_update_check": true to your settings file in the CaVE folder.

Beyond that, I have no possible answer.
 
Last edited by DarkAkuma,
  • Like
Reactions: Chop1n
Guide for Tranfering Pokemon to NSO N64 Pokemon Stadium

Noxbur

Member
Newcomer
Joined
Apr 13, 2023
Messages
24
Trophies
0
Age
30
XP
127
Country
Brazil

Tutorial:
"Transfer Pak Workaround" for Pokemon Stadium | Nintendo Switch Online

Hey everyone! This is my first "tutorial" here, so my apologies if the writing and formating don't fit some quality standards. But, I'm happy to do it and was encouraged by @DarkAkuma .

Description:
The purpose of the the following guide is to make use of a combination of tools and files in order to play the recently released Pokemon Stadium for the Nintendo Switch Online with Pokemon from the Gameboy games (Red/Blue/Yellow), as used to be possible via the Transfer Pak feature on the Nintendo 64 (not present on NSO version).

Requirements
- Nintendo Switch running CFW/with access to homebrew (I'm running the lastest Atmosphere version).
- Nintendo Switch Online Nintendo 64 app installed and updated (so Pokemon Stadium shows up).
- DBI Homebrew app installed (recommended to manage save files).
- Project 64 Emulator for Windows.
- Pokemon Stadium N64 game (I used the 1.0 version, but I don't think it matters).
- NRage Input Plugin for Project 64 (to use Transfer Pak feature with the emulator, 'cause the default settings don't have it).
- Pokemon Red/Blue/Yellow Gameboy game.
- Pokemon Red/Blue/Yellow Gameboy Save File (Yellow version .SAV format used. This save was not made by me, I found it online, so I'm not responsible for the Pokemon moves and stuff like that).
- Cave Database Manager (to convert save files. ED64-Saveswap also works).
- USB cable.


Project 64 Setup

  1. Download and install the emulator.
  2. Download NRage Input and place the DLL file into the root of Project 64 installation folder.
  3. Open Project 64 and go to "Options > Configuration > Plugins". If NRage input was placed correctly, select "N-Rage..." option within the Input (controller) dropdown. Apply/OK.

    1681403748043.png
    1681403787437.png


  4. Go to "Options" again but now select "Input Settings".

    1681403925582.png


  5. Keep the "Controller 1" selected at the top of the new window, and open the "Controller Pak" tab bellow. Mark the "rawdata" checkbox and select "Transfer Pak" in the dropdown.

    1681404105397.png


  6. Browse your Pokemon Gameboy game and respective save file (you can use mine if you're using yellow) and save.


Transfering Your Pokemon

  1. Run Pokemon Stadium with Project 64. When you see this screen with a Game Pak indication, it means your Gameboy ROM and Savefile have been detected.

    1681404427296.png


  2. Proceed to the Pokemon Lab and select the available GB Pak.

    1681404480269.png


  3. If, like me, you don't care about the organization, skip to nº 5, since on NSO it will not matter anyway. If you do, here you can organize your Boxes and Party with the Pokemon from the GB Pak. So, do as you please. The SAV already has the Pokemon organized in different boxes, according to their level, but you can redo it however you want.

    1681404853928.png
    1681404889134.png


  4. Go to any Cup or the Gym Leader and open the Registration area to register your Pokemon. This is what really matters, because the registered Pokemon and the only ones going to the NSO version when we move on. None of the boxes or the GB Pak organization will be accessible on the Switch. You cannot use the Lab on the NSO version, only on the emulator.

    1681405045477.png
    1681405225115.png
    1681405248940.png


  5. After you register your Pokemon (remember to do it on every cup, because of the level difference), make sure that everything is saved (always select "Save And Quit" options) and now you can close the game and the emulator.


Converting your savefile

  1. Open the Project 64 installation folder, and grab your savefile in the "Save" folder. It'l probably be a ".fla" format file. You can use my FLA save too (here) if you want and don't care too much about the teams I made (there's no progress there aside from the pokemon transfer and registration).

  2. Open Cave Database Manager and create/open a NSO 64 database just to open up the menus on the top. Go to "Tools > SRAM > Save RAM to cartridge.sram".

    1681409361231.png


  3. You will be prompted to select a file to convert. Pick the ".fla" format file you grabbed from Project 64 folder before. After the conversion is done, you'll see a confirmation message that a "cartridge.sram" file has been placed in the same folder as the source file.
    1681409538114.png
    1681409568496.png


  4. If you choose to convert using ED64-Saveswap, it's also simple. Just open it and select the .fla file, keep all boxes checked and click "convert". Rename it "cartridge.sram" manually and you're done.
    1681410626324.png


Transfering the savefile to the Nintendo Switch

  1. On your Nintendo Switch, open the Homebrew Menu (hold R while opening a game).
  2. Open DBI application and select "Run MTP Responder" at the bottom, and plug it to your computer wit the USB cable.
    1681409924132.png


  3. Once your Switch is detected by your computer, navigate to "Saves > Installed Games > Nintendo 64 - Nintendo Switch Online > [your profile folder] > saves > N-4590_e. Here you should see a cartridge.sram file already in place, that's your unmodded save (backup if you want). If you don't see the numeric folder or the file, open the game once and do like a sound setting adjustment to make sure a savefile is created (that's what I did).
    1681409982259.png
    1681410226232.png
    1681410244212.png


  4. Replace the existing cartridge.sram with the one you converted using Cave Database Manager or ED64-Saveswap (check if the name matches exactly).

  5. Disconnect the Switch from the PC (press B on DBI to shut down MTP and go back).

  6. Profit!


Hope I made it simple enough to understand. Any feedback about it is appreciated. Let us know if it worked out for you. :)
 

Attachments

  • 1681410006699.png
    1681410006699.png
    55.7 KB · Views: 40
  • 1681410062983.png
    1681410062983.png
    60 KB · Views: 35
  • 1681404817594.png
    1681404817594.png
    124 KB · Views: 46
Last edited by Noxbur,

PixelateVision

New Member
Newbie
Joined
Apr 21, 2021
Messages
4
Trophies
0
Age
24
XP
66
Country
United States
Can someone explain to me the difference between "Two+ Players Take Turns" and "Two+ Players Simultaneously"? I'm not sure which one I should be setting in games that support multiplayer (for instance, NHL '94 on the Genesis).
 

scoobydude51

Well-Known Member
Member
Joined
Oct 8, 2010
Messages
169
Trophies
1
XP
1,228
Country
United States
Can someone explain to me the difference between "Two+ Players Take Turns" and "Two+ Players Simultaneously"? I'm not sure which one I should be setting in games that support multiplayer (for instance, NHL '94 on the Genesis).

take turns = Super Mario Bros. (player one plays until life lost and player two starts)
simultaneously = Tetris GB (both players play at the same time)

that’s a good explanation in general
 
Last edited by scoobydude51,

PixelateVision

New Member
Newbie
Joined
Apr 21, 2021
Messages
4
Trophies
0
Age
24
XP
66
Country
United States
take turns = Super Mario Bros. (player one plays until life lost and player two starts)
simultaneously = Tetris GB both (players play at the same time)

that’s a good explanation in general
Thank you! It sounds like for a multiplayer sports title like NHL '94 or similar that Simultaneously is the way to go.
 

tatundria

Well-Known Member
Member
Joined
Feb 24, 2009
Messages
394
Trophies
1
XP
2,139
Country
Argentina

Tutorial:

"Transfer Pak Workaround" for Pokemon Stadium | Nintendo Switch Online

Hey everyone! This is my first "tutorial" here, so my apologies if the writing and formating don't fit some quality standards. But, I'm happy to do it and was encouraged by @DarkAkuma .

Description:
The purpose of the the following guide is to make use of a combination of tools and files in order to play the recently released Pokemon Stadium for the Nintendo Switch Online with Pokemon from the Gameboy games (Red/Blue/Yellow), as used to be possible via the Transfer Pak feature on the Nintendo 64 (not present on NSO version).


- Nintendo Switch running CFW/with access to homebrew (I'm running the lastest Atmosphere version).
- Nintendo Switch Online Nintendo 64 app installed and updated (so Pokemon Stadium shows up).
- DBI Homebrew app installed (recommended to manage save files).
- Project 64 Emulator for Windows.
- Pokemon Stadium N64 game (I used the 1.0 version, but I don't think it matters).
- NRage Input Plugin for Project 64 (to use Transfer Pak feature with the emulator, 'cause the default settings don't have it).
- Pokemon Red/Blue/Yellow Gameboy game.
- Pokemon Red/Blue/Yellow Gameboy Save File (Yellow version .SAV format used. This save was not made by me, I found it online, so I'm not responsible for the Pokemon moves and stuff like that).
- Cave Database Manager (to convert save files. ED64-Saveswap also works).
- USB cable.


  1. Download and install the emulator.
  2. Download NRage Input and place the DLL file into the root of Project 64 installation folder.
  3. Open Project 64 and go to "Options > Configuration > Plugins". If NRage input was placed correctly, select "N-Rage..." option within the Input (controller) dropdown. Apply/OK.

    View attachment 364724View attachment 364725

  4. Go to "Options" again but now select "Input Settings".

    View attachment 364728

  5. Keep the "Controller 1" selected at the top of the new window, and open the "Controller Pak" tab bellow. Mark the "rawdata" checkbox and select "Transfer Pak" in the dropdown.

    View attachment 364734

  6. Browse your Pokemon Gameboy game and respective save file (you can use mine if you're using yellow) and save.


  1. Run Pokemon Stadium with Project 64. When you see this screen with a Game Pak indication, it means your Gameboy ROM and Savefile have been detected.

    View attachment 364741

  2. Proceed to the Pokemon Lab and select the available GB Pak.

    View attachment 364742

  3. If, like me, you don't care about the organization, skip to nº 5, since on NSO it will not matter anyway. If you do, here you can organize your Boxes and Party with the Pokemon from the GB Pak. So, do as you please. The SAV already has the Pokemon organized in different boxes, according to their level, but you can redo it however you want.

    View attachment 364744View attachment 364745


  4. Go to any Cup or the Gym Leader and open the Registration area to register your Pokemon. This is what really matters, because the registered Pokemon and the only ones going to the NSO version when we move on. None of the boxes or the GB Pak organization will be accessible on the Switch. You cannot use the Lab on the NSO version, only on the emulator.

    View attachment 364746View attachment 364748View attachment 364749


  5. After you register your Pokemon (remember to do it on every cup, because of the level difference), make sure that everything is saved (always select "Save And Quit" options) and now you can close the game and the emulator.


  1. Open the Project 64 installation folder, and grab your savefile in the "Save" folder. It'l probably be a ".fla" format file. You can use my FLA save too (here) if you want and don't care too much about the teams I made (there's no progress there aside from the pokemon transfer and registration).

  2. Open Cave Database Manager and create/open a NSO 64 database just to open up the menus on the top. Go to "Tools > SRAM > Save RAM to cartridge.sram".

    View attachment 364763

  3. You will be prompted to select a file to convert. Pick the ".fla" format file you grabbed from Project 64 folder before. After the conversion is done, you'll see a confirmation message that a "cartridge.sram" file has been placed in the same folder as the source file.
    View attachment 364764View attachment 364766

  4. If you choose to convert using ED64-Saveswap, it's also simple. Just open it and select the .fla file, keep all boxes checked and click "convert". Rename it "cartridge.sram" manually and you're done.
    View attachment 364773


  1. On your Nintendo Switch, open the Homebrew Menu (hold R while opening a game).
  2. Open DBI application and select "Run MTP Responder" at the bottom, and plug it to your computer wit the USB cable.
    View attachment 364767

  3. Once your Switch is detected by your computer, navigate to "Saves > Installed Games > Nintendo 64 - Nintendo Switch Online > [your profile folder] > saves > N-4590_e. Here you should see a cartridge.sram file already in place, that's your unmodded save (backup if you want). If you don't see the numeric folder or the file, open the game once and do like a sound setting adjustment to make sure a savefile is created (that's what I did).
    View attachment 364768View attachment 364771View attachment 364772

  4. Replace the existing cartridge.sram with the one you converted using Cave Database Manager or ED64-Saveswap (check if the name matches exactly).

  5. Disconnect the Switch from the PC (press B on DBI to shut down MTP and go back).

  6. Profit!


Hope I made it simple enough to understand. Any feedback about it is appreciated. Let us know if it worked out for you. :)
Please, can anyone share an already converted savefile for those who do not have access to Project64?
 

rodigo1991

Member
Newcomer
Joined
Mar 26, 2018
Messages
12
Trophies
0
Age
33
XP
185
Country
Brazil
Can anyone test the N64 to Switch adapter with a TransferPak and a GB pokemon game? I have everything but this adapter, and I live in Brazil, it's difficult to get this type of accessory here, if someone has a way to test it, it will be interesting to know if the game recognizes the TransferPak with the game.

https://www.mayflash.com/product/n64_controller_adapter_mf103.html

MAYFLSH_product_mf103_04.png
 

Chop1n

Member
Newcomer
Joined
Sep 12, 2022
Messages
10
Trophies
0
Age
34
Location
Washington, DC
XP
72
Country
United States
No. I saw no point because the vast majority of GBA games work. The exception is hacks/translations, which is a pita to track, and generally I just dont give a shit about hacks and translations. My goal with CaVE and NSO is to get legit official ROMs working, and that's it.

Hacks... may work, or may not. I don't play hacks myself, so don't care to look into it beyond the single hack I looked into. The issue with that was an improper file size/junk data embedded at the end of the ROM. I have no clue why it was like that, but figure users can find tools themselves to fix such hacks if its the same problem with others.

I feel like I have said this shit before... so please people... actually read this thread (and the FAQ) before asking questions!

I think I've found the solution to this issue: NSO GBA seems to demand a precise ROM size. If a 64mb/8MB ROM ends up being a single byte larger as a result of a hack, then it needs to be expanded (with zeroes) to 128mb/16MB, and so on. Credit to rolen47 over on reddit for the solution (I can't yet link the post, but you can find it in /r/romhacking). I used XSE, apparently favored by the Pokemon nerds, to expand my FE6 ROM which had previously been impossible to get to work, but apparently you could get the same outcome with a simple batch script, as rolen47 suggests.

Please add this information to the FAQ! I wouldn't mind taking the time to ping everyone in this thread who's been having the same problem, because I know how happy they'll be to hear the solution. I assume I can just quote all of them in one reply or something?
 

jackieleex3

Active Member
Newcomer
Joined
Apr 16, 2018
Messages
36
Trophies
0
Age
34
XP
654
Country
United States
Can anyone test the N64 to Switch adapter with a TransferPak and a GB pokemon game? I have everything but this adapter, and I live in Brazil, it's difficult to get this type of accessory here, if someone has a way to test it, it will be interesting to know if the game recognizes the TransferPak with the game.

https://www.mayflash.com/product/n64_controller_adapter_mf103.html

MAYFLSH_product_mf103_04.png
I tested two n64 adapter from hyperkin and mayflash and none of them work for transferpak
 

Site & Scene News

Popular threads in this forum

General chit-chat
Help Users
  • No one is chatting at the moment.
    Psionic Roshambo @ Psionic Roshambo: I did use a bot for Diablo III though but no ban there lol