UPDATED!
Skip below for pictures and more details
Skip below for pictures and more details
Hey everyone. I just completed my indoor aquaponics system.
So I have been working on my indoor aquaponics system for a couple of months now and just finally got it finished, well at least functional for now and I will worry about aesthetics later.
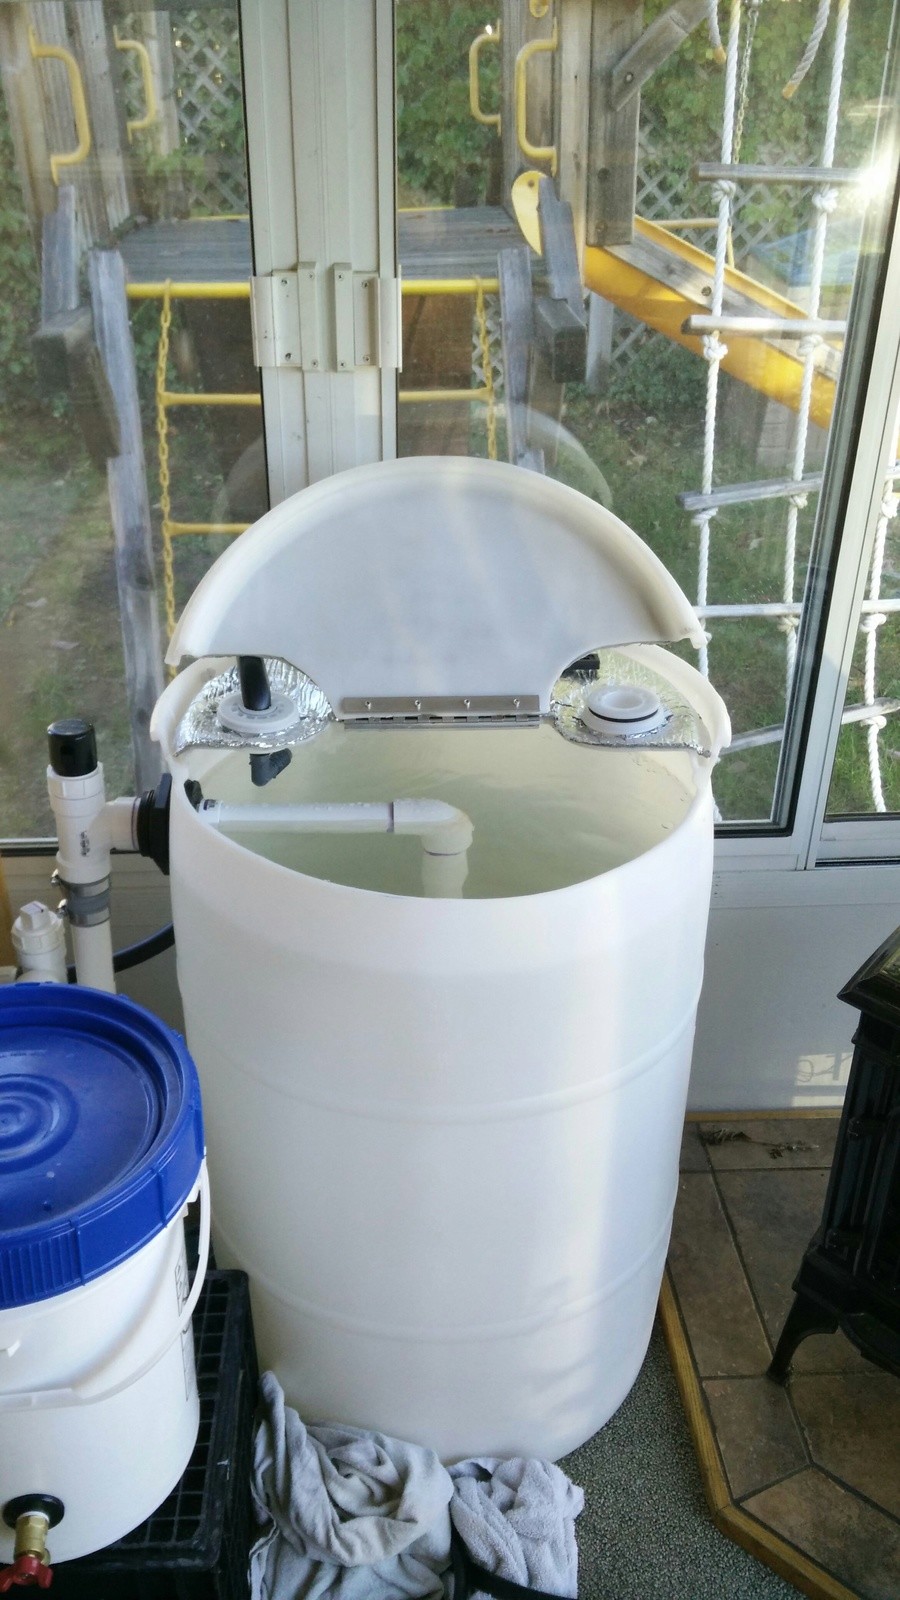
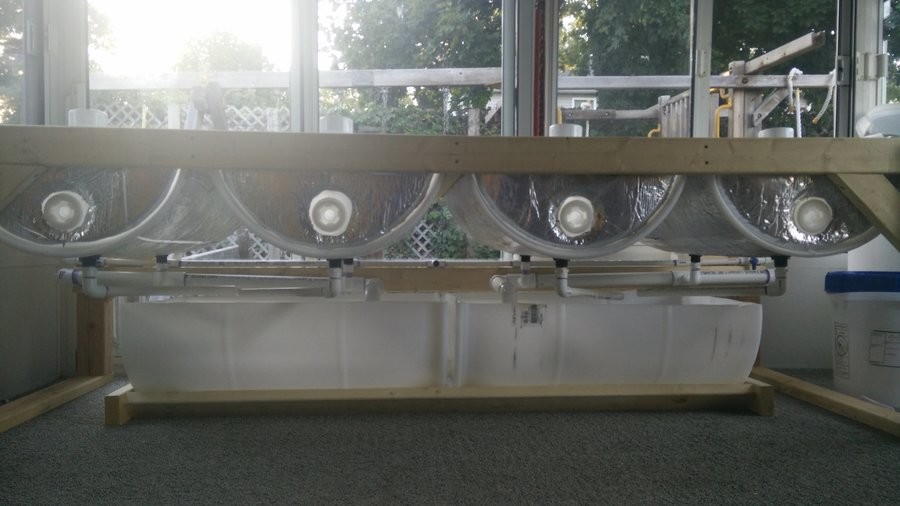
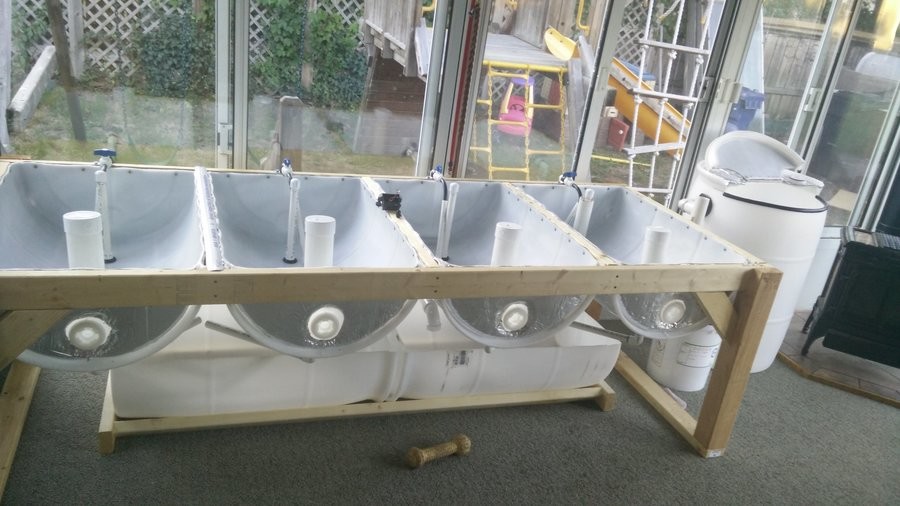
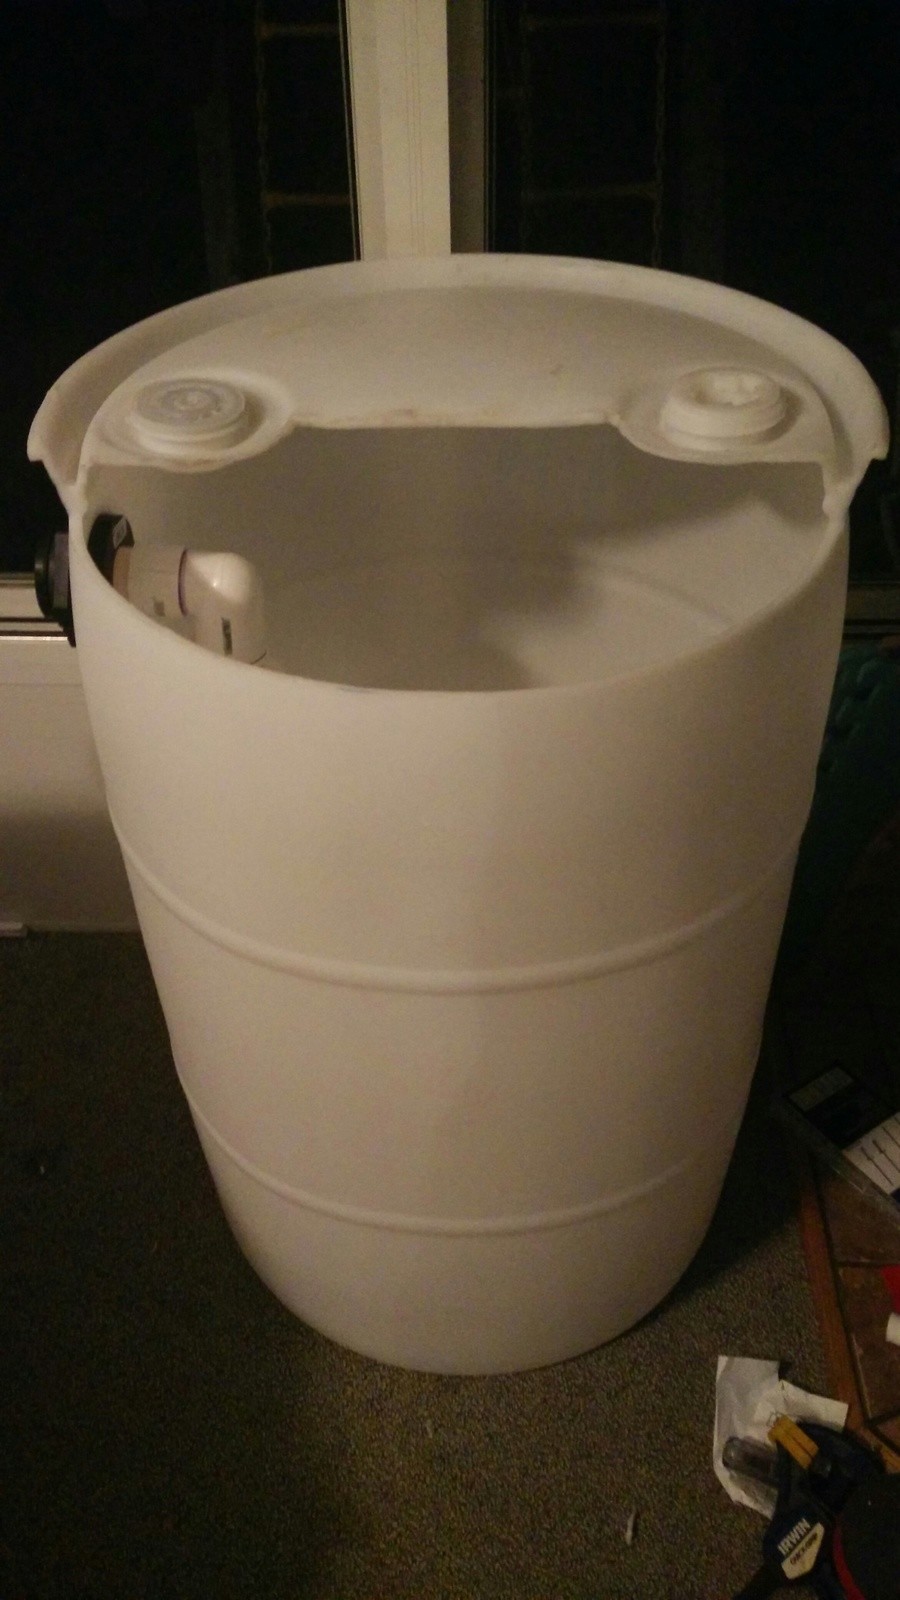
What I have here is a system built utilizing 55 Gallon Drums. My wife gets me these from her job at the biopharmaceutical manufacturing plant.
Well, onto the video as it says a lot more about the system.
For this system, I am using some little feeder goldfish to start my system. After the system becomes kinda stabilized I will then switch over to trout so we can get fish to eat from the system as well.
The idea of an aquaponics system is that you feed your fish, and the waste that the fish produce feeds the plants that you are growing, and the plants in turn clean the water for the fish. It gives it an almost pure organic growing environment.
Thank you all.
UPDATE!
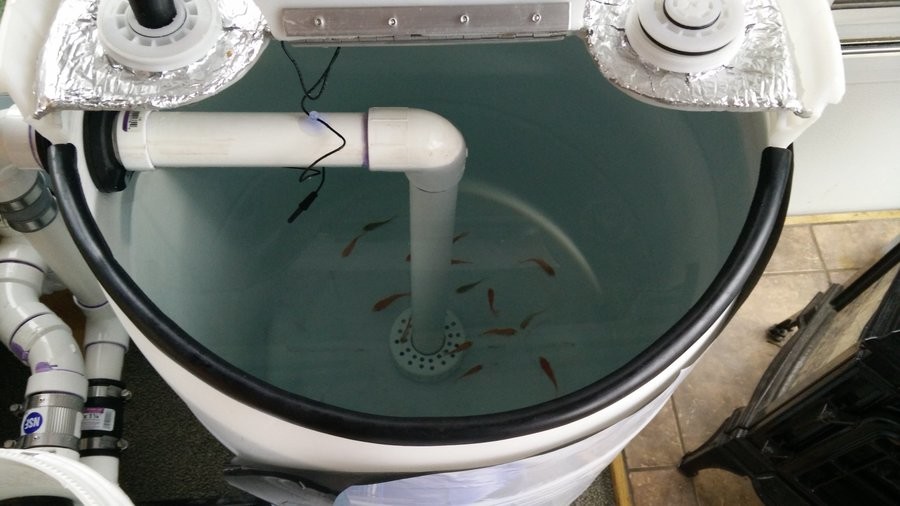
Starting off in this system is about 16 feeder goldfish. They shit a lot, which is what we want because their shit is food for the plants. The plants clean the water which makes it great for the fish to live in.
It will be at least another month before I can add plants to the grow beds. There needs to be enough beneficial bacteria colonies in the system to convert the fish waste into nutrients that the plants can take up. There is much more to it than that, but those are the simplest terms that I can put it in.
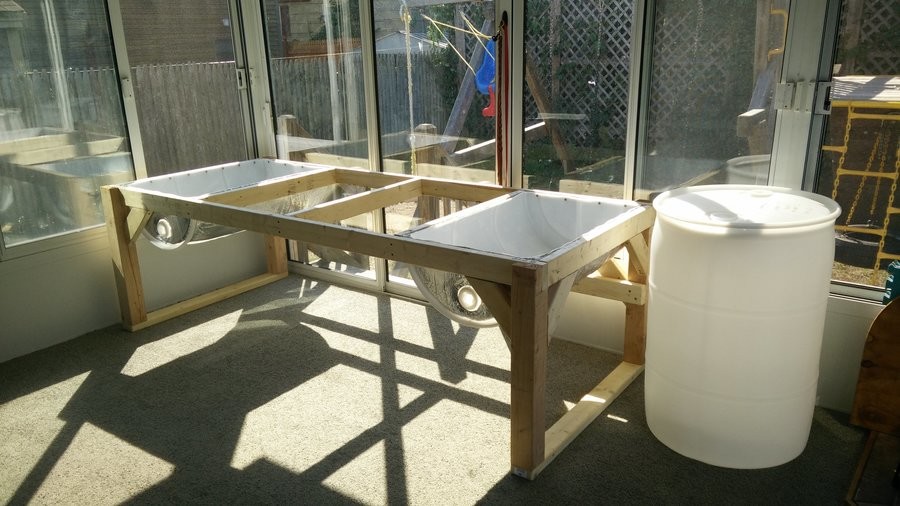

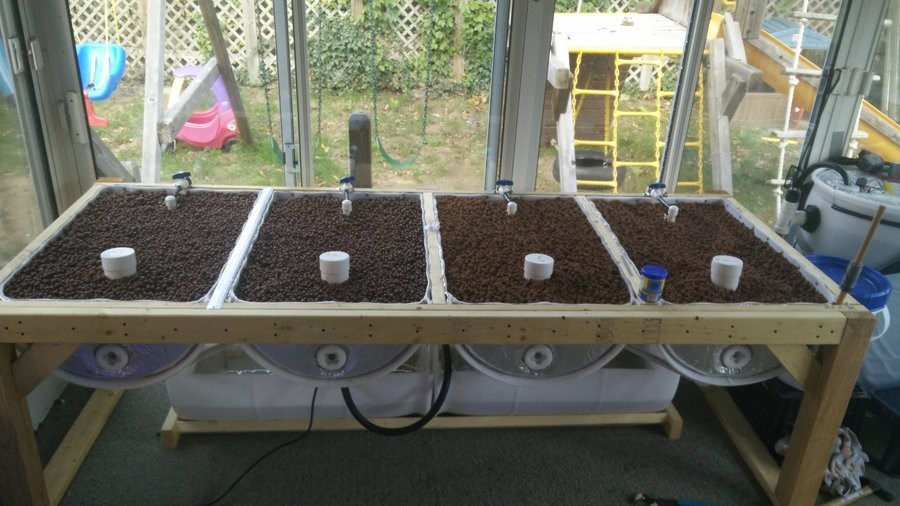
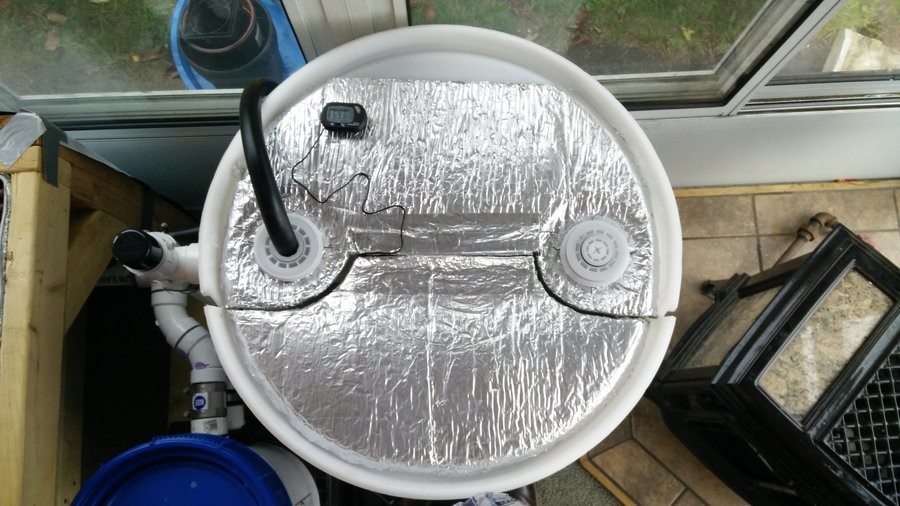
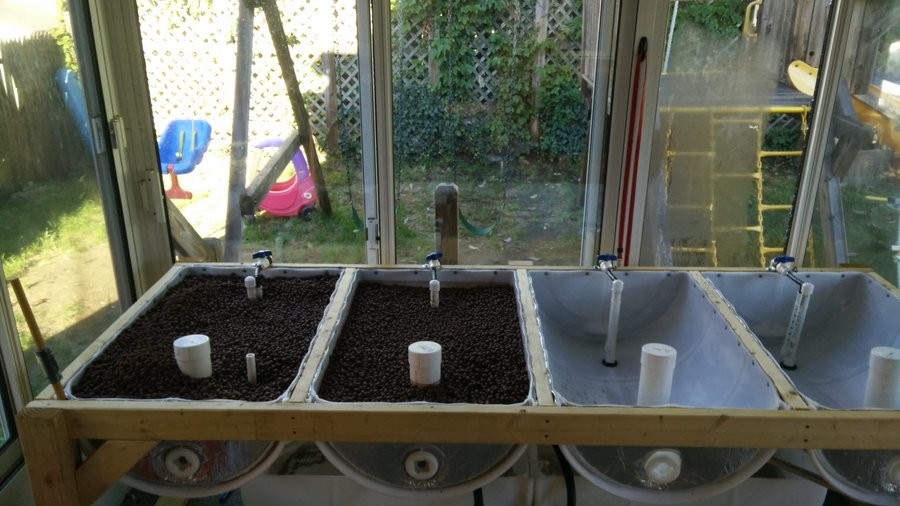
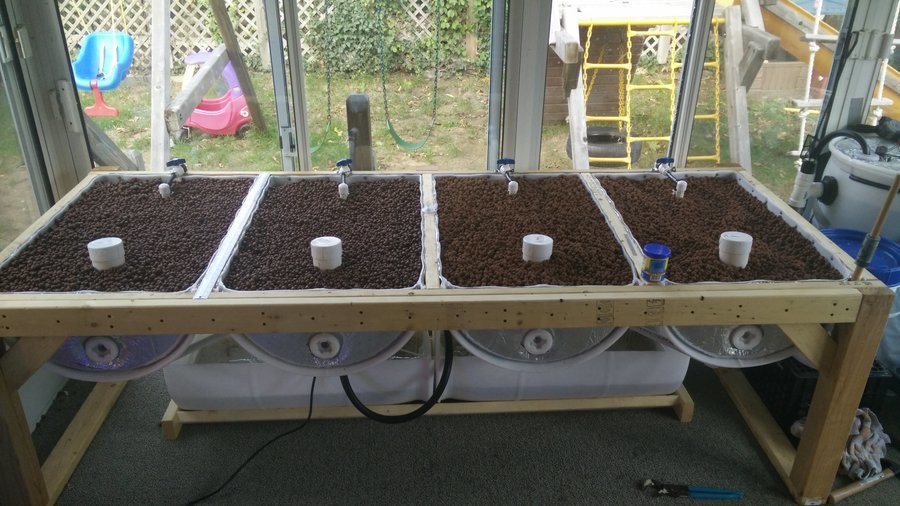
The frame is constructed mostly with 4x4's and 2x4's. The barrels hang from the frame with some screws.
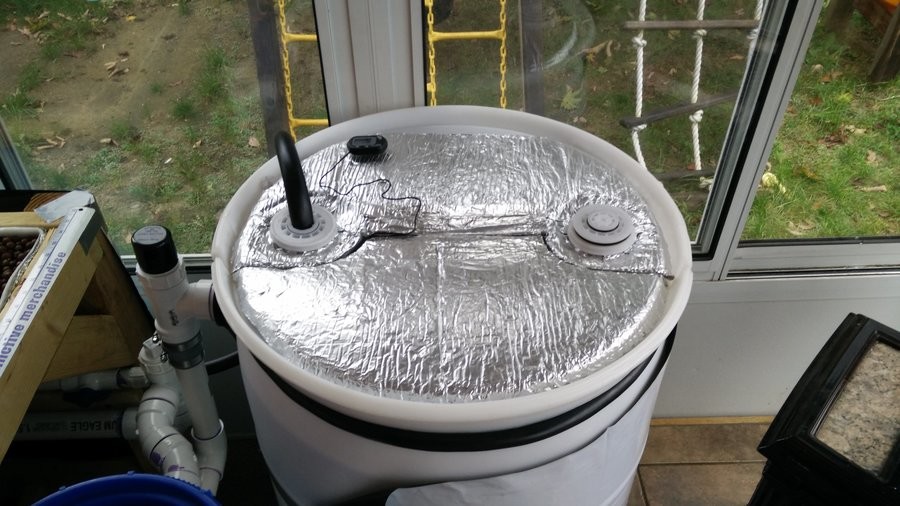
I covered the barrels with Frost King self adhesive foil lined foam insulation. I used that stuff for a few reasons. The first is as insulation to help regulate temperatures. The other big reason was to prevent light leaking into the buckets because that would allow algae to grow which would use up the nutrients that could otherwise go to my plants.
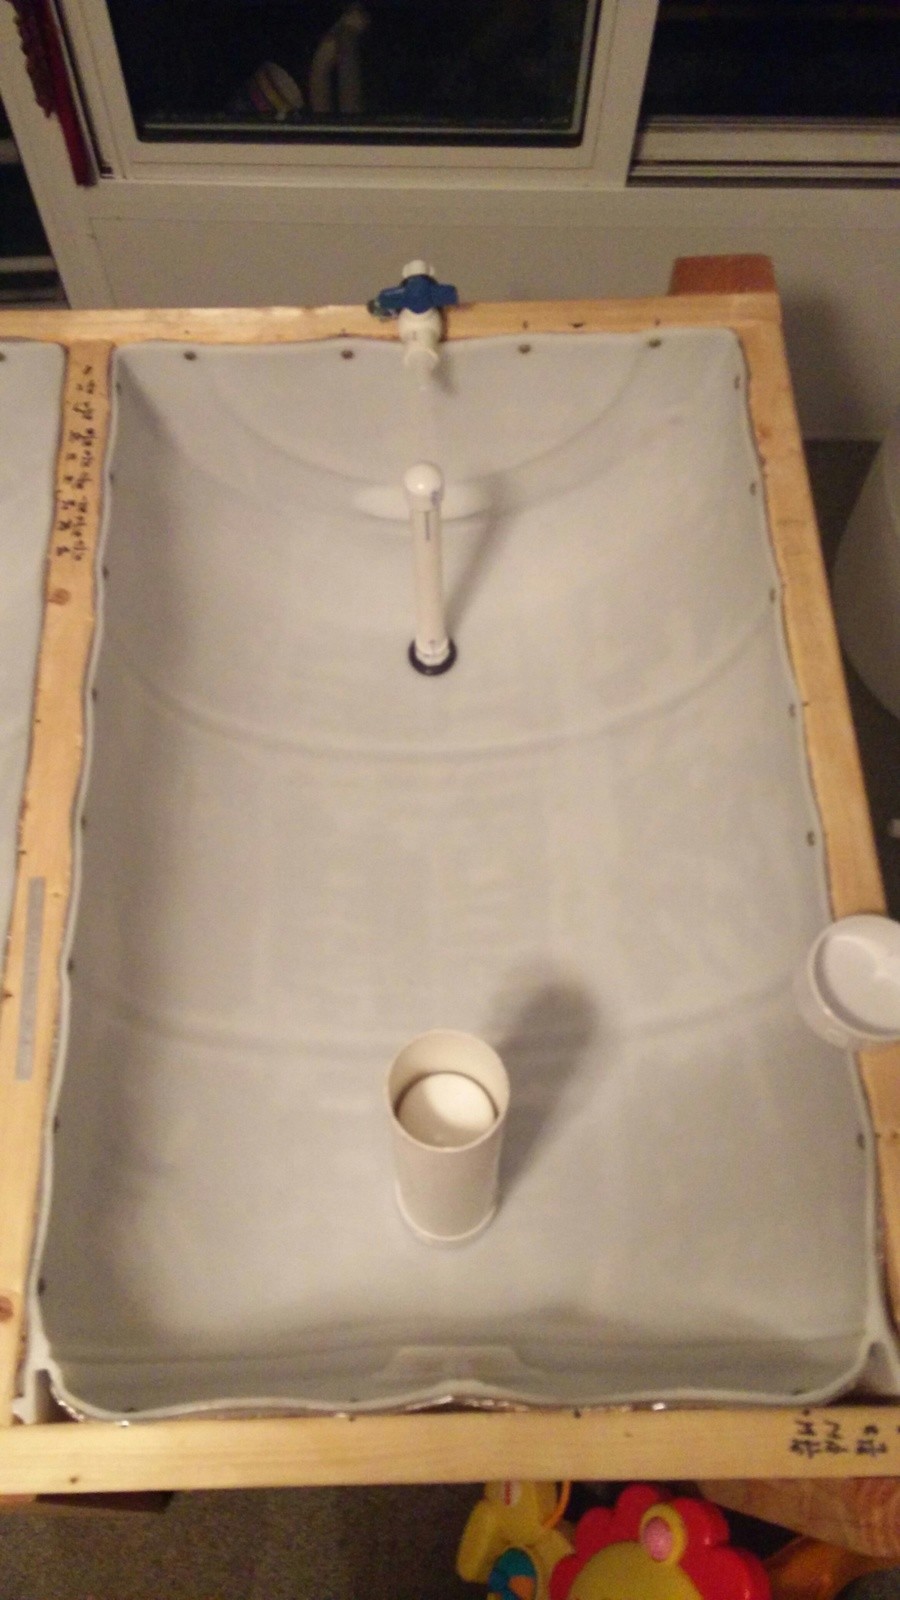
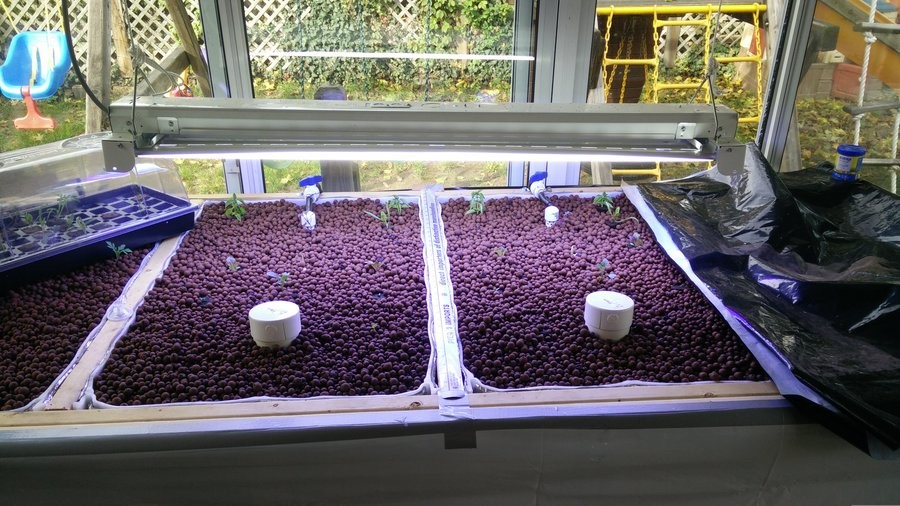
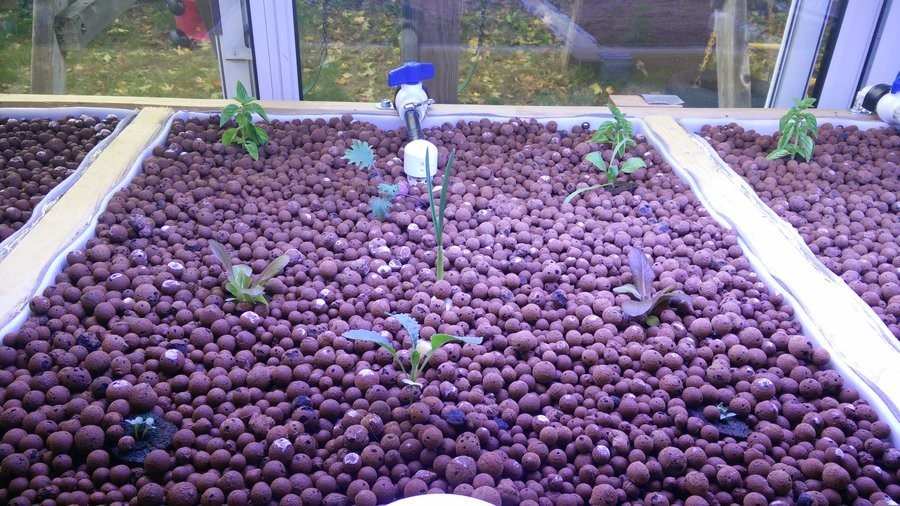
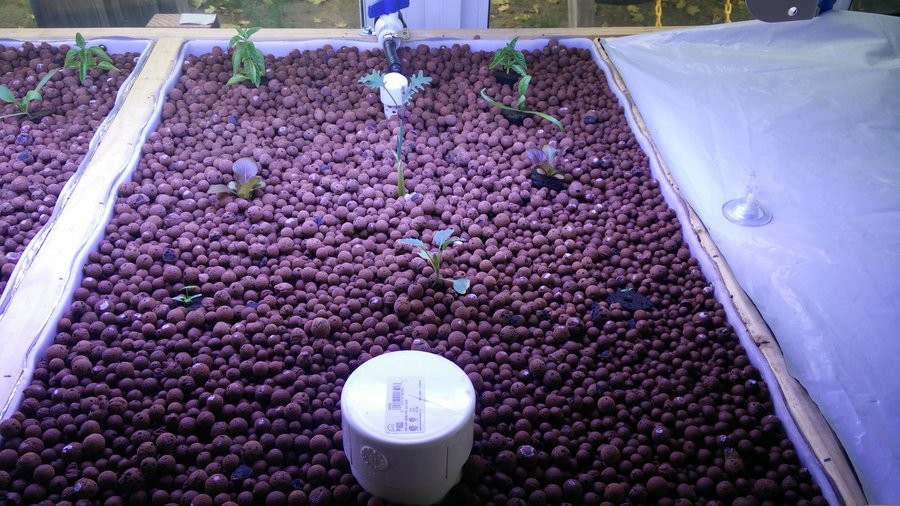
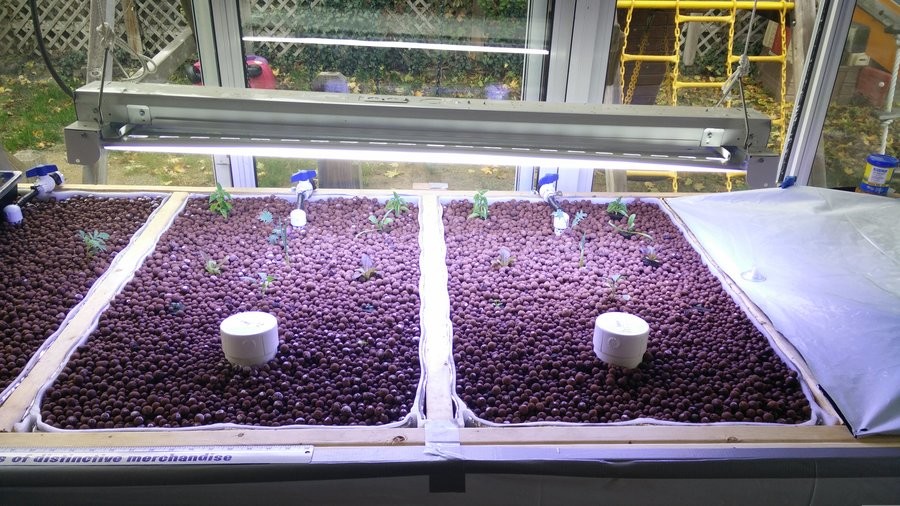
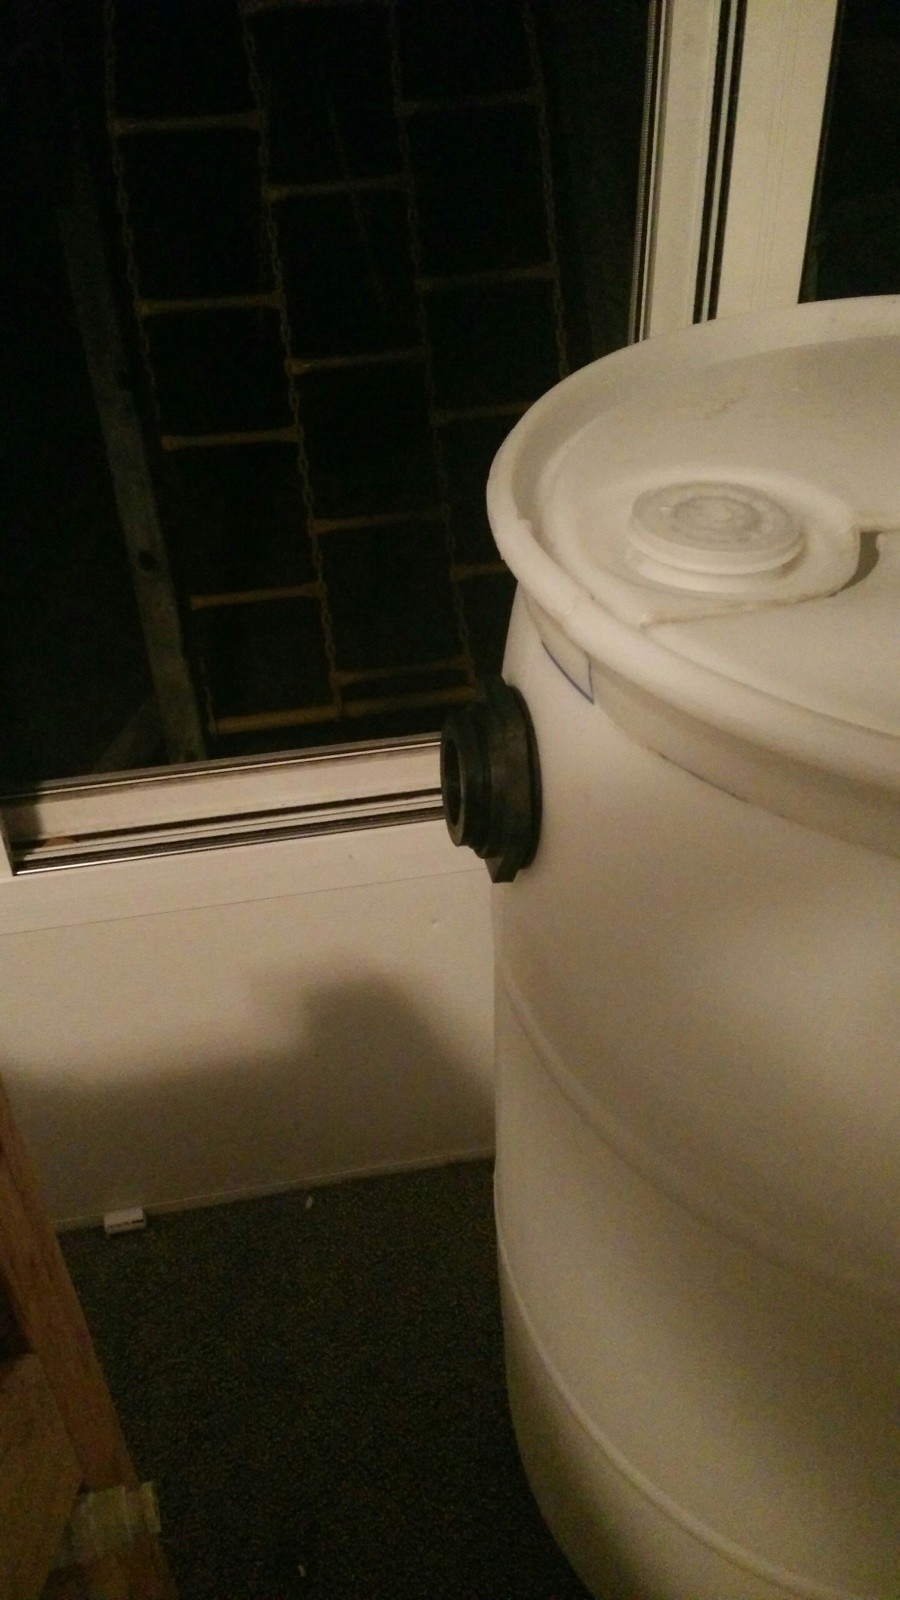
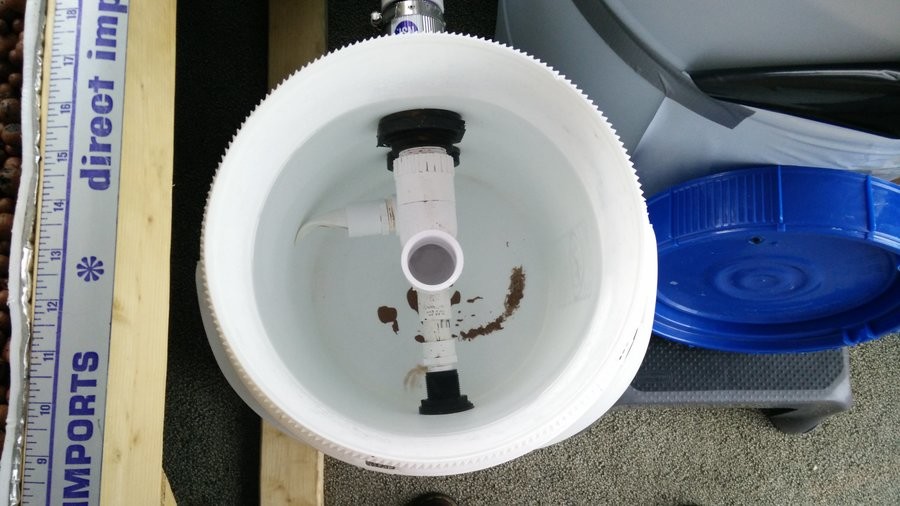
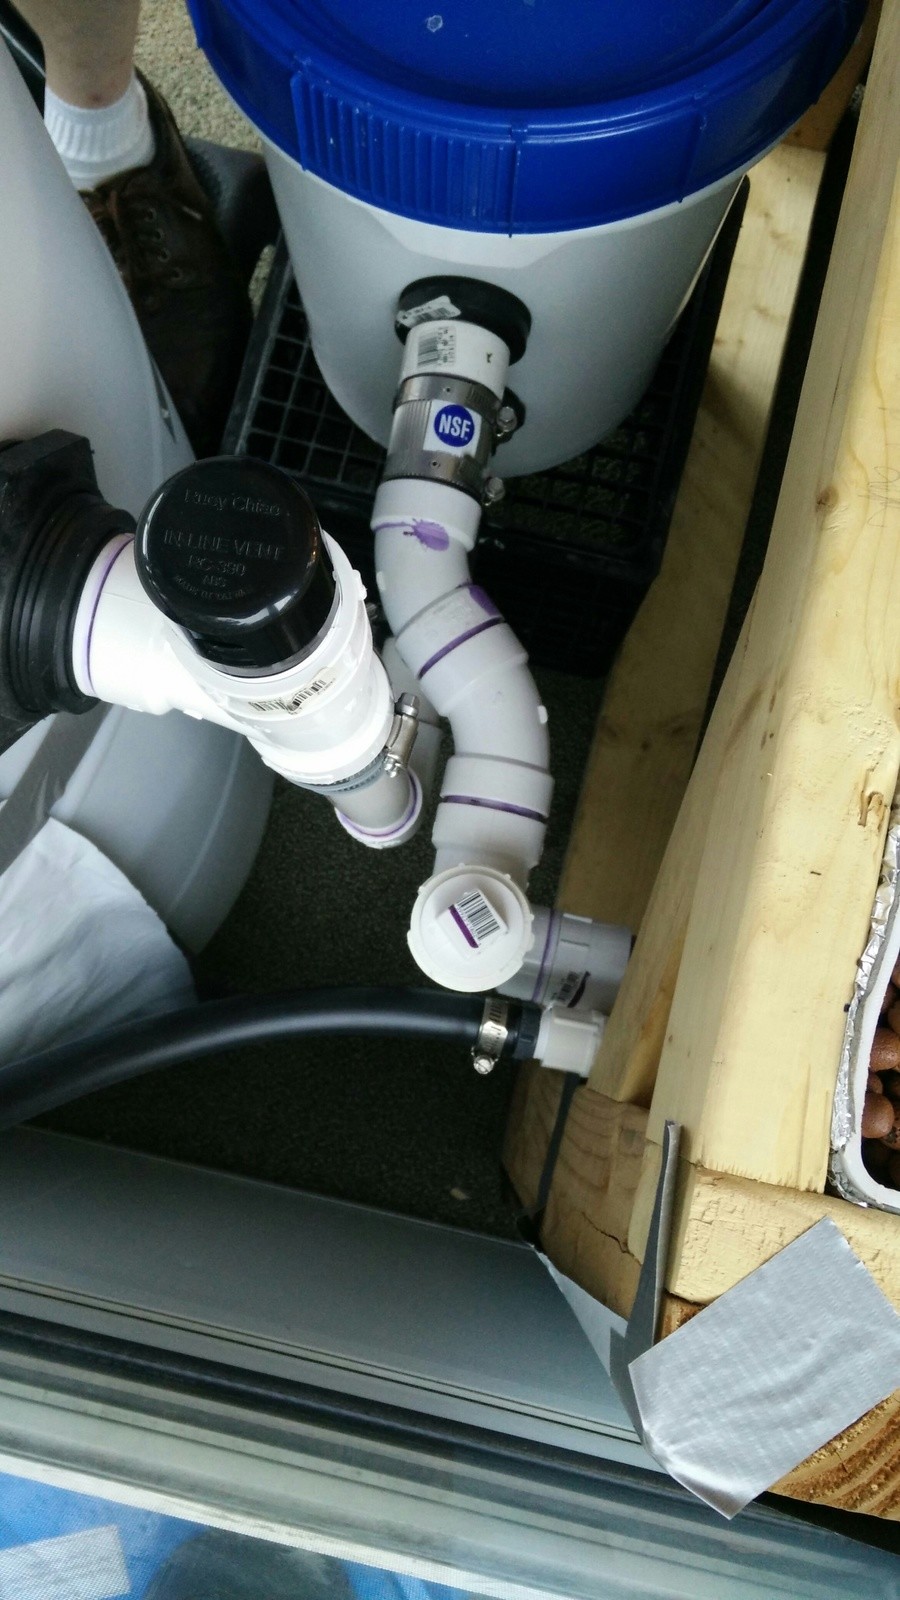
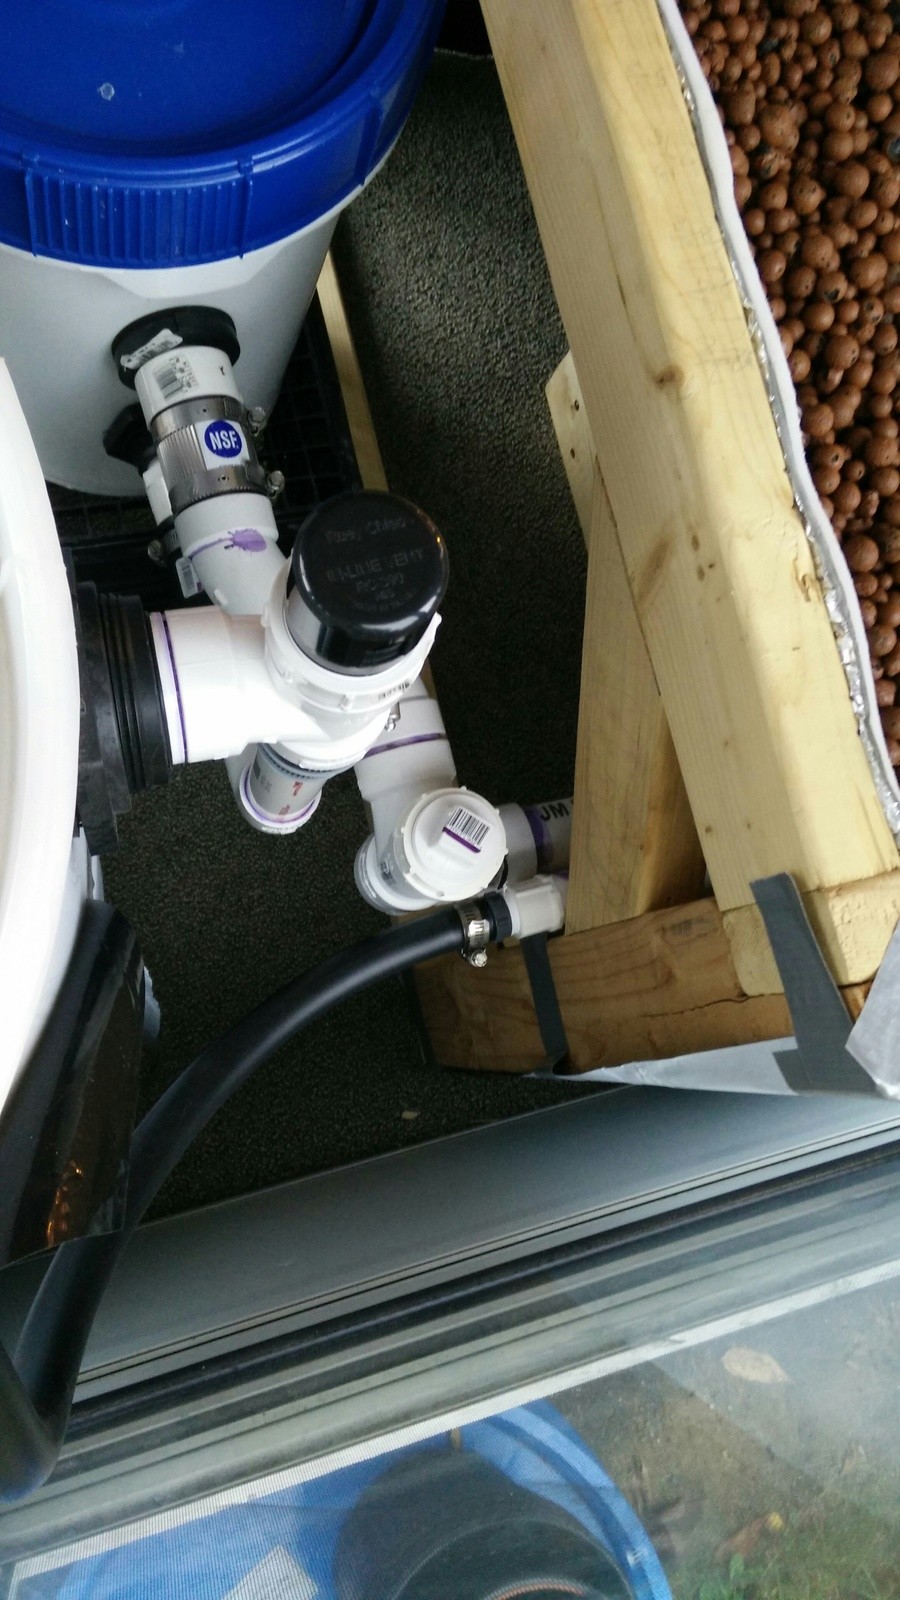
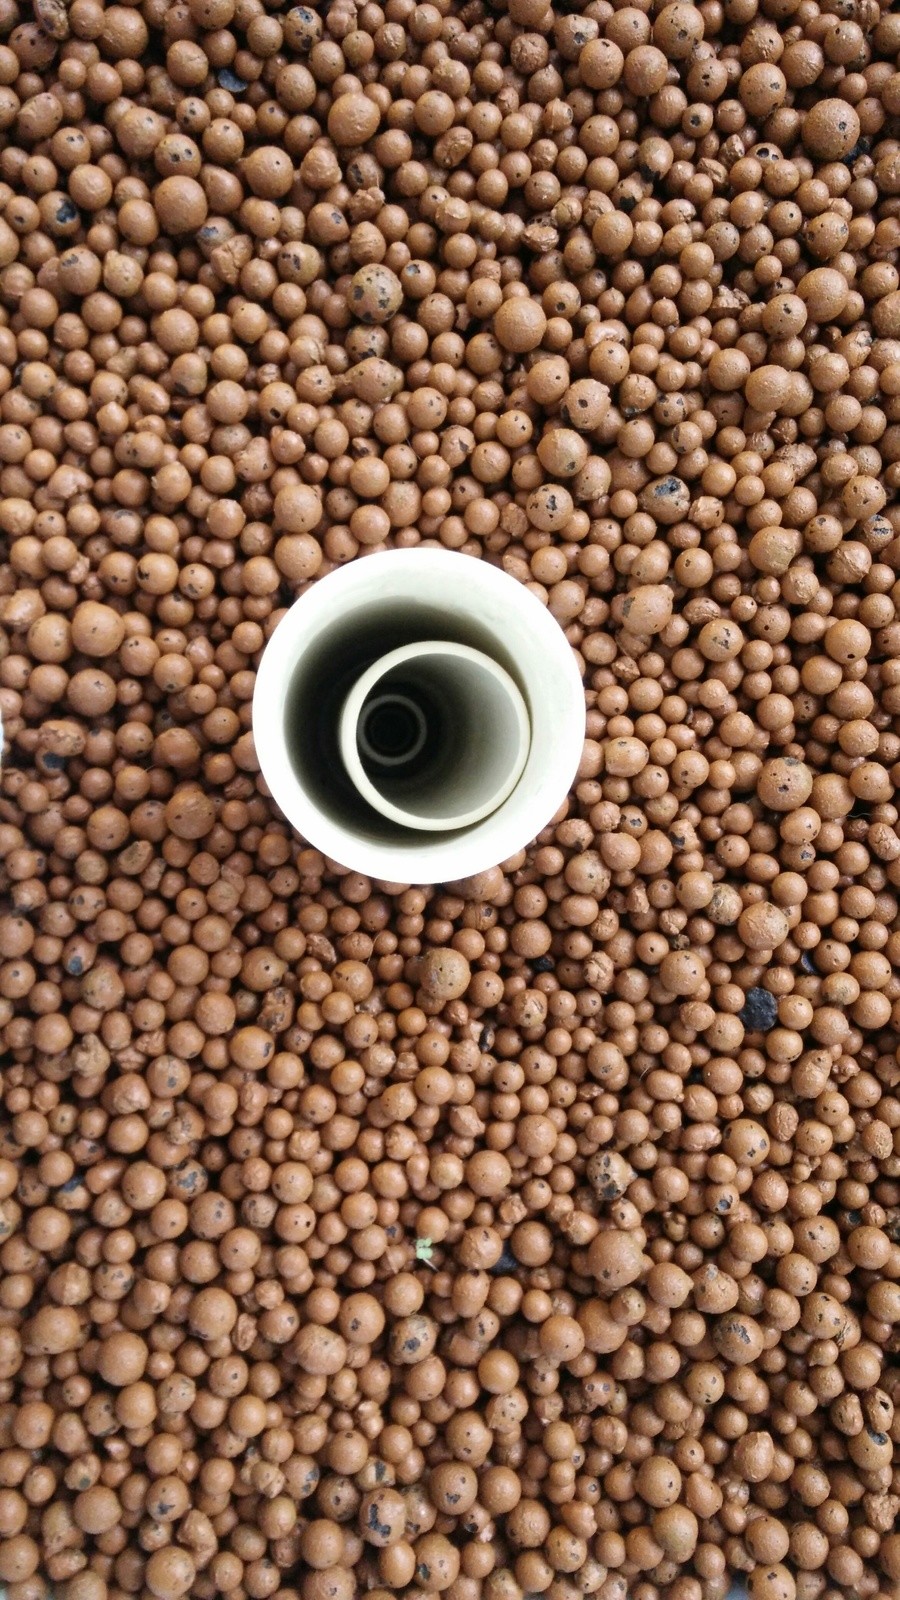
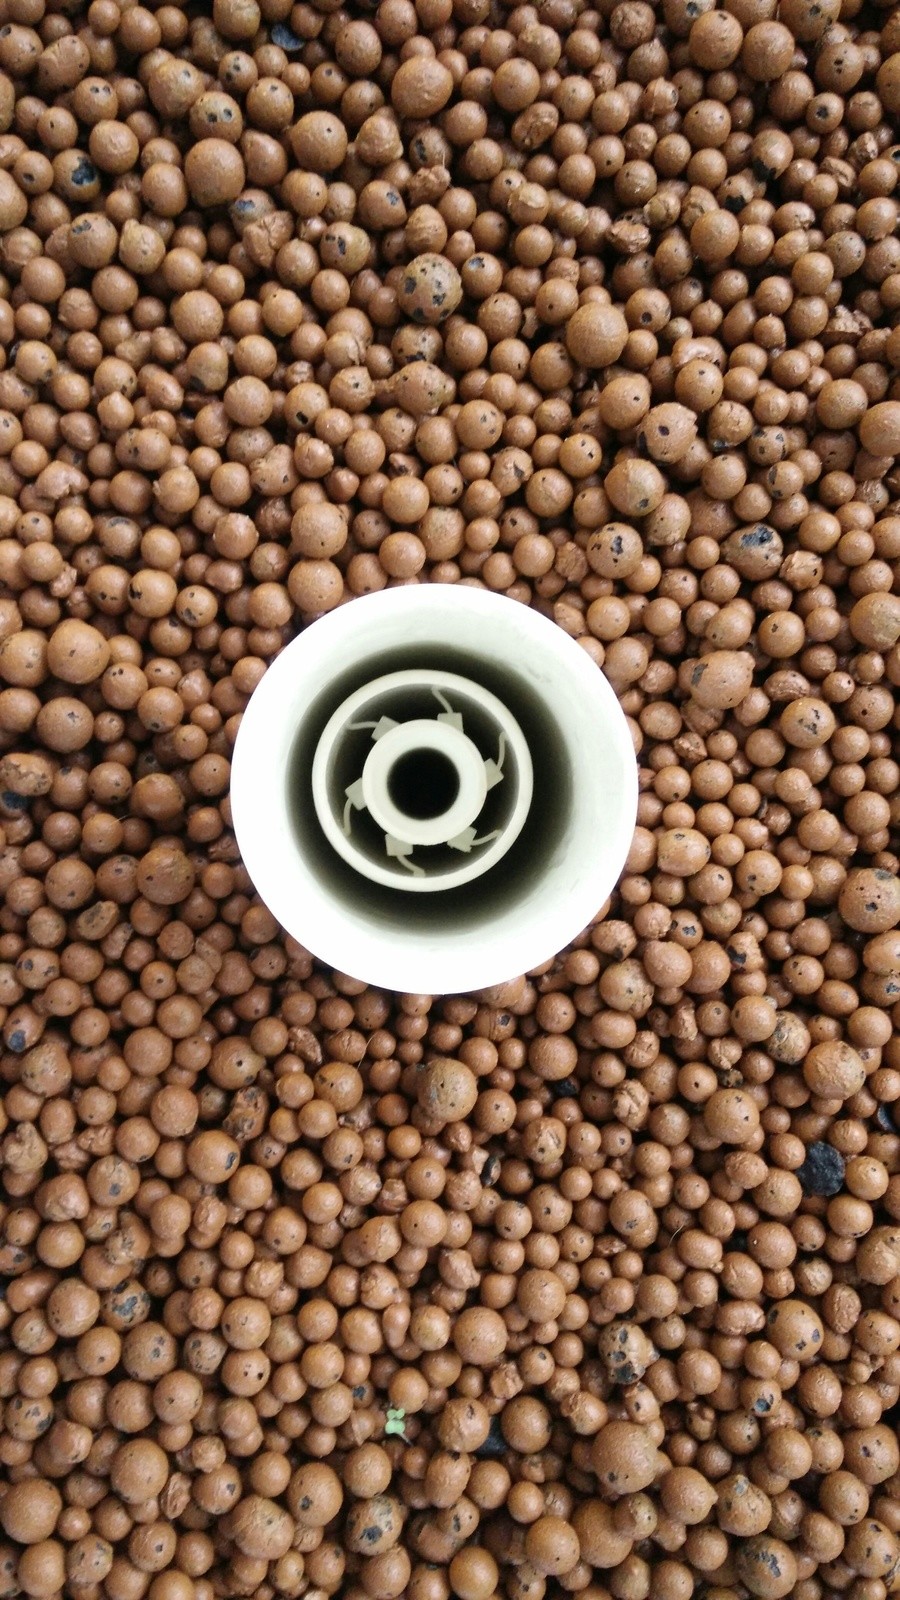
Each grow bed has two 3/4" bulkhead fittings going through the bottom of the grow beds. One is for the bell siphon (I will explain that a little later), the other one (pic below) is on the opposite end and that is for an emergency overflow and it also has a slow drain to it in case the pump fails or we lose power and the grow beds are half full, they will slowly drain so my roots dont just sit in standing water would could eventually cause root rot.
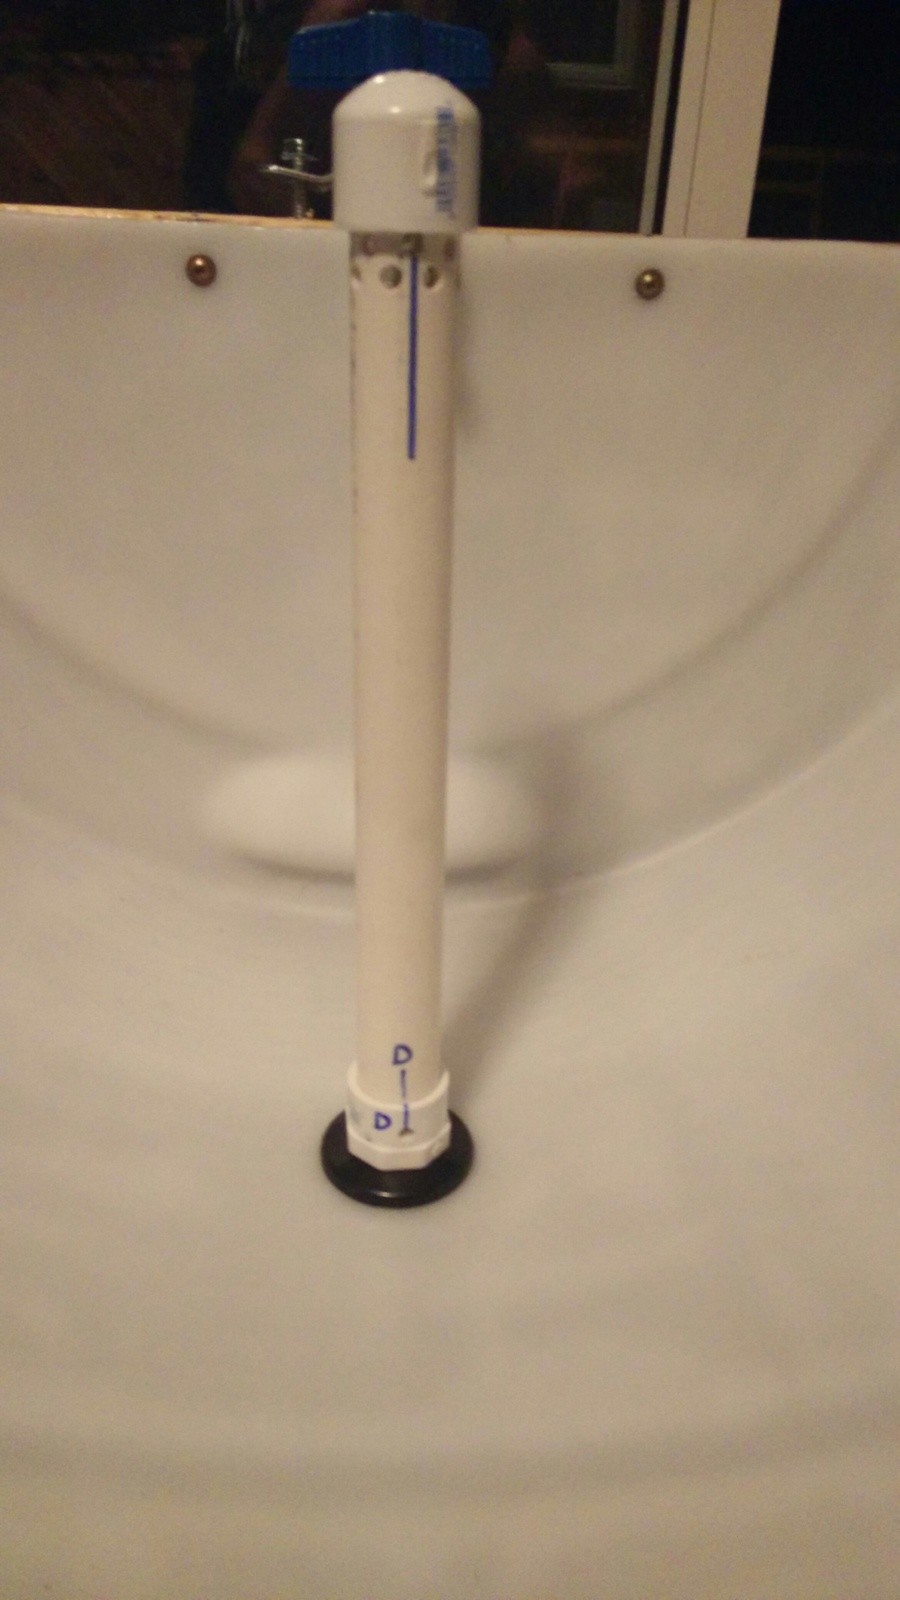
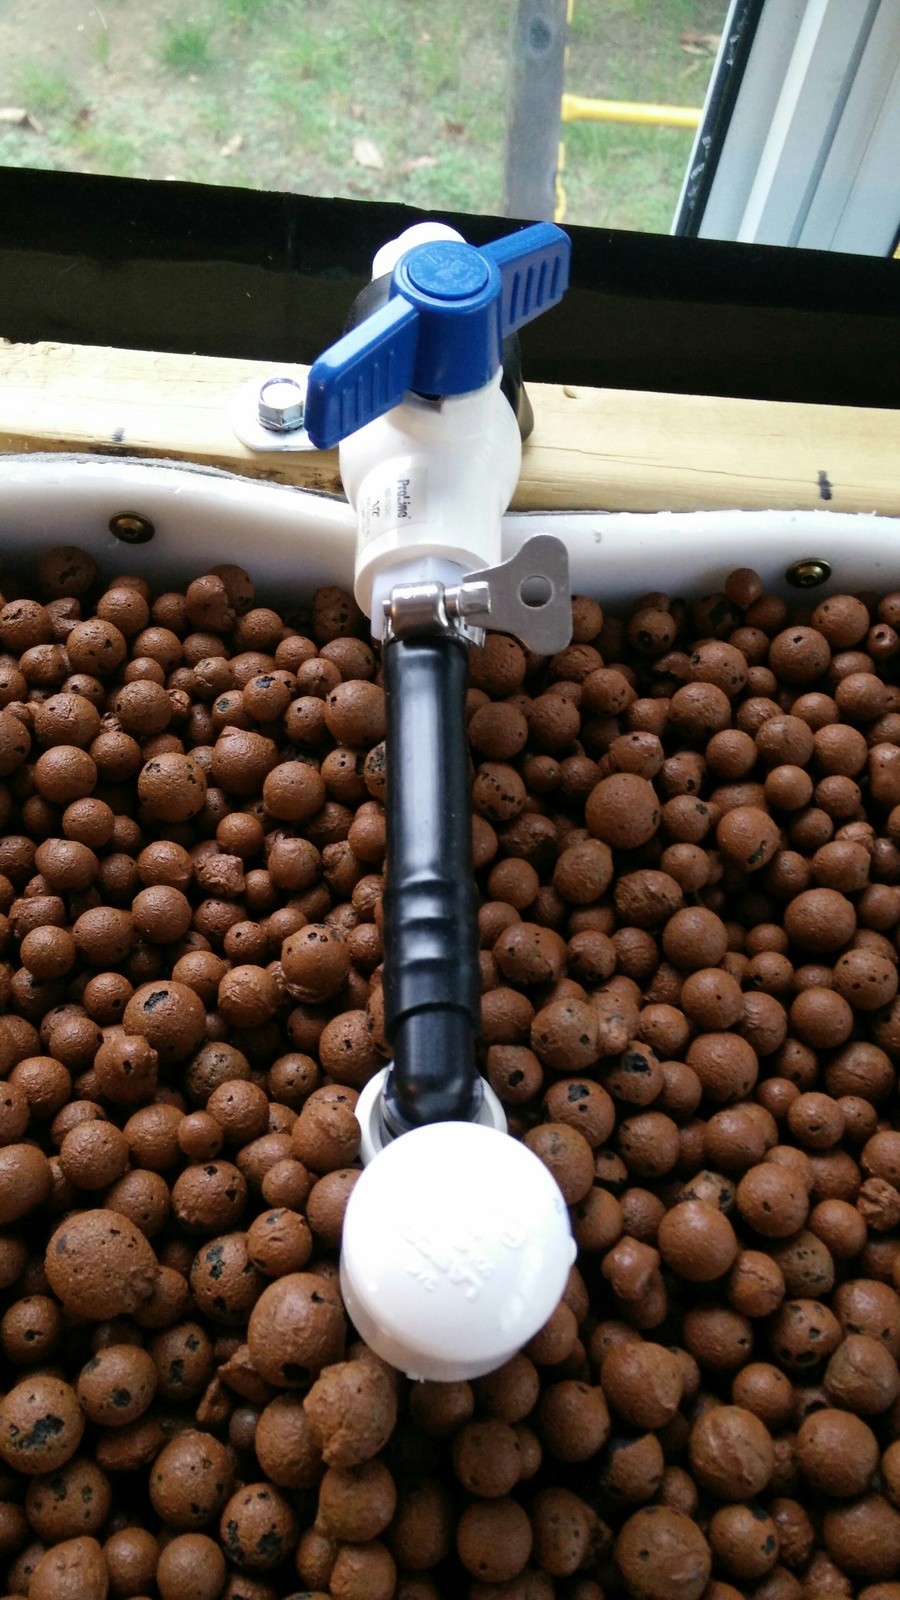
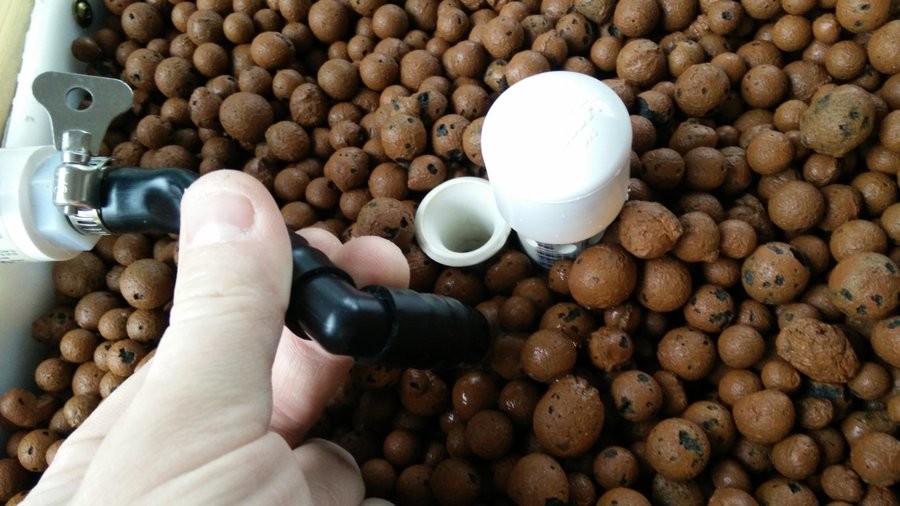
There is only one real purpose for this "Fill Pipe" and that is just to give the water a direct place to go to fill the grow bed. Most other people I have seen just have the water splashing on the top of their grow media and it eventually grow a lot of algae there. I am trying to minimize it with this idea. You can see this in action in the video that I posted up in my last post.
As you can see in the pictures above, the water is actually coming in from where that valve is, flows through the flexible black tube, and then into the "Fill Pipe". I used the flexible black tubing so I could remove it from the fill pipe and look at the flow rate of the liquid coming out. The flare on the PVD fill pipe is so I can more easily insert the black tube and elbow piece easily into the fill pipe.
The other two 2/5 parts that I cut away I will use as an outdoor soil grow bed next year.
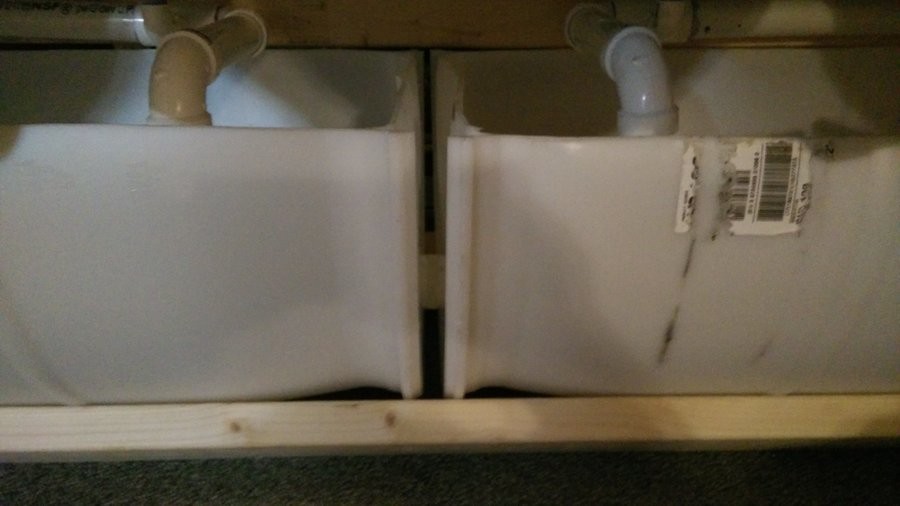
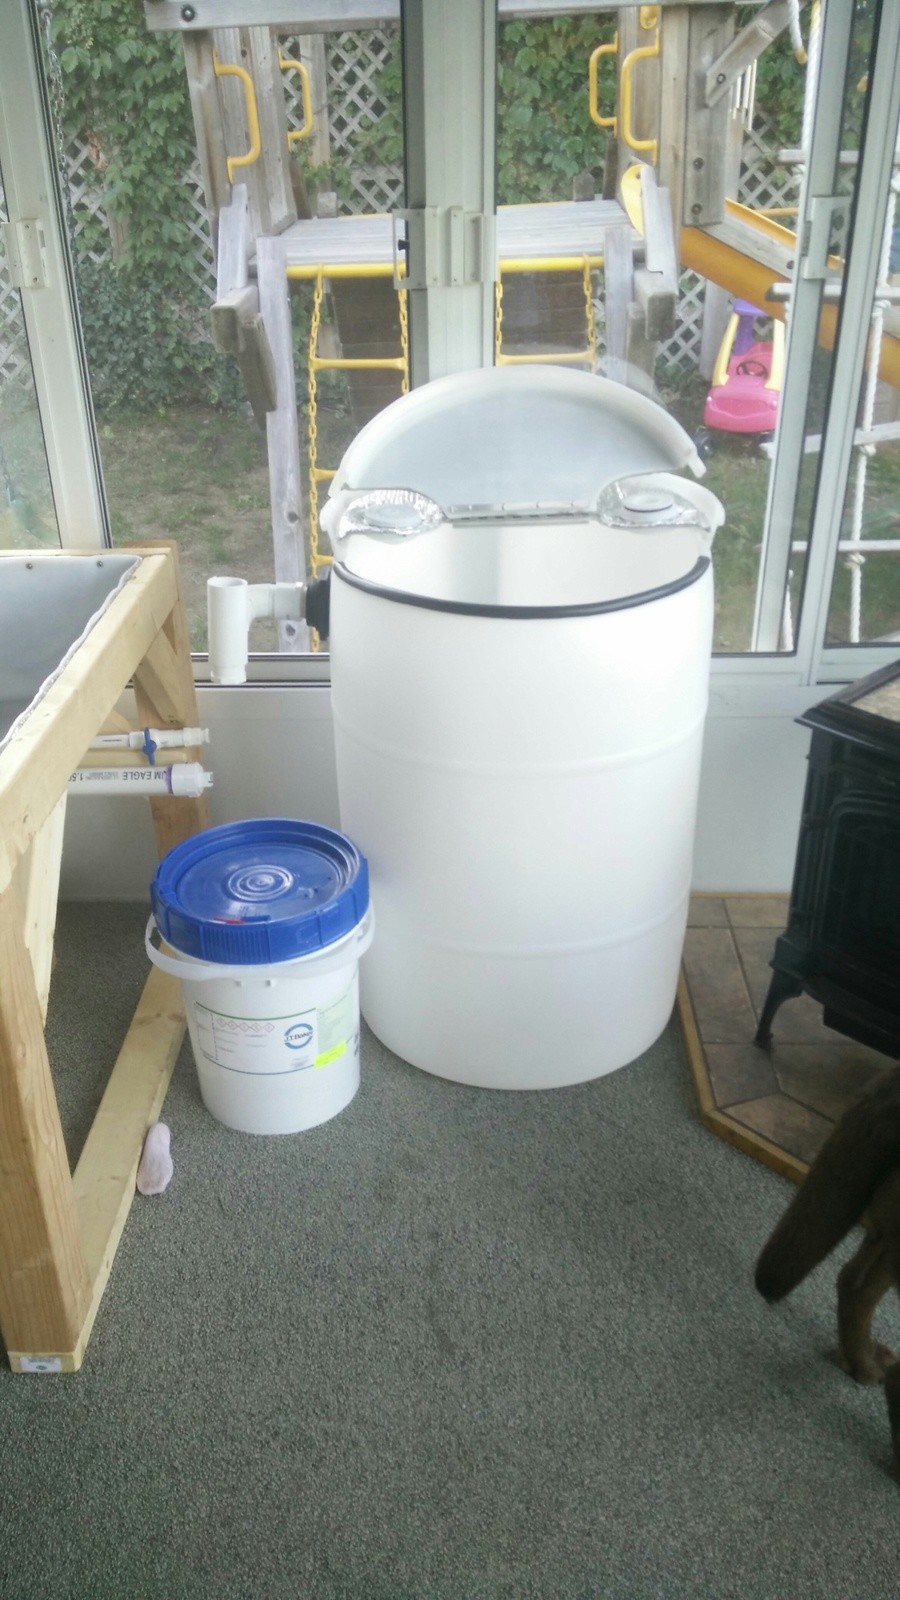
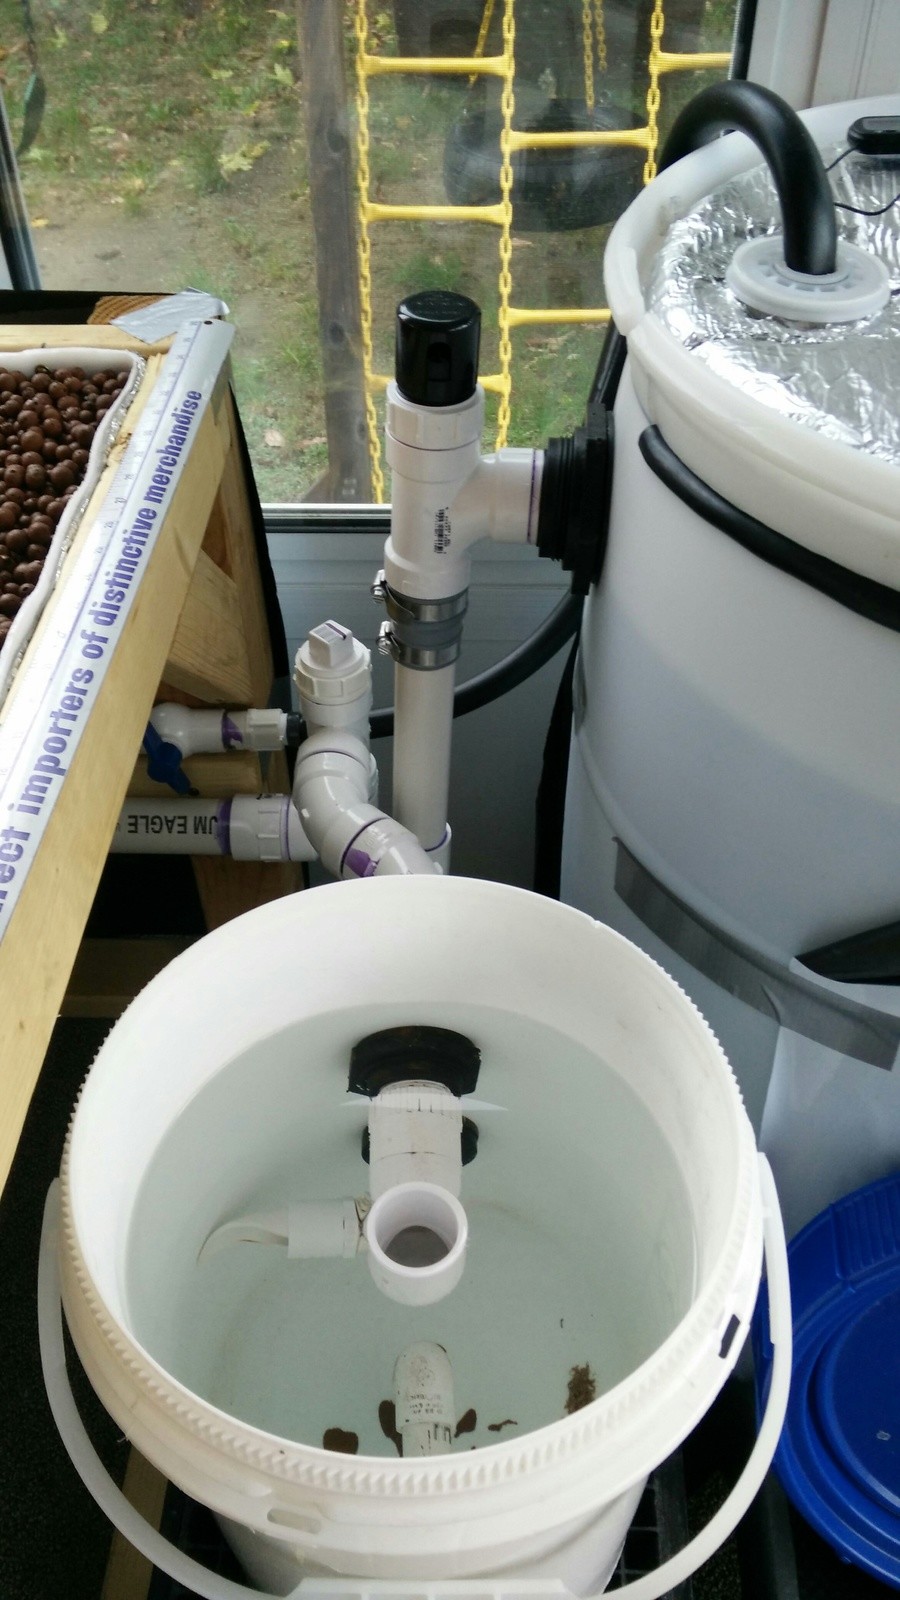
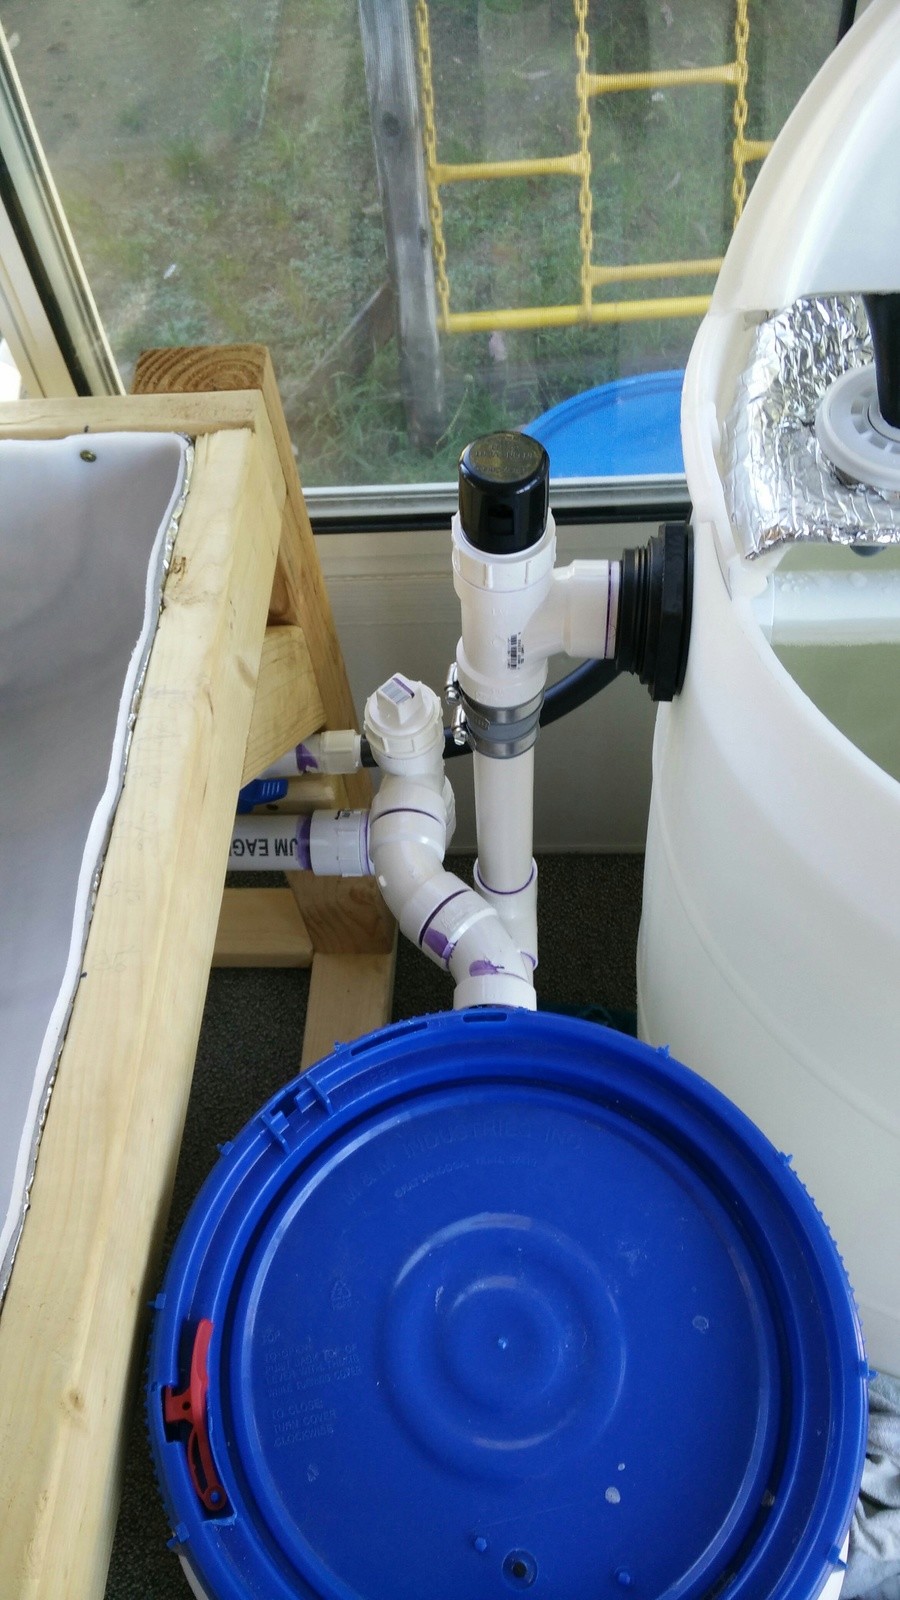
So I have these two parts for my sump tank, and I made it so that I could line up the bungholes and use a 2" threaded union to join the 2 parts together.
I will eventually add that Frost King shit to the sump tank, it's just rather expensive stuff so it can wait.

Now, the more pain in the ass shit to explain, the plumbing underneath.
So, each Bell Siphon drain has it's own 3/4" pipe going to the sump tank.
The emergency drains are a little different. They do not all combine together, but the two on the left two grow beds combine together to a 1.5" PVC pipe and the two on the right two grow beds combine together also to a 1.5" PVC pipe which drains into the sump tank.
In addition, the swirl filter drains into the the 1.5" PVC pipe on the right side. More on the swirl filter later.
Did you follow that? I'm having a hard time explaining that exactly how I mean it all.
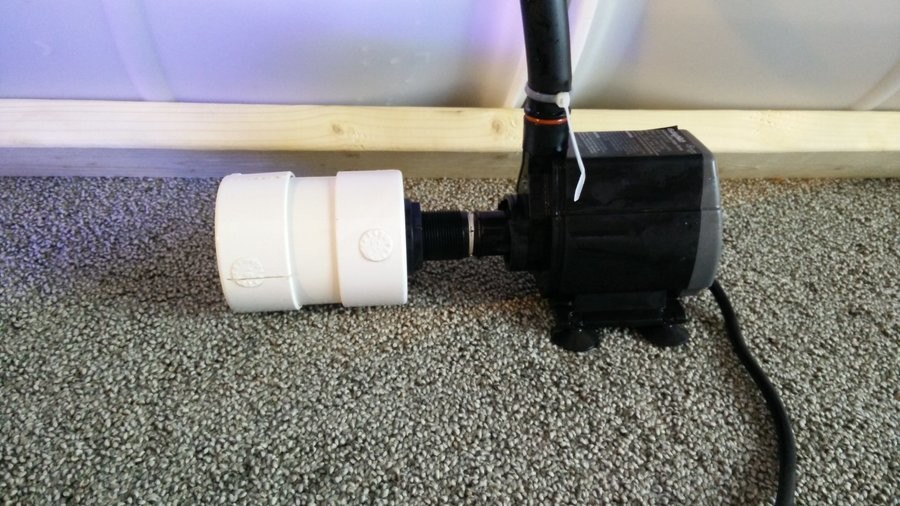
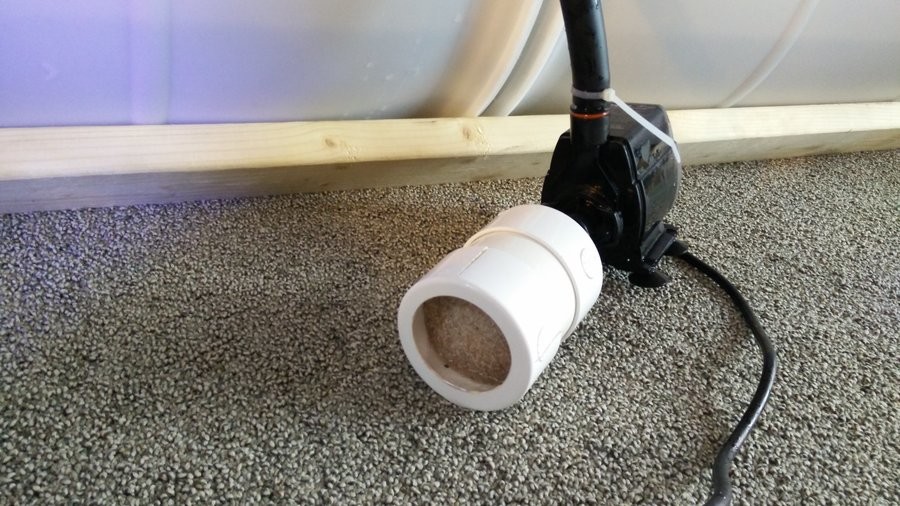
The filter I made consists of 3" thin wall PVC drainage pipe. I put a 3" at each end. One cap has a big hole drilled into it, the other cap has a 3/4" bulkhead fitting that attaches to the pump.
This is the neat par of this. My wifes mother works at Walmart, and she just happened to get a bag filled with the center circle pieces of those large buffing pads that they use to buff the floor and they fit perfectly into the 3" PVC drainage pipe. So I am using them as filters that I can easily take out and wash or replace as needed. There are 4 different type of those little circle pads and they filter out different levels of fineness of the debris in the water.
The pump feeds into the 3/4" black tubing which then goes into some 3/4" PVC on the frame. That then branches off to some 1/2" PVC to fill the grow beds. Additionally, it feeds 3/4" black tubing to the fish tank.


I installed a 1.5" bulkhead fitting near the top for the drain. The drain pipe itself reaches to the bottom of the tank to help pick up the fish waste. I made a little guard out of a 3" PVC cap to prevent fish from getting sucked up into the drain, which had happened before I added the guard. A shitload of holes are drilled into the cap/guard.
The 1.25" pipe goes through a 1.25" bulk head fitting into the 5 gallon bucket which acts as the swirl filter. The inlets gets reduced further to 3/4" and then it goes through an elbow so that the flow going it causes the liquid to be spinning in the bucket so the solid matter stays towards the middle.
The cleaner water goes upwards through a 1.25" drain. The drain is the elbow facing upwards. That drain goes through a 1.25" bulkhead fitting. From there the drain of the swirl filters returns to the sump tank via that 1.5" PVC pipe that the 2 right most grow bed emergency drains are also connected to.
On the front of the swirl filter I have a 3/4" bulkhead fitting with a spigot on the outside. On the inside there is a 3/4" PVC pipe and elbow that goes to the bottom center of the bucket. When I open the spigot it will cause the solid matter to get sucked up and out. I can then use that dirty water for my plants outside.
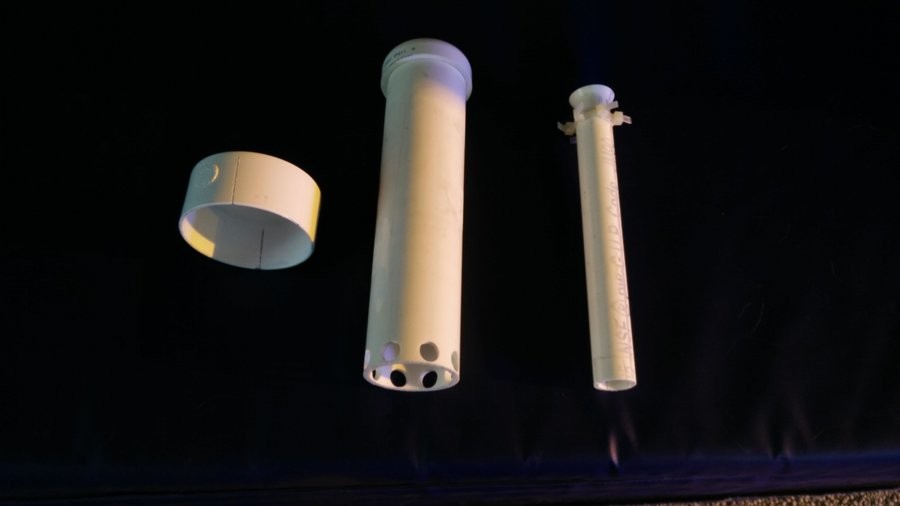

The bell siphon has a few parts to it to get it to work correctly.
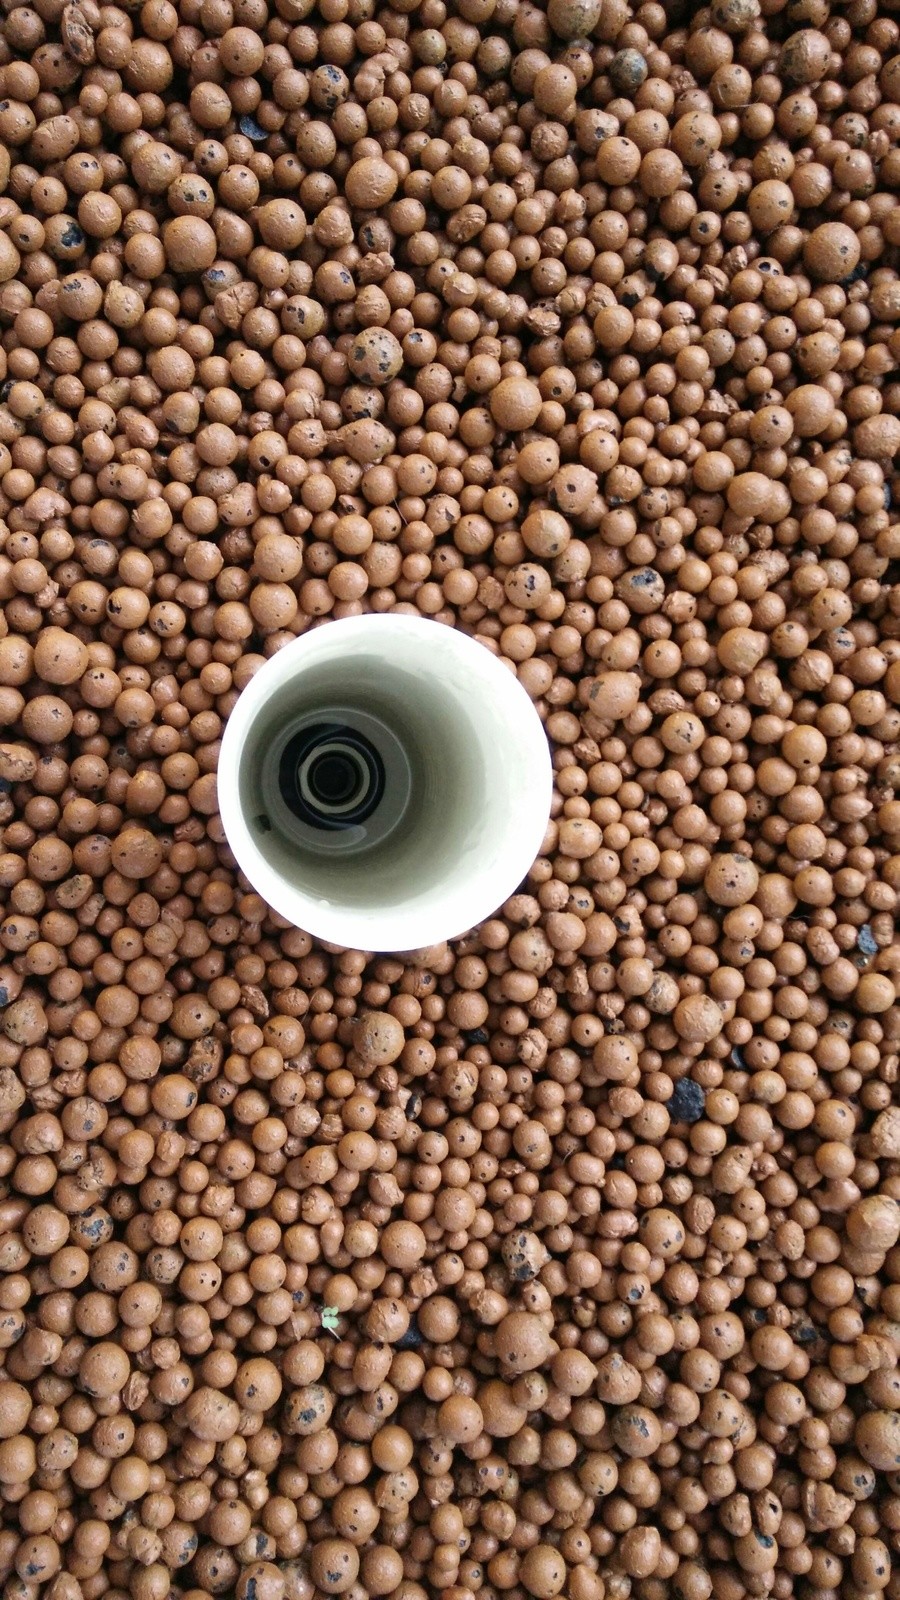
Outer 3" thin wall drainage PVC with slots cut in it. Acts as a media guard to keep the clay pellets and roots out of the rest of the siphon.
2" PVC and cap that acts as the bell.
3/4" PVC that I flared out the top, and that acts as the stand pipe.
I put some zip ties on the stand pipe to make it so it is centered inside of the bell pipe.
For more info on how a bell siphon works, just check out some videos on youtube. I don't feel like explaining it here.
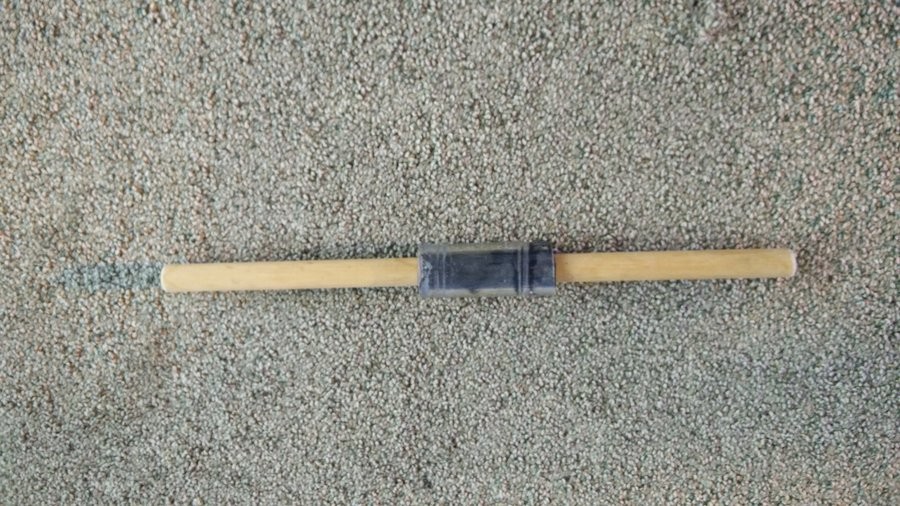
This is the little tool I made to help me put the bell siphon together.
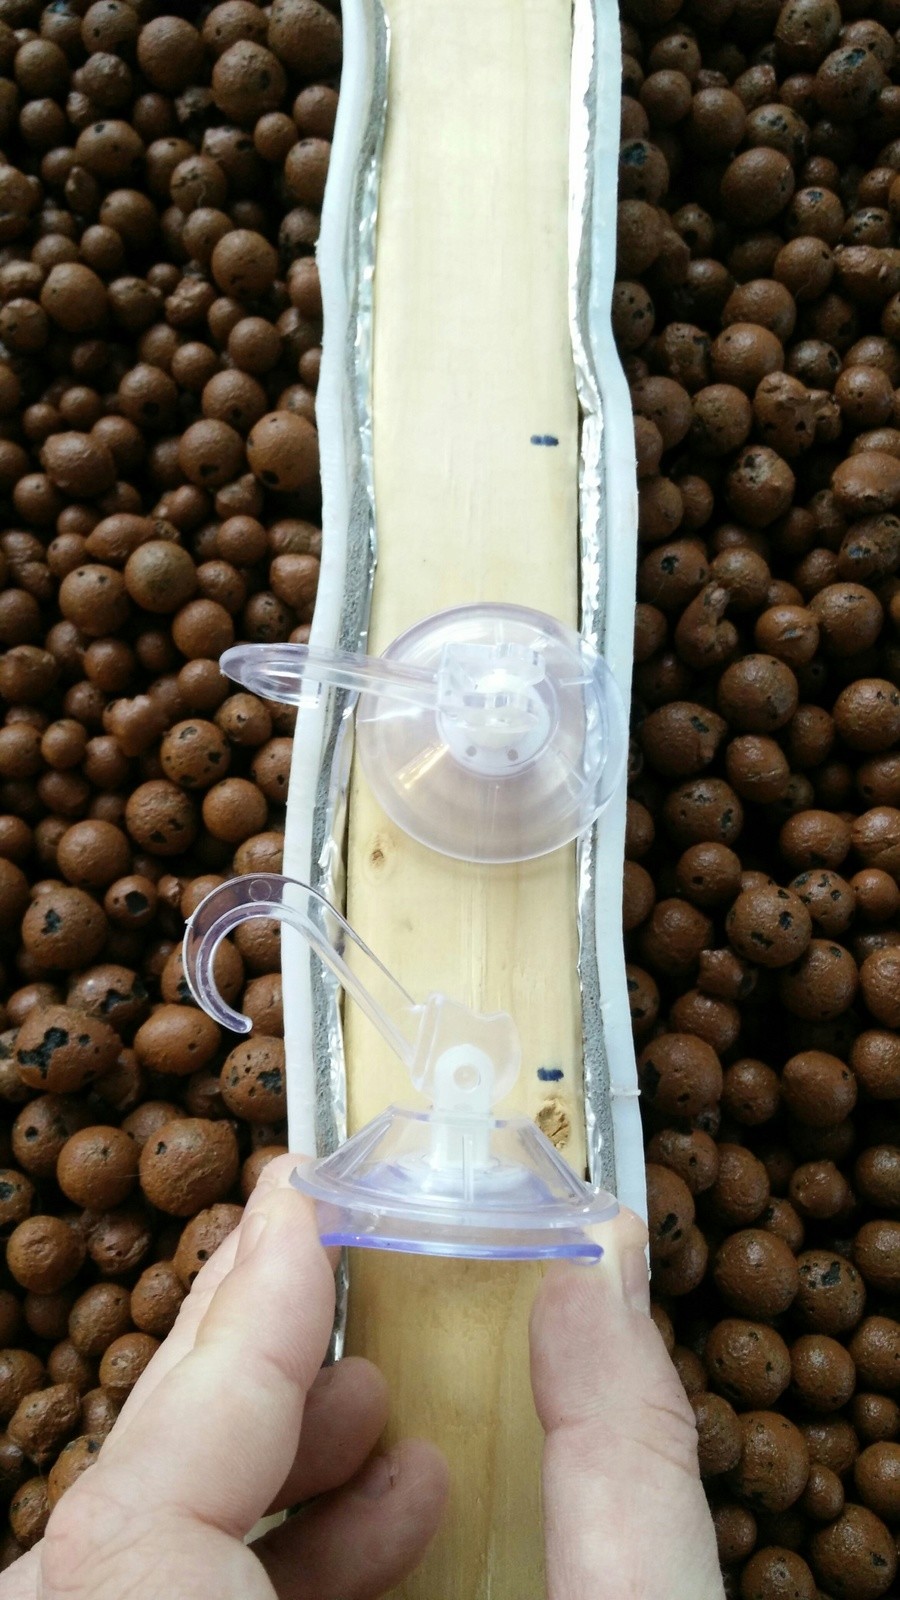
I use these suction cups to take apart the bell siphon when I need to inspect it. I will make something a little better when I come up with a good idea of how I want to do it.
This is a video of the bell siphon draining one of the grow beds. Works quite nicely.
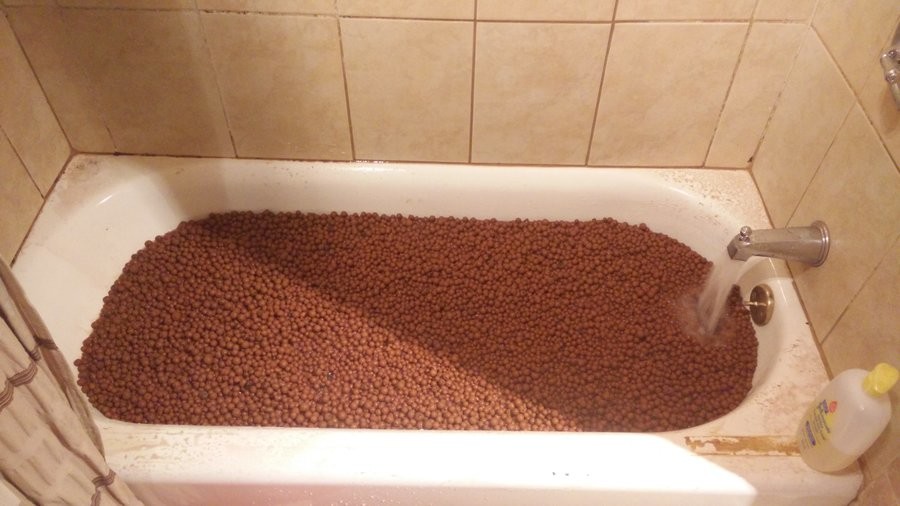
Many others use something different for their media, but I much prefer these for many reasons that I dont want to explain here. The only downside is that you have to wash the dust off of them first which was a pain in the ass so I did it in my bath tub. My wife wasn't too pleased about that.
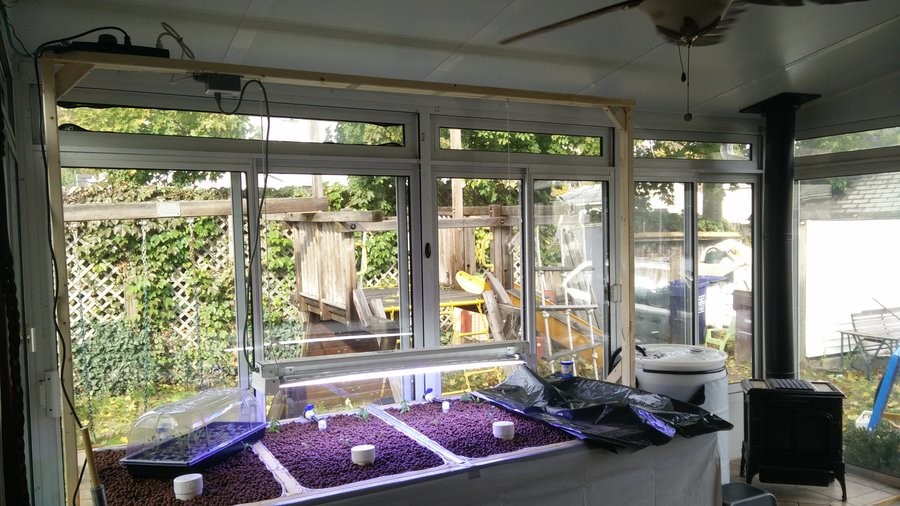
Well folks. So that was a lot of the details of this grow system. I have made it so I can expand on it and eventually add vertical grow tubes and whatever else I want.
I hope you all enjoyed this. It was fun putting it all together. It took me about 2 months, about $2k - $3k usd, and like a hundred trips to Home Depot, Lowes, and many hydro stores to find exactly what I needed to put this all together.
Thank you all for viewing.
Last edited by DeadlyFoez,