ROM Hack RELEASE Xenoblade Chronicles 2 Graphics Settings

GBJark324

Active Member
Newcomer
Joined
Jan 19, 2022
Messages
42
Trophies
0
Age
23
XP
114
Country
United States
For users of the Yuzu PC emulator. This guide allows user to completely disable resolution downscaling in the game, which improves the quality of the visuals a lot. This is needed even if Yuzu is set to higher resolution scaling (like 2x, 3x, etc.) due to specific quirks associated with this particular game, otherwise ingame resolution will be lower than the emulator indicates. Note that in fixing the resolution of the game to be a proper higher value, this method has higher system requirements requiring a good CPU and good GPU.

Please refer to my post #374 on the last page which has the best configuration settings for PC emulation at 2x resolution setting (1440p). That post was written for Ryujinx, however for Yuzu the only difference is where the configuration files go. Read below.

STEP 1.
Go to first page and first post of this thread. Download Next Method. Open Xenoblade2Base.zip. Inside open Raw Image folder. Then open Max 720p folder. Look inside here for the files called: D007651BC7C6A51ED7E8F463E02AC2EF.ips and lib_nx.ini
Somewhere on your computer, create a folder called XB2Temp.
Inside create these various sub-folders and copy the files there:
XB2Temp\exefs\Xenoblade2Graphics\D007651BC7C6A51ED7E8F463E02AC2EF.ips
XB2Temp\romfs\monolib\shader\lib_nx.ini
XB2Temp\romfs\stream\dumpini\lib_nx.ini


STEP 2.
Open the files lib_nx.ini (for example with Windows Notepad program) and completely replace the text there with the configuration settings I have in post #374.

STEP 3.
Create a fresh local installation of Yuzu.
To do this, download a new copy of Yuzu, extract it to a folder, then inside the Yuzu folder manually create a folder called:
user
After that, start Yuzu for the first time, and start Xenoblade 2 with DLCs installed, until you reach the title screen. Then, quit the game.

STEP 4.
Now in the Yuzu installation folder it will have automatically created for you these sub-folders:
user\sdmc\atmosphere\contents
Inside this contents sub-folder you will see a bunch of folders with a bunch of numbers, each number is the ID of either the base game or one of the DLCs. For example one folder could be something like this: user\sdmc\atmosphere\contents\0100E95004039004 could be one of the numbered folders among various

The exact folder numbers will vary and only some folders will work. So what you do is, copy+paste the contents from inside XB2Temp into one of those numbered folders (don't copy XB2Temp itself, only copy the stuff inside it).

Repeat this process, copying the contents from inside XB2Temp to all the numbered folders.

When that is done and you start the game again, it should have increased clarity because it will be actually rendering at HD resolution properly (no more downscaling) and without unnecessary blurring effects (except TMAA which remains engaged to reduce aggressive pixelation). Make sure emulator is running in docked configuration. I recommend 2x resolution graphics setting.
 
Last edited by GBJark324,
  • Like
Reactions: prprdog and RahFah

kurephos

New Member
Newbie
Joined
Feb 5, 2022
Messages
2
Trophies
0
Age
39
Location
South Pole
XP
44
Country
Antarctica
Folks,

I feel I have made an important discovery relevant to people using this tool with a PC emulator like Ryujinx or Yuzu.

This applies to people intending to run the game at high resolutions like 2K or 4K with a powerful graphics card like Geforce RTX to match.

I have noticed that with the INI configurations provided in this thread (i.e., 720p), when the game is started the emulators successfully override the original resolution to give the desired new output as intended, e.g. 4K.

However, because there is no way to completely disable all forms of resolution scaling in the game and the default resolution provided in the INI configuration here maxes out at 720p, I have noticed that in many sections of the game as you play the resolution can reset itself back down to 720p. The game will start to look a lot less sharp than before and the emulator is unable to enforce the high resolution limit anymore. This can happen in many places in the game, and is not fixed unless rebooting the game each time this occurs.

I have finally found a workaround for this issue, which effectively finally completely disables resolution scaling on emulators. Use the 720p base ("raw") configuration provided in this thread, but in the INI file change the following values:

red_AtMinX=2.0
red_AtMinY=2.0

This tends to make the game look sharper in general because it runs at a high resolution all the time, rather than just some of the time.

I provide my full optimized configuration below for reference. This disables all the post-processing blur and oversharpen effects. EXCEPT the TMAA (temporal anti-aliasing) which I prefer for a less pixelated image, it looks better when the resolution is not incorrectly changing and other post-process effects are disabled, but you can disable it too if you want. Please ensure the emulator is running in docked mode (and not pseudo handheld mode).

Finally, please note that the configuration files in this thread may need to be put not into the base mod folder (0100e95004038000) but assuming you have all the free DLC installed, you might need to put the configuration into a DLC folder like 0100E95004039002 which you would need to manually create (that happens to be the New Quests Pack but you can look for IDs of other DLCs as needed).

As example for Ryujinx using New Quests Pack folder:

So you would have the INI file with the content below in:
C:\Users\whateveryouwindowsuernameis\AppData\Roaming\Ryujinx\mods\contents\0100E95004039002\romfs\monolib\shader\lib_nx.ini

And the other file goes here:
C:\Users\whateveryouwindowsuernameis\AppData\Roaming\Ryujinx\mods\contents\0100E95004039002\exefs\Xenoblade2Graphics\D007651BC7C6A51ED7E8F463E02AC2EF.ips

All the best.

tonemap=on
ssao=off
bloom=on
godray=on
AntiAliasing=off
ColReduction=on
dof=off
lensFlare=off
aoskip=off

lut=on
luttex1=lutba

cube=cube

toneHistogramLow=0.8
toneHistogramHigh=0.9
tonemax=1.0
tonemin=0.15
tonescale=7.0
toneUpSpeed=0.1
toneDownSpeed=0.5
toneBlmmax=1000
toneBlmmin=0.001
toneBlmmul=100.0

godray_inival=0.95
godray_decay=0.99
godray_scale=1.235

blm_border_sub=1.0
blm_border_mul=0.105
blm_border_sub2=0.0
blm_border_mul2=0.0
blm_border_max=3.5
blm_str1=1.0
blm_str2=1.0
blm_str3=1.0
blm_gauss1=0.9
blm_gauss2=0.8
blm_gauss3=0.8
blm_weight1=0.63
blm_weight2=0.1
blm_weight3=0.14
blm_weight4=0.53
blm_weight5=0.58
blm_deviation1=0.2
blm_deviation2=0.5
blm_deviation3=1.0
blm_deviation4=1.0
blm_deviation5=1.0
blm_saturation1=0.0
blm_saturation2=0.0
blm_saturation3=0.0
blm_saturation4=0.0
blm_saturation5=0.35
blm_emissive_str=9.0
blm_tone_scale=0.05
blm_emissive_max=20.0
blm_emissive_min=0.0

lens_max=1
lens_rot=0
lens_sub=1.5
lens_mul=3.5
lens_weight=0.1
lens_decay=1.0
lens_str=1.5
lens_paMax=4.0
lens_UVDecay=0.290

AA_Sharpness=2.0
AA_Range=0.5
AA_Threshold=0.17
AA_ThresholdMin=0.05

red_sclX=1.0
red_sclY=1.0
red_hdsclX=1.0
red_hdsclY=1.0

red_Auto=on
red_AtMaxX=1.0
red_AtMaxY=1.0
red_AtMinX=2.0
red_AtMinY=2.0
red_AtRate=97.0


ao_Lengs=0.1
ao_LengsRatio=1.98
ao_range=5.7
ao_rangeRatio=1.000
ao_sub=0.02
ao_subRatio=0.150
ao_Mul=2.0
ao_blurRange=0.720
ao_blurScale=0.75
ao_av_Shwstr=0.5


blur=off
blurStr=0.2
blurAlpha=4.0
blurSub=0.025
blurBlurRange=0.32

shadowStr=1.0
shadowHalf=on
shadowColor=0.0, 0.0, 0.0
simShwStr=1.6
simShwIn=0.7
simShwMin=0.15

sRGBMode=on
gamma=6

ao_av_CenterWeight=1.090
ao_av_MaxDistance=0.15
ao_av_MaxRadius=0.2
ao_av_FadeOutStart=70000.0
ao_av_FadeOutDistance=10000.0
ao_av_BlurFallOff=0.050
ao_av_BlurScale=1.6
ao_av_Shwstr=0.5

cam_near=0.1
cam_far=80000.0

avmp01 = 0.5 , 0.5 , 0.5
avmp02 = 0.5 , 0.5 , 0.5
avmp03 = 0.5 , 0.5 , 0.5
avmp04 = 0.5 , 0.5 , 0.5
avmp05 = 0.5 , 0.5 , 0.5
avmp06 = 0.5 , 0.5 , 0.5
avmp07 = 0.5 , 0.5 , 0.5
avmp08 = 0.5 , 0.5 , 0.5
avmp09 = 0.5 , 0.5 , 0.5
avmp10 = 0.5 , 0.5 , 0.5
avmp11 = 0.5 , 0.5 , 0.5
avmp12 = 0.5 , 0.5 , 0.5
avmp13 = 0.5 , 0.5 , 0.5
avmp14 = 0.5 , 0.5 , 0.5
avmp15 = 0.5 , 0.5 , 0.5
avmp16 = 0.5 , 0.5 , 0.5

cloud_h_min=1000.0
cloud_h_max=1100.0

cloud_color = 1.0, 1.0, 1.0

toonDirType = Camera
toonDirBackBright = 1.0
toonDirElevation = 0.1
toonDirPntSptRatio = 0.0
toonDirLightScaleVal = 0.333;
toonDirInOutMin = 0.6
toonIBLScaleVal = 0.28;
toonShadowAlpha = 0.02;
toonCharShadowAlpha = 0.02;
toonCharShadowMin = 0.46;
toonOutlineWidth = 2.3
toonOutlineMaxWidthPixelCoverage = 11.5;
toonOutlineDispOffPixelCoverage = 1.0;
toonRimDirAngleX = 13.40
toonRimDirAngleY = -11.90

rim_color = 1.0, 1.0, 1.0
rim_intensity = 3.0

iblDirectLightIntensity = 1.0
iblSkyIntensity = 1.5
iblBlendBetweenFrame = 30

skyToneDirLightIntensity = 0.2
skyToneAmbientIntensity = 0.32

tssao = on
tssaoRadius = 1.0
tssaoIntensityMul = 1.0
tssaoIntensityPow = 0.16
tssaoOutputAO = 0.35
tssaoPostBlurSharpness = 0.55
tssaoLuminanceCorrection = 0.3
tssaoSelectiveFiltering = on
tssaoWeakenRatio = 0.8

ssr = on
ssrIntensity = 1.0
ssrShinessFade = 0.8
ssrGroundness = 0.73
ssrFadeSec = 5.0

shadowCloud = on
shadowCloudStr = 0.8
shadowCloudSize = 300
shadowCloudScrollDir = 150.0
shadowCloudScrollSpeed = 6.0

shadowRaytraceDistance = 0.15
shadowRaytracePitch = 0.0

tmaa=on
tmaaSharpness_0 = 0.4
tmaaSharpness_1 = 0.6
tmaaSharpness_2 = 0.6
tmaaSharpness_3 = 0.72
tmaaSharpness_4 = 0.8
tmaaSharpness_5 = 0.0
tmaaSharpness_Hnd_0 = 1.2
tmaaSharpness_Hnd_1 = 1.1
tmaaSharpness_Hnd_2 = 1.1
tmaaSharpness_Hnd_3 = 1.12
tmaaSharpness_Hnd_4 = 1.2
tmaaSharpness_Hnd_5 = 1.3
tmaaBlendDefault = 0.05
tmaaBlendPBR = 0.0
tmaaBlendMPF = 0.3
tmaaBlendToon = 0.05
tmaaNewUpScale=on

shwCharParm = 17.92;
shwHalfLamParm = 1.0;

wetMaxShiness = 0.5
wetDarkness = 0.48
wetShinessScale = 0.6
wetToInsideFrame = 10
wetToOutsideFrame = 20

TransReduction = on
trans_red_sclX = 0.5
trans_red_sclY = 0.5

blur2=off
blur2Str = 1.0
blur2Sub = 0.2
blur2ObjScale = 0.65
blur2CameraScale = 0.8
blur2BlurRange = 0.7
blur2PixelRange = 20.0
blur2HLV = on

gpucount=64

leafSpecColMinShiness = 0.1
leafSpecColMaxShiness = 0.4
leafSpecColRatio = 0.85
This was super helpful thanks.

Something I noticed was that the bloom in the game looked like it was still being rendered at 720p resolution. I fiddled with some settings and making these changes fixes the low resolution bloom (and possibly other effects that rely on resolution):

red_sclX=2.5
red_sclY=2.5
red_hdsclX=2.5
red_hdsclY=2.5

red_Auto=off

My guess is that red_Auto controls the dynamic resolution scaling, whereas the other variables control the base resolution. I also haven't played around enough with it yet to know if the game will revert to lower resolutions at some point, or if it breaks anything so ymmv.
 

KnightsMetal

Member
Newcomer
Joined
Feb 14, 2021
Messages
23
Trophies
0
Age
26
XP
593
Country
United States
This was super helpful thanks.

Something I noticed was that the bloom in the game looked like it was still being rendered at 720p resolution. I fiddled with some settings and making these changes fixes the low resolution bloom (and possibly other effects that rely on resolution):

red_sclX=2.5
red_sclY=2.5
red_hdsclX=2.5
red_hdsclY=2.5

red_Auto=off

My guess is that red_Auto controls the dynamic resolution scaling, whereas the other variables control the base resolution. I also haven't played around enough with it yet to know if the game will revert to lower resolutions at some point, or if it breaks anything so ymmv.
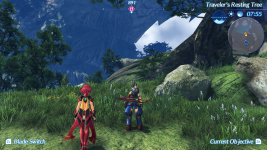
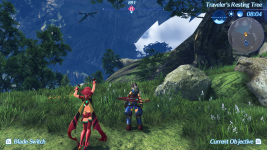
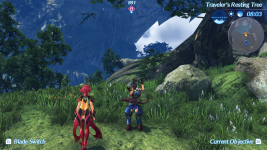
just tried your setting. interesting, 720p is less blocky now, transparency is less grainy/noisy, and the grass is different. Also red_Auto does control dynamic resolution, its what I originally used to turn it off, it does nothing on XCDE though.
ryujinx_capture_2022-02-06_21-30-02.png
 

Attachments

  • ryujinx_capture_2022-02-06_21-31-34.png
    ryujinx_capture_2022-02-06_21-31-34.png
    1.8 MB · Views: 333
  • ryujinx_capture_2022-02-06_21-31-43.png
    ryujinx_capture_2022-02-06_21-31-43.png
    1.8 MB · Views: 261
  • ryujinx_capture_2022-02-06_21-36-54.png
    ryujinx_capture_2022-02-06_21-36-54.png
    1.7 MB · Views: 241

cobjak

Well-Known Member
Member
Joined
Jan 16, 2019
Messages
278
Trophies
0
Age
31
XP
552
Country
France
Im planning to replay this game and I wonder whats the best presets right now for docked?
Go to middle of page 19, I posted my settings that I made by mixing all best settings I found on this thread and the xenoblade chronicles 1 thread!

You will have best quality in docked mod and handled, the only thing you need is overclock 1600mz and 480 (gpu I think I don't remember well) if you don't overclock the game will be 20fps so very slow 50% of the time
 
  • Like
Reactions: Nikoru

rsc-pl

Well-Known Member
Member
Joined
Jul 9, 2014
Messages
209
Trophies
0
XP
784
Country
Poland
Go to middle of page 19, I posted my settings that I made by mixing all best settings I found on this thread and the xenoblade chronicles 1 thread!

You will have best quality in docked mod and handled, the only thing you need is overclock 1600mz and 480 (gpu I think I don't remember well) if you don't overclock the game will be 20fps so very slow 50% of the time
Is it compatible with original Japanese version or only western one?
 
  • Like
Reactions: cobjak

Exclesa

Member
Newcomer
Joined
Jul 1, 2020
Messages
5
Trophies
0
Age
29
XP
95
Country
United States
For users of the Yuzu PC emulator. This guide allows user to completely disable resolution downscaling in the game, which improves the quality of the visuals a lot. This is needed even if Yuzu is set to higher resolution scaling (like 2x, 3x, etc.) due to specific quirks associated with this particular game, otherwise ingame resolution will be lower than the emulator indicates. Note that in fixing the resolution of the game to be a proper higher value, this method has higher system requirements requiring a good CPU and good GPU.

Please refer to my post #374 on the last page which has the best configuration settings for PC emulation at 2x resolution setting (1440p). That post was written for Ryujinx, however for Yuzu the only difference is where the configuration files go. Read below.

STEP 1.
Go to first page and first post of this thread. Download Next Method. Open Xenoblade2Base.zip. Inside open Raw Image folder. Then open Max 720p folder. Look inside here for the files called: D007651BC7C6A51ED7E8F463E02AC2EF.ips and lib_nx.ini
Somewhere on your computer, create a folder called XB2Temp.
Inside create these various sub-folders and copy the files there:
XB2Temp\exefs\Xenoblade2Graphics\D007651BC7C6A51ED7E8F463E02AC2EF.ips
XB2Temp\romfs\monolib\shader\lib_nx.ini
XB2Temp\romfs\stream\dumpini\lib_nx.ini


STEP 2.
Open the files lib_nx.ini (for example with Windows Notepad program) and completely replace the text there with the configuration settings I have in post #374.

STEP 3.
Create a fresh local installation of Yuzu.
To do this, download a new copy of Yuzu, extract it to a folder, then inside the Yuzu folder manually create a folder called:
user
After that, start Yuzu for the first time, and start Xenoblade 2 with DLCs installed, until you reach the title screen. Then, quit the game.

STEP 4.
Now in the Yuzu installation folder it will have automatically created for you these sub-folders:
user\sdmc\atmosphere\contents
Inside this contents sub-folder you will see a bunch of folders with a bunch of numbers, each number is the ID of either the base game or one of the DLCs. For example one folder could be something like this: user\sdmc\atmosphere\contents\0100E95004039004 could be one of the numbered folders among various

The exact folder numbers will vary and only some folders will work. So what you do is, copy+paste the contents from inside XB2Temp into one of those numbered folders (don't copy XB2Temp itself, only copy the stuff inside it).

Repeat this process, copying the contents from inside XB2Temp to all the numbered folders.

When that is done and you start the game again, it should have increased clarity because it will be actually rendering at HD resolution properly (no more downscaling) and without unnecessary blurring effects (except TMAA which remains engaged to reduce aggressive pixelation). Make sure emulator is running in docked configuration. I recommend 2x resolution graphics setting.
I followed up until Step 4, I checked the Yuzu directory and did not see any subfolders in the user folder i manually created. Do you absolutely have to download and install a brand new fresh copy of Yuzu? You can't use an existing installation?
 

DutchyDutch

COPYRIGHT LOLOLOLOL
Member
Joined
Nov 16, 2014
Messages
954
Trophies
0
Age
24
XP
862
Country
Netherlands
I'm trying to get this game look as good as possible in portable mode and am willing to OC, I'm confused by which profile I'd have to use for that though. Does anyone know?
 
  • Like
Reactions: cobjak

cobjak

Well-Known Member
Member
Joined
Jan 16, 2019
Messages
278
Trophies
0
Age
31
XP
552
Country
France
I'm trying to get this game look as good as possible in portable mode and am willing to OC, I'm confused by which profile I'd have to use for that though. Does anyone know?

Follow the author"s instruction page 1 and then replace the settings text by mine page 19! Juste overclock mem 1400 mhz and gpu to 460mhz
 

cobjak

Well-Known Member
Member
Joined
Jan 16, 2019
Messages
278
Trophies
0
Age
31
XP
552
Country
France
Gotcha, so no CPU overclock then?

And also, which OC would you recommend for Docked?

No cpu for me and got a stable 30fps et very very very good quality and resolution compare to the poor original one!

And those settings was for docked mode already, I played few minutes handled with the same settings and it worked

(see the pics, some are docked some handled)
 

Attachments

  • 2022012318035900-4CBEE39065EC88984BABA68A511DDD19.jpg
    2022012318035900-4CBEE39065EC88984BABA68A511DDD19.jpg
    440.7 KB · Views: 231
  • 2022012316343700-4CBEE39065EC88984BABA68A511DDD19.jpg
    2022012316343700-4CBEE39065EC88984BABA68A511DDD19.jpg
    391.3 KB · Views: 317
  • 2022012316175200-4CBEE39065EC88984BABA68A511DDD19.jpg
    2022012316175200-4CBEE39065EC88984BABA68A511DDD19.jpg
    275.7 KB · Views: 335
  • 2022012316170500-4CBEE39065EC88984BABA68A511DDD19.jpg
    2022012316170500-4CBEE39065EC88984BABA68A511DDD19.jpg
    391.4 KB · Views: 261
  • 2022012110554400-4CBEE39065EC88984BABA68A511DDD19.jpg
    2022012110554400-4CBEE39065EC88984BABA68A511DDD19.jpg
    319.4 KB · Views: 334
  • 2022010620172200-4CBEE39065EC88984BABA68A511DDD19.jpg
    2022010620172200-4CBEE39065EC88984BABA68A511DDD19.jpg
    423 KB · Views: 312

Gnostalgia

Well-Known Member
Newcomer
Joined
Feb 22, 2022
Messages
49
Trophies
0
Age
35
Location
Virginia
XP
237
Country
United States
I followed up until Step 4, I checked the Yuzu directory and did not see any subfolders in the user folder i manually created. Do you absolutely have to download and install a brand new fresh copy of Yuzu? You can't use an existing installation?
(This was originally a double post so I am editing it. Look below)
 

Gnostalgia

Well-Known Member
Newcomer
Joined
Feb 22, 2022
Messages
49
Trophies
0
Age
35
Location
Virginia
XP
237
Country
United States
I followed up until Step 4, I checked the Yuzu directory and did not see any subfolders in the user folder i manually created. Do you absolutely have to download and install a brand new fresh copy of Yuzu? You can't use an existing installation?
You don't need a fresh install. Just head into the appropriate location to put the files in (for example, I ONLY use 1 folder (not all as instructed) so whenever I make changes I put them in

C:\Users\(username)\AppData\Roaming\yuzu\sdmc\atmosphere\contents\0100E95004039003

and it works just like that.
 

piyosuke

New Member
Newbie
Joined
Feb 24, 2022
Messages
1
Trophies
0
Location
Hokkaido
XP
57
Country
Japan
I tried 60fps cheat code on a console with a graphics mod, I was surprised to see how smoothly it worked !
masagrator, could you make a code for JPN ver too ?
 

terrifyingRei

New Member
Newbie
Joined
Feb 28, 2022
Messages
1
Trophies
0
Age
31
Location
Michigan
XP
23
Country
United States
So I'm trying to emulate this game using the graphics settings provided in this thread, but the explosion effects come out all broken, even when I don't use the custom settings. Graphics accuracy is currently set to extreme. Googling this issue only yields a result on github stating the solution as "DMAEngine: Introduce Accelerate DMA". I'm not sure what to do with this or how to apply it.

A screenshot of the issue from the github thread:
 

Attachments

  • 108620326-e4df5c00-746e-11eb-8c82-d4ee12037d9b.png
    108620326-e4df5c00-746e-11eb-8c82-d4ee12037d9b.png
    5.3 MB · Views: 274

Gnostalgia

Well-Known Member
Newcomer
Joined
Feb 22, 2022
Messages
49
Trophies
0
Age
35
Location
Virginia
XP
237
Country
United States
So I'm trying to emulate this game using the graphics settings provided in this thread, but the explosion effects come out all broken, even when I don't use the custom settings. Graphics accuracy is currently set to extreme. Googling this issue only yields a result on github stating the solution as "DMAEngine: Introduce Accelerate DMA". I'm not sure what to do with this or how to apply it.

A screenshot of the issue from the github thread:
I only saw this issue during that scene tbh. Although, afterwards, I found out that I needed to set GPU Accuracy to "High" instead of "Extreme" because of weird facial animations (the eyes glitch. Sometimes rex only closes 1 eye, sometimes pyra doesn't close ANY eyes in some cutscenes if the accuracy is on Extreme or Normal). It might fix the problem with this scene but again, I had the same issue and haven't seen it afterwards
 
  • Like
Reactions: terrifyingRei

QuestionSleep1984

Member
Newcomer
Joined
Jun 10, 2019
Messages
19
Trophies
0
Age
27
Location
Inside of the Great Deku Tree
XP
500
Country
Mexico
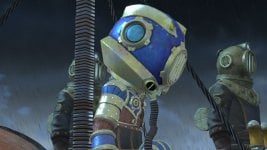
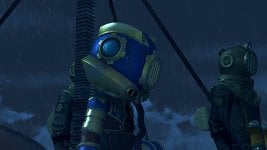
Anyone know why the mod looks a little bit washed (the water, the clouds and the rain)? I've tried with several config files but with all of them it looks the same.
 

Attachments

  • modded-0.jpg
    modded-0.jpg
    185.4 KB · Views: 289
  • unmodded-0.jpg
    unmodded-0.jpg
    158.7 KB · Views: 293
  • modded-1.jpg
    modded-1.jpg
    179.6 KB · Views: 289
  • unmodded-1.jpg
    unmodded-1.jpg
    140.8 KB · Views: 314

Medel87

Well-Known Member
Member
Joined
Dec 18, 2021
Messages
174
Trophies
0
Age
37
XP
1,025
Country
Spain
I downgraded to 2.0.2 to make this works, but I have problem with dlcs, maybe dlcs should be downgraded too to the version when 2.0.2 was released? Someone can help me with this please?

Edit: Problem solved, thanks anyway
 
Last edited by Medel87,

Site & Scene News

Popular threads in this forum

General chit-chat
Help Users
  • Xdqwerty
    what are you looking at?
  • BakerMan
    I rather enjoy a life of taking it easy. I haven't reached that life yet though.
    SylverReZ @ SylverReZ: @AncientBoi, https://www.youtube.com/watch?v=7jUWpmU-X8k