Homebrew How can i restore my Nand dump on my DSi?

ummm

Well-Known Member
OP
Newcomer
Joined
Jan 10, 2020
Messages
69
Trophies
0
Age
43
XP
305
Country
Mexico
i have a BIG problem guys,
you see.... In late 2019, I make a nand dump of the original state of my DSi using fwtool 2.0.0,
In january of this year, i formatted my DSi, since i wanted to restore my nand, i search for a guide of how to do it, i found one page that says that a old version of fwtool can restore a nand dump,
so i tried and i use my original dump (the name of the dump is:Nand.bin) but fwtool says me that it needs to be rename like:dsi_nand.bin,
so i rename it and when i select the restore nand funtion now its saying that the size of my DSi nand and my nand dump are not the same and says: operation aborted.

I dont know what else can i do, i heard that i need to hardmode my dsi, but i dont know is it safe because of this questions:

1. Since fwtool says me that the size of my DSi nand and my nand dump are not the same, if i restore my nand dump with a hardmode, it isnt going to brick my dsi because of this?

2. i dont know how to do a hardmode, can somebody explain what i have to do?

thanks for your answers, i would really like some help please!
 

Pk11

A catgirl with a DSi
Member
Joined
Jun 26, 2019
Messages
1,285
Trophies
1
Age
22
Location
米国
Website
xn--rck9c.xn--tckwe
XP
3,906
Country
United States
i have a BIG problem guys,
you see.... In late 2019, I make a nand dump of the original state of my DSi using fwtool 2.0.0,
In january of this year, i formatted my DSi, since i wanted to restore my nand, i search for a guide of how to do it, i found one page that says that a old version of fwtool can restore a nand dump,
so i tried and i use my original dump (the name of the dump is:Nand.bin) but fwtool says me that it needs to be rename like:dsi_nand.bin,
so i rename it and when i select the restore nand funtion now its saying that the size of my DSi nand and my nand dump are not the same and says: operation aborted.

I dont know what else can i do, i heard that i need to hardmode my dsi, but i dont know is it safe because of this questions:

1. Since fwtool says me that the size of my DSi nand and my nand dump are not the same, if i restore my nand dump with a hardmode, it isnt going to brick my dsi because of this?

2. i dont know how to do a hardmode, can somebody explain what i have to do?

thanks for your answers, i would really like some help please!
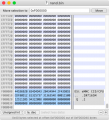
If you really want to restore the backup you likely just need to remove the no$gba footer from the end of the file (everything after offset 0xF000000), but I strongly suggest against doing so, flashing the nand is extremely dangerous as even if everything goes correctly the DSi's nand is super crappy quality and can brick after just flashing a couple times...

no$gba footer:
upload_2020-3-5_16-1-34.png

Why is it that you want to flash a backup? If its just to remove unlaunch or something then using the unlaunch installer is a much safer way to do so.
 

ummm

Well-Known Member
OP
Newcomer
Joined
Jan 10, 2020
Messages
69
Trophies
0
Age
43
XP
305
Country
Mexico
If you really want to restore the backup you likely just need to remove the no$gba footer from the end of the file (everything after offset 0xF000000), but I strongly suggest against doing so, flashing the nand is extremely dangerous as even if everything goes correctly the DSi's nand is super crappy quality and can brick after just flashing a couple times...

no$gba footer:
View attachment 198642

Why is it that you want to flash a backup? If its just to remove unlaunch or something then using the unlaunch installer is a much safer way to do so.

sorry, i am a complete noob in dsi hacking, what is no$gba and no$gba footer, they are the same or diferent and what i do after that?


i want to flash my nand dump because i have half of my childhood in that nand dump, i have like 20000 PHOTOS in there (IM SERIOUS THE DSI CAMERA APP WAS MY DAILY CAMERA FOR TAKING PHOTOS, SPECIAL PHOTOS), i formatted my dsi because i wanted Flipnote studio back because i had it once but i dont know if i deleted it or it just disappear.
i dont want to install flipnote studio in twilight menu or hiya CFW, i want to be in my main system.
 

Pk11

A catgirl with a DSi
Member
Joined
Jun 26, 2019
Messages
1,285
Trophies
1
Age
22
Location
米国
Website
xn--rck9c.xn--tckwe
XP
3,906
Country
United States
sorry, i am a complete noob in dsi hacking, what is no$gba and no$gba footer, they are the same or diferent and what i do after that?
no$gba is a GBA / DS / DSi emulator for PC, the no$gba footer is the area of the nand backup I had selected in the screenshot in my previous post.
Edit, figured I should elaborate more on this: The footer contains information about your console which I think are needed to decrypt the backup, its called the no$gba footer since no$gba requires it to exist and in that style, so fwTool 2.0 decided to do it like that is why you'd have one even without having used no$gba.
i want to flash my nand dump because i have half of my childhood in that nand dump, i have like 20000 PHOTOS in there (IM SERIOUS THE DSI CAMERA APP WAS MY DAILY CAMERA FOR TAKING PHOTOS, SPECIAL PHOTOS), i formatted my dsi because i wanted Flipnote studio back because i had it once but i dont know if i deleted it or it just disappear.
You can use ninfs to mount your nand backup on your computer to extract the images.
Here's a quick tutorial on roughly how you'd do it, sorry if anything's a bit wrong for non-macOS but it should be close enough:
  • Install Python 3 if you don't already have it
  • Install ninfs using the instructions for your system on the GitHub linked above
  • Run "ninfs" in the terminal (at least on macOS that'll launch it, you might need to do "python3 -m ninfs gui" or so)
  • Select "Nintendo DSi NAND backup" from the dropdown
  • For "File" select your nand.bin
  • For "Mount Point" select an empty folder
  • Click "Mount"
  • Mount "twl_photo.img", it'll probably either be in the folder you selected as Mount Point or show up as a mount drive like a flash drive, macOS does both. On macOS you can double click, on windows I think OSFMount can mount the .img, or any other tool for mounting .img files should work, I don't think windows comes with one(?) (Don't quote me on that though), for Linux I'm not sure either but just look up how to mount a .img if you don't know how
  • Your images will be at "photo/DCIM/100NIN##/HNI_####.jpg" (# means a number)
i dont want to install flipnote studio in twilight menu or hiya CFW, i want to be in my main system.
Did you download flipnote studio or was it preinstalled? If you downloaded it then you'll be able to redownload it from the store, if it was preinstalled then I guess if you are sure you want to take the risk (even if you do everything perfectly there is a very real chance it will brick) then open your nand in a hex editor, delete everything from offset 0xF000000 to the end, and flash with fwTool 1.4
 
Last edited by Pk11,

ummm

Well-Known Member
OP
Newcomer
Joined
Jan 10, 2020
Messages
69
Trophies
0
Age
43
XP
305
Country
Mexico
no$gba is a GBA / DS / DSi emulator for PC, the no$gba footer is the area of the nand backup I had selected in the screenshot in my previous post.
Edit, figured I should elaborate more on this: The footer contains information about your console which I think are needed to decrypt the backup, its called the no$gba footer since no$gba requires it to exist and in that style, so fwTool 2.0 decided to do it like that is why you'd have one even without having used no$gba.

You can use ninfs to mount your nand backup on your computer to extract the images.
Here's a quick tutorial on roughly how you'd do it, sorry if anything's a bit wrong for non-macOS but it should be close enough:
  • Install Python 3 if you don't already have it
  • Install ninfs using the instructions for your system on the GitHub linked above
  • Run "ninfs" in the terminal (at least on macOS that'll launch it, you might need to do "python3 -m ninfs gui" or so)
  • Select "Nintendo DSi NAND backup" from the dropdown
  • For "File" select your nand.bin
  • For "Mount Point" select an empty folder
  • Click "Mount"
  • Mount "twl_photo.img", it'll probably either be in the folder you selected as Mount Point or show up as a mount drive like a flash drive, macOS does both. On macOS you can double click, on windows I think OSFMount can mount the .img, or any other tool for mounting .img files should work, I don't think windows comes with one(?) (Don't quote me on that though), for Linux I'm not sure either but just look up how to mount a .img if you don't know how
  • Your images will be at "photo/DCIM/100NIN##/HNI_####.jpg" (# means a number)

Did you download flipnote studio or was it preinstalled? If you downloaded it then you'll be able to redownload it from the store, if it was preinstalled then I guess if you are sure you want to take the risk (even if you do everything perfectly there is a very real chance it will brick) then open your nand in a hex editor, delete everything from offset 0xF000000 to the end, and flash with fwTool 1.4


Thank you very much!!!!!!! you save a half of my childhood, I recover my original Nand, nothing wrong happended
here, look!:
WIN_20200306_15_09_27_Pro.jpg WIN_20200306_15_11_01_Pro.jpg


unfortunately,i mount the TWL photo.img and when i tried to enter the .img, windows says me: this image can be damage or corrupted
 

Pk11

A catgirl with a DSi
Member
Joined
Jun 26, 2019
Messages
1,285
Trophies
1
Age
22
Location
米国
Website
xn--rck9c.xn--tckwe
XP
3,906
Country
United States
Thank you very much!!!!!!! you save a half of my childhood, I recover my original Nand, nothing wrong happended
here, look!:
View attachment 198763 View attachment 198764
Ah nice :yay:
Try not to put yourself in a situation where you'll want to restore a backup again though as the nand will have some heavy wear after that restore :ha:

unfortunately,i mount the TWL photo.img and when i tried to enter the .img, windows says me: this image can be damage or corrupted
Ah, I checked on Windows and yeah you'll need to use OSFMount if you want to access them on windows: (continuing from my "Mount "twl_photo.img"" step before)
  1. Install OSFMount if you haven't already and open it (Note: I have v2.0.1001, so things might be a bit different if you get v3, v2 used to be needed for HiyaCFW installation but v3 should work too)
  2. Click "Mount new..."
  3. Click the "..." to the right of the "Image file" box
  4. Browse to where you mounted your nand and select "twl_photo.img"
  5. Click "OK" (If you want you can choose a custom drive letter first, otherwise just note which one its using, probably D or E)
  6. It'll now be mounted, images will be at "X:\photo\DCIM|\100NIN##\HNI_####.jpg" (# means a number, X is the drive letter)
 

Site & Scene News

Popular threads in this forum

General chit-chat
Help Users
    BigOnYa @ BigOnYa: I haven't played my Switch n a month or so, just been playing Xbox, and just picked to play lil...