Tutorial
Updated
How to add exFAT support to the Switch Console on any OFW without update!
- Now updated with "TegraRcmSmash" for PC users!
- Added support for 3.0.1 and 3.0.2
- HacDiskMount 1.0.5-5
In this tutorial we will add the exFAT support to "any official firmware" without the need of update. *(the only OFWs which has not been tested yet are 1.0.0 & 2.0.0).
"Zelda" seems to have the exFAT driver inside the "package2" when extracted, although no one have try it yet the same method was successfully done on OFWs 3.0.1 & 3.0.2. If you have a console with OFW 1.0.0 you can give it a try, once you obtained a good dump of your NAND.
*Theoretically, there should be no risk of getting ban using this method (Installing the exFAT driver) because it work as if we update the Switch console offline using an actual purchased game cartridge. However, During this process the NAND will be modified. It is recommended to follow the instructions with caution and always have a backup of the NAND before any attempt to modify it. Keep in mind that there is a possibility that Nintendo can detect such a modification and may ban your console. Use under your own discretion!
You can choose whatever method you feel comfortable with to send the payload/s. The methods I am going to use to send the payload/s are two of the most convent ways for PC & Android users.
Before I start the the exFAT driver installation section I will help to show some of the new users one of the methods they can use to dump the NAND. I will cover some basic information on the NAND dump topic because there are plenty threads that did a great job explaining the different methods to acquire it. Like I mentioned earlier, I am going to use a PC Running Windows and/or an android device to dump the NAND, extract the Switch BIS keys, then get the Switch ready to install exFAT driver. *If you were an advanced user, or a user who dumped their NAND already, proceed to part 2 of this thread, or be patient please. No one was brought to life as a "Cyber-Savvy"
Tools, materials & software/App needed:
- A USB type C to USB type A for the PC method/A USB type C to USB type A/C or micro USB. Depending on your Android device (for the Android Method ).
- MicroSD/SDCX/SDHC card Formatted into exFAT or FAT32 at least 8GB, preferably >32 GB.
- A tool of your choose to enter the RCM mode (Tegra Recovery Mode).
- Switch encryption keys (Not provided!) You can search for it. It's there, believe me!
- Hekate - CTCaer mod v4 (Thanks to @CTCaer
https://github.com/CTCaer/hekate/releases/download/v4.0/hekate_ctcaer_4.0.zip
*Added Payload launching. Supports: All current CFW bootloaders, Linux chainloading and payload tools.
- biskeydump: (Dumps all your Switch BIS keys for eMMC contents decryption, to be used as a fusee payload)
https://files.sshnuke.net/biskeydumpv6.zip
- HacDiskMount : Allows to open Switch eMMC RawNand dumps (and physical devices) and lets you perform operations on the individual partitions within, such as dump/restore from file, or mount them as a drive letter in Windows (with transparent crypto performed provided you have your BIS keys)
https://files.sshnuke.net/HacDiskMount1055.zip
- parcheador.rar
https://mega.nz/#!kE9RHYiY!TURDnr8Mond2NBboHy5qZl-XbhDISYoaIEIBjN4Q-Hk
- memloader: (Parses ini files from microsd root and loads/decompresses/boots the appropriate binaries on the AArch64 CPU of the Nintendo Switch.
https://files.sshnuke.net/memloaderv2.zip
- TegraRcmSmash
https://files.sshnuke.net/TegraRcmSmash1213.zip
Or
-TegraRcmGUI_v2.2
- Installer
https://github.com/eliboa/TegraRcmGUI/releases/download/2.2/TegraRcmGUI_v2.2_installer.msi
- Portable
https://github.com/eliboa/TegraRcmGUI/releases/download/2.2/TegraRcmGUI_v2.2_portable.zip
- *zadig-2.3.rar (if needed)
https://zadig.akeo.ie/downloads/zadig-2.3.exe
- A game dump or a physical game cartridge and a method to dump it. The game dump/cartridge has to have the same update as your console. i.e the game has the same update as your Switch console OFW. To help channeling your search here's some of them:
The Legend of Zelda Breath of the Wild/ Mario Kart 8 Deluxe/ Disgaea 5/ Ultra Streat Fighter II (OFW 1.0.0)
Dragon Ball Xenoverse 2/ Mario plus Rabbids Kingdom Battle/Cars 3 Driven to Win (OFW 2.1.0)
Splatoon 2/ Sonic Forces (OFW 2.3.0)
Pokemon Tournament DX (OFW 3.0)
Batman The Telltale Series/ Syberia 2/ The Elder Scrolls V. Skyrim (OFW 3.0.1)
Attack on Titans 2/ Xenoblade Chronicles 2 (OFW 3.0.2)
Bayonetta 2/ Gal Gun 2 (OFW 4.0.1)
Kirby Star Allies (OFW 4.1.0)
Goggling NSW or BigBlueBox will put you in the right path.
*These are not they only games you can use. You can use any game as long it has the same update your Switch console has.
-If you are going to dump the NAND and install the exFAT driver download everything.
- If you are just need to install the exFAT driver just download the HacDiskMount, parcheador.rar, Memloader, TegraRcmSmash1202.zip, and zadig-2.3.rar
*Additionally, if you are going to use an Android device you are going to need to download NXLoader APK too:
- NXLoader APK
https://github.com/DavidBuchanan314/NXLoader/releases/download/alpha-0.3/NXLoader-v0.3.apk
Before we start, I am assuming that you know how to enter to the RCM (recovery/rescue) mode using one of the following methods with a 3D printed jig, paper clip, with cable/wire or etc...
1. Dumping the NAND
Although there are two ways to dump the NAND; Whole & Partial. They both will dump the whole NAND.
1-(Whole) Using a Micro SD/SDXC/SDHC card 32GB or bigger formatted to exFAT. This will dump the whole physical partition as one big file.
(* Some 32GB cards have less available free space than 29.1 GiB, so they may trigger partial dumping).
2-(Partial) Using a Micro SD/SDXC/SDHC card at least 8GB formatted toFAT32. This will trigger the automatic partial dumping.
In this mode it will start dumping in 2GB parts or in 1GB if you have 8GB and smaller card. Download the attached file "partial.idx.txt" and rename it to "partial.idx" then place it on the root of your Micro SD/SDXC/SDHC card this will force the partial dumping to restart from the last section and not to start from the begging. Safely remove the Micro SD/SDXC/SDHC card, turn the Nintendo Switch, then insert it into the console.
a. Using a PC:
On the PC: Unplug all USB devices connected, if any. Put the Switch console into the RCM mode. Plug it into your PC. Go to the "Device manager" in Windows, it will show it as "APX" under Other devices. Download "zadig-2.3.rar" from the link provided. Extract and run it.
From the device list, where is the green arrow is pointing scroll down (twice) until you see "libusbK (v3.0.7.0)". Click Install Driver button. Go back to Device manger, it should show as "libusbK USB" and when you click on it will show "APK"

Download "TegraRcmSmash", "Hekate", and "biskeydump" from the provided links. Create a new folder, name it "Tegra" and extract all three into the folder. Depending on your Windows system choose Win32 or X64, extract the "TegraRcmSmash.exe" into the "Tegra" folder.
With the Switch console forced into the RCM and connected to the PC drag "Hekate" and drop it into the "TegraRcmSmash.exe" this will activate the RCM and send the "Hekate" payload to the Switch console.
On the Switch Console: Under the "hekate ctcaer" you will have the following options:
[hekate - ipl]
Launch firmware
-Tools...
-Console info...
-Reboot (Normal)
-Reboot (RCM)
-Power OFF
-About
Move up and down using the Vol up & down button, and select the "Tools" by pressing the power button.
At this time the "Tools" window will show you the following options:
[Tools]
-Back
-----------------------------------------------Full------------------------------------------------------
-DUMP RAW eMMC (NAND files and every thing else in the memory, approximately 29.1 GB)
-DUMP eMMC BOOT (physical eMMC partitions BOOT0 and BOOT1, approximately 9 MB)
-----------------------------------------GP Partitions------------------------------------------------
-DUMP eMMC SYS (Contain the imported NAND files, approximately 2.6 GB)
-DUMP eMMC USER
-----------------------------------------------Misc-------------------------------------------------------
-DUMP Package1
------------------------------------------Dangerous----------------------------------------------------
AutoRCM
To prevent any issues, start with "DUMP eMMC SYS" its only 2.6 GB and will take less than 6 minutes to dump. Once done, dump "DUMP eMMC BOOT" You can use them as a fallback to un-break/fix the console if anything went wrong. These two dumps are a MUST to have, even if you wasn't planing on dump your whole NAND.
If during dumping the "RAW eMMC" you got "Fatal error (1) while writing to SD card XX% time taken XXXX seconds" immediately try to "Dump RAW eMMC" again (by pressing Vol up or down) and it will continue from the last part it was trying to.
If this doesn't work, move the already dumped parts to your computer, without moving the "partial.idx" file and try again. Again it will re-try to dump the the last part all over again.
Once the "DUMP RAW eMMC" finished. You can press Vol button choose back, back again, then power off the Console.
Create a new folder, name it "NAND" and move all the file we just dump. If you used the "Partial" dump, download the attached "joiner_scripts_for_windows_linux_macos.zip" file and extracted into the same folder.
Select all the "rawnand.bin.XX" files, drag and drop them into the "join_15_2GBparts_windows.bat" file if using windows or "join_15_2GBparts_linux_macosx" if using linux.
Wait until the process is 100% Then you will have a "rawnand.bin" file (29.1GB, approximate) keep this file and back it up somewhere safe.
On the Switch Console: Force the console into RCM mode, using the USB cable plug it to the PC.
On the PC: Open the "Tegra" folder, select the "biskeydump.bin" and drag it into the "TegraRcmSmash.exe" this will launch the biskeydump with all your keys on the Switch console screen. If it didn't show for any reason just turn off the Switch console and reboot to the RCM mode while connected to the PC device, re-select the "biskeydump.bin", drag it into the "TegraRcmSmash.exe" and that should fix it. Take pictures, write or scan the QR Code and keep it somewhere safe.

If you want to make sure your NAND dump was good.
*Once you have acquired the "rawNAND.bin" and the "BIS Keys" you can open the HacDiskMount> File>Open file>Choose the "rawNAND.bin"
Double click on PRODINFO> enter BIS KEY 0 (crypt) and (tweak) then click Test. you should get "OK! Entropy:

b. Using an Android device:
On the Android device: After downloading all the payloads from the provided links install the NXLoader.APK
launch the NXLoader, press config button> select primary payload> locate "hekate ctcaer 1.6.bin" and load it.
On the Switch console: Force the console into the RCM mode. Once in the RCM mode you need to connect USB type C to type C/A/micro USB between the Switch and the Android device.
On the Android device: the NXLoader will bring a pop up window asking you to open the Loader when the device is connected, press "OK"
The NXLoader will show some "Logs" information stating that the device is connected and the payload was injected. At this time you can unplug the USB cable from both, the Console and the Android device.

On the Switch Console: Under "hekate" you will have the following options:
[hekate - ipl]
Launch firmware
-Tools...
-Console info...
-Reboot (Normal)
-Reboot (RCM)
-Power OFF
-About
Move up and down using the Vol up & down button, and select the "Tools" by pressing the power button.
At this time the "Tools" window will show you the following options:
[Tools]
-Back
-----------------------------------------------Full------------------------------------------------------
-DUMP RAW eMMC (NAND files and every thing else in the memory, approximately 29.1 GB)
-DUMP eMMC BOOT (physical eMMC partitions BOOT0 and BOOT1, approximately 9 MB)
-----------------------------------------GP Partitions------------------------------------------------
-DUMP eMMC SYS (Contain the imported NAND files, approximately 2.6 GB)
-DUMP eMMC USER
-----------------------------------------------Misc-------------------------------------------------------
-DUMP Package1
------------------------------------------Dangerous----------------------------------------------------
AutoRCM
To prevent any issues, start with "DUMP eMMC SYS" its only 2.6 GB and will take less than 6 minutes to dump. Once done, dump "DUMP eMMC BOOT" You can use them as a fallback to un-break the console if anything went wrong. These two dumps are a MUST to have, even if you wasn't planing on dump your whole NAND.
If during dumping the "RAW eMMC" you got "Fatal error (1) while writing to SD card XX% time taken XXXX seconds" immediately try to "Dump RAW eMMC" again (by pressing Vol up or down) and it will continue from the last part it was trying to.
If this doesn't work, move the already dumped parts to your computer, without moving the "partial.idx" file and try again. Again it will re-try to dump the the last part all over again.
Once the "DUMP RAW eMMC" finished. You can press Vol button choose back, back again, then power off the Console.
On the PC: Create a new folder, name it "NAND" and move all the file we just dump. If you used the "Partial" dump, download the attached "joiner_scripts_for_windows_linux_macos.zip" file and extracted into the same folder.
Select all the "rawnand.bin.XX" files, drag and drop them into the "join_15_2GBparts_windows.bat" file if using windows or "join_15_2GBparts_linux_macosx" if using linux.
Wait until the process is 100% Then you will have a "rawnand.bin" file (29.1GB, approximate) keep this file and back it up somewhere safe.
On the Android device: Open the NXLoader, locate the "biskeydump.bin" and load it.
On the Switch Console: Force the console into RCM mode, connect the USB cable between the Switch and the Android device. The Switch will launch biskeydump with all your keys printed on the Switch console screen. If it didn't show for any reason just turn off the Switch console and reboot it into to the RCM mode while connected to the Android device, and that should fix it. Take pictures, write or scan the QR Code and keep it somewhere safe.
If you want to make sure your NAND dump was good.
*Once you have acquired the "RAWNAND.bin" and the "BIS Keys" you can open the HacDiskMount> File>Open file>Choose the "RAWNAND.bin"
Double click on PRODINFO> enter BIS KEY 0 (crypt) and (tweak) then click Test. you should get "OK! Entropy:
2. Installing the exFAT Driver
a. Using a PC
On the PC: Download the "memloader" payload from the provide link. extract the zip files inside. copy the "memloader.bin" file into the "Tegra" folder. Copy the contains of the "sample" folder to the root of your Micro SD/SDXC/SDHC card insert the SD card into the switch while the console turned off.
On the Switch Console: Force the console into the RCM mode. connect to the PC using the USB cable.
On the PC: Open the "Tegra" folder, select the "memloader.bin" drag and drop it into the "TegraRcmSmash.exe" The memloader payload will show on the Switch console.
On the Switch Console: memeloader will show the following options:
-ums_sd.ini
-ums_emmc.ini
---go to USB command mode instead
Moving up and down using the Vol buttons, choose "ums_emmc.ini" by pressing power button, the Switch screen will go black. The Computer will detect new hardware
View attachment 125034
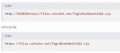
On the PC: Run "HacDiskMount" as administrator, Choose to open file> Choose "Physical Drive" option. Then select "Linux UMS disk 0" as shown in this image:

This will Load a new window with the Switch NAND partitions/files. Double-click on BCPKG2-1-Normal-Main and another window will pop up. Press browse under the "dump to file" option and choose where you want to save the"BCPKG2-1-Normal-Main" file. Then click start to dump the partition to a file. Once done keep an original copy of it somewhere safe.

Download "parcheador.rar" from the provided link, create a new folder call it "exFAT driver" then extract "parcheador" in it . Copy and paste a copy of the "BCPKG2-1-Normal-Main.bin" file we just extracted. Add an .XCI file of the game that match your switch console OFW. inside the "exFAT driver" Create a new .txt file and call it "keys.txt" you need to provide the following keys and add them in the exact order.

The keys must be in following format: master_key_00 = XXXXXXXXXX where X is the key. They are online. just search for them!

Once you have find the keys and write them inside the "keys.txt" file. Drag the .XCI file to the "parcheador.bat" file and wait for it to be done. At this time we just patched our "BCPKG2-1-Normal-Main.bin" file with the exFAT driver using the same OFW the Switch console is already on!

Go back to "HacDiskMount" one last time and click on the Browse button under the "Restore from file" option and choose the "BCPKG2-1-Normal-Main.bin" that we just patched and press start

Close the "HacDiskMount" app. Unplug the USB cable. turn off the Switch by pressing and holding the power button for 12 sec. Eject the Micro SD/SDXC/SDHC card and format it to exFAT (after copying all the important files). Reinsert the SD card in the Switch and enjoy the exFAT support!
b. Using an Android device:
On the PC: Download the "memloader" payload from the provide link. extract the zip files inside. copy the "memloader.bin" file and the contains of the "sample" folder to the root of your Micro SD/SDXC/SDHC card insert the SD card into the switch while the console turned off.
On the Android device: Load the NXLoader, locate the "memloader.bin" and load it.
On the Switch Console: Force the console into the RCM mode. connect the USB cable between the Switch and the Android device. "memloader" will show the following options:
-ums_sd.ini
-ums_emmc.ini
---go to USB command mode instead
Moving up and down usingthe Vol buttons, choose "ums_emmc.ini" by pressing power button, the Switch screen will go black. Unplug the USB cable from the Android device and plug it into the Computer while it is still connected to the Switch console. The Computer will detect new hardware

On the PC: Run "HacDiskMount" as administrator, Choose to open file> Choose "Physical Drive" option. Then select "Linux UMS disk 0" as shown in this image:
This will Load a new window with the Switch NAND partitions/files. Double-click on BCPKG2-1-Normal-Main and another window will pop up. Press browse under the "dump to file" option and choose where you want to save the"BCPKG2-1-Normal-Main" file. Then click start to dump the partition to a file. Once done keep an original copy of it somewhere save.
Download "parcheador.rar" from the provided link. Create a new folder call it "exFAT driver" then extract "parcheador" in it . Copy and paste a copy of the "BCPKG2-1-Normal-Main.bin" file we just extracted. Add an .XCI file of the game that match your switch console OFW. inside the "exFAT driver" Create a new .txt file and call it "keys.txt" You need to provide the following keys and add them in the exact order.
The keys must be in following format: master_key_00 = XXXXXXXXXX where X is the key. They are online. just search for them!
Once you have find the keys and write them inside the "keys.txt" file. Drag the .XCI file to the "parcheador.bat" file and wait for it to be done. At this time we just patched our "BCPKG2-1-Normal-Main.bin" file with the exFAT driver using the same OFW the Switch console is already on!
Go back to "HacDiskMount" one last time and click on the Browse button under the "Restore from file" option and choose the "BCPKG2-1-Normal-Main.bin" that we just patched and press start
Close the "HacDiskMount" app. Unplug the USB cable. turn off the Switch by pressing and holding the power button for 12 sec. Eject the Micro SD/SDXC/SDHC card and format it to exFAT (after copying all the important files). Reinsert the SD card in the Switch and enjoy the exFAT support!
Warning:
Don't forget your console into RCM. This will drain your battery without a cable. And because, it does not have a battery cuttoff, it will completely drain it.
If this happens, you should power of your console, and let it charge into normal mode (red battery icon top-left) for 20-30 minutes, to open. Better remove the sd card, if it has payloads/homebrew/eMMC files, because it will boot into Horizon OS.
Here's some additional information if someone want to know more about the NAND dump processes.
*Dump RAW eMMC (important!):
Let's you dump the whole general purpose partition from your Switch's eMMC. This includes Switch system and user files.
It's one of the 4 physical partitions that your eMMC has. The other are BOOT0, BOOT1 and RPMB
*DUMP RAW eMMC (NAND files and every thing else in the memory, approximately 29.1GB)
*Dump eMMC SYS: (uneeded if you already dumped the RAW eMMC): The General Purpose physical partition, contains several GPT partitions.
By using this option, you can dump all these partitions, except USER, as separate files.
*Dump eMMC USER) (uneeded if you already dumped the RAW eMMC):
As described above, this will dump the USER partition from your eMMC's General Purpose partition.
*Dump eMMC BOOT (important!): This will dump the physical eMMC partitions BOOT0 and BOOT1. These are needed to complete your eMMC full backup.
*AutoRCM (Dangerous!): The AutoRCM, also known as briccmii, it is based on @Reisyukaku AutoRCM v2 and it smartly corrupts the boot configuration in BOOT0 partition.
This allows the user to always boot/reboot into RCM, without the need of a jig.
Because it writes to the eMMC, it is considered a dangerous operation and must be used with caution and only if needed.
Warning: The various auto rcm solutions are incompatible between them.
That means, that if you used AutoRCM v2, you need to use the same again to restore it back. Not another solution.
*Reboot (normal): Reboot normally, without any mods and CFW
*Reboot (rcm): Reboot into Recovery mode again. Useful if you want to run another payload or you want to remove your sd card.
*Power off: Powers off the console. When this is used, it's better to remove any sd card with homebrew/CFW/eMMC files and reboot into Horizon OS.
Credits to!
 Special thanks to Team ReSwitched, @SciresM @SimonMKWii , @CTCaer , @rajkosto ,@Raugo , DavidBuchanan314, and for everyone who helped to make this possible!
 Attachments
Last edited by Finalxfantasy,