Tutorial
Updated
How to play Project Diva Dreamy Theater
Hello, everybody, this would be my first tutorial here, I'm a big fan of Project Diva Games, I've got almost all of them, one of the games I don't have, and also don't plan to get soon is the Steam one (can you believe they put Denuvo on it?) This was the franchise that made me buy a PSP, a PS3 and a PS4 (also a 3DS and a Switch, what can I say, I'm a big fan of the games); anyway, after I finally put HEN on my SuperSlim I remembered that I never got to play Dreamy Theater, they were very hard to get, since all the old tutorials told you to create a JP account, get PSN Cards to get Yens on your region locked account, connect the PSP to the PS3 and keep it connected; if all we need was to get the disc, I was willing to pay but since, but since that was not an option and they made it so difficult to get them on digital I just never did it before. But that changed some days ago, after a lot of research I made them work, both on the emulator and on the PS3 and since I didn't found a straight forward easy tutorial about how to do it, here it is.
So, let's start:
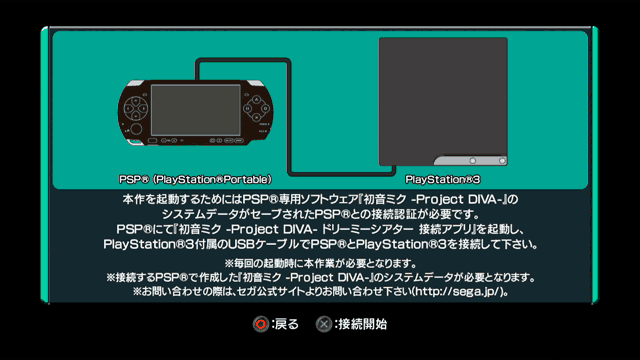
Okay, now, before we start, a little heads up, on RPCS3 is a lot easier but I've noticed a little of input lag, I tried to play with my Dualshock 4 connected trough bluetooth, maybe that was the problem and maybe if you use a wired controller there's no input lag, I don't have a way to test that so feel free to try it and share your experience.
PS3
Now, for the PS3 you'll also need two more apps:
Remember that the capitals are very important. Now, it's time to start Apollo.
Once there, select "USB Saves", and press X
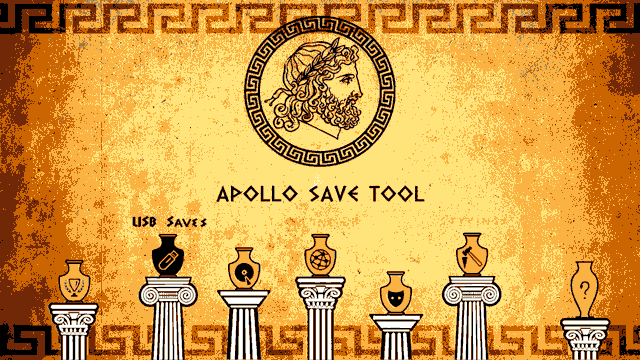
Now you should see the Save Files on your USB like this:
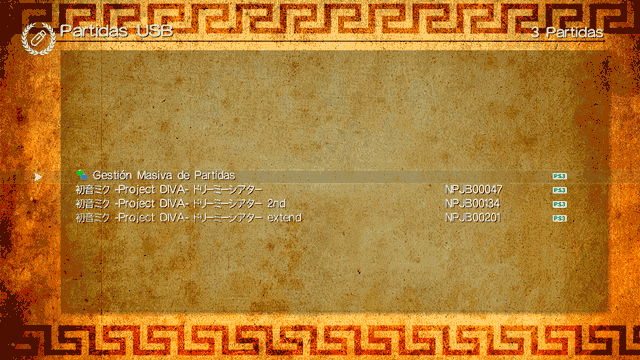
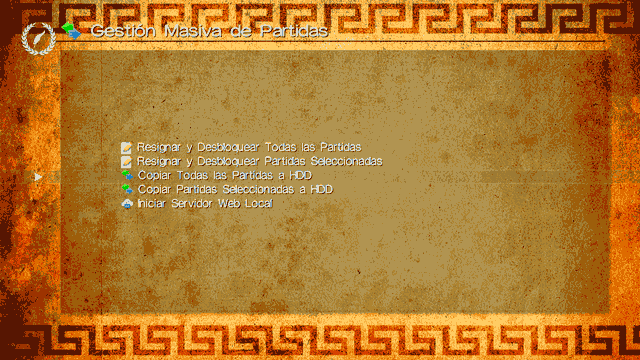
Press X on "Bulk Save Management" (I think that's what it's called in English, I did this in Spanish as you can see) then this screen should appear:
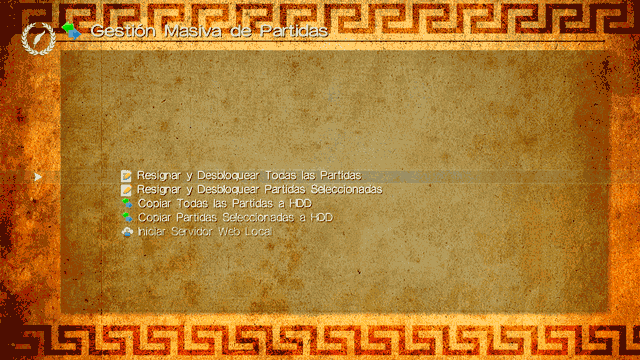
You need to press X first on "Resign & Unlock all Saves" wait it to finish and then go to the option that says: "Copy all Saves to HDD" and press X.
Okay, Dreamy Theater 2nd and Extended should be playable now, you can stop here, Dreamy Theater 2nd includes all the songs from Dreamy Theater 1st so if you are fine with that you can stop here, but if you want (as I did) to play Dreamy Theater 1st then we need to continue.
For Dreamy Theater 1st we are gonna need Artemis.
Once you start Artemis, It will automatically download all the available cheats for everygame, wait a little, the app should start and you'll see this screen:
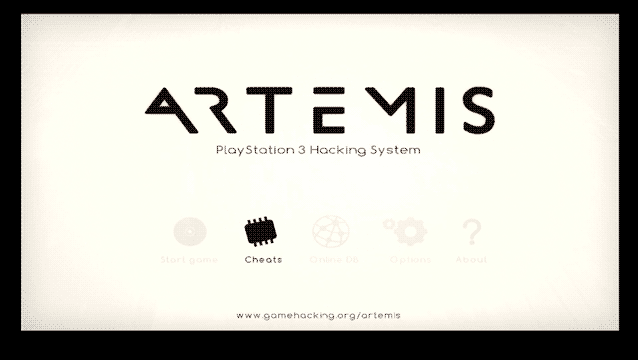
You have to press X on the option that says Cheats. Now you'll see all the cheats avaiable on a screen like this:
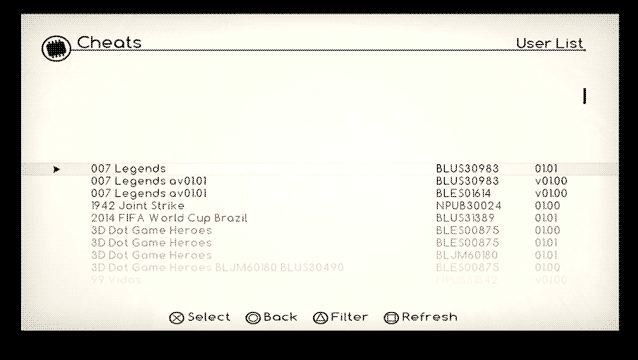
Here you have press triangle to apply a filter that will show just the games that you have installed, it should look something like this:
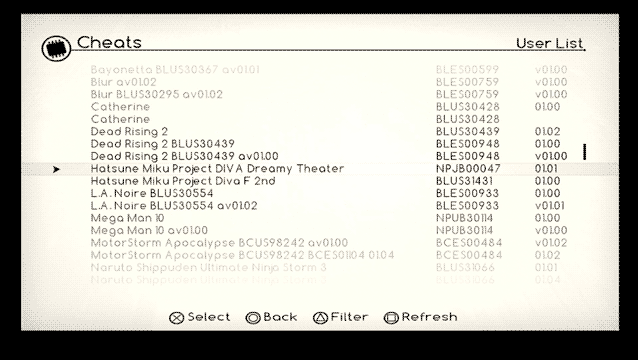
Navigate to Hatsune Miku Project DIVA Dreamy Theater, as you can see next to the ID of the game there is a number (01.01), that is the version of the game the patch/cheat will work on, that's why It is very important to update the game before trying this. Press X and a screen listing all the cheats available for our game should appear.
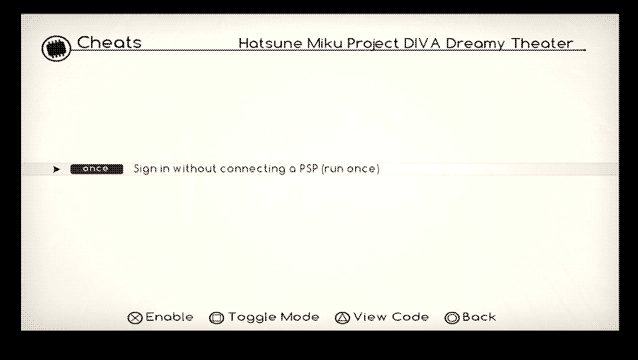
There, just press X to enable "Sign in without connecting a PSP (run once)" it should look exactly like in the screenshot, see the "once" tag on the left, that is very important. Now press circle until you go back to the main screen of Artemis:
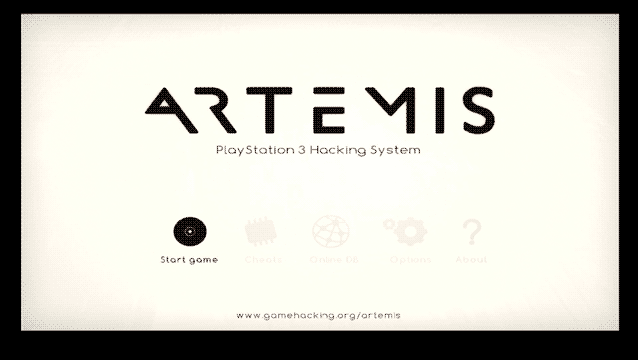
Now, navigate to the option that says "Start Game", DO NOT CLOSE ARTEMIS BY PRESSING THE PS BUTTON. Just press X on Start Game, now the main XMB of your PS3 should load, just wait until it does. The next part is very important, so READ FIRST before opening the game because there are TWO steps you need to follow in a certain amount of time.
First step: Go to your games and start Project Diva Dreamy Theater, like you will normally do, If you did all correctly a notification should appear while the game is loading that should look like this:

The notification says, "Artemis PS3 Start To Attach", now, do you see the logo on the bottom right corner of the screen? It is very important to wait until that appears.
Second step: It is very important that you do this before the logo dissappears, alright? two things to be aware, the notification from Artemis and the logo, some times the notification loads a lot faster than the logo, don't worry, it is not totally necessary to both of them to be on the screen at the same time, but you should do this before the logo disappears, be fast and press the PS Button once.
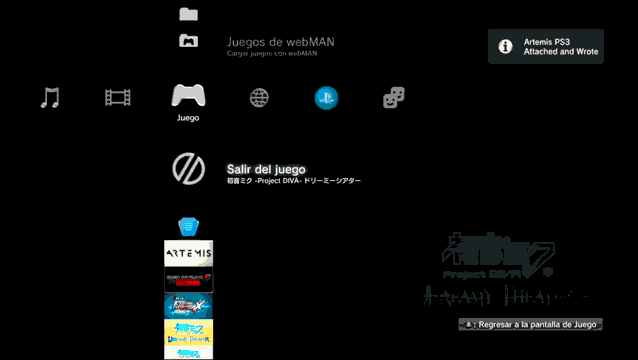
Now the XMB will load, and here we press the START button, a notification with the message: "Artemis PS3 Attached and Wrote" should appear, now we can get back to our game by pressing the PS button again, and let the game to load, we press start on the title screen and we should now see, this:
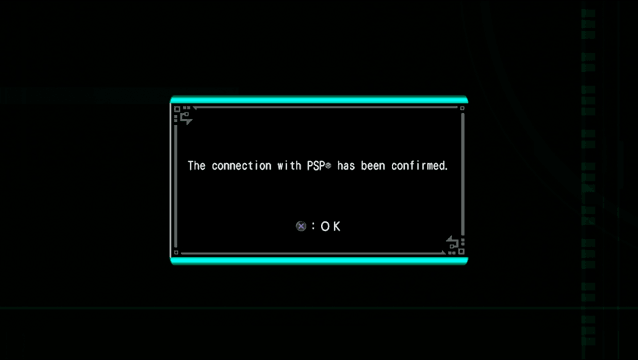
And that would be all, the game will ask if we want to load our previously copied savefile, we say yes, and that should be all folks. We can now play all three Dreamy Theater Games on our PS3.
RPCS3
As I said, on the emulator, all is easier, for this you should already know how to install PKG files/games and where to put the rap files, but lets wrap it up quickly.
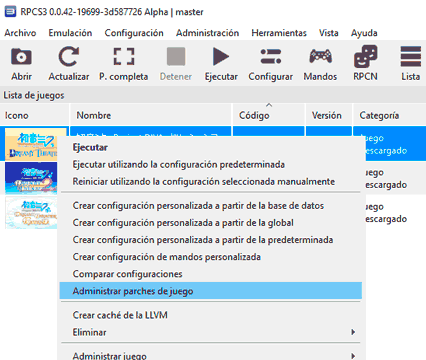
On the main screen of the emulator do right click on the game and select "Manage Game Patches"
It would load all the patches available (or update the list), then you should see a page like this:
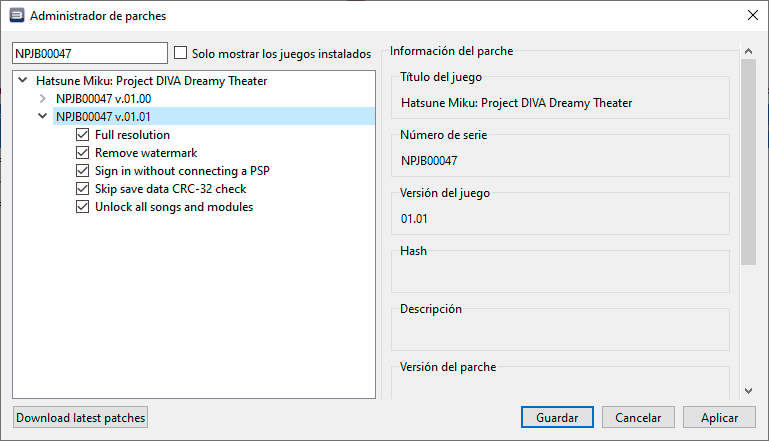
Just check all the patches for the game, remember we are using the updated version (1.01). Press Apply and then Save. Now you just have to do the same for the three games.
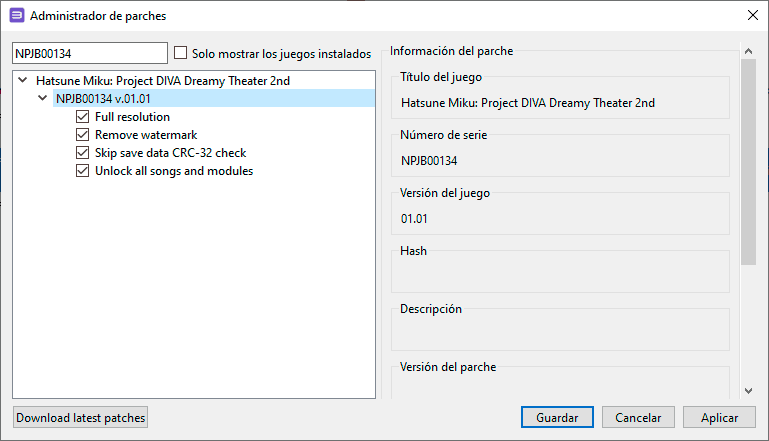
Here is Dreamy Theater 2nd:
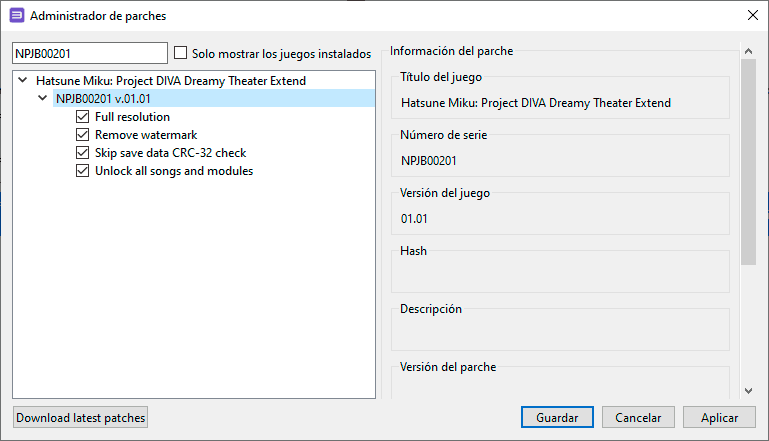
And here it is Dreamy Theater Extend:
That's all, now you don't even need the savefile trick... or at least that's what I think, I tried all the tricks I found to make Dreamy Theater work, and for this one I deleted the savefiles trick I did before trying the patches... and it worked, so them being no longer needed is just a guessing but I'm pretty sure this method will work just fine like that.
ENGLISH PATCH
Now that we have all three Dreamy Theater Games working, it's time to apply our English Patch.
The original author of the patch didn't really made a Release or anything similar, we will need to download the entire github repos as zip files:
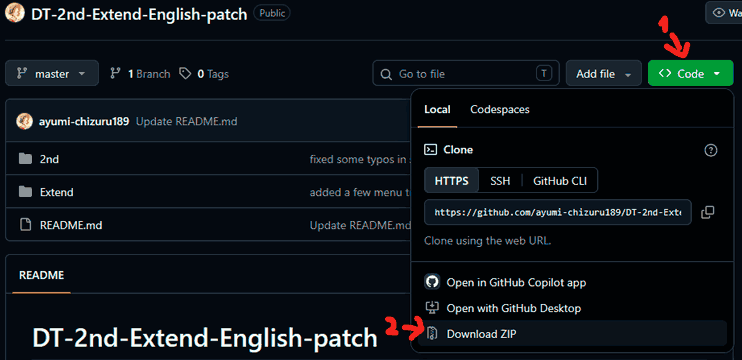
Once uncompressed we should have three folders, named: 1st, 2nd and Extend.
The structure of the folders should be like this:
1st (Main folder)
Reference Links:
So, let's start:
- First, the obvious, you'll need a PS3 with magic on it activated (I used one with HFW 4.93.1 and HEN 3.5) or RPCS3.
- You'll need the PKG files for the three games: Project Diva Dreamy Theater 1st, Project Diva Dreamy Theater 2nd and Project Diva Dreamy Theater Extend and also their corresponding upgrade pkg files, it is very important to have the games on version 1.01, at this point I'm guessing you already know how to install PKG files/games with WebMan MOD on your PS3, right?.
- Now, the games are gonna be on japanese, there are partial translations for the three, they are not perfect but for the most part, they work, you can get them here (there are two projects DT-1st-English-patch and DT-2nd-Extend-English-patch).
Okay, now, before we start, a little heads up, on RPCS3 is a lot easier but I've noticed a little of input lag, I tried to play with my Dualshock 4 connected trough bluetooth, maybe that was the problem and maybe if you use a wired controller there's no input lag, I don't have a way to test that so feel free to try it and share your experience.
PS3
Now, for the PS3 you'll also need two more apps:
- Apollo, homebrew app to transfer savegames.
- Artemis, homebrew to activate cheats.
- The ID for each game:
- Dreamy Theater 1st ID is NPJB00047
- Dreamy Theater 2nd ID is NPJB00134
- Dreamy Theater Extend ID is NPJB00201
- The savegame (SAVEDATA) (See attached file on this post) on an USB that has to be FAT32 formated with MBR partition table (you should already have one if you put HFW and HEN on your PS3) the files need to be on an specific structure:
Code:
USB (This is your pendrive)
└── PS3/
    └── SAVEDATA/
            └── [folder with the ID of the game]/
Remember that the capitals are very important. Now, it's time to start Apollo.
Once there, select "USB Saves", and press X
Now you should see the Save Files on your USB like this:
Press X on "Bulk Save Management" (I think that's what it's called in English, I did this in Spanish as you can see) then this screen should appear:
You need to press X first on "Resign & Unlock all Saves" wait it to finish and then go to the option that says: "Copy all Saves to HDD" and press X.
Okay, Dreamy Theater 2nd and Extended should be playable now, you can stop here, Dreamy Theater 2nd includes all the songs from Dreamy Theater 1st so if you are fine with that you can stop here, but if you want (as I did) to play Dreamy Theater 1st then we need to continue.
For Dreamy Theater 1st we are gonna need Artemis.
Once you start Artemis, It will automatically download all the available cheats for everygame, wait a little, the app should start and you'll see this screen:
You have to press X on the option that says Cheats. Now you'll see all the cheats avaiable on a screen like this:
Here you have press triangle to apply a filter that will show just the games that you have installed, it should look something like this:
Navigate to Hatsune Miku Project DIVA Dreamy Theater, as you can see next to the ID of the game there is a number (01.01), that is the version of the game the patch/cheat will work on, that's why It is very important to update the game before trying this. Press X and a screen listing all the cheats available for our game should appear.
There, just press X to enable "Sign in without connecting a PSP (run once)" it should look exactly like in the screenshot, see the "once" tag on the left, that is very important. Now press circle until you go back to the main screen of Artemis:
Now, navigate to the option that says "Start Game", DO NOT CLOSE ARTEMIS BY PRESSING THE PS BUTTON. Just press X on Start Game, now the main XMB of your PS3 should load, just wait until it does. The next part is very important, so READ FIRST before opening the game because there are TWO steps you need to follow in a certain amount of time.
First step: Go to your games and start Project Diva Dreamy Theater, like you will normally do, If you did all correctly a notification should appear while the game is loading that should look like this:
The notification says, "Artemis PS3 Start To Attach", now, do you see the logo on the bottom right corner of the screen? It is very important to wait until that appears.
Second step: It is very important that you do this before the logo dissappears, alright? two things to be aware, the notification from Artemis and the logo, some times the notification loads a lot faster than the logo, don't worry, it is not totally necessary to both of them to be on the screen at the same time, but you should do this before the logo disappears, be fast and press the PS Button once.
Now the XMB will load, and here we press the START button, a notification with the message: "Artemis PS3 Attached and Wrote" should appear, now we can get back to our game by pressing the PS button again, and let the game to load, we press start on the title screen and we should now see, this:
And that would be all, the game will ask if we want to load our previously copied savefile, we say yes, and that should be all folks. We can now play all three Dreamy Theater Games on our PS3.
RPCS3
As I said, on the emulator, all is easier, for this you should already know how to install PKG files/games and where to put the rap files, but lets wrap it up quickly.
- Once you have your pkg files and their rap files, put the rap files on: RPCS3\dev_hdd0\home\00000001\exdata
- Install your pkg files by just dragging them one by one to the emulator, it will took a time to install the game and load some stuff, just wait.
- The game will try to start, let it go until the title screen and then just close the game.
- Update the games with their corresponding pkg file by doing the same (drag the update files, one by one, to the emulator screen)
On the main screen of the emulator do right click on the game and select "Manage Game Patches"
It would load all the patches available (or update the list), then you should see a page like this:
Just check all the patches for the game, remember we are using the updated version (1.01). Press Apply and then Save. Now you just have to do the same for the three games.
Here is Dreamy Theater 2nd:
And here it is Dreamy Theater Extend:
That's all, now you don't even need the savefile trick... or at least that's what I think, I tried all the tricks I found to make Dreamy Theater work, and for this one I deleted the savefiles trick I did before trying the patches... and it worked, so them being no longer needed is just a guessing but I'm pretty sure this method will work just fine like that.
ENGLISH PATCH
Now that we have all three Dreamy Theater Games working, it's time to apply our English Patch.
The original author of the patch didn't really made a Release or anything similar, we will need to download the entire github repos as zip files:
Once uncompressed we should have three folders, named: 1st, 2nd and Extend.
The structure of the folders should be like this:
1st (Main folder)
└── 2d/
└── gm_module_tbl.farc
└── pv_db.txt
└── string_array.bin
2nd (Main folder)└── 2d/
└── gm_module_tbl.farc
└── pv_db.txt
└── string_array.bin
Extend (Main folder)└── 2d/
└── lang/
└── gm_module_tbl.farc
└── pv_db.txt
Now you DO NOT have to copy the main folders, you need to copy each of the folders content, just the content, on their corresponding games:- Copy the contents of the 1st folder on: /dev_hdd0/game/NPJB00047/USRDIR/rom/
- Copy the contents of the 2nd folder on: /dev_hdd0/game/NPJB00134/USRDIR/rom/
- Copy the contents of the Extend folder on: /dev_hdd0/game/NPJB00201/USRDIR/rom/
Reference Links:
- https://forums.rpcs3.net/thread-199884.html
- https://gbatemp.net/threads/project-diva-connection-app-needed.669747/post-10655443
- https://github.com/ayumi-chizuru189
- The trick with the savefiles that are on the RPCS3 forum worked both for Diva 2nd and Extend on the emulator, but they didn't work on the PS3, I had to use the ones from the GBA Temp.
- On the GBA Temp post, they talk about an EBOOT.BIN trick, but I didn't get that to work on my PS3.
- On those files there is also a tool (for linux) to manually patch the EBOOT.BIN, I used it, but then the game wouldn't even start and I had to force the PS3 to shut down, If you figure out how to make it work, please tell me because I have to admit, it's kinda a bother to have to use Artemis every time I want to play Dreamy Theater 1st.
- It seems that savefiles from RPCS3 and PS3 are not compatible between them.
- I was planning to post this on PSX-Place but for some reason I just kept getting error messages whenever I clicked Post thread.
Attachments
Last edited by ElSasori69,