How to create images for use in Usagi.
Before you begin you need the following tools.An image editor, in the tutorial I'll be using Photoshop CS6.
The latest version of Usagi (theme editor).
Download this package of textures (click here), in order to edit the textures, you will need a PSD file editor.
This tutorial will teach you how to make themes using a single image. If you are going to create a theme using different images, just put the images in the files, 412x240-top.psd and 320x240-low.psd, I will not go into detail.
If you are going to create a theme using different images, just put the images in the files, 412x240-top.psd and 320x240-low.psd, I will not go into detail.
Warning: If you are having problems, to unzip the RAR archive package, use this ZIP compressed package (Click here) .
View attachment 95367
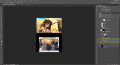
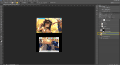
Open the single-image.psd file, select the layer A1, then insert the single image.
The layer, should be placed on top of the layer A1.
You must resize the image to fit on both screens.
View attachment 95368
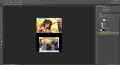
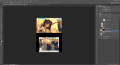
After you resize the image, close the low_image_extender folder, as shown in the image.
View attachment 95369
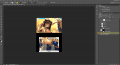
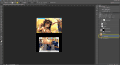
With the folder selected, press ctrl + J to duplicate the folder.
View attachment 95370
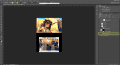
Select the duplicate folder with the mouse, right-click the duplicate folder. Select the option, convert to smart object.
View attachment 95371
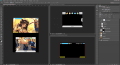
With the shift key pressed, click on the cut mask gives layer image_cutter_top, to make a selection.
View attachment 95372
With the cut selection enabled, select the layer of the image that was converted to the smart object. Press ctrl + J to perform a cut selection.
View attachment 95373
This process will create a perfect cut, and will create a new layer with the selected area.
View attachment 95374
Perform the same procedure, using the cut mask gives image_cutter_botton layer.
View attachment 95375
Selecting the image layer again, press ctrl + J again to cut the selected area.
View attachment 95376
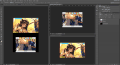
Go to the Photoshop menu, window menu, and change the preview mode to the mode shown in the image above. With one image in the left corner and two images in the right corner.
View attachment 95377
For this mode to be used, you must open the 412x240-top.psd and 320x240-low.psd files.
View attachment 95378
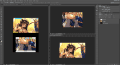
Drag the layers that have been cut to the right files as shown in the image, then hide the 3ds_icons layer.
View attachment 95379
Now, save the images in PNG format, and insert these images using the latest version of Usagi.
Go to part 2 >>
Warning: The files available below have the same content, the only thing they have different, is the compression format.
After you resize the image, close the low_image_extender folder, as shown in the image.
View attachment 95369
With the folder selected, press ctrl + J to duplicate the folder.
View attachment 95370
Select the duplicate folder with the mouse, right-click the duplicate folder. Select the option, convert to smart object.
View attachment 95371
With the shift key pressed, click on the cut mask gives layer image_cutter_top, to make a selection.
View attachment 95372
With the cut selection enabled, select the layer of the image that was converted to the smart object. Press ctrl + J to perform a cut selection.
View attachment 95373
This process will create a perfect cut, and will create a new layer with the selected area.
View attachment 95374
Perform the same procedure, using the cut mask gives image_cutter_botton layer.
View attachment 95375
Selecting the image layer again, press ctrl + J again to cut the selected area.
View attachment 95376
Go to the Photoshop menu, window menu, and change the preview mode to the mode shown in the image above. With one image in the left corner and two images in the right corner.
View attachment 95377
For this mode to be used, you must open the 412x240-top.psd and 320x240-low.psd files.
View attachment 95378
Drag the layers that have been cut to the right files as shown in the image, then hide the 3ds_icons layer.
View attachment 95379
Now, save the images in PNG format, and insert these images using the latest version of Usagi.
Go to part 2 >>
Warning: The files available below have the same content, the only thing they have different, is the compression format.