

- Joined
- Nov 27, 2006
- Messages
- 10,311
- Reaction score
- 591
- Trophies
- 1
- Age
- 33
- Location
- Bruges, Belgium
- XP
- 1,612
- Country

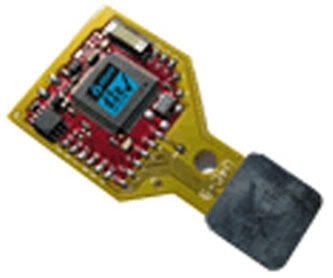
Installing any solderless chip on your Wii, in this case a Solderless D2Pro
What you’ll need + tips
Here’s what you’ll need to install the Solderless D2Pro:
- Tri-Wing screwdriver with a fairly thin, long neck
- Small Phillips screwdriver
- A container to hold all the screws and pieces of plastic
- Stanley Knife to remove plastic feet
And first some tips which can make the difference between a working and a non working Wii:
- Ground yourself first, you can do that by just holding your hands on your PC case. This is to remove all the static electricity of your hands.
- Always be very patient and don’t force things. Taking the Wii apart is quite easy and it should disassemble very easy
- Make sure your workspace is tidy and you have enough space
Installation
Okay, let’s get started!
First unplug your Wii of all cables, and then lay it in your workspace like this:

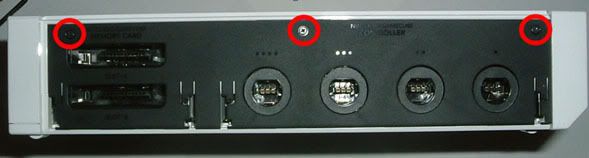
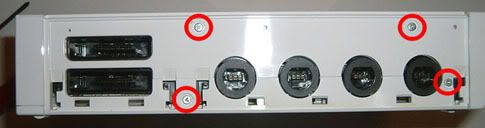
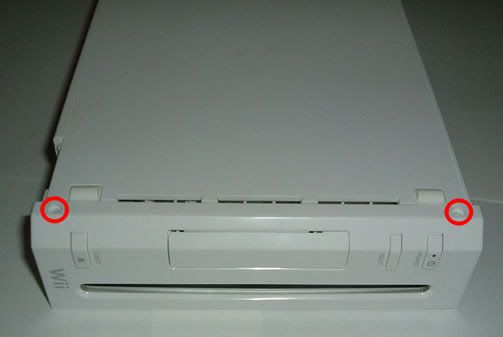
Take out those 2 flaps , these should clip off easily as they are supposed to be removed if you use the console on it’s side, laying flat.
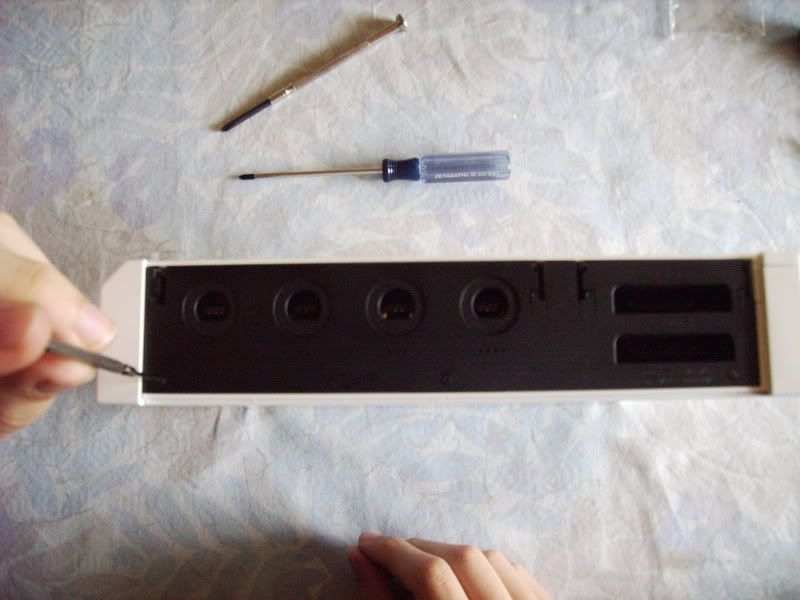
Remove the three black screws that hold the face plate of the GameCube compartment in place.
Now just take off the black cover.

Now unscrew the four screws under the plastic cover. On my console they were combination of Tri-wing and normal crosshead screws.
Turn the Wii upside down vertically and remove the screw that holds the battery and then remove the battery.
Peel off the three plastic covers on the bottom of the Wii. I used a stanley knife for this but you may want to use something else.
Also remove the two rubber pads, who are on top in this picture. You should stick them again close by, so you can easily reassemble your Wii.
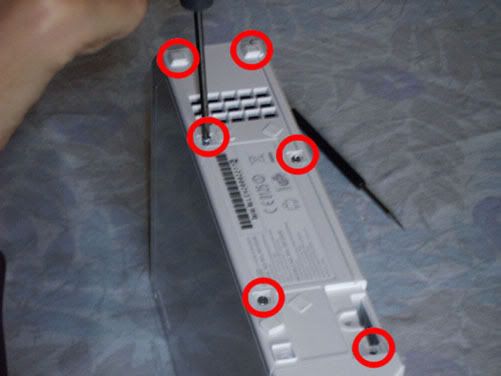
Then remove the 6 screws that are exposed (3 from the plastic covers, 2 from the rubber pads and 1 that was in the Battery part)
Now lay the Wii on it’s side so that the feet are visible. Remove the plastic covers and then remove the screws that are under it.
Now you should be able to take the front of the Wii.
Do this very careful, because there are two wires connected to the front!
Unplug the cable inside to remove the plate completely.
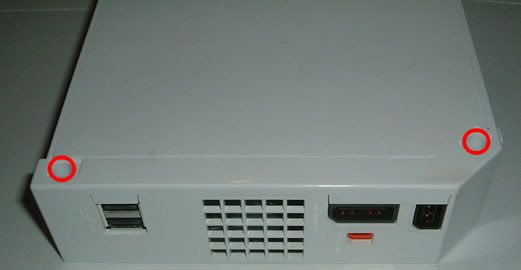
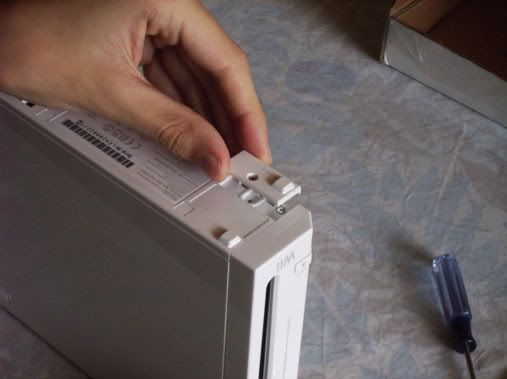
Turn the Wii on its side again with the feet facing upwards. Remove the two plastic feet at the rear of the console and the screws that are under them.
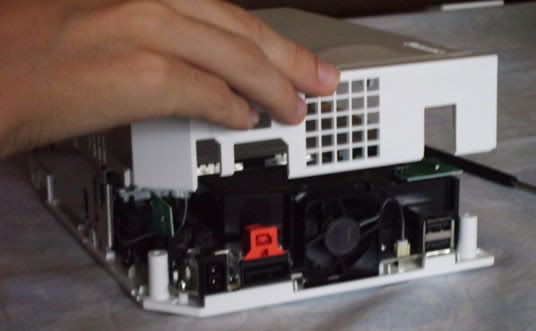
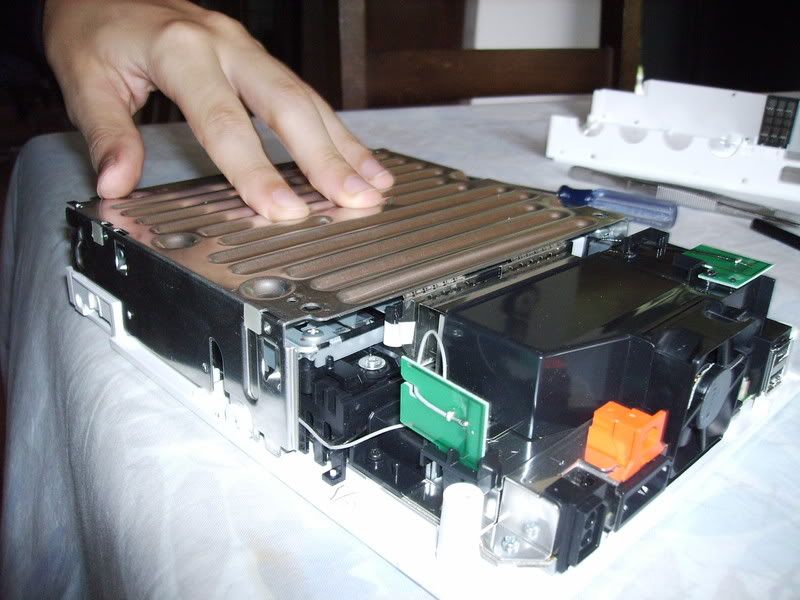
Now you should be able to take the Wii apart. Take the plastic cover carefully of the the Wii.
Now you may have this heatsink or you may have it not. If you have it, just remove it (with a little force). It’s not held down by any screws, it’s just on quite strong.
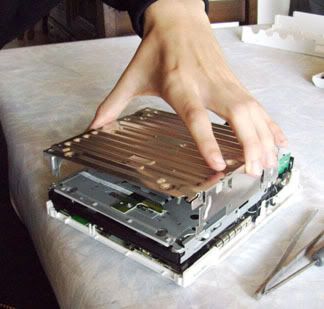
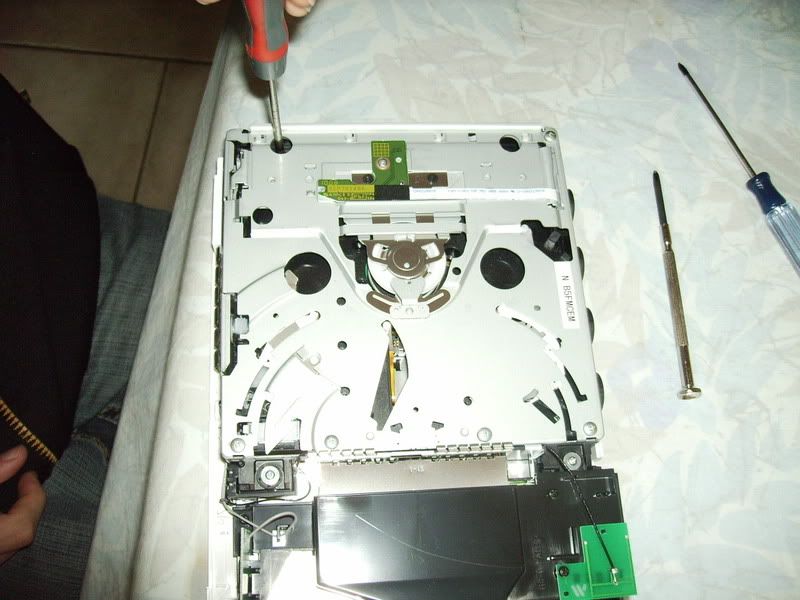
Now remove those 4 screws, as stated on the picture.
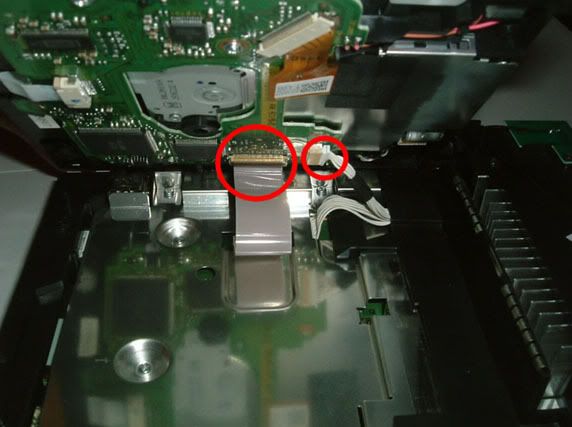
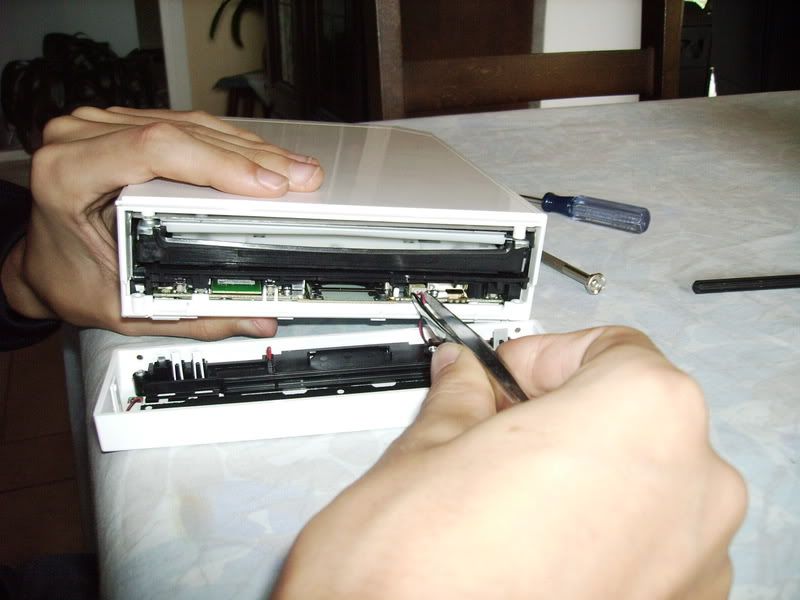
Now you will be able to pick up the DVD drive. Do it carefully though, because there are cables connected to it. Remove those cables.
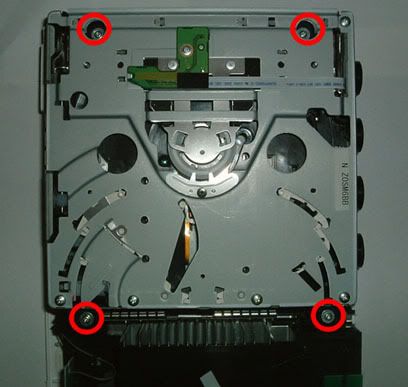
You need to lift the brown hatch before you can release the ribbon cable.
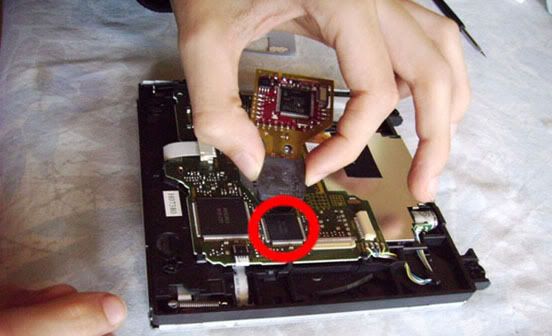
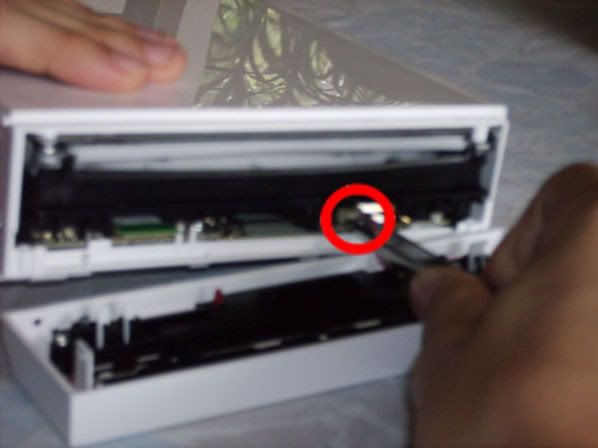
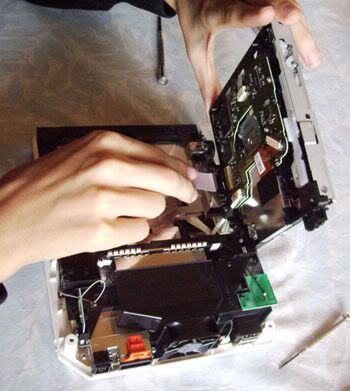
Now you can take your Solderless D2Pro, and press it (with some force, so the connectors are good in place) on the chip as shown in the picture.
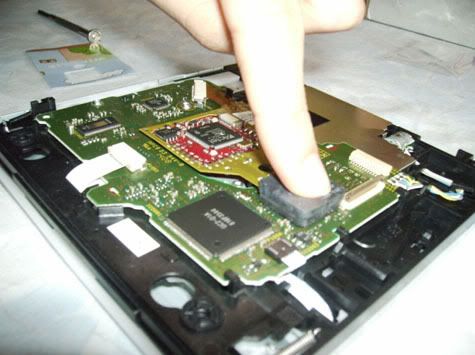
Plug the cables back in (carefully with that ribbon cable, make sure the hatch is closed), then take that paper that is also on the above picture (in the top left corner), and press it on the D2Pro chip. That will act as a isolator. It’s very important that you put that paper there!
If you don’t put it there, there’s a chance that your chip may malfunction or even die.
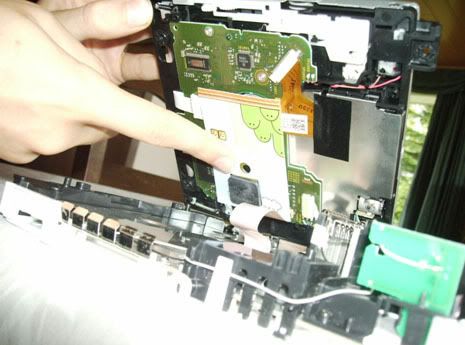
Now just reassemble your Wii. I did this by just following the guide from bottom to top. I will however post some more pictures, so you can easily see where to screw.

The two holes on the right should be black triwings, the two on the left should be normal screws.

The two screws on the top are triwings, the two on the bottom are regulars.
On the left (where I’m pointing at) it’s a black long regular screw, the one in the middle and on the right are black small regular screws.
Now it’s just a matter of burning an ISO, and playing it on your Wii!
What you’ll need + tips
Here’s what you’ll need to install the Solderless D2Pro:
- Tri-Wing screwdriver with a fairly thin, long neck
- Small Phillips screwdriver
- A container to hold all the screws and pieces of plastic
- Stanley Knife to remove plastic feet
And first some tips which can make the difference between a working and a non working Wii:
- Ground yourself first, you can do that by just holding your hands on your PC case. This is to remove all the static electricity of your hands.
- Always be very patient and don’t force things. Taking the Wii apart is quite easy and it should disassemble very easy
- Make sure your workspace is tidy and you have enough space
Installation
Okay, let’s get started!
First unplug your Wii of all cables, and then lay it in your workspace like this:
Take out those 2 flaps , these should clip off easily as they are supposed to be removed if you use the console on it’s side, laying flat.
Remove the three black screws that hold the face plate of the GameCube compartment in place.
Now just take off the black cover.
Now unscrew the four screws under the plastic cover. On my console they were combination of Tri-wing and normal crosshead screws.
Turn the Wii upside down vertically and remove the screw that holds the battery and then remove the battery.
Peel off the three plastic covers on the bottom of the Wii. I used a stanley knife for this but you may want to use something else.
Also remove the two rubber pads, who are on top in this picture. You should stick them again close by, so you can easily reassemble your Wii.
Then remove the 6 screws that are exposed (3 from the plastic covers, 2 from the rubber pads and 1 that was in the Battery part)
Now lay the Wii on it’s side so that the feet are visible. Remove the plastic covers and then remove the screws that are under it.
Now you should be able to take the front of the Wii.
Do this very careful, because there are two wires connected to the front!
Unplug the cable inside to remove the plate completely.
Turn the Wii on its side again with the feet facing upwards. Remove the two plastic feet at the rear of the console and the screws that are under them.
Now you should be able to take the Wii apart. Take the plastic cover carefully of the the Wii.
Now you may have this heatsink or you may have it not. If you have it, just remove it (with a little force). It’s not held down by any screws, it’s just on quite strong.
Now remove those 4 screws, as stated on the picture.
Now you will be able to pick up the DVD drive. Do it carefully though, because there are cables connected to it. Remove those cables.
You need to lift the brown hatch before you can release the ribbon cable.
Now you can take your Solderless D2Pro, and press it (with some force, so the connectors are good in place) on the chip as shown in the picture.
Plug the cables back in (carefully with that ribbon cable, make sure the hatch is closed), then take that paper that is also on the above picture (in the top left corner), and press it on the D2Pro chip. That will act as a isolator. It’s very important that you put that paper there!
If you don’t put it there, there’s a chance that your chip may malfunction or even die.
Now just reassemble your Wii. I did this by just following the guide from bottom to top. I will however post some more pictures, so you can easily see where to screw.
The two holes on the right should be black triwings, the two on the left should be normal screws.
The two screws on the top are triwings, the two on the bottom are regulars.
On the left (where I’m pointing at) it’s a black long regular screw, the one in the middle and on the right are black small regular screws.
Now it’s just a matter of burning an ISO, and playing it on your Wii!


")


