Team Rebug starts pre-orders for their SwitchMe internal modchip
NEWS UPDATE: July 22th - Team REBUG has started pre-orders for their Switch Dev Board! 
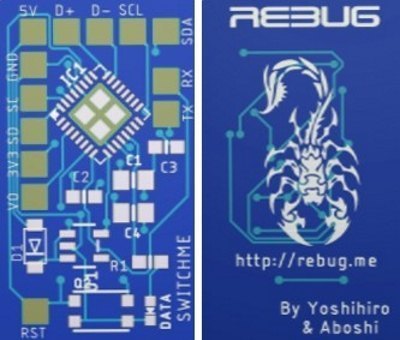
Team REBUG has put on the final touches to their 'SwitchME' dev board for the Nintendo Switch console, they have added some 'breakout' solder pads for future expansion and other usages, but it still only needs 4 wires for normal installs on your Switch, and it allows full usage of all the various payloads from ReiNX to Atmosphere to SX OS.
Nintendo Switch Dev Boardevilsperm said:Pricing Tiers:
- 1 – $7.49
- 2-9 – $7.29
- 10-19 – $7.00
- 20-49 – $6.79
- 50+ – $6.00
You can use this to launch Custom Firmware’s for the Nintendo Switch.
- Internal board to launch RCM payloads.
- Cortex m0+ dev board
- This is a pre-order, expect delivery in the very near future.
- Board Dimensions 0.59 x 1.05 inch
The project is basically finished now, they have moved into the 'pre-order' phase with amazing affordable pricing starting at only $7.49 each, so check it out now:If no Auto RCM strapping used you will either need to use a jig or solder pin 1-10 on the right joycon. We will have detailed write-ups soon under the Nintendo Switch section of the site. You can also use this as standalone development board (Like the Trinket m0)
- Auto RCM Strapping – 5-6 wire install
- Software Auto RCM – 4 wire install
- Normal Mode – 4 wire install
- Auto Payload injection after reboot – 5-6 wire install
Official Site: Rebug Source: MaxConsole
Last edited by garyopa,