


*8-18-16: updated Raspbian image to latest self hosting pack. AIO Self Hosting 2.0 Now with 100% boot rates for Wii U 5.5.1!*
Then put it to good use! Host with it.
Benefits:
- 100% Self contained. WiFi not needed. No need to do any router hacking or use TubeHax. You don't go online with this. No accidental updates.
- Unlike EZ-Share wifi solutions you're not limited to a 32GB or smaller SD card.
- It's cool.
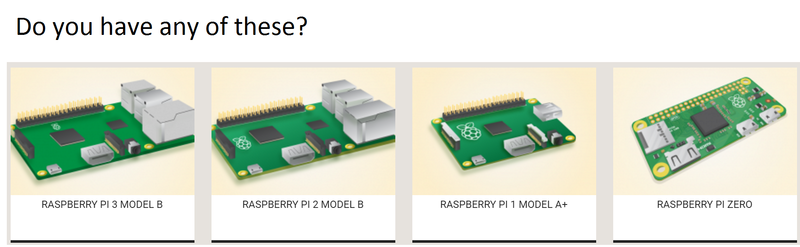
So I know that this isn't very cost effective. It's kinda fun to put an old dusty raspberry pi 1 to use. This will also work on pi 2's. I only had to buy a 6 dollar used Wii USB LAN adapter. I had the rest lying around so I thought I'd share with those that want to do the same thing because hey, why not.
If you are familiar with Linux and want to skip all the instructions then here is the quick and dirty:
1. Install Raspbian on your Raspberry Pi.
2. Install Apache and PHP.
3. Put any self hosting solution you want in the /var/www/html/ folder.
4. Setup static network ip's on both the pi and the wii u.
5. Use a crossover cable to connect the two.
Noob friendly instructions (image includes my latest self hosting package but you can use any you want):
How to update the web page without fully re-imaging the SD card:
Now you can simply boot up the Pi whenever you want to run your exploits. You could even trick the Wii U into loading the same Loadiine app every time you fire up the browser. Take it in your car! Take it on trips! Completely self contained!
If you don't have a crossover ethernet cable and a Wii LAN adapter then the Pi makes a great little webhosting device (just change the static IP on Rasbian to an IP that is on your network. I tested this and it's working great on 5.5.1
*Final Note* I did this as a weekend project. It was fun and I'll use it but I'm not going to maintain this very much. Anybody can use the above instructions then update any of the homebrew and apps yourself. Everything is contained on the Raspberry Pi inside of /var/www/html/. Have fun!
Video of it working
Then put it to good use! Host with it.
Benefits:
- 100% Self contained. WiFi not needed. No need to do any router hacking or use TubeHax. You don't go online with this. No accidental updates.
- Unlike EZ-Share wifi solutions you're not limited to a 32GB or smaller SD card.
- It's cool.
So I know that this isn't very cost effective. It's kinda fun to put an old dusty raspberry pi 1 to use. This will also work on pi 2's. I only had to buy a 6 dollar used Wii USB LAN adapter. I had the rest lying around so I thought I'd share with those that want to do the same thing because hey, why not.
If you are familiar with Linux and want to skip all the instructions then here is the quick and dirty:
1. Install Raspbian on your Raspberry Pi.
2. Install Apache and PHP.
3. Put any self hosting solution you want in the /var/www/html/ folder.
4. Setup static network ip's on both the pi and the wii u.
5. Use a crossover cable to connect the two.
Noob friendly instructions (image includes my latest self hosting package but you can use any you want):
Needed items:
- Raspberry Pi with SD card (8GB or bigger) and power adapter.
- SD card for your wii U (2GB or bigger)
- Wii USB LAN adapter
- Crossover ethernet cable
- Windows computer with SD slot for imaging the Raspberry Pi SD
- Download and install these tools:
- SD Formatter - https://www.sdcard.org/downloads/formatter_4/eula_windows/
- Win32 Disk Imager - https://sourceforge.net/projects/win32diskimager/
- Rasbian with Apache and selfhosting image 2.0(extract with winrar) -
https://mega.nz/#F!dRtkkLyD!1xkLVG8Aovgb2aXN9OOCpA
Instructions:
1. Insert your raspberry pi SD into your pc and fire up SD Formatter.
2. Format your Raspberry Pi's SD card using SD formstter and set "FORMAT SIZE ADJUSTMENT" option to "ON" in the "Options" menu.
3. Click "Format" button.
4. Right-click on Win32 Disk Imager and select Run as administrator.
5. Under "Image File" click on the blue folder icon and select the image file that you extracted. It should be called "AIO SelfHost for RaspberryPi 1.3.img".
6. Make sure your SD drive letter is selected from the list to the right of the blue folder.
7. Click write. Click through the warnings about formatting your SD card.
8. When it's finished imaging put your SD card into your Raspberry Pi and power up. You do not need to plug in HDMI or composite video unless you want to watch it boot. (Do not connect crossover yet)
9. Copy everything that is INSIDE of the folder "SD CARD" to the root of your Wii U SD card.
- SD card should look like this SD:/wiiu/...
10. Plug in your Wii USB ethernet adapter and power on your wii u. (don't connect the crossover cable yet)
11. Go to your internet settings and set up a new connection using ethernet. System Settings -> Internet -> Connect to the Internet -> Y -> Wired Connection
12. Set your IP address to "10.10.10.15". Set subnet of "255.255.255.0". Set DNS of "10.10.10.1"
13. Make the Wired connection your default connection or the next steps won't work.
14. Plug in the crossover cable to the Wii USB LAN adapter and the other end to your raspberry Pi.
13. Open up your browser on the Wii U and point to: "http://10.10.10.10/"
14. Done.
How to update the web page without fully re-imaging the SD card:
1. Download the latest "AIO without PC software" package.
http://gbatemp.net/threads/5-5-1-5-4-0-5-3-2-self-hosting-package-everything-in-one-zip-file.424679/
2. Extract the download and copy the "www" folder to a fat32 formatted USB flash drive. If the Raspberry Pi reboots then it's not going to detect the USB. Reformat it to fat32 and try again. If it still doesn't work then try a different flash drive.
3. Plug in the flash drive to your Raspberry Pi. (Use a USB hub if you don't have enough ports or do what I do, unplug the keyboard and just use the mouse for the next step)
4. Raspbian will pop up with a message saying "Removable medium is inserted"
5. Click on "Open in File Manager" and then click OK.
6. Drag the "www" folder to the Raspbian desktop.
7. Unplug the USB flash drive and plug back in the keyboard if you removed it earlier.
8. Right click on the "www" folder and click "Open in Terminal"
9. Type in these EXACT commands:
sudo rm -r /var/www/html/*
sudo mv * /var/www/html/
10. Delete the "www" folder from the desktop and reboot the raspberry pi.
All done
Now you can simply boot up the Pi whenever you want to run your exploits. You could even trick the Wii U into loading the same Loadiine app every time you fire up the browser. Take it in your car! Take it on trips! Completely self contained!
If you don't have a crossover ethernet cable and a Wii LAN adapter then the Pi makes a great little webhosting device (just change the static IP on Rasbian to an IP that is on your network. I tested this and it's working great on 5.5.1
*Final Note* I did this as a weekend project. It was fun and I'll use it but I'm not going to maintain this very much. Anybody can use the above instructions then update any of the homebrew and apps yourself. Everything is contained on the Raspberry Pi inside of /var/www/html/. Have fun!
Video of it working
Last edited by Kafluke,

")


