Disney Infinity, Lego Dimensions, Skylanders Base Emulator - Project D.I.R.E.
Project D.I.R.E.
(UPDATE 29 NOVEMBER 2023)
We have been made aware that certain individuals are attempting to sell the community edition of this project on ETSY, a project that is explicitly offered for free. This action not only undermines the spirit of our community project but is also a move that capitalizes on the work of others in a very negative way. Furthermore, these sales include unauthorized distribution of bin files related to Lego, Skylanders, and Disney Infinity, which is a clear infringement of intellectual property rights. We strongly urge the community to maintain the integrity of the project by helping us address and curtail these unauthorized sales. It is essential to remind everyone that our project was created for free distribution, and it should remain that way. Your support in this matter is invaluable.
Special Thanks to the following individuals for their dedication and hard work. Without them this project would not be possible.
znxDomain -> firmware unlocker, tester, researcher
Lucky.peic -> firmware gui editor, tester, prototype, initial writeups, researcher
B47M4N -> firmware gui editor, tester, pcb and case creator, researcher, user guide writer
Bowman -> alt firmware, prototype tester
Mystic -> supplied test files, tester
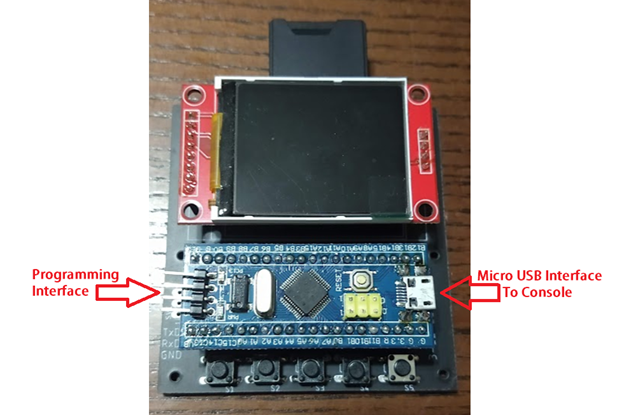
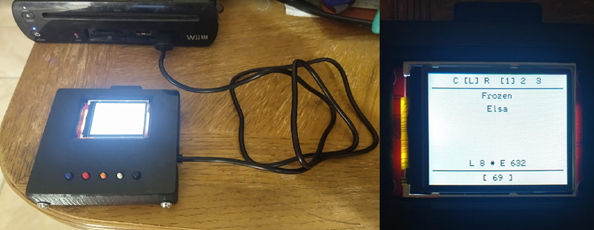
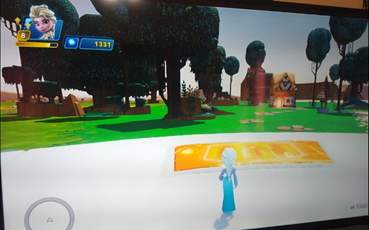
Project D.I.R.E. (Disney Infinity Reverse Engineered) is a portal emulator for Disney Infinity, Lego Dimensions, and Skylanders. This replaces the original portal in place of a custom created one to inject your own character dumps without the need for the original characters, vehicles, or playsets.
This emulator originally started several years ago after a talented coder named obiima did not release his project to the public. Obiima created and demoed a console portal emulator for 3 games: Disney Infinity, Lego Dimensions, and Skylanders. Obiima never released his project into the wild and the project he did release privately was closed firmware meaning locked to the stm32 Bluepill. This project picks up where he left off.
The Firmware allows this device to select between games by holding one of the buttons during boot. Specific Button usage can be found in the User Guide. You have the option of using limited onboard memory or by using an SD card you can increase the character count in your base emulator. By adding your own character files known as bin files, you can inject them into the game without having to keep your original characters.
This emulator currently works on the Wii, Wii U, PS3, and PS4.
We CAN NOT confirm if this works on the PS5 or Nintendo Switch as we do not own those consoles with these games to test with.
We have been told Skylanders plays on the Nintendo Switch but does NOT use the Portal of Power.
We have also seen footage of Disney Infinity being played on a PS5 with a PS4 base.
XBOX 360 and XBOX One are Not Yet included in this release. There is a security chip required from an Activision portal to make this work and we have not yet discovered a simple method to allow these games to work on these specific consoles.
Some of the files are too large to fit in this forum post and have been attached via mediafire.
All files can be found here: https://www.mediafire.com/folder/9u87thpc42j9a/Release+Package
(UPDATE 29 NOVEMBER 2023)
We have been made aware that certain individuals are attempting to sell the community edition of this project on ETSY, a project that is explicitly offered for free. This action not only undermines the spirit of our community project but is also a move that capitalizes on the work of others in a very negative way. Furthermore, these sales include unauthorized distribution of bin files related to Lego, Skylanders, and Disney Infinity, which is a clear infringement of intellectual property rights. We strongly urge the community to maintain the integrity of the project by helping us address and curtail these unauthorized sales. It is essential to remind everyone that our project was created for free distribution, and it should remain that way. Your support in this matter is invaluable.
Special Thanks to the following individuals for their dedication and hard work. Without them this project would not be possible.
znxDomain -> firmware unlocker, tester, researcher
Lucky.peic -> firmware gui editor, tester, prototype, initial writeups, researcher
B47M4N -> firmware gui editor, tester, pcb and case creator, researcher, user guide writer
Bowman -> alt firmware, prototype tester
Mystic -> supplied test files, tester
Project D.I.R.E. (Disney Infinity Reverse Engineered) is a portal emulator for Disney Infinity, Lego Dimensions, and Skylanders. This replaces the original portal in place of a custom created one to inject your own character dumps without the need for the original characters, vehicles, or playsets.
This emulator originally started several years ago after a talented coder named obiima did not release his project to the public. Obiima created and demoed a console portal emulator for 3 games: Disney Infinity, Lego Dimensions, and Skylanders. Obiima never released his project into the wild and the project he did release privately was closed firmware meaning locked to the stm32 Bluepill. This project picks up where he left off.
The Firmware allows this device to select between games by holding one of the buttons during boot. Specific Button usage can be found in the User Guide. You have the option of using limited onboard memory or by using an SD card you can increase the character count in your base emulator. By adding your own character files known as bin files, you can inject them into the game without having to keep your original characters.
This emulator currently works on the Wii, Wii U, PS3, and PS4.
We CAN NOT confirm if this works on the PS5 or Nintendo Switch as we do not own those consoles with these games to test with.
We have been told Skylanders plays on the Nintendo Switch but does NOT use the Portal of Power.
We have also seen footage of Disney Infinity being played on a PS5 with a PS4 base.
XBOX 360 and XBOX One are Not Yet included in this release. There is a security chip required from an Activision portal to make this work and we have not yet discovered a simple method to allow these games to work on these specific consoles.
Some of the files are too large to fit in this forum post and have been attached via mediafire.
All files can be found here: https://www.mediafire.com/folder/9u87thpc42j9a/Release+Package
Attachments
Last edited by Kfkboys,