The editable files of this tutorial, can be downloaded in part 1, click here to go to part1.
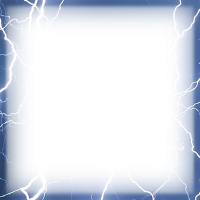
Before starting, I should point out that this tutorial will explain the concept needed in the process of creating the border textures. The advanced method uses the method explained in this tutorial. The difference is in the designer applied in the project. Below, before beginning this tutorial, see two examples, a theme with simple textures and another theme with advanced textures.the only thing that changed was the drafting on the designer. The method of creating the textures, is the same in both cases.
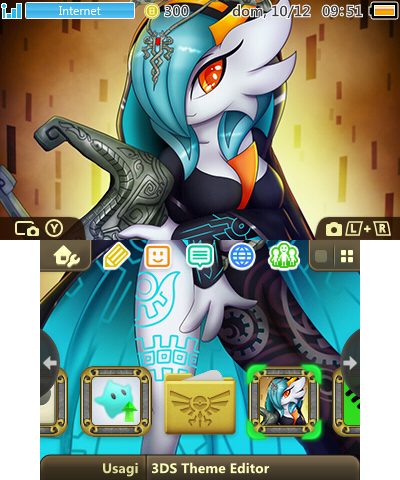

Before starting, I should point out that this tutorial will explain the concept needed in the process of creating the border textures. The advanced method uses the method explained in this tutorial. The difference is in the designer applied in the project. Below, before beginning this tutorial, see two examples, a theme with simple textures and another theme with advanced textures.the only thing that changed was the drafting on the designer. The method of creating the textures, is the same in both cases.
How to create 48px borders
View attachment 97500
By opening the 48px border file, you will see the items shown in the image above. Here we have a layer called border-48px, and above it a layer called, white square, this layer is inserted inside the layer border-48px, through an option called create cut mask.
View attachment 97501
So we can start to create the border, to start you must create a new layer above the layer, border-48px and disable the white square layer.
Stop: If your intent is to create a colored texture, do not create a new layer, edit the white square layer.
View attachment 97501
If your texture has multiple layers, all layers created must be added within the border-48px layer using the Create Cut Mask option. To use this option, create the layer and right-click on it, and choose the option to create cut mask. When using this option, an arrow icon will appear, pointing down, on the layer.this will indicate that the layer will be inside the border-48px layer.
Note: All textures must have layers, with size of 36px wide and 71px in height. You should create a square texture and work on it. In other words, even if you create a detailed texture, you should occupy the area of 36px wide and 71px wide. The area must be completely occupied. Any doubt just see the demo border, available in the file.
Occupy the entire area, leave no part unfilled. Do not base the border-48px layer area because it has no fill in the rounded corners.
The procedure explained above will only be necessary if you are to create an elaborate border. If you are going to create a border using a single layer as mentioned earlier, simply edit the color of the white square layer and skip this step.
View attachment 97504
I created a multi-layered texture, this Texture will be available, in a folder inside the 48px border file. Below the default Texture folder, which you will use to create your own textures.I left this Texture for you to see the methods explained in the tutorial.
View attachment 97500
By opening the 48px border file, you will see the items shown in the image above. Here we have a layer called border-48px, and above it a layer called, white square, this layer is inserted inside the layer border-48px, through an option called create cut mask.
View attachment 97501
So we can start to create the border, to start you must create a new layer above the layer, border-48px and disable the white square layer.
Stop: If your intent is to create a colored texture, do not create a new layer, edit the white square layer.
View attachment 97501
If your texture has multiple layers, all layers created must be added within the border-48px layer using the Create Cut Mask option. To use this option, create the layer and right-click on it, and choose the option to create cut mask. When using this option, an arrow icon will appear, pointing down, on the layer.this will indicate that the layer will be inside the border-48px layer.
Note: All textures must have layers, with size of 36px wide and 71px in height. You should create a square texture and work on it. In other words, even if you create a detailed texture, you should occupy the area of 36px wide and 71px wide. The area must be completely occupied. Any doubt just see the demo border, available in the file.
Occupy the entire area, leave no part unfilled. Do not base the border-48px layer area because it has no fill in the rounded corners.
The procedure explained above will only be necessary if you are to create an elaborate border. If you are going to create a border using a single layer as mentioned earlier, simply edit the color of the white square layer and skip this step.
View attachment 97504
I created a multi-layered texture, this Texture will be available, in a folder inside the 48px border file. Below the default Texture folder, which you will use to create your own textures.I left this Texture for you to see the methods explained in the tutorial.
Note, just begin to create the texture, after using the cut mask option, to add the texture to the parent layer (border-48px layer).
If you want you can edit the color is the layout of the layer, Application-area. Like I did in the picture above. I left two effects, the first lets you add a stroke, the second lets you add a shadow.
View attachment 97505
After finishing the designer of your texture, select all the layers that are inside the parent layer (border-48px) and press ctrl + j, to duplicate those layers. After performing this procedure, place all of these layers inside the BGM-Layer folder. And enable the preview of this layer. The result should stand as shown in the picture above, it's ugly I know. But this procedure is necessary.
View attachment 97510
This effect is optional, it serves to increase the shadow effect on the border.
Note: If you do not want to use this effect, skip the explanations below.
View attachment 97511View attachment 97512 In the border-48px layer, has two disabled effects, the bevel & notch effect and the internal Brightness effect. By using these two effects together, you will magnify the effect available in the shadow effects folder. Just change the colors of the fields shown in the images above.keep values and settings intact The colors to be used should be removed from the corners of the border textures, remove the colors from the rounded sides. Use the dropper tool, after capturing the color, put the color, with a darker tone. Use the same color in all the color fields shown in the images above.
View attachment 97513
Now activate the Shadow Effects folder, this folder has 8 shadow effects. Four internal shadow effects and four external shadow effects. If you want to change, you should always use one of each. Never use more than two effects of the same genre. The file already comes with the two most used effects activated.if you want to change the settings, simply change the opacity of the effect layers. In the image above, I used the standard effects.
Note: You must enable this folder to be able to perform the procedure below, regardless of any settings or changes you may have made.
View attachment 97514
Now, let's change the colors of the BG-top layer, this layer will cover much of the background of the BGM-LAYER layer. Follow the explanations below.
This layer has a linear effect with two colors, the first color will be applied at the top and the second color will be applied at the bottom. This layer has two colors, because of the layer of shadow effects, which changes the coloring of certain points on the border.this procedure corrects the appearance of white pixels in the edge contours.
Opening the color palette you must pick up the colors, from the areas shown in the image above with arrow. These areas have the exact colors to avoid the appearance of white pixels in the texture. This error happens when the 3DS performs the Texture Cut procedure.as it can not identify the lack of pixels in those areas it adds white dots. To correct this problem follow the instructions.
Note: You must use the dropper tool to get the exact colors.
View attachment 97515
Perform the same procedure, getting the color from the bottom, removing it from the point shown in the image.
View attachment 97517
Now activate this layer, so that it fills, the whole border.
View attachment 97518
Now close the Editable Texture folder, then with the selected folder, press ctrl + j, to duplicate the folder and all content contained within the folder.
View attachment 97519
Now convert the duplicate folder to the smart object (right-click on the duplicate folder and choose the convert to smart object option), then press ctrl + A to create a cut selection area. Now press ctrl + j to duplicate the selected area.
View attachment 97520
You will have a new layer.
View attachment 97521
Now let's make the layer, which will create the effect of stretching down. Press ctrl + M to activate the cut selection, and make a cut selection as shown in the image above. After performing the cut selection, press ctrl + j to duplicate the selected area.
View attachment 97522
Select the new layer, and put that 1px layer down. As shown in the picture above. The border is finished. If you do not want to follow the procedures below, save the file in PNG format.
Select all layers except the Editable Texture folder (this includes all content contained within it). Then choose the merge layers option. After merging the layers press Ctrl + A then Ctrl + J, to create a layer, with the texture image without any editing.
I use this method to save texture images in editable files, if I want to make changes to the file, I'll still have the image of the old border, in case I want to use it in another project.
Continues on the next page >>
If you want you can edit the color is the layout of the layer, Application-area. Like I did in the picture above. I left two effects, the first lets you add a stroke, the second lets you add a shadow.
View attachment 97505
After finishing the designer of your texture, select all the layers that are inside the parent layer (border-48px) and press ctrl + j, to duplicate those layers. After performing this procedure, place all of these layers inside the BGM-Layer folder. And enable the preview of this layer. The result should stand as shown in the picture above, it's ugly I know. But this procedure is necessary.
View attachment 97510
This effect is optional, it serves to increase the shadow effect on the border.
Note: If you do not want to use this effect, skip the explanations below.
View attachment 97511View attachment 97512 In the border-48px layer, has two disabled effects, the bevel & notch effect and the internal Brightness effect. By using these two effects together, you will magnify the effect available in the shadow effects folder. Just change the colors of the fields shown in the images above.keep values and settings intact The colors to be used should be removed from the corners of the border textures, remove the colors from the rounded sides. Use the dropper tool, after capturing the color, put the color, with a darker tone. Use the same color in all the color fields shown in the images above.
View attachment 97513
Now activate the Shadow Effects folder, this folder has 8 shadow effects. Four internal shadow effects and four external shadow effects. If you want to change, you should always use one of each. Never use more than two effects of the same genre. The file already comes with the two most used effects activated.if you want to change the settings, simply change the opacity of the effect layers. In the image above, I used the standard effects.
Note: You must enable this folder to be able to perform the procedure below, regardless of any settings or changes you may have made.
View attachment 97514
Now, let's change the colors of the BG-top layer, this layer will cover much of the background of the BGM-LAYER layer. Follow the explanations below.
This layer has a linear effect with two colors, the first color will be applied at the top and the second color will be applied at the bottom. This layer has two colors, because of the layer of shadow effects, which changes the coloring of certain points on the border.this procedure corrects the appearance of white pixels in the edge contours.
Opening the color palette you must pick up the colors, from the areas shown in the image above with arrow. These areas have the exact colors to avoid the appearance of white pixels in the texture. This error happens when the 3DS performs the Texture Cut procedure.as it can not identify the lack of pixels in those areas it adds white dots. To correct this problem follow the instructions.
Note: You must use the dropper tool to get the exact colors.
View attachment 97515
Perform the same procedure, getting the color from the bottom, removing it from the point shown in the image.
View attachment 97517
Now activate this layer, so that it fills, the whole border.
View attachment 97518
Now close the Editable Texture folder, then with the selected folder, press ctrl + j, to duplicate the folder and all content contained within the folder.
View attachment 97519
Now convert the duplicate folder to the smart object (right-click on the duplicate folder and choose the convert to smart object option), then press ctrl + A to create a cut selection area. Now press ctrl + j to duplicate the selected area.
View attachment 97520
You will have a new layer.
View attachment 97521
Now let's make the layer, which will create the effect of stretching down. Press ctrl + M to activate the cut selection, and make a cut selection as shown in the image above. After performing the cut selection, press ctrl + j to duplicate the selected area.
View attachment 97522
Select the new layer, and put that 1px layer down. As shown in the picture above. The border is finished. If you do not want to follow the procedures below, save the file in PNG format.
Select all layers except the Editable Texture folder (this includes all content contained within it). Then choose the merge layers option. After merging the layers press Ctrl + A then Ctrl + J, to create a layer, with the texture image without any editing.
I use this method to save texture images in editable files, if I want to make changes to the file, I'll still have the image of the old border, in case I want to use it in another project.
Continues on the next page >>