

 Anycubic Vyper GBAtemp review
Hardware
Product Information:
Good Printer for Beginners.
Anycubic has been in the 3D printer business for a few years now, releasing everything from resin-based printers and curing stations to good ol’ fashion FDM printers. Anycubic’s printers tend to range anywhere from budget-oriented, beginner tier printers to more expensive, higher end ones. Anycubic has announced and released their latest FDM printer, the Anycubic Vyper, which falls right in between at $359.99. So how is it?
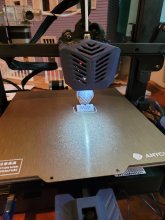
First thing we’ll do is take a look at what you’ll get when you buy your own Vyper, as well as specs and construction process. The specs for the Vyper are:
- Printer Type: FDM
- Build Volume: 245mm*245mm*260mm
- Print Resolution: ±0.1mm
- Stepper Driver: TMC2209 “Ultra Silent”
- Extruder: Single, default nozzle diameter 0.4mm
- Print Bed: Heated
- Print Speed: up to 180mm/s
- Filaments supported: PLA, TPU, ABS, PETG, Wood
- Maximum Nozzle Temp: 260C
- Maximum Hot Bed Temp: 110C
- Weight: ~22 lbs (~10kg).
- Extra Features: Filament Sensor, auto-leveling bed.
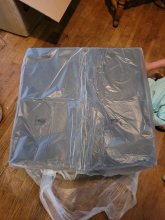
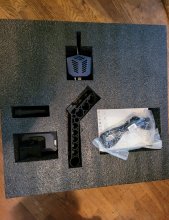
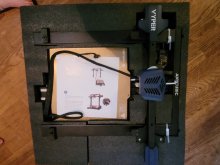
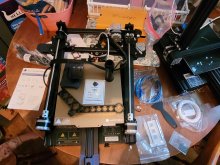
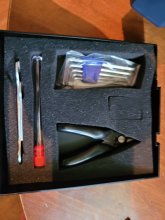
Opening the box, Anycubic has done an excellent job packing the printer securely for shipping, with the printer itself being separated into two main pieces that are secured between two tiers of a nice, firm black foam. Inside you’ll find both halves of the printer, the filament holder, touchscreen module, a USB-B cable, a small sample of white filament, build and setup instructions, a warranty “support card,” a full sized SD card (which contains a test file, manuals, and an old copy of Cura along with some profiles), and the tools needed to construct and maintain your printer. Building the printer is incredibly simple, requiring only four screws to attach the two pieces of the frame together, three screws to attach the touchscreen, and snapping the plastic filament holder to the base of the printer. After that, it’s simply a matter of cutting some zip ties used to secure pieces of the build, and attaching seven JST connectors for the motors, all of which is clearly documented and shown in photographs on the instructions page. This is perhaps one of the simplest 3D printer builds out there currently, which is really great.
In terms of features, the Anycubic Vyper certainly isn’t missing much, with a filament sensor that will detect if you run out of filament during a print, auto bed leveling so you won’t need to manually level your print bed before prints, dual lead screws, and three cooling fans for the print head, which is all quite nice considering the price point Anycubic is coming in at. Even the print bed is interesting, with the bed itself being covered with magnetic tape and then the build plate being a sheet of spring steel covered with a “special coating” that’s pitted and designed to allow prints to stick securely to the plate during printing and is easily removed and maneuverable to pull them off again once done.
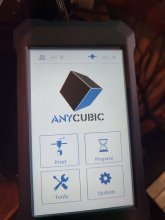
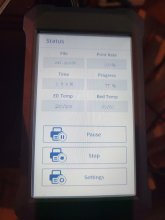
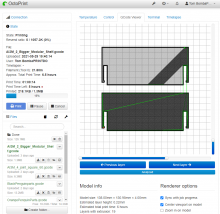
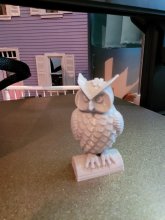
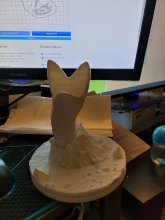
Once you’ve got everything built and ready to go, it’s time to insert the SD card into the base, turn it on, and get ready to print! The touchscreen module provides your main control of the printer, and has a nice simple interface (gee, that seems to be a common theme!), with Print, Prepare, Tools, and System being the four main options. You can set up your print, manually manage temperatures, auto-level your bed, and load/unload your filament. Loading filament is once again simple and easy: you pop the spool on the holder, snip and straighten the end, and slot it through the filament sensor into the teflon tube to the extruder. Once done, you can either manually move the filament along to the extruder, or use the touchscreen to automatically pull the filament along. Anycubic included a sample 3D model you can use to print your very first model, which is a small owl statue. Before every print, Anycubic suggests running the Auto-level function, which is accessed via the “Prepare” menu. This will heat the nozzle and print bed to 200c/60c respectively, the extruder will probe 16 points on the print bed and then use that data to automatically adjust the z-offset to ensure your prints are perfectly level. And for the most part, this works quite well! My only complaint with this process is that Anycubic opted not to include any way to manually level the print bed yourself, but really this is more a personal nitpick than anything. And if you don’t want to have to go back and forth and add files to the SD card to use your printer, you can plug the printer into any Windows PC or Mac in order to control the printer from your PC. Although personally, I use a Raspberry Pi 3b with OctoPrint, so I can simply manage my printer from anywhere in the house, which is something I strongly recommend because despite claiming to be “ultra-silent,” the TMC2209 stepper driver...isn’t. Or at least, the way Anycubic programmed the TMC2209 results in the motors (and particularly the hotbed's motor) being quite loud. Compared to my Crealty Ender 3 V2, which uses the slightly “louder” TMC2208, is somehow so much quieter than the Vyper. Whether they can fix this in a firmware update or not I couldn’t say, but until then I’d suggest perhaps keeping the printer in another room if you’re sensitive to constant noise.
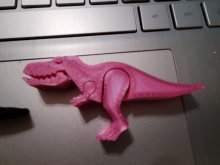

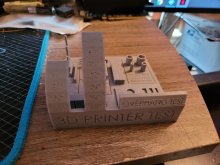
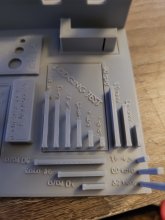
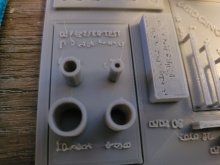


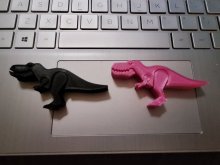
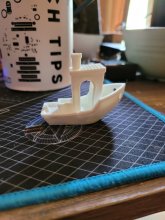
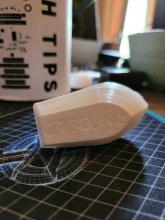
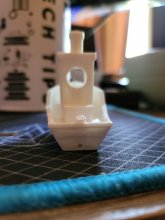
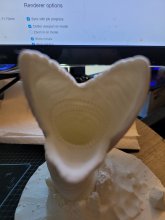
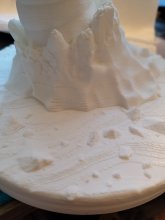
So how about the most important part then: how is the print quality? Well, this one is a hard one to answer, given that there are so many different variables that will affect how a print will look, and you really need to tinker and fine tune things to get the perfect prints. But overall, things are mostly ok. I’ve printed a few “benchmark” models, including the ever popular 3D Benchy ship as well as a more complex and detailed benchmark that shows off various capabilities of the printer. Looking at the Benchy ship, everything looks pretty ok with only the rear text being basically unreadable and the rear bottom hole being a tad messy. With the more complex benchmark, however, you can really see the limits of what you can accomplish with this printer. The biggest problem, as you can see, deals with the areas that require more precise movement, specifically the text which is basically illegible. Interestingly, I've printed this model a few different times with a few different filaments and it appears the grey filament that was provided by Anycubic is actually just...kind of low quality. There are still similar issues, they're simply not as bad as seen here. This is likely because of the 0.4mm nozzle included by default, which is one of the more common nozzle sizes, so keep in mind you might want to pick up some smaller nozzles to swap to and fine-tune your slicer settings, in case you want to print things in more detail. Everything else, however, seemed to print pretty well! The overhang test had the most issues starting at around 70 degrees, but otherwise the hole test, diameter test, bridging test, and line tests all printed out quite well.
So is the Anycubic Vyper worth it? If you’re a beginner to 3D printing, absolutely! The number of QoL features included for the modest $359.99 price point simply can’t be beat. The accuracy might not be pixel perfect, and boy is the “ultra silent” TMC2209 not really that silent, but for the price you’re paying you honestly won’t find much better.
Verdict
- Auto bed leveling and filament sensor
- Great price for the features included
- Simple and easy to build
- Perfect for beginners
- Not a huge fine of the location of the filament holder
- A bit loud
- Not super duper accurate

Options
View top chatters