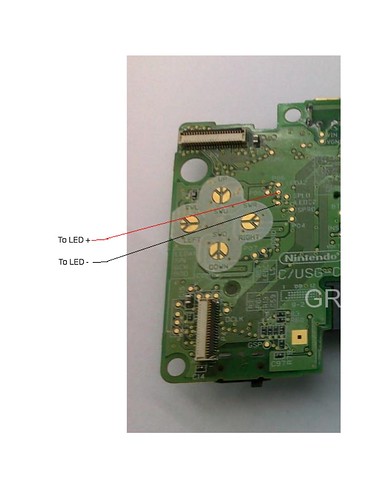
You do it by soldering a resistor (or LED bulb) to the DS Lite motherboard. It has to be on the points labelled LEDA2 and LEDC2.
I wouldnt do it with soldering though, I'd use electrical tape or just any tape. There's also conductive glue as an alternative to soldering, but I'd try it with tape since that way if I get it wrong I can just redo. The points are really small. There is every reason to avoid soldering.
For the record I have never done this mod. I've done it on 3DS XL (and DSi) but never DS Lite, but I did read a lot about doing it to a DS Lite.
See also:
- youtube video titled: "DS lite running without top screen"
- youtube video titled: "DSboy Lite 2 (DS lite in permanent GBA mode)"
- acidmods forum thread titled "run your Ds lite with only the bottom screen"