

Tutorial
Updated
[TUTORIAL] Mod to put rechargeable lithium batteries to GBP and GBC from original 3V socket
Well, after two months of waiting, I finally have all the parts and I can finally share with you the circuit that I have devised to have these consoles free of batteries and to be able to use / charge them with any normal 5V charger that today has all the world.
- Required parts:
Current rectifier at 3V output. Buck LDO module:
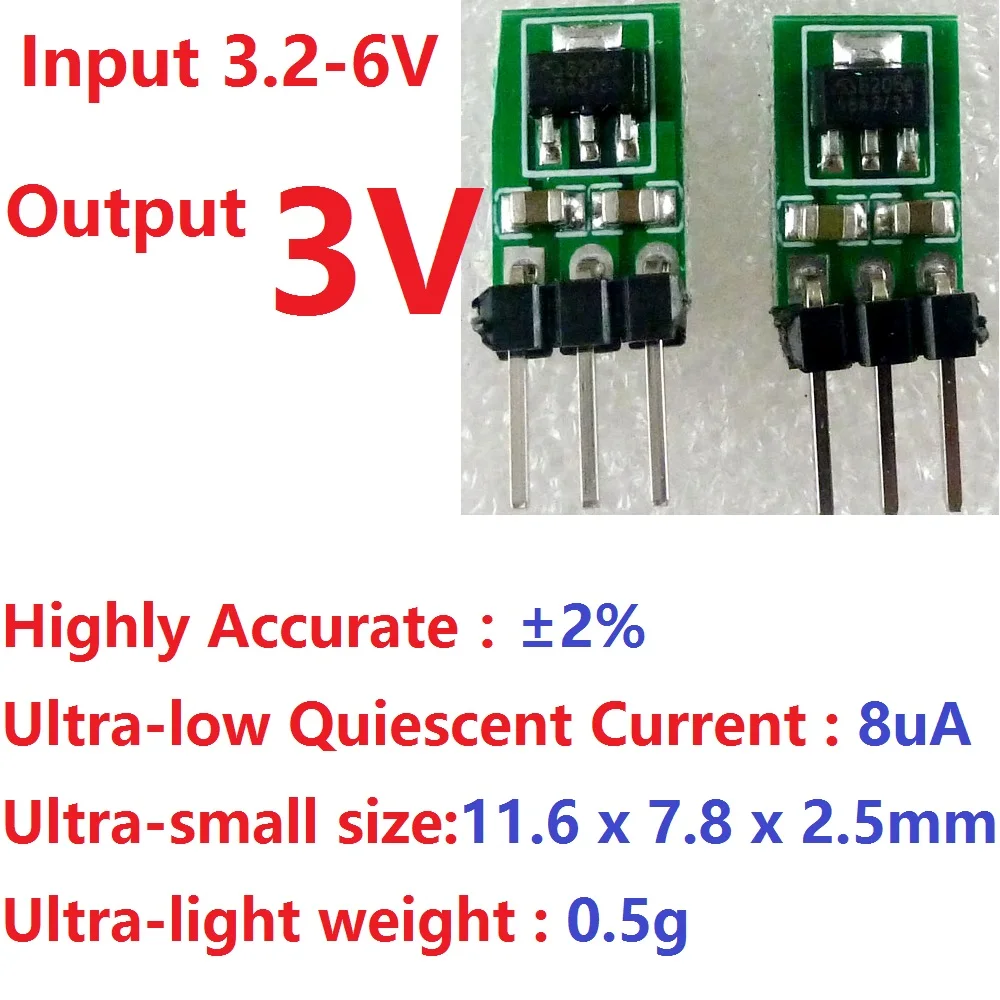
https://es.aliexpress.com/item/32810944408.html
5v charging module, USB 5V 1A 18650 TP4056:
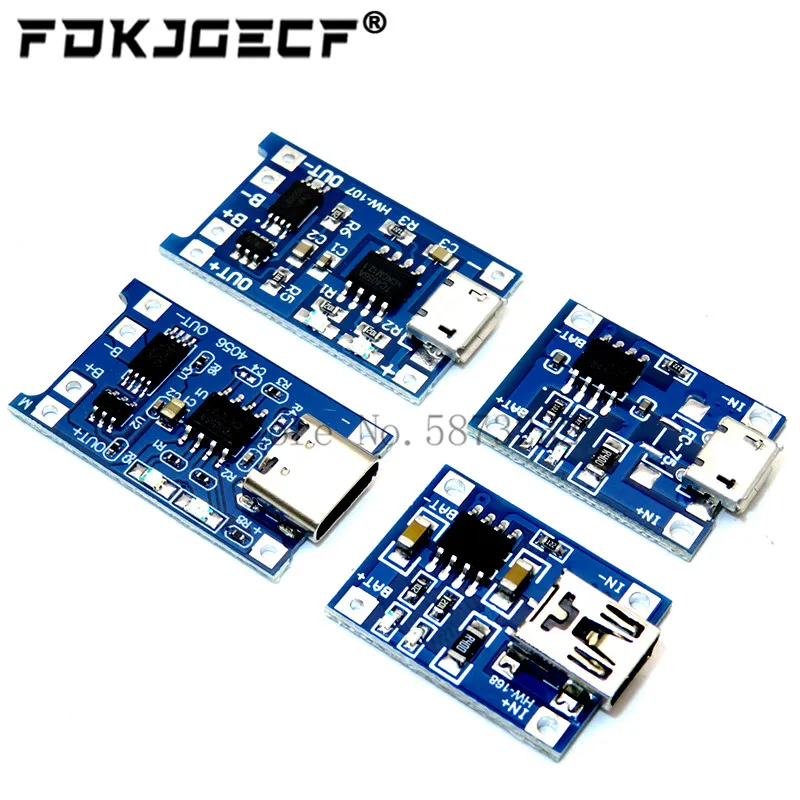
you can buy the one you want, since the input plug will be removed.
https://es.aliexpress.com/item/1005001567784022.html
Micro JST PH 1.25 connector, 2 pins, male and female:
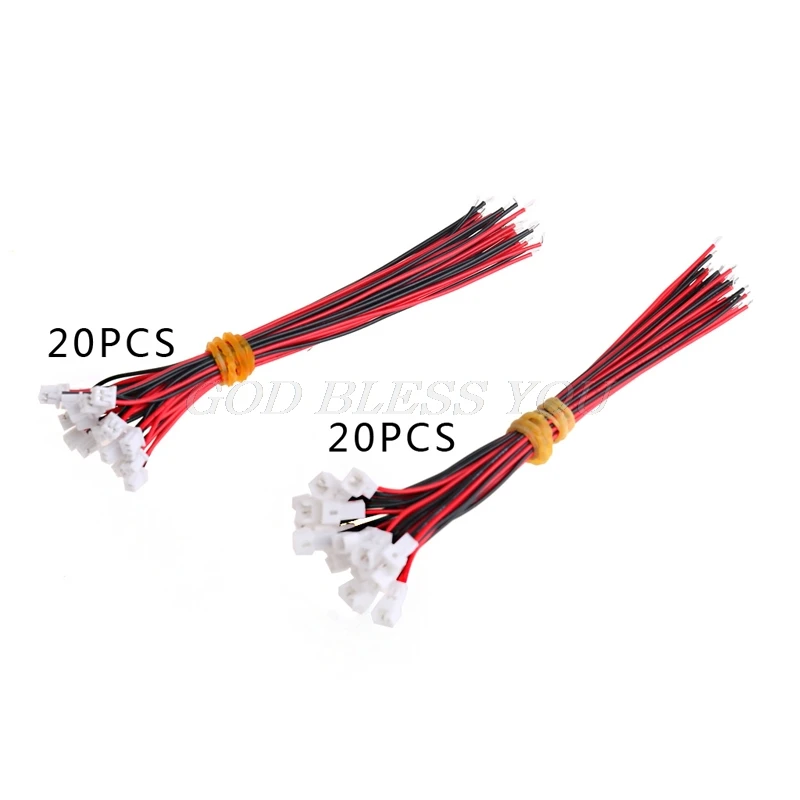
https://es.aliexpress.com/item/4001111139441.html
3.7v batteries, models 603048 900mAh for the GBP and 103450 2000mAh for the GBC
and how is the usb cable to the console socket:

https://www.amazon.es/gp/product/B00KYT3YTQ
Circuit diagram that we are going to use, so you don't get lost:

- Steps:
First we locate the diode that acts as a fuse for the external power socket, battery plates and we remove everything:
GBP


GBC


The plates will be like this, it's how you have to solder the cables:
GBP

GBC

Well, the next thing is to solder the output rectifier module to 3V, so that the consoles work, since these batteries are 3.4 ~ 4.2v, we will solder the pin VO to the socket + from the batteries, using a wire to hold it onto the plate.
GBP

GBC

then solder the gnd of the 3V module to the socket - of the batteries and to the pin batt - out of the charging module, and the VI of the 3V module to pin batt + out :

to the batt + - of the charging module we connected the connection plug, and where was the fuse plus the gnd of the current plug of the console welds it to V - IN and V + IN of the charging module respectively, having to look like this:
GBP


GBC


and we prepare the batteries:

Now we cut the cases of the consoles so that everything enters, and we will do it so that they are like this:
GBP

GBC


It only remains to isolate the areas for safety and mount everything:
GBP

GBC

and connect the batteries:


Mod finished, enjoy them:


- Required parts:
Current rectifier at 3V output. Buck LDO module:
https://es.aliexpress.com/item/32810944408.html
5v charging module, USB 5V 1A 18650 TP4056:
you can buy the one you want, since the input plug will be removed.
https://es.aliexpress.com/item/1005001567784022.html
Micro JST PH 1.25 connector, 2 pins, male and female:
https://es.aliexpress.com/item/4001111139441.html
3.7v batteries, models 603048 900mAh for the GBP and 103450 2000mAh for the GBC
and how is the usb cable to the console socket:
https://www.amazon.es/gp/product/B00KYT3YTQ
Circuit diagram that we are going to use, so you don't get lost:
- Steps:
First we locate the diode that acts as a fuse for the external power socket, battery plates and we remove everything:
GBP
GBC
The plates will be like this, it's how you have to solder the cables:
GBP
GBC
Well, the next thing is to solder the output rectifier module to 3V, so that the consoles work, since these batteries are 3.4 ~ 4.2v, we will solder the pin VO to the socket + from the batteries, using a wire to hold it onto the plate.
GBP
GBC
then solder the gnd of the 3V module to the socket - of the batteries and to the pin batt - out of the charging module, and the VI of the 3V module to pin batt + out :
to the batt + - of the charging module we connected the connection plug, and where was the fuse plus the gnd of the current plug of the console welds it to V - IN and V + IN of the charging module respectively, having to look like this:
GBP
GBC
and we prepare the batteries:
Now we cut the cases of the consoles so that everything enters, and we will do it so that they are like this:
GBP
GBC
It only remains to isolate the areas for safety and mount everything:
GBP
GBC
and connect the batteries:
Mod finished, enjoy them:
Last edited by Ninoh-FOX,


