


Thanks to Dennis Gagliano(is he around here?) for his youtube post:
(4k demonstration using different parts)
Short:The Sun can now charge my 3ds wirelessly while enjoying wireless audio while streaming

I used the following products(google them):
AUKEY Solar Charger With 16000mAh USB-C & Quick Charge 3.0 Dual-Output Power Bank
Only modification was goo(see more about goo below) & tape to get the qi pcb stuck to the back of it for a compact, one hand grab and go solution.
Aobiny charger 3 Coils Qi Wireless ChargerCircuit Board Coil Wireless Charging
Tried a few different ways to take advantage of the small screw holes... ditched them in the final. The goo is holding it in place just fine.
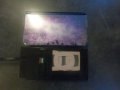
Slim-Thin Qi Standard Wireless Charging Receiver Module for Samsung Galaxy S5 Series
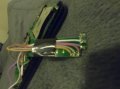
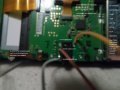
This was trimmed down to slim the package. The solder blocks that come on here were taken off and then wires soldered directly to the pads, experimented with folds in unit and lost charging, recommended not to fold, at least between the solder points and the pcb of the receiver. I used my multi meter and toned out the docking port to find out which was ground. (closest to ZR)
Brightech - BrightPlay Live HD Bluetooth Transmitter with apt-X Technology for Digital Quality Sound
Removed the onboard usb, battery, audio plug, soldered 5 wires, audio left, audio right, common ground and the two power wires to the board. Side note, this package comes as a PCB soldered on a PCB, id like to may buy another and take the one board off and perhaps make a small 3ds specific daughter board. Currently this one has some tape around it to protect the sparky bits.
8 in. x 10 in. x 0.050 in. Polystyrene Sheet/30ga silicone wire/Electrical tape/homemade surgo to hold it to the Solar Power Bank
some cables/some solder/patience/wiggling of parts to get no screen wash from "pressure" added from the bulk of parts
First few times I packaged everything together, the lower right side of the screen would be a bit white from pressure, noticeable on black screens.)
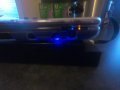
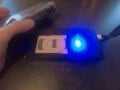
I used always use solar battery packs for out on the go our just sitting in the kitchen window, and recently needed one for my Hero6. Splattered the back of it with a mix of 50/50 corn starch and clear caulk (added black ink, two pens, ended up with way to much purple/grey putty matches my galaxy 3ds) to make a homemade "Surgo". Stuck the Qi charging pcb on the goo and made standoffs for this next bit. Cut out a clear bit of .050 poly to use as the base the 3ds would sit on. Sanded it square. Surrounded in various electrical tape. The Bluetooth is nice and with the layout of my house if its charging in the middle I can walk between two rooms with headphones. I cut an old headphone cable and used the cable to create a key-chain as a "key" to enable the Bluetooth. May add a switch to not have to have the key, but hey it reminds me the Bluetooth is on because no lights are visible yet to indicate the Bluetooth is on unless you take off the back lid. When the lid is off there is a small square hole to see the pairing button and lights. Can be paired with key or stylus. Have yet to re-position the pairing switch to the back and I think a Bluetooth light up front would look nice.
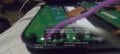
Running the charger, Bluetooth and streaming NTR gets me a pretty hot little 3ds. To combat heat created from the induction charging I taped the charging circuit on-top of the card slot. Seems to help, and flashcards only fit slightly tight. With the official carts being slightly thinner than my R4 plus, the tape holding the qi package to the card slot is making it harder for me to take the carts out, and is slightly annoying. So next time I take it apart to take pictures I may remove the tape and expose my error, remove tape and enjoy Would love to see battery percentage, and temp of device in a homebrew app like in the 3ds test app by @8BitWonder but have heard the hardware will not support this. Perhaps squeezing in a small lcd equipped usb power meter type device would provide a nice quick set of stats on the face of the bottom. I think I have room.
Found a battery percentage in the 3DSHELL thanks to @Joel16 from his post:
https://gbatemp.net/threads/3dshell-multi-purpose-file-mananger-gui-wip.471503/
(4k demonstration using different parts)
Short:The Sun can now charge my 3ds wirelessly while enjoying wireless audio while streaming
I used the following products(google them):
AUKEY Solar Charger With 16000mAh USB-C & Quick Charge 3.0 Dual-Output Power Bank
Only modification was goo(see more about goo below) & tape to get the qi pcb stuck to the back of it for a compact, one hand grab and go solution.
Aobiny charger 3 Coils Qi Wireless ChargerCircuit Board Coil Wireless Charging
Tried a few different ways to take advantage of the small screw holes... ditched them in the final. The goo is holding it in place just fine.
Slim-Thin Qi Standard Wireless Charging Receiver Module for Samsung Galaxy S5 Series
This was trimmed down to slim the package. The solder blocks that come on here were taken off and then wires soldered directly to the pads, experimented with folds in unit and lost charging, recommended not to fold, at least between the solder points and the pcb of the receiver. I used my multi meter and toned out the docking port to find out which was ground. (closest to ZR)
Brightech - BrightPlay Live HD Bluetooth Transmitter with apt-X Technology for Digital Quality Sound
Removed the onboard usb, battery, audio plug, soldered 5 wires, audio left, audio right, common ground and the two power wires to the board. Side note, this package comes as a PCB soldered on a PCB, id like to may buy another and take the one board off and perhaps make a small 3ds specific daughter board. Currently this one has some tape around it to protect the sparky bits.
8 in. x 10 in. x 0.050 in. Polystyrene Sheet/30ga silicone wire/Electrical tape/homemade surgo to hold it to the Solar Power Bank
some cables/some solder/patience/wiggling of parts to get no screen wash from "pressure" added from the bulk of parts
First few times I packaged everything together, the lower right side of the screen would be a bit white from pressure, noticeable on black screens.)
I used always use solar battery packs for out on the go our just sitting in the kitchen window, and recently needed one for my Hero6. Splattered the back of it with a mix of 50/50 corn starch and clear caulk (added black ink, two pens, ended up with way to much purple/grey putty matches my galaxy 3ds) to make a homemade "Surgo". Stuck the Qi charging pcb on the goo and made standoffs for this next bit. Cut out a clear bit of .050 poly to use as the base the 3ds would sit on. Sanded it square. Surrounded in various electrical tape. The Bluetooth is nice and with the layout of my house if its charging in the middle I can walk between two rooms with headphones. I cut an old headphone cable and used the cable to create a key-chain as a "key" to enable the Bluetooth. May add a switch to not have to have the key, but hey it reminds me the Bluetooth is on because no lights are visible yet to indicate the Bluetooth is on unless you take off the back lid. When the lid is off there is a small square hole to see the pairing button and lights. Can be paired with key or stylus. Have yet to re-position the pairing switch to the back and I think a Bluetooth light up front would look nice.
Running the charger, Bluetooth and streaming NTR gets me a pretty hot little 3ds. To combat heat created from the induction charging I taped the charging circuit on-top of the card slot. Seems to help, and flashcards only fit slightly tight. With the official carts being slightly thinner than my R4 plus, the tape holding the qi package to the card slot is making it harder for me to take the carts out, and is slightly annoying. So next time I take it apart to take pictures I may remove the tape and expose my error, remove tape and enjoy Would love to see battery percentage, and temp of device in a homebrew app like in the 3ds test app by @8BitWonder but have heard the hardware will not support this. Perhaps squeezing in a small lcd equipped usb power meter type device would provide a nice quick set of stats on the face of the bottom. I think I have room.
Found a battery percentage in the 3DSHELL thanks to @Joel16 from his post:
https://gbatemp.net/threads/3dshell-multi-purpose-file-mananger-gui-wip.471503/
- "Precise battery percentage using mcu::hwc"
Attachments
Last edited by dsearnack,


