The Wii U was truly the black sheep of the main Nintendo consoles, but in terms of homebrew capabilities, it was but a diamond in the rough. While the Wii U is way past its heyday by almost a decade, the homebrew community still continues to thrive and develop great things for the system.
One of these developers, @shinyquagsire23, has made some research and advancements towards creating a modchip for the Wii U, which he titled "de_Fuse". The modchip started when Shiny Quasire started looking at the then unhacked Wii Mini console, in an attempt to glitch boot0 on it, and while getting curious if it could work on Wii U, he found that a similar exploit could be attempted for it, with the only downsides being OTP dumps being impossible due it being all 00s and the driver for boot0 being limited to SDHC cards.
While the necessity of having a modchip for the Wii U is not a must since Wii U already has coldboot exploits and many other things like Aroma that could serve a similar purpose, the main purpose of this modchip is to allow booting a Wii U console straight from the SD card, without having to rely on the Wii U's internal eMMC chip to boot into the console. This due to the recent news about some Wii U consoles bricking entirely due to failures in the eMMC chip, so giving players the option to boot from SD card would be a relief to this delicate issue that plagues the console.
The rest of the information is highly technical and dives into the eFuses, OTP, boot0, boot1 and SRAM of the console, so those interested in a more in-depth and detailed information regarding the process can read it in Shiny Quagsire's own article about de_Fuse on his webpage.
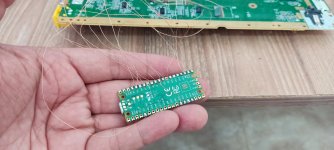
The modchip is currently in early stages of development, and it currently requires an FPGA of sorts, but it hasn't been standardized in terms of schematics or parts. However, Shiny Quagsire is trying to aim for a $25-$35 dlls range when its finished (or lower), based on RP2040 chip. Those interested and willing to collaborate and help out throughout its development can do so through Shiny Quagsire's GitHub repository for the modchip, where he keeps all of the coding and research for it open source.
i have installed it to try it out - my wii u is not completely broken but that mod has big potential.
My NAND Chip sometimes throws errors or refuses to install an Update on the first try (it starts the install process but the install will sometimes fail and throws errors when writing on NAND - not everytime but sometimes. I bought Breath of the wild PAL and it had to be updated to run and that update took around 3 install attempts to successfully install on NAND) so i wanted to be sure to have the option ready in case it crashes one day.
i got a broken unit for cheap ...with wii u black screen of death ..wii u got power off accidently while updating .now no display nor sync with gamepad ...its software issue ...will this method work in mine ??? will you recommend me to wait for this scene to develop furthur or i shall go for the install even at this stage?
i got a broken unit for cheap ...with wii u black screen of death ..wii u got power off accidently while updating .now no display nor sync with gamepad ...its software issue ...will this method work in mine ??? will you recommend me to wait for this scene to develop furthur or i shall go for the install even at this stage?
i m not sure if this will fix your problem - i could imagine that it could fix it as long as you can dump the basic stuff (like otp)
but you will either have to let your wii u be open all the time or make some holes in it to root a cable from the pico to the outside (and you will need a way to press the "flash" button somehow.).
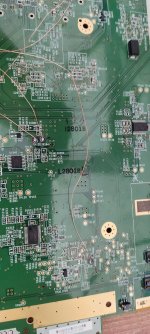
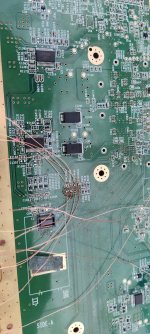
as i don't care about the visuals i just drilled a big hole on the bottom (to access the flash button) and cut out some stuff at the front (where the sd card sits) to get an usb cable out. it doesnt look nice but i can access everything i need to update the pico whenever a new release is coming out. i m not too good at that kind of coding so i cant help developing it sadly. soldering is quite easy if you are used to it a bit.
the current state of this project is quite nice but i guess if you are a bit more patient you will have a better experience with it and you probably dont need a way to access the flash button / usb slot after soldering it in (hence: no need to drill holes or something like that). I guess waiting is better for the moment.
well said buddy highly appretiate your answer,,im myself thinking of waiting till this scene develop
and yes im 99 % sure otp etc in my wii u can be extracted as i also studied the method ...im also an electronics engineer hence working on motherboard soldering micro soldering aint a big deal for me...ill now wait for the scene to furthur develop as you also said it will reduce the need of drilling the console body to get access to usb and flash button
On the wii_u_modchip GitHub repo, in the `pico_defuse/README.md` file, it says:
... But the bigger issue is that the Pico microUSB is currently the only way to perform backups/restores/diagnostics (and the firmware hasn't quite finalized yet), so the USB cable from the Pico has to go ~somewhere out the front of the console or the back.
Here's a suggestion: you can connect a pair of wires (and ground) to the debug pins to load firmware without needing a direct USB connection. You'll want to use the Raspberry Pi Debug Probe (or any standard SWD debugger).
On the wii_u_modchip GitHub repo, in the `pico_defuse/README.md` file, it says:
Here's a suggestion: you can connect a pair of wires (and ground) to the debug pins to load firmware without needing a direct USB connection. You'll want to use the Raspberry Pi Debug Probe (or any standard SWD debugger).
Hello everyone. My wii u is flashing blue light. I installed the chip, I loaded the firmware to the chip and everything is fine, my problem arises when I want to flash the files on the SD, it is a 1GB SD, the steps for this process suggest the following, flash boot1.img in the SD I do it with the win32diskimager software, then it asks to copy fw.img and ios.patch in the root of the SD but it becomes unrecognizable for windows and it asks me to format it to be able to access it I use windows I also try to open it with linux debian and I can't either, have any of you done it, how could I do it, what steps are followed after flashing the SD with boot1 to be able to copy the fw.img and ips.patch files to the SD
Hello everyone. My wii u is flashing blue light. I installed the chip, I loaded the firmware to the chip and everything is fine, my problem arises when I want to flash the files on the SD, it is a 1GB SD, the steps for this process suggest the following, flash boot1.img in the SD I do it with the win32diskimager software, then it asks to copy fw.img and ios.patch in the root of the SD but it becomes unrecognizable for windows and it asks me to format it to be able to access it I use windows I also try to open it with linux debian and I can't either, have any of you done it, how could I do it, what steps are followed after flashing the SD with boot1 to be able to copy the fw.img and ips.patch files to the SD
The easiest way is just to use two SD cards, one less than 2GB in size only with boot.img flashed on it, and a second one for everything else, formatted in fat32.
Let us know how it goes.
The easiest way is just to use two SD cards, one less than 2GB in size only with boot.img flashed on it, and a second one for everything else, formatted in fat32.
Let us know how it goes.
Thank you for answering me, first of all my English is very basic, I must use the translator. If I understand correctly, I require two SD Cards, one less than 2GB and the other size would not matter, is that correct? I ask the following: first insert the card that contains the boot1 flashed on it, after it is loaded, I remove the card and insert the second card to continue with the process. Or how would the console only have 1 SD card reader. I apologize for my ignorance and thanks again for answering
Thank you for answering me, first of all my English is very basic, I must use the translator. If I understand correctly, I require two SD Cards, one less than 2GB and the other size would not matter, is that correct? I ask the following: first insert the card that contains the boot1 flashed on it, after it is loaded, I remove the card and insert the second card to continue with the process.
Thank you for answering me, first of all my English is very basic, I must use the translator. If I understand correctly, I require two SD Cards, one less than 2GB and the other size would not matter, is that correct? I ask the following: first insert the card that contains the boot1 flashed on it, after it is loaded, I remove the card and insert the second card to continue with the process. Or how would the console only have 1 SD card reader. I apologize for my ignorance and thanks again for answering
Flash boot1.img to a 1GB SD card. Some 2GB cards may work, but 1GB seems to be the sweet spot--it just has to be non-SDHC. boot1.img includes an MBR header, so you may have to format the FAT32 partition after flashing in order to continue. Flashing can be done via win32diskimager, dd, or any other SD card formatter.
According to the author's above instructions, I first flash boot1.img, and then directly format this SD card as FAT32. It will work very well. This way, you don't need 2 SD cards.
Thank you for your answers @Valery0p and @Ysecond.
Yesterday I was able to make the connection
My steps are the following in case it helps anyone, I will try to mount a video on Youtube but in my mother tongue, I already made the otp and seeprom backup.
1 Use the Windows CMD to delete any partition on the SD card and leave it without giving it any format.
2 use the program wim32diskimager to flash boo1
3 Format the SD fat32 and copy FW.img and ios.patch
4 insert the SD into the wii u
5 flash the raspberry pi pico with the firmware pico_defuse.uf2, to do this press the bootstrap button of the pi pico and hold it, at the same time connect it to the computer it will connect as if it were a storage unit and 2 files will appear by default there is no need to delete them then the pico_defuse.uf2 firmware is copied when it finishes copying the storage unit disappears and an error message appears in Windows. there is no need to worry about that, we proceed to disconnect the pi pico from the computer
6 make all the connections between the pi pico and the wii u board in the creator's gir there are already images of the points to be soldered
7 open putty to connect the pi pico with the computer you have to select serial connection and you have to write the port by hand before you can go to the file manager and connect the pi pico to the computer to verify which com ports are selected and know which one to write in putty the speed is 115200
8 connect the wii u to power
9 connect the wii u to a monitor via HDMI
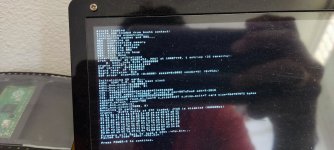
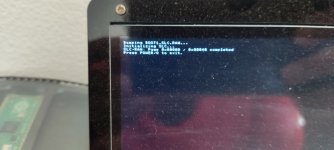
10 give the power button will appear in putty something like the following "WII U_STATE_MONITORING"
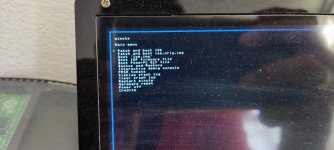
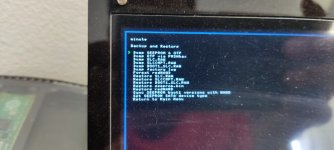
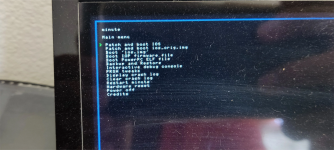
11 now you can navigate through the minute menu it is different from gary's menu because in this menu you navigate with the power button and select with the eject button
Now I have a question, how can I make the MLC backup if it has a size of 32GB and the SD is 1GB?
I am very happy to do this process because at least the wii u no longer has the blinking blue light and I see a light at the end of the tuner to be able to repair it thanks to the creator of de_fuse and this community
The next step will be to make the backup of MLC to carry out the verification
I also apologize for formulating my problem in this thread but it seemed the right thing to do, so open a separate thread. I don't know if I would have the attention that I have had in this thread. I apologize to the creator if necessary, I will open a thread to continue with the process, if not I will continue in this thread
Finally I tell you that I have 3 wii u all bought to try to repair them, none of them work, another one arrived with the problem that the game pad does not connect, it is not the game pad because I tried it with a wii u that works and the gamepad works, I changed the radio frequency modules and it is still not repaired and the other wii u got stuck in a file transfer between wii and wii u it stayed in the fourth step and neither forwards nor backwards I am also trying to solve it with the menu from SDIO I entered a thread but they advised me to open one for better monitoring.
thank you
Post automatically merged:
Update.
1 I did start the menu with the 1GB memory in which boo1 is flashed and copied the fw.img and ios.patch files when it was loaded, I made the change for a 64GB memory of the SDXC type only with the fw files. img and ios.patch copied to the root and everything worked.
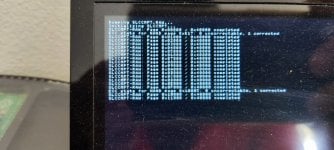
2 I started doing all the dumps that allow the backup and restore option, everything seems fine.
3 when removing the sd card and reviewing the files on the computer, the SLC.RAW dump only weighs approximately 500MB. and the SLCMPT.RAW dump also weighs about the same.
I don't see more dump options in the menu to get the 8GB of MLC/EMMC from the console.
4 perform the process again with the otp.bin, but I have doubts when I perform the otp dump, it is saved as de_Fuse_otp.bin, I would have to rename it to otp.bin or leave it like that.
Thanks and I'll stay tuned, I'll check again the git of the creator of this tool in case I'm omitting something, let's continue documenting this wonderful work
I also have such doubts. I didn't see the dump mlc option either. So I want to know, is ' minute_minute ' and ' minute_ ' the same thing? The menu in the photo is just ' minute ' Is it?
It's the first Nintendo Switch firmware update of 2024. Made available as of today is system software version 18.0.0, marking a new milestone. According to the patch...
After a couple days of Nintendo releasing their 18.0.0 firmware update, @SciresM releases a brand new update to his Atmosphere NX custom firmware for the Nintendo...
Today, April 8th, 2024, at 4PM PT, marks the day in which Nintendo permanently ends support for both the 3DS and the Wii U online services, which include co-op play...
Hello, GBAtemp members! After a prolonged absence, I am delighted to announce my return and upgraded form to you today...
Introducing tempBOT AI 🤖
As the embodiment...
Yet another casualty goes down in the never-ending battle of copyright enforcement, and this time, it hit a big website which was the host for many fangames based and...
With Apple having recently updated their guidelines for the App Store, iOS users have been left to speculate on specific wording and whether retro emulators as we...
The highly popular and accurate FPGA hardware, MisterFGPA, has received today a brand new update with a long-awaited feature, or rather, a new core for hardcore...
The time has finally come, and after many, many years (if not decades) of Apple users having to side load emulator apps into their iOS devices through unofficial...
The romhacking community is always a source for new ways to play retro games, from completely new levels or stages, characters, quality of life improvements, to flat...
Retro handheld manufacturer Anbernic is releasing a refreshed model of its RG35XX handheld line. This new model, named RG35XX 2024 Edition, features the same...
It's the first Nintendo Switch firmware update of 2024. Made available as of today is system software version 18.0.0, marking a new milestone. According to the patch...
Today, April 8th, 2024, at 4PM PT, marks the day in which Nintendo permanently ends support for both the 3DS and the Wii U online services, which include co-op play...
Hello, GBAtemp members! After a prolonged absence, I am delighted to announce my return and upgraded form to you today...
Introducing tempBOT AI 🤖
As the embodiment...
After a couple days of Nintendo releasing their 18.0.0 firmware update, @SciresM releases a brand new update to his Atmosphere NX custom firmware for the Nintendo...
With Apple having recently updated their guidelines for the App Store, iOS users have been left to speculate on specific wording and whether retro emulators as we...
The time has finally come, and after many, many years (if not decades) of Apple users having to side load emulator apps into their iOS devices through unofficial...
Yet another casualty goes down in the never-ending battle of copyright enforcement, and this time, it hit a big website which was the host for many fangames based and...
A new Nintendo Switch firmware update is here. System software version 18.0.1 has been released. This update offers the typical stability features as all other...
The highly popular and accurate FPGA hardware, MisterFGPA, has received today a brand new update with a long-awaited feature, or rather, a new core for hardcore...
Nintendo has recently announced through their social media accounts that a new Indie World stream will be airing tomorrow, scheduled for April 17th, 2024 at 7 a.m. PT...


 de_Fuse, the One True Pwn article