

Tutorial
Updated
How to mod CTCater's Hekate (custom colours and text)
Hello everyone,
Today I'll be showing you how to make your own Hekate mods. These are the kind of mods I'll be showing off today:
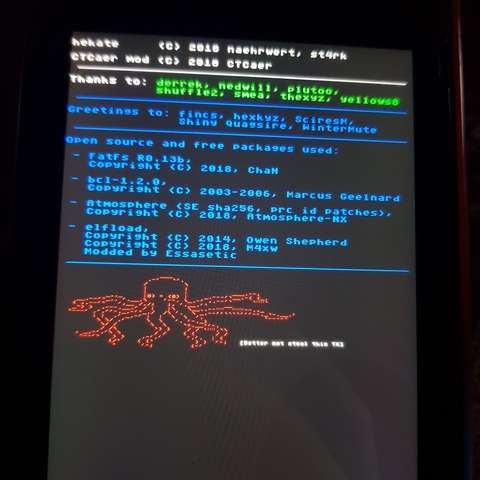
(unlike in the picture I'll be showing you how to modify the title on the top as well.)
Requirements:
DevkitPro: https://github.com/devkitPro/installer/releases
Git: https://git-scm.com/downloads
Notepad++: https://notepad-plus-plus.org/
Being able to use command prompt properly,
Knowing how to look up and use hex values,
Have about 15-20 minutes to spare,
And be a master coder and have a 300iq.
NOTE: I will not be going through how to get these programs installed and working in this tutorial. In order to follow this you must already have them installed and verify they're working properly. I will also be changing some things from the example photos (nothing major just a few minor text edits.)
You shouldn't worry too much about the requirements (the ones that don't require you to download stuff anyway) as I'll try to make it as "noob" friendly as possible. But if (for whatever reason) you can't meet the requirements/lost interest then I suggest to leave now. Otherwise buckle up as this is going to be a fun ride.")
STEP 1: Getting the source code:
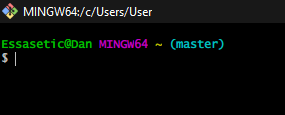
Launch up Git Bash and you should see a screen like this:
(the tab will be much bigger for you obviously)
Then simply copy and paste this command into the terminal and hit enter:
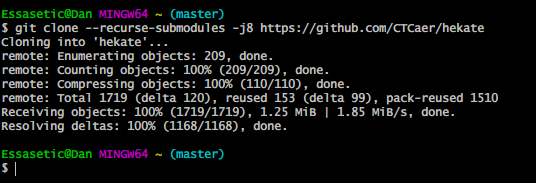
If you've done it correctly you should end up with something like this:
We now have the Hekate source code installed to wherever we directed it to. (The default directory is the "Users" folder). We can now close out of Git Bash! This is the boring stuff over with. Time to move to the more exciting parts now.
STEP 2: Editing the Source Code:
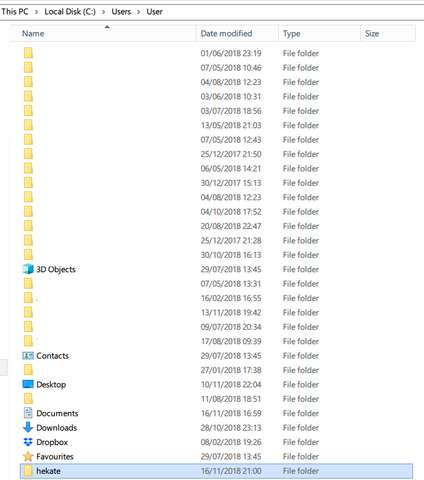
Navigate to where you stored the source code. In my case (and probably yours too) it will be in the C:/User/Users directory. Go there and you should find a "hekate" folder inside of there.
If it isn't in the "Users" directory then you simply have to check the top of the Git Bash tab to tell you where it's directed at.
Anyway go inside the folder and you should see all the source code inside of it. (If not then I highly recommend redownloading it just so none of it is missing/corrupt.)
Search for main.c inside that folder and you should get this result:
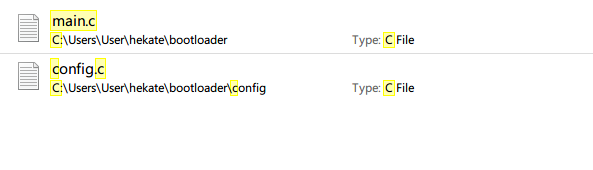
You can simply ignore config.c as it's not what we need for this. Right click on main.c and click on "Edit with Notepad++".
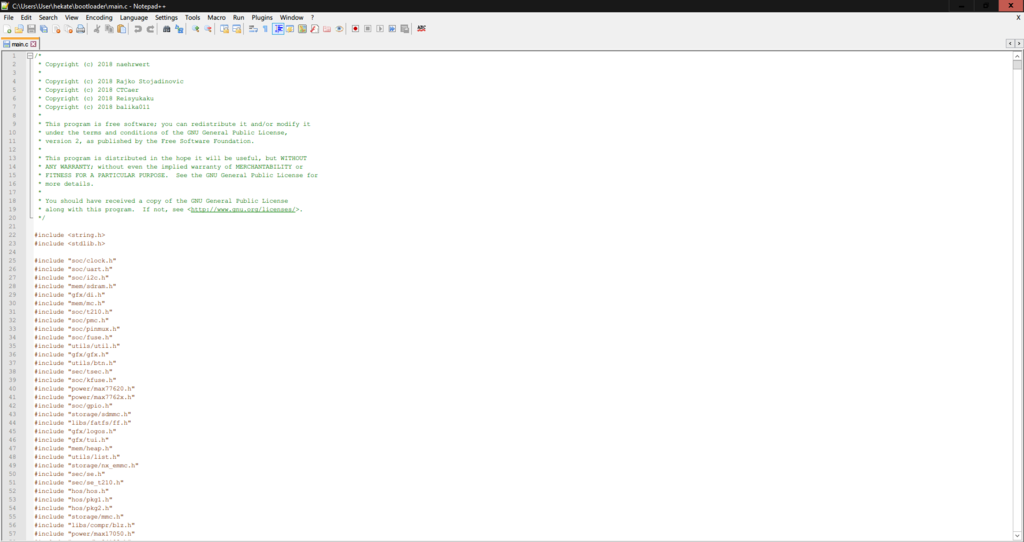
You should then be able to see this:
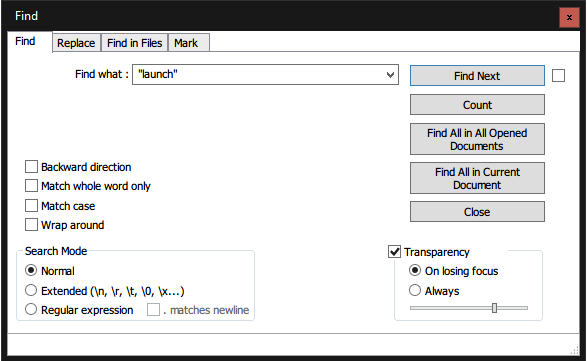
Then hit ctrl+f then search
You should be able to see this:
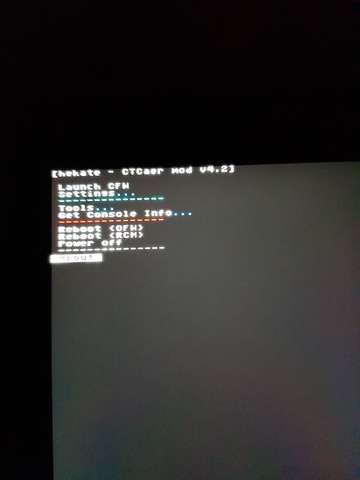
You will probably recognise this from the menu you see when you boot Hekate. You can change the text (in between the quotes) to whatever you want.
You'll also notice that there are dashes separating the text and an hex value next to it. We'll come back to that as for now we're only interested in the text.
Once you've done editing the menu text. We can move on to the about section.
Hit Ctrl+F again, this time click on "backward direction" and search for
You should end up somewhere around here:
One of the things you can do here is add your own text into the credits. I feel like this is a good time to mention this:
PLEASE DON'T REMOVE THE CREDITS, PUT YOUR OWN NAME ON AND RE-RELEASE IT TO THE PUBLIC AND CLAIM IT AS YOUR OWN CODE/WORK.
This will only get you into legal trouble (as it violates the GNU 2.0 licence Hekate uses). And it makes you look scummy.
However feel free to remove the credits entirely and put your own in as long as it's for PRIVATE USE ONLY!!!
With that warning out of the way:
Simply press enter to make another line in the code, put a quotation mark on it, add a few spaces to align with the credits (or don't if you don't like being organised,) add your own text, then add
This is what you should end up with:

We're almost done with the text (for now). We'll get to editing hex values/colours in just a moment. But for now.
Scroll down a few lines and you should see this:
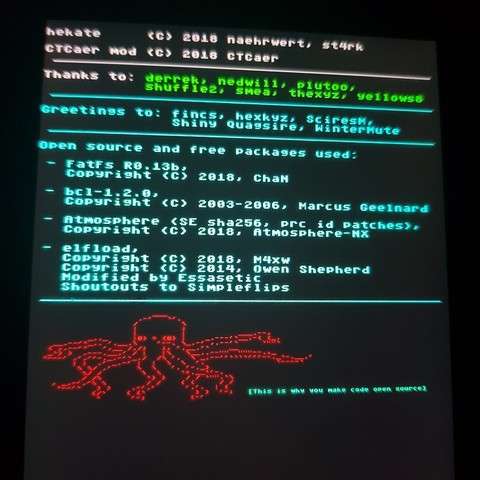
You can see the text "switchbrew" written next to the octopus. You can edit this to whatever you like. (I personally don't want to make a flame war against TX fanboys on this thread at least). So I'll put "This is why you make code open source" on there.
We're done for text for now. Now we can get to editing hex values!
You can completely ignore the code that's on line 3200 and 3201. Leave that as the default. What we're interested in is the "credits" and "octopus" words and the hex values next to them.
Let's start with the credits:
you'll notice that they're two hex values on the credits.
The first one represents "Thanks to" (by default which is blue)
And the second values represents "Greetings to" and "Open source and free packages used" (which by default is grey)
I'd recommend looking for which colours that you'll want to use at this point.
For the purposes of this tutorial I'll go with Green and Cyan.
I'd recommend going to this website:
As it's a great way of picking out colours.
BUT REMEMBER ALWAYS ADD FF TO THE BEGINNING OF EACH HEX VALUE AND REMOVE THE HASHTAG! (Also make all the letters capitals just to be safe.)
Otherwise it'll be too short and Hekate won't recognise it.
So for example (since I'm picking green and cyan) these are the values by default:
Green: #00ff00
Cyan: #00ffff
You'd want to make them something like this:
Green: FF00FF00
Cyan: FF00FFFF
Then simply paste them in. (DO NOT PASTE IT OVER THE 0x.)
Now we'll move on to the octopus:
since we already know what we're doing this will be quicker.
However now instead of two they're 4 values. And I'll need to explain to you what they are and what they do.
The 1st and 3rd values represent the octopus (as they're the same value,)
The 2nd value represents the grey outline of the octopus
and the 4th value represents the text right next to the octopus that we edited earlier.
So I'll want the 1st and 3rd values to be red,
i'll leave 2nd value as default
and leave the 4th value as default (as I like the colour.)
So following the same rules as last time (and yes before you ask red needs two f's as well despite already having two f's.)
And if you've done everything correctly you should of done this:

Almost finished now.
Go to ctrl+f and type in the edited text you put for "Launch" (so for me it's "Launch CFW".)
Remember the dashes I mentioned earlier? Well we're going to be editing that now.
As long as you've understood the examples I've put for what to do you can easily skim through this.
These are the colours I'll be putting for the dashes:
First dash will be red,
second dash will be cyan
third dash will be white.
(Use the example above for reference of what to do for what colour that you want to put.)
Then scroll down until you hit line 3326.
There you'll see the title and a value that you can ignore.
For the title you can simply edit it to what you want (in between quotations obviously).
You should end up with something like this:
(You can edit other hex values in the submenus but I won't be going through that as that'll be unnecessary and make the tutorial even longer.)
You're now done editing the text! Simply click file and save and exit out of Notepad++!
STEP 3: Compiling:
Now open up Command Prompt and type in:
(or you can open up Powershell in the directory by holding shift and right clicking if you went into the Registry to set that up.)
And simply type. Get this.
I know. So simple but yet so effective.
Anyway hit enter and you should see all the code compile.
Give it about 30 seconds to compile and once it's done you should see this.
If you get any errors in between check what you've put. (I'll be happy to help in the comments).
Now close Command Prompt/Powershell and navigate to the hekate folder.
You should see a new folder called output and inside that our compiled hekate.bin file.
STEP 4: Testing and Final Results:
Simply inject the payload using any method you want and you can see the results for yourself:
So this is the end of the tutorial.
Just a few notes before I sign off.
#1: There's probably a way to edit the octopus to be a different image but I haven't tested that out yet and frankly I've spent enough time on this tutorial already and it's long enough.
#2: You can use the compilation method to compile other things as well (like modules for Atmosphere so you can run the latest version without any problems.)
and #3: I would like some constructive feedback on the tutorial. Because despite spending hours on it I'd like people to point out what I can improve on for next time.
Thanks for following this tutorial.
This is Essasetic signing off.
Have a good one =)
Today I'll be showing you how to make your own Hekate mods. These are the kind of mods I'll be showing off today:
(unlike in the picture I'll be showing you how to modify the title on the top as well.)
Requirements:
DevkitPro: https://github.com/devkitPro/installer/releases
Git: https://git-scm.com/downloads
Notepad++: https://notepad-plus-plus.org/
Being able to use command prompt properly,
Knowing how to look up and use hex values,
Have about 15-20 minutes to spare,
NOTE: I will not be going through how to get these programs installed and working in this tutorial. In order to follow this you must already have them installed and verify they're working properly. I will also be changing some things from the example photos (nothing major just a few minor text edits.)
You shouldn't worry too much about the requirements (the ones that don't require you to download stuff anyway) as I'll try to make it as "noob" friendly as possible. But if (for whatever reason) you can't meet the requirements/lost interest then I suggest to leave now. Otherwise buckle up as this is going to be a fun ride.
STEP 1: Getting the source code:
Launch up Git Bash and you should see a screen like this:
(the tab will be much bigger for you obviously)
Then simply copy and paste this command into the terminal and hit enter:
git clone --recurse-submodules -j8 https://github.com/CTCaer/hekate
If you've done it correctly you should end up with something like this:
We now have the Hekate source code installed to wherever we directed it to. (The default directory is the "Users" folder). We can now close out of Git Bash! This is the boring stuff over with. Time to move to the more exciting parts now.
STEP 2: Editing the Source Code:
Navigate to where you stored the source code. In my case (and probably yours too) it will be in the C:/User/Users directory. Go there and you should find a "hekate" folder inside of there.
If it isn't in the "Users" directory then you simply have to check the top of the Git Bash tab to tell you where it's directed at.
Anyway go inside the folder and you should see all the source code inside of it. (If not then I highly recommend redownloading it just so none of it is missing/corrupt.)
Search for main.c inside that folder and you should get this result:
You can simply ignore config.c as it's not what we need for this. Right click on main.c and click on "Edit with Notepad++".
You should then be able to see this:
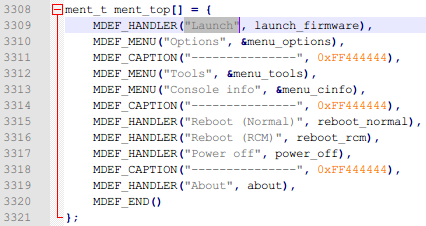
Then hit ctrl+f then search
(with quotations) and press "Find Next"."launch"
You should be able to see this:
You will probably recognise this from the menu you see when you boot Hekate. You can change the text (in between the quotes) to whatever you want.
You'll also notice that there are dashes separating the text and an hex value next to it. We'll come back to that as for now we're only interested in the text.
Once you've done editing the menu text. We can move on to the about section.
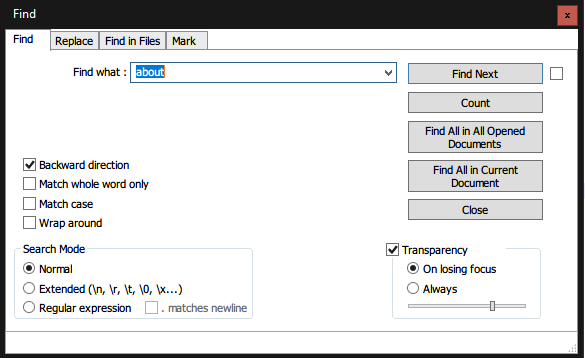
Hit Ctrl+F again, this time click on "backward direction" and search for
(yes without quotations.)about
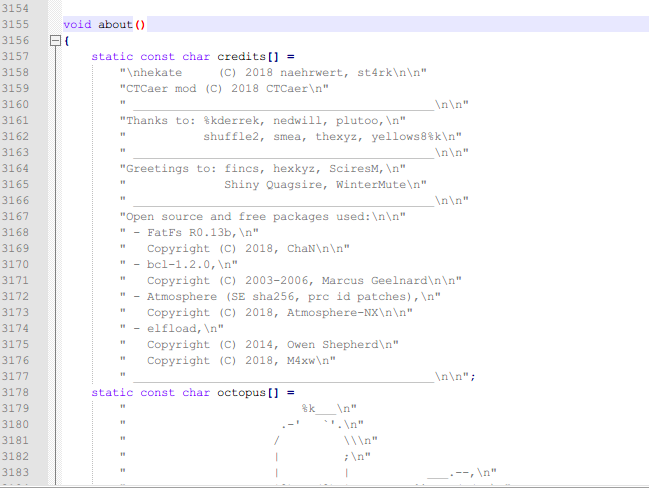
You should end up somewhere around here:
One of the things you can do here is add your own text into the credits. I feel like this is a good time to mention this:
PLEASE DON'T REMOVE THE CREDITS, PUT YOUR OWN NAME ON AND RE-RELEASE IT TO THE PUBLIC AND CLAIM IT AS YOUR OWN CODE/WORK.
This will only get you into legal trouble (as it violates the GNU 2.0 licence Hekate uses). And it makes you look scummy.
However feel free to remove the credits entirely and put your own in as long as it's for PRIVATE USE ONLY!!!
With that warning out of the way:
Simply press enter to make another line in the code, put a quotation mark on it, add a few spaces to align with the credits (or don't if you don't like being organised,) add your own text, then add
right next to it. Then repeat this if you want to add multiple lines of text.
This is what you should end up with:
We're almost done with the text (for now). We'll get to editing hex values/colours in just a moment. But for now.
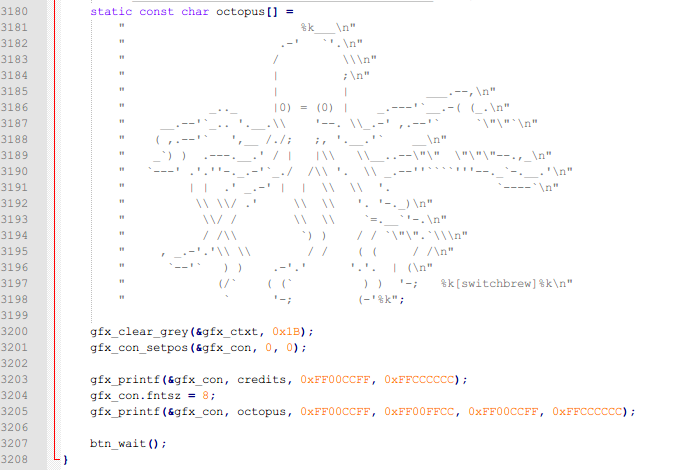
Scroll down a few lines and you should see this:
You can see the text "switchbrew" written next to the octopus. You can edit this to whatever you like. (I personally don't want to make a flame war against TX fanboys on this thread at least). So I'll put "This is why you make code open source" on there.
We're done for text for now. Now we can get to editing hex values!
You can completely ignore the code that's on line 3200 and 3201. Leave that as the default. What we're interested in is the "credits" and "octopus" words and the hex values next to them.
Let's start with the credits:
you'll notice that they're two hex values on the credits.
The first one represents "Thanks to" (by default which is blue)
And the second values represents "Greetings to" and "Open source and free packages used" (which by default is grey)
I'd recommend looking for which colours that you'll want to use at this point.
For the purposes of this tutorial I'll go with Green and Cyan.
I'd recommend going to this website:
As it's a great way of picking out colours.
BUT REMEMBER ALWAYS ADD FF TO THE BEGINNING OF EACH HEX VALUE AND REMOVE THE HASHTAG! (Also make all the letters capitals just to be safe.)
Otherwise it'll be too short and Hekate won't recognise it.
So for example (since I'm picking green and cyan) these are the values by default:
Green: #00ff00
Cyan: #00ffff
You'd want to make them something like this:
Green: FF00FF00
Cyan: FF00FFFF
Then simply paste them in. (DO NOT PASTE IT OVER THE 0x.)
Now we'll move on to the octopus:
since we already know what we're doing this will be quicker.
However now instead of two they're 4 values. And I'll need to explain to you what they are and what they do.
The 1st and 3rd values represent the octopus (as they're the same value,)
The 2nd value represents the grey outline of the octopus
and the 4th value represents the text right next to the octopus that we edited earlier.
So I'll want the 1st and 3rd values to be red,
i'll leave 2nd value as default
and leave the 4th value as default (as I like the colour.)
So following the same rules as last time (and yes before you ask red needs two f's as well despite already having two f's.)
And if you've done everything correctly you should of done this:
Almost finished now.
Go to ctrl+f and type in the edited text you put for "Launch" (so for me it's "Launch CFW".)
Remember the dashes I mentioned earlier? Well we're going to be editing that now.
As long as you've understood the examples I've put for what to do you can easily skim through this.
These are the colours I'll be putting for the dashes:
First dash will be red,
second dash will be cyan
third dash will be white.
(Use the example above for reference of what to do for what colour that you want to put.)
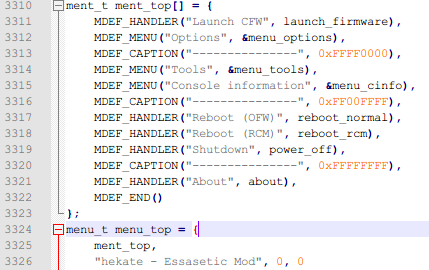
Then scroll down until you hit line 3326.
There you'll see the title and a value that you can ignore.
For the title you can simply edit it to what you want (in between quotations obviously).
You should end up with something like this:
(You can edit other hex values in the submenus but I won't be going through that as that'll be unnecessary and make the tutorial even longer.)
You're now done editing the text! Simply click file and save and exit out of Notepad++!
STEP 3: Compiling:
Now open up Command Prompt and type in:
cd insert your hekate directory here
(or you can open up Powershell in the directory by holding shift and right clicking if you went into the Registry to set that up.)
And simply type. Get this.
make
I know. So simple but yet so effective.
Anyway hit enter and you should see all the code compile.
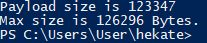
Give it about 30 seconds to compile and once it's done you should see this.
If you get any errors in between check what you've put. (I'll be happy to help in the comments).
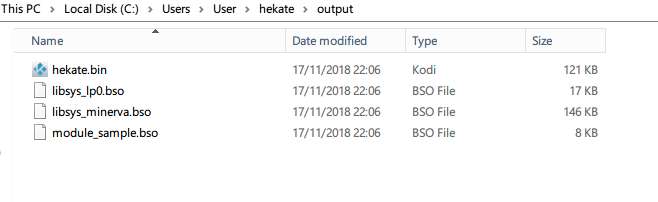
Now close Command Prompt/Powershell and navigate to the hekate folder.
You should see a new folder called output and inside that our compiled hekate.bin file.
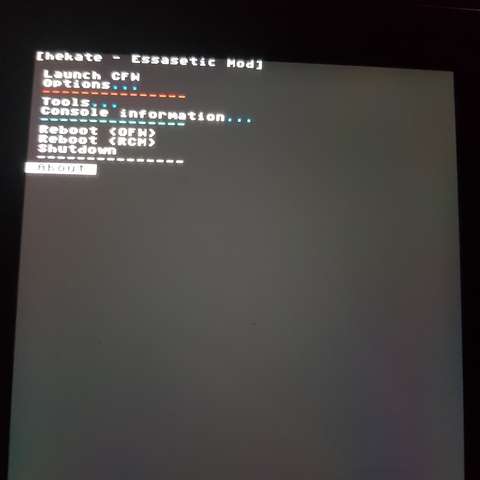
STEP 4: Testing and Final Results:
Simply inject the payload using any method you want and you can see the results for yourself:
So this is the end of the tutorial.
Just a few notes before I sign off.
#1: There's probably a way to edit the octopus to be a different image but I haven't tested that out yet and frankly I've spent enough time on this tutorial already and it's long enough.
#2: You can use the compilation method to compile other things as well (like modules for Atmosphere so you can run the latest version without any problems.)
and #3: I would like some constructive feedback on the tutorial. Because despite spending hours on it I'd like people to point out what I can improve on for next time.
Thanks for following this tutorial.
This is Essasetic signing off.
Have a good one =)
Last edited by Essasetic,
, Reason: For the people who use the white theme. You should be able to see the tutorial now.

