


https://gbatemp.net/threads/release-ultimate-gen-md-forwarder-maker-for-3ds.454972/how do i do the sega vc injector?
You are using an out of date browser. It may not display this or other websites correctly.
You should upgrade or use an alternative browser.
You should upgrade or use an alternative browser.
Hello, someone who doesnt understand what im doing here. I tried to use the 3ds cia converter but it just responds with wrong xorpad. Im using decrypted roms downloaded from the web with godmode9
no need to do that, extract the cia with ctrtool or something.
um how?
You could just do "ctrtool --contents=contents game.cia" Or if you're not familiar with command line tools you can google "Asia81HackPack" and use that to extract the CIA.um how?
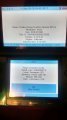
My CIA file fails to install and I don't know why. I followed the instructions using xorpad files and I received the message in the pic provided. Now I'm starting over and I'm trying to use the new version 5.0 method with the boot9.bin file to create a new CIA file, and I get the error message that I need to generate my xorpads. I have a few questions:
1) In which folder do I put the boot9.bin and *.3ds files exactly?
2) Do I still need to create the ncchinfo.bin file if I no longer need the .xorpad files?
3) How do I know if I have the proper key to use the boot9.bin file? I just dumped my boot9.bin file to my boot9strap folder and I'm using that (date modified is 5/1/2017).
Attachments
Last edited by Chomper,


Use 3dsconv, it's 2x even 3x faster (from personnal use), no need to generate xorpads, and you have a percentage display.Hope to display a progress bar when converting multiple filesThanks.
Just drag'n'drop your .3ds and you're done.

Last edited by Asia81,
I just gave this a shot (just got Luma set up on my 3DS) and after installing the .cia with FBI it tells me I have a new title and is listed, but when I try to Unwrap nothing happens. These are the steps I did:
**EDIT** sigh, again--disregard. Just needed to restart the device and they opened fine. :/
- Extracted Simple CIA Converter to folder on desktop and launched it. Saw folders were created.
- Copied boot9.bin from /boot9strap folder of SD card to Simple CIA Converter folder on desktop.
- Copied .3DS file (Dragon Quest VII) into Simple CIA Converter's /roms subfolder.
- Launched Simple CIA Converter.
- Clicked Create 'ncchinfo.bin', though I'm not sure this is needed anymore in new version?.
- Clicked Convert 3DS ROM to CIA and pointed it at folder where .3ds file is located.
- Once it was complete, copied the .cia file to SD card in /cias.
- Inserted SD into 3DS and booted up.
- Launched FBI installer.
- Browsed to the dq7.cia file and installed it.
- Shaved my beard, regrew it, raised a family.
- When it was done I exited FBI installer and saw Dragon Quest VII listed as a new item on the screen, but could not unwrap it.
**EDIT** sigh, again--disregard. Just needed to restart the device and they opened fine. :/
Last edited by midas1108,
hi guys and thanks Riku for this... i hope someone can help me with my issue.
i have pre decrypted .3ds files and i cannot convert them to .cia no matter what i tried.. decypting them doesnt make sense anyway since they are decrypted already .. any ideas?
i have pre decrypted .3ds files and i cannot convert them to .cia no matter what i tried.. decypting them doesnt make sense anyway since they are decrypted already .. any ideas?

i need to have a boot9.bin and boot11.bin? for converter my 3ds backup to cia?3dsconv
In case the readme.txt was not very clear about where to place the 'boot9.bin' file, it goes in the main '3DS Simple CIA Converter v5.0' folder and not in the 'xorpads' subfolder. You do not need to place a second 'boot9.bin' in 'xorpads'. You also do not need to Create 'ncchinfo.bin' file beforehand; this step is redundant. Just go straight to Convert 3DS ROM to CIA after once you have the 'boot9.bin' & placing your 3DS files in the 'ROM' folder.
Another thing I found out is that you do not have to worry about extracting different boot9.bin files from separate 3DS systems. They're the exact same file as far as I could tell using winRAR to check CRC32 hash between both of my New 3DS units. I dunno if differences in firmware create different boot9.bin, but both of mine are on 11.6-0.39U firmware.
Edit : More clarification. You only need to extract just the 'boot9.bin' file and not the 'boot11.bin'. To create boot9.bin, press and hold the (Start) + (Select) + (X) buttons for a few seconds at start up when turning on your 3DS. If you keep holding this combination, you will be stuck at a blank screen. This is fine. Just let go of the buttons to enter into 3DS Home Menu. Restart the 3DS while holding (Start) to enter Luma Chainloader. Select GodMode9, go to SDCARD > boot9strap folder to check if 'boot9.bin' , 'boot11.bin' , and 'otp.bin' were created. This might take several attempts and restarts if these don't show up. You can delete these three after obtaining boot9.bin.
Last edited by TurdPooCharger,
the bootrom is burned into the cpu at the factory. it is identical for all produced systems (new/old, retail/dev). it cannot be updated without a hardware revision, which is too expensive and not worth it this late in the console's life.Another thing I found out is that you do not have to worry about extracting different boot9.bin files from separate 3DS systems. They're the exact same file as far as I could tell using winRAR to check CRC32 hash between both of my New 3DS units. I dunno if differences in firmware create different boot9.bin, but both of mine are on 11.6-0.39U firmware.

you need boot9strap to dump the bootrom (boot9/boot11).How to generate boot9.bin and boot11.bin without godmode9 and without A9LH/B9S?
But its pointless for me to dump it personally because every bootrom is the same (hash), right?you need boot9strap to dump the bootrom (boot9/boot11).
only dumping is the suggested method for copyright reasons. getting it via other means is piracy and not supported here.But its pointless for me to dump it personally because every bootrom is the same (hash), right?
But its pointless for me to dump it personally because every bootrom is the same (hash), right?
In case you can't or won't extract your own boot9.bin, the CRC32 hash for this file is E0989F6D.
Wait if I convert my legit .3ds game (dumped) to .cia would It be compatible with the legit eshop application and the updates from eshop? I mean, "fake" .cia or legit/good .cia (eshop compatibility)?
Updates aren't done on eShop but through launching the game needing an update and pressing Y. (I believe) DLC for the games are tricky as Nintendo eShop will know you didn't purchase those if you did not buy and install them through eShop, and these will get deleted off your 3DS. Just don't go on eShop and stick to the alternative.
hmm I remember installing some .cias (games) and after that i entered the legit eshop application to update the games and I got an error or something like that and I was able to repair the game and to update it aswell. I guess it was a "bad/fake" .cia and I repaired it using the legit eshop application. Now, I dont know if this would still work with newer games/firmwares.
Last edited by deSSy2724,
Similar threads
- Replies
- 31
- Views
- 8K
- Replies
- 16
- Views
- 13K
- Replies
- 1
- Views
- 4K
- Replies
- 123
- Views
- 25K
Site & Scene News
New Hot Discussed
-
-
62K views
Nintendo Switch firmware 18.0.0 has been released
It's the first Nintendo Switch firmware update of 2024. Made available as of today is system software version 18.0.0, marking a new milestone. According to the patch... -
23K views
Atmosphere CFW for Switch updated to pre-release version 1.7.0, adds support for firmware 18.0.0
After a couple days of Nintendo releasing their 18.0.0 firmware update, @SciresM releases a brand new update to his Atmosphere NX custom firmware for the Nintendo...by ShadowOne333 98 -
20K views
Wii U and 3DS online services shutting down today, but Pretendo is here to save the day
Today, April 8th, 2024, at 4PM PT, marks the day in which Nintendo permanently ends support for both the 3DS and the Wii U online services, which include co-op play...by ShadowOne333 179 -
16K views
GBAtemp Exclusive Introducing tempBOT AI - your new virtual GBAtemp companion and aide (April Fools)
Hello, GBAtemp members! After a prolonged absence, I am delighted to announce my return and upgraded form to you today... Introducing tempBOT AI 🤖 As the embodiment... -
13K views
Pokemon fangame hosting website "Relic Castle" taken down by The Pokemon Company
Yet another casualty goes down in the never-ending battle of copyright enforcement, and this time, it hit a big website which was the host for many fangames based and...by ShadowOne333 66 -
13K views
The first retro emulator hits Apple's App Store, but you should probably avoid it
With Apple having recently updated their guidelines for the App Store, iOS users have been left to speculate on specific wording and whether retro emulators as we... -
12K views
MisterFPGA has been updated to include an official release for its Nintendo 64 core
The highly popular and accurate FPGA hardware, MisterFGPA, has received today a brand new update with a long-awaited feature, or rather, a new core for hardcore...by ShadowOne333 54 -
12K views
Delta emulator now available on the App Store for iOS
The time has finally come, and after many, many years (if not decades) of Apple users having to side load emulator apps into their iOS devices through unofficial...by ShadowOne333 95 -
10K views
"TMNT: The Hyperstone Heist" for the SEGA Genesis / Mega Drive gets a brand new DX romhack with new features
The romhacking community is always a source for new ways to play retro games, from completely new levels or stages, characters, quality of life improvements, to flat...by ShadowOne333 36 -
9K views
Anbernic announces RG35XX 2024 Edition retro handheld
Retro handheld manufacturer Anbernic is releasing a refreshed model of its RG35XX handheld line. This new model, named RG35XX 2024 Edition, features the same...
-
-
-
225 replies
Nintendo Switch firmware 18.0.0 has been released
It's the first Nintendo Switch firmware update of 2024. Made available as of today is system software version 18.0.0, marking a new milestone. According to the patch...by Chary -
179 replies
Wii U and 3DS online services shutting down today, but Pretendo is here to save the day
Today, April 8th, 2024, at 4PM PT, marks the day in which Nintendo permanently ends support for both the 3DS and the Wii U online services, which include co-op play...by ShadowOne333 -
169 replies
GBAtemp Exclusive Introducing tempBOT AI - your new virtual GBAtemp companion and aide (April Fools)
Hello, GBAtemp members! After a prolonged absence, I am delighted to announce my return and upgraded form to you today... Introducing tempBOT AI 🤖 As the embodiment...by tempBOT -
98 replies
Atmosphere CFW for Switch updated to pre-release version 1.7.0, adds support for firmware 18.0.0
After a couple days of Nintendo releasing their 18.0.0 firmware update, @SciresM releases a brand new update to his Atmosphere NX custom firmware for the Nintendo...by ShadowOne333 -
96 replies
The first retro emulator hits Apple's App Store, but you should probably avoid it
With Apple having recently updated their guidelines for the App Store, iOS users have been left to speculate on specific wording and whether retro emulators as we...by Scarlet -
95 replies
Delta emulator now available on the App Store for iOS
The time has finally come, and after many, many years (if not decades) of Apple users having to side load emulator apps into their iOS devices through unofficial...by ShadowOne333 -
66 replies
Pokemon fangame hosting website "Relic Castle" taken down by The Pokemon Company
Yet another casualty goes down in the never-ending battle of copyright enforcement, and this time, it hit a big website which was the host for many fangames based and...by ShadowOne333 -
57 replies
Nintendo Switch firmware update 18.0.1 has been released
A new Nintendo Switch firmware update is here. System software version 18.0.1 has been released. This update offers the typical stability features as all other...by Chary -
54 replies
MisterFPGA has been updated to include an official release for its Nintendo 64 core
The highly popular and accurate FPGA hardware, MisterFGPA, has received today a brand new update with a long-awaited feature, or rather, a new core for hardcore...by ShadowOne333 -
53 replies
Nintendo "Indie World" stream announced for April 17th, 2024
Nintendo has recently announced through their social media accounts that a new Indie World stream will be airing tomorrow, scheduled for April 17th, 2024 at 7 a.m. PT...by ShadowOne333
-