Tutorial
Updated
Ultimate Wii U Troubleshooting Guide | system memory error 160-0103 | stuck Wii U Screen | stuck Factory Reset | Black Screen (after stuck update)
Introduction
There are several common problems Wii Us run into. Some symptoms have a varaity on causes and some problems have different solutions. This is primarily a meta guide designed to diagnose the cause of the problem and then to point you to the solution that is right for you.
The first step you should try is removing all external devices. If the problem persists look at the Symptoms described below, which will then point you the Cause to find further information
Symptoms
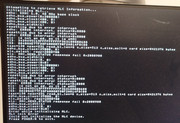
160-0103 error message
Does it happen during boot (before the Wii U Menu) or after (e.g. In a game, during inital setup)
- After -> Failing eMMC
- During
- Do you know for sure CBHC (Cold Boot Haxchi) was not installed. (you bought it new back then and never modded it)
- No CBHC -> Failing eMMC
- CHBC or not sure -> try CBHC unbrick, if it doesn't help go to failing eMMC
- Do you know for sure CBHC (Cold Boot Haxchi) was not installed. (you bought it new back then and never modded it)
160-0101 error message during boot -> CHBC Brick
160-1400 error message during boot -> Missing Disc Drive
160-1402 error message during boot ->Wrong Disc Drive Key
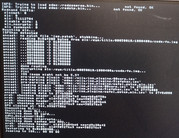
Stuck on Wii U boot Screen
Did mess with Region Change / Initial Launch / Deleting MLC files
- Yes -> Initial Launch
- No -> Failing eMMC
Black Screen
What is the LED doing?
- Doesn't light
- Check if the Powersupply provides 15V
- Check for short on Wii U Power connector
- If none of these apply -> 3V3 Standby Buck Converter probably failed
- Check for short on Wii U Power connector
- Check if the Powersupply provides 15V
- Staying red
- Try turning on using the eject button and remote
- Still red -> SLC Failure / boot1 corruption / SEEPROM corruption
- Try turning on using the eject button and remote
- Red blinking after some time -> Overheating / VRMs failing
- Red Blinking on cold boot -> Short on one of the Power Rails
- Blue blinking -> SLC Corruption (system.xml / fw.img) or bad RAM
- Orange blinking -> ISFShax SD card missing
- static blue
- Wait 1m, try turning off by shortly (less than 1s) pressing power
- Still on -> OS crash
- Turns off -> Display Problem
- Wait 1m, try turning off by shortly (less than 1s) pressing power
Wii U Menu freezes when trying to launch anything -> Defective 2.4Ghz Wifi Module
All games freeze on the splash screen -> Defective Bluetooth Module
Wii U freezes during boot on Wii U Menu splash screen while coldbooting Aroma / Tiramisu -> Defective Bluetooth Module
Solutions
CBHC Brick
There was an exploit called Haxchi. It gets installed to a DS VC game and then exploits that game when launched to launch a CFW / Homebrew. To avoid having to launch the game every boot manually, the cold boot title could be changed from the Wii U menu to the exploited DS Game, so it gets launched when the Wii gets turned on. The Problem happens when said game gets deleted or moved. Then the Wii U can't find it's cold boot tile, doesn't know what to do and shows either 160-0101 or 160-0103. If the error happens some time after boot this isn't a CBHC brick and changing the CB title will do nothing for you!
The CBHC brick can be fixed by changing the coldboot title back to the Wii U Menu. Luckily @GaryOderNichts has found the UDPIH exploit and created the recovery menu, which allows us to do just that.
Go here: https://gbatemp.net/threads/udpih-usb-host-stack-exploit-recovery-menu.613369/
Failing eMMC
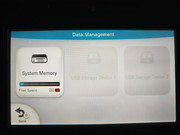
A failing eMMC causes a 160-0103 error whenever a corrupted file gets read from the internal memory (MLC). That can happen at any point. Don't confuse this problem with a CBHC brick, which can also cause 160-0103. It can also happen that the error message isn't shown. If for example the fonts are corrupted, the Wii U will hang at the white Wii U screen. Also if that error happens during Factory Reset, the error would only be shown on the Gamepad and if that isn't connected you will just notice that the Factory Reset get's stuck. In theory this error can also be caused by logical corruption (not actual failing Hardware) but from our experience it was always a Hardware fault (except if you explicitly messed with the eMMC or SCFM). In some very rare cases that can be caused by corruption on the SLC, which caches the eMMC (MLC) but most likely it is a failing eMMC chip. Nintendo sourced the eMMC chips for the 32GB Consoles from Samsung, Toshiba and Hynix. The Hynix ones are the ones failing. Not all Hynix chips have to fail, but almost all chips that fail are Hynix. Also it's not like Nintendo cheaped out or Hynix is a bad company, it just looks there was a problem effecting these chips, which only shows up after a few years. Also the 8GB Consoles are not affected, they don't use Hynix.
So if the Symptoms match (an even more if you know you have a Hynix) it's pretty sure a failing eMMC. Even if that problem only happens sometimes it should be dealt with asap, because it will get worse and will eventually lead to a full brick.
If you want a 100% confirmation you can dump the logs, either using the homebrew WiiUCrashLogDumper https://github.com/wiiu-env/WiiUCrashLogDumper/releases/tag/v0.1 which requires Tiramisu or Aroma. If your Wii U can't run Homebrew anymore, because it crashes you can use UDPIH and the recovery_menu from @GaryOderNichts to dump the logs: https://gbatemp.net/threads/udpih-usb-host-stack-exploit-recovery-menu.613369/
Then search all the .log files for
Only errors concerning the dev:mlc01 are relevant. Here the example for such an error:
Errors concerning the optical disc drive (dev:odd01) can be ignored. Here is such an example, that can be ignored:
Then search all the .log files for
MEDIA ERROR and DATA CORRUPTION.Only errors concerning the dev:mlc01 are relevant. Here the example for such an error:
Code:
10:48:16:325: FSA: ### MEDIA ERROR ###, dev:mlc01, err:-2228230, cmd:11, path:(null)
Code:
10:48:16:325: FSA: ### MEDIA ERROR ###, dev:odd01, err:-2228230, cmd:11, path:(null)Even though this is a Hardware problem, not all hope is lost (even without soldering)! Over the course of this year we developed not just one but three procedures to fix or work around that problem.
If you can solder there is the option of replacing the eMMC with a micro SD card, this can be done by either soldering wires directly or by using the MLC2SD Interposer. IMPORTANT: only solder when the Tutorial tells you to, for the first part the old eMMC must still be connected!
You can then either install a 64GB SD card in that Interposer and cleanely reinstall the System Titles, which is the recommended way or you can clone your existing MLC to a 32GB card and fix the corruption manually as good as possible (no longer recommended)
For the fresh Install on a 64GB card look here: https://gbatemp.net/threads/how-to-upgrading-rebuilding-wii-u-internal-memory-mlc.636309/
For cloning the old eMMC look here: https://gbatemp.net/threads/using-n...emmc-fix-160-0103-system-memory-error.636361/
If you can't solder there is also the option to use redNAND with ISFShax: https://gbatemp.net/threads/fixing-...-soldering-using-rednand-with-isfshax.642268/
As already said the recommended option is using NAN-AID with a 64GB SD card is the recommended option. It gives you a nice storage upgrade and allows you to run completely stock firmware. By formatting and reinstalling we ensure that there is no corruption and the system is in a 100% clean state. You can also upgrade to more to 64GB, but that would require a CFW all the time. The disadvantage is that you lose all the data. So you have to back it up and then restore the data. That is usally still less effort than fixing the cloned MLC.
When cloning the existing MLC, you carry over all the corruption. Depending how bad it is, that can be more or less work to fix. There is also some kind of corruption that can't be fixed and would cause future factory resets to hang.
The redNAND method has the obious advantage that you don't need to solder and that you can choose the size freely, but that comes with some disadvantages: Your Wii U will depend on the removable SD card to function. The card can get removed or lost. Also you need to run a CFW all the time. Since this depends on some hacks, it might be less reliable.
OS Crash
But to tell for sure what's the problem, we would need to look at the logs.
We can test if UDPIH https://gbatemp.net/threads/udpih-usb-host-stack-exploit-recovery-menu.613369/ works, It is unlikely to work, but easy enough to try and the pico can later also be used for paid the beak. You need to try connecting the Pico a little early (time it by the disc drive sounds). You won't see anything on the screen, instead you have to look at the LED and see if it turns purple to determine success. If it was successful, you can navigate blindly to dump the logs, which can then be analyzed.
If UDPIH doesn't work there is Paid The Beak (PTB), it allows launching minute to install ISFShax and dumping the logs to see whats wrong. One common reason on 32GB models is a bad eMMC (see the Failing eMMC sections)
Depending on some factors we can make some guesses. If you experienced system memoery error 160-0103 before or your Wii U froze before (especially during installing stuff), there is a good chance you have a failing eMMC. If you open the console up and see it is a Hynix eMMC (don't confuse with the SLC or the RAM), then it is very likely that the eMMC is failing. In that case a SD card reader can be used to dump the eMMC, the image can then be transfered to an SD card and the SD card can then replace the eMMC. In most cases that will make the Wii U show at least a picture and make udpih work again, so we avoid the defuse.
You might be wondering why transfering the corrupted data from the eMMC over can improve the situation. The answer is, that at that stage in the boot it often doesn't fail because of a read but of a write operation. When the eMMC is failing, it can go into a read only state, which makes the write fail and the OS crash. Also writes of partial blocks can fail, because for that the eMMC would need to read back the rest of the block, which can fail, if the eMMC detects corruption.
Display Problem
This can be as simple as a broken HDMI cable, the Wii U being configured for the old AV cable instead of HDMI (or the other way around) or it can also be the HDMI chip failing. The Problem is, without a TV picture you can't see the paring code for the gamepad. The easiest thing to try, ist to use the AV cable, if you have one (maybe from the original Wii).
If you don't have this cable or it doesn't help, you still have options:
- Bruteforce just try out all combinations, there aren't that many, so it is feasible with some time. To get the Wii U into paring mode, you have to press the sync button twice.
- Dumping the code via UDPI: https://gbatemp.net/threads/udpih-usb-host-stack-exploit-recovery-menu.613369/post-10275652 after you have dumped the pin, turn off the Wii U, look at the code on the PC, turn the Wii U on again, wait a minute, press the sync button on the console twice and enter the pin on the gamepad.
Initial Launch
Use UDPIH https://gbatemp.net/threads/udpih-usb-host-stack-exploit-recovery-menu.613369/post-10275652 with this recovery_menu: https://github.com/jan-hofmeier/recovery_menu/releases/tag/v0.5.0-3 and set the Inital Launch Value to 0. Then shut down and boot the Wii U normally. It should boot into the inital setup.
SLC Corruption / bad RAM
First try Paid The Beak (PTB). If PTB is able to load minute, then the RAM is likely fine and you have SLC corruption. In that case have a look at this thread: https://gbatemp.net/threads/wii-u-blinking-blue-light-no-image.640588/
If PTB also gives you a blue blinking LED, first verify that the UNSTBL_PWR jig works, by trying it once without the SD in. If it still blinks blue, then triggering UNSTBL_PWR doesn't work and you need to troubleshoot that. But if the LED stays red, then triggering UNSTBL_PWR works and the reason you also got a blue blinking LED with PTB is likely bad DRAM.
In this case you would need de Fuse to diagnose further:
If the defuse boot1 loads but boot1 then fails to load minute (fw.img) from the SD, then you probably have have bad memory. For further diagnosis you would have to modify the memory test in the minute boot1. But first make sure the SD is set up correctly and if minute still doesn't load look at the defuse README for troubleshooting.
3V3 Standby Buck Converter failure
Check if the 3V3 output (C1257) of the buck is shorted. If the output is not shorted check if the 15V input (C1388) is there, when console is plugged in.
SLC Failure / BOOT1 Corruption / SEEPROM Corruption
TODO
Overheating / VRMs failing
Open the Wii U and clean it. If you use a vacuum make sure to hold the fan. If it spins the fan, it can generate voltage, which can fry the Wii U.
If that doesn't help one of the VRMs, buck converters or the power brick is probably weak.
Short on Power Rail
If you have messed with the Disc Drive make sure the cable is connected the right way around. The end with the stubs goes towards the Disc Drive
TODO
ISFShax SD card missing
Make sure the SD card is formatted FAT32 and has the minute fw.img on it. See https://gbatemp.net/threads/how-to-set-up-isfshax.642258/ for details.
Disk Drive Missing
160-1400 means the Wii U can't find it's Disc Drive. If it is physically connected, then probably this small component on the Wii U board failed and needs to be replaced or bridged: https://gbatemp.net/threads/absolute-fix-to-160-1400-error.572879/
Wrong Disc Drive Key
160-1402 means the key in the Wii Us SEEPROM doesn't match the key on the drive circuit board. So you probably just connected the Drive from another Wii U. If your intention was to swap the drive, you have to move the circuit board from the old drive to the new one. In the future it might be possible to change the key in the SEEPROM, but currently it's not.
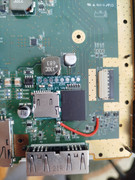
Defective 2.4Ghz Wifi Module
The console freezes when trying to boot a game, but music still plays and the animation also moves
It can be replaced without soldering. It is the Module with the black and white cable attached
Defective Bluetooth Module
If the BT Modules is broken the Wii U Menu Boot screen will freeze. A line like this in the syslog would also indicate a problem with the BT Module:
Code:
00:00:11:915: BT: [Err] OHCI initialization failed - rv=0xfffffff6
Last edited by SDIO,