@FXDX hey!
first, thanks for this great thread! :-)
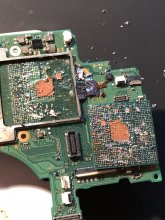
I've got a switch wehre some pads are saying .OL in diode mode (1.png). I checked your initial post and followed the wires from pad 6 and 7 to the CPU.. do you think the CPU is damaged, or is there anything else which is causing .OL on these pads?
For additional infos please check out this post: https://gbatemp.net/threads/usb-c-pin-nr-5-has-got-only-3-volts-switch-wont-turn-on.562548/
thanks!
The measurements made with the motherboard mounted and the battery installed?
It is possible that on the tracks with the problem there is actually a short under the Tegra processor and it requires a reball. You can try a reflow to see what happens, if you do not have the opportunity to reball. I don't think the CPU has anything physical. It's probably just a matter of soldering between the processor and the board.
Last edited by FXDX,