- Joined
- Oct 24, 2002
- Messages
- 11,957
- Trophies
- 4
- Age
- 39
- Location
- South England
- Website
- www.gbatemp.net
- XP
- 25,117
- Country

GBAtemp.net review of the...
Wiinja

aka: Wiinja, Wii Modchip.
Manufactured by: Team Ninja
By shaunj66 and Costello - 7th January 2007
Review Contents & Index:
Welcome to another GBAtemp hardware review. This time; we're taking a step away from the normal realm of handhelds to review a console modchip.
The Wii has been available for approximately only 4 months at the time of this review, and we're already starting to see the first modchips produced to circumvent protection and allow the playing of game back-ups on regular DVD media.
Nintendo left the serial port connections open and available on the Wii DVD drive, much like they did with the Gamecube. All current Wii modchips "attack" the DVD drive via this serial connection. They override code on the drive to "trick" the Wii into believing a game burned onto any regular writable DVD disc is an original. This also allows for playing Gamecube backups on the Wii.
Unfortunately, right from the start (and this goes for all the other (3) current Wii modchips) the team have specifically said that this modchip does not implement region free functionality. Due to the methods used by the modchips, it currently seems impossible for them to allow for region free loading. And as the Wiinja is non-updateable, even if a method was found, the Wiinja would still not be able to implement it.
So this means you're only going to be able to boot backups from the same region as your Wii console. That means; PAL games on a PAL console, NTSC-U on an NTSC-U console and NTSC-J games on an NTSC-J console. This applies to both Wii games AND Gamecube games. Though, Gamecube game regions can be worked around by booting up a piece of homebrew software that will allow you to swap over discs to boot a foreign game.
Official Feature List:
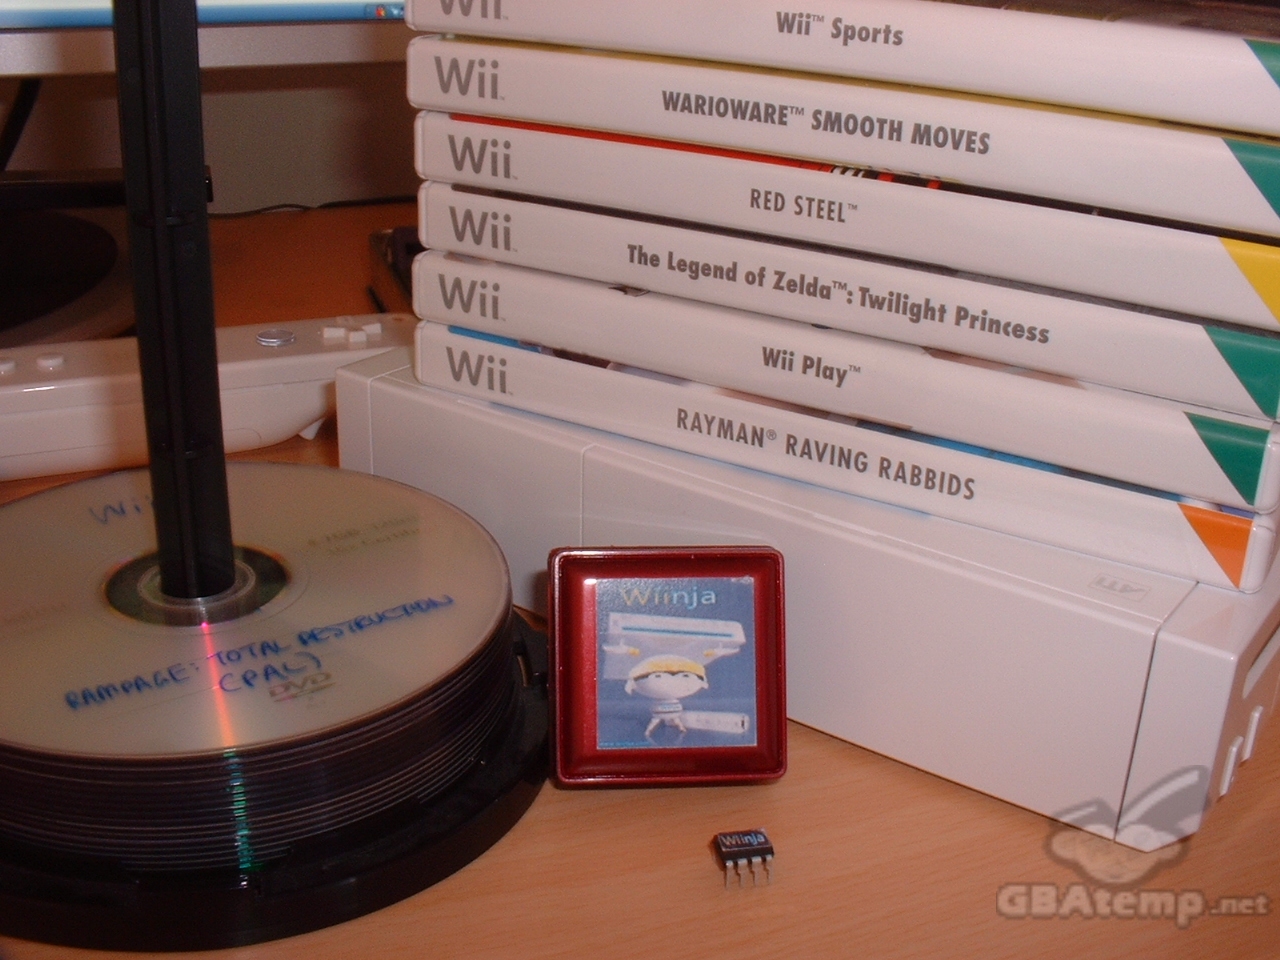
When we first opened the package the Wiinja was inside, we had thought that the team were perhaps trying to bribe us into writing a great review… Don't panic… Because inside was a small presentation box that you normally see jewellery sold in. But when we saw the Wiinja label slapped atop that box, we knew what was inside (and it wasn't jewellery!).
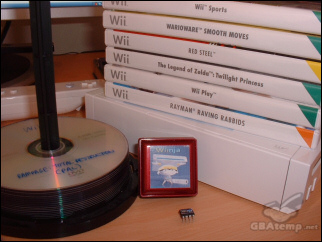
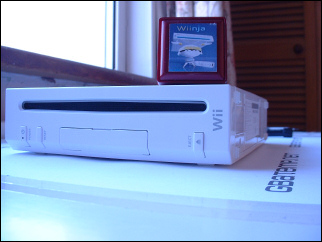
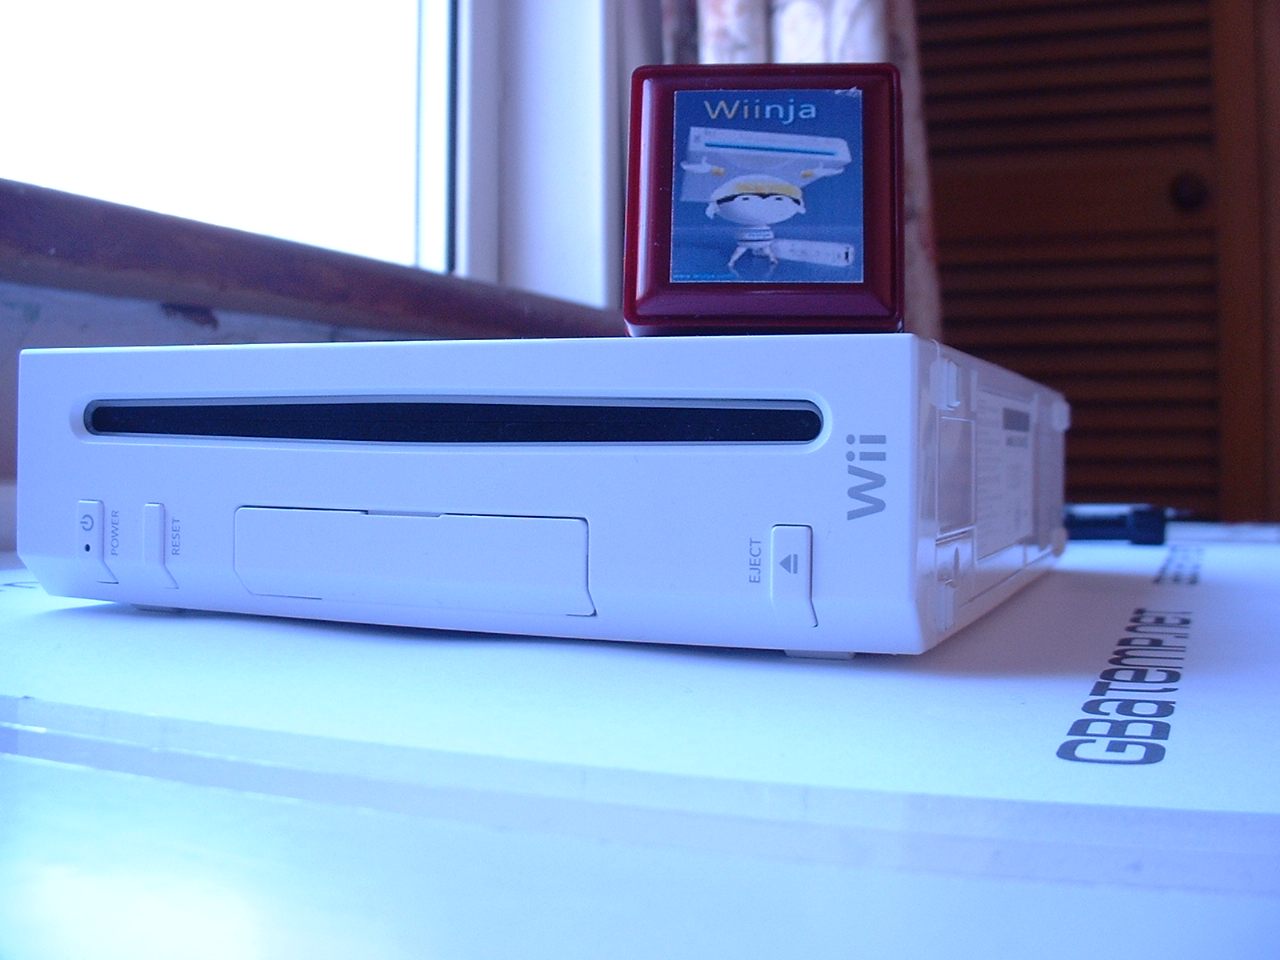
The Wiinja is packaged in a small red plastic box. Inside the box is a safe layer of fabric/cushion wrapped around the box and the Wiinja itself. The box is strong, and the added protection around the Wiinja is good piece of mind that your Wiinja will arrive undamaged. Even though it is free to rattle around the box, the box is sturdy enough to take any external damage.
Inside the lid of the box was a small piece of folded paper. This showed us the schematics of the Wii DVD drive and some short notes on how to install the Wiinja.
Both the label on the box and the small leaflet inside, look somewhat low quality. They look like they've been printed on a home inkjet printer and don't really give out a professional feel.
Not that this is a crucial criticism, just something we did notice and thought we'd share.
About the chip
The Wiinja modchip is a small chip called a PIC. This tiny microcontroller can hold a small amount of code, and has been used in the modding of games consoles and other consumer electronics for years. Its popularity for this is simple; PIC microcontrollers are extremely low cost. They are cheap to buy, are widely available and are very cheap to mass-manufacture.
Many people question this. If the chip is so cheap to produce then why are the modchips being sold for a higher price? Well, that's simple - You're not really paying for the chip, but for the code that is on the chip.
As the PIC chip isn't custom designed for installing into the Wii. The Wiinja requires you to solder 5 wires from the chip, and to the Wii DVD drives PCB.
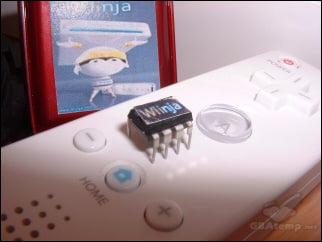
The Wiinja PIC has 8 legs; you only need to use 5 of them. Our Wiinja arrived with its legs in the normal downward position. We recommend that you bend the legs outward so the chip could lay flat on a surface. This makes the installation later a lot easier. Just be careful when bending those legs! They are quite strong, but if you over bend them or use the wrong tool then you could snap them off, and that would make the Wiinja useless or make for a MUCH harder installation.
The Wiinja has a tiny little label stuck on the top with the Wiinja logo on it. The label, again, is low quality and looks like it could have been printed off on a home printer. We were surprised to see the logo wasn't printed directly on the chip, but weren't exactly disappointed either.
Installation
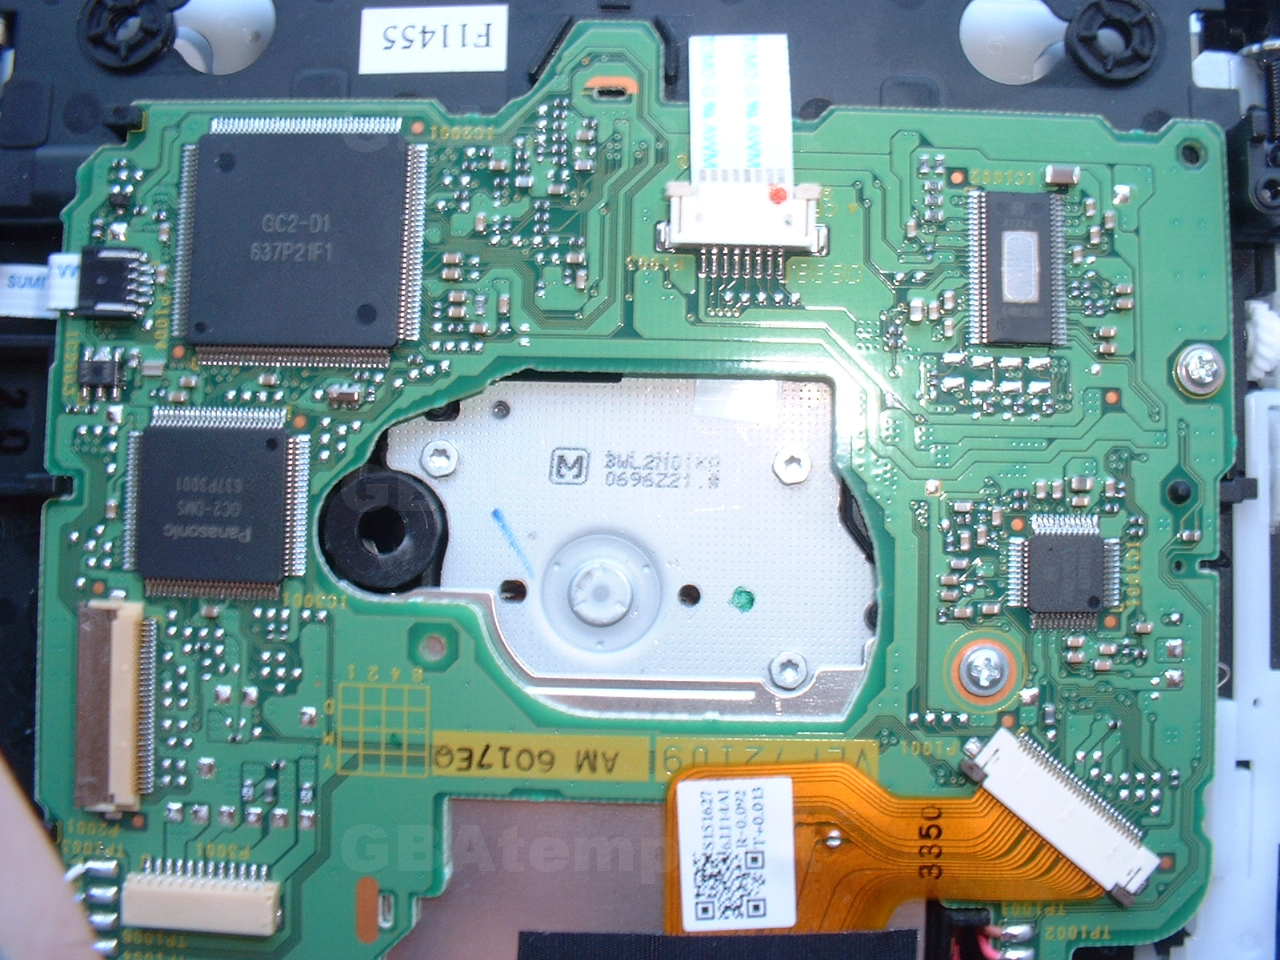
Before we begin with the installation we need to mention a few things. In recent days, as people have been installing their Wii modchips it has been discovered that one particular model of the Wii DVD drive is currently incompatible with any of the three current modchips. The Panasonic chipset on-board the drive varies between units, and there are currently three known chipsets: (You can find out what chipset your Wii has by disassembling the Wii to its DVD drive PCB and checking the Panasonic chipset).
GC2-DMS = Compatible
GC2R-D2A = Compatible
GC2-D2B = Not compatible
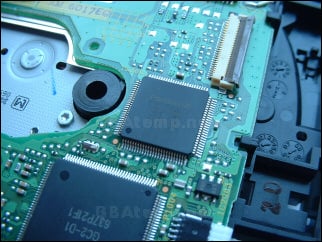
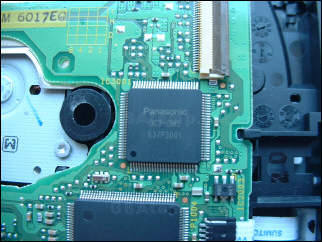
According to research by some teams, the latter chipset is more likely to be found in Wii units that shipped in late January and early February. It is unknown whether all future Wii units will have this chipset or if it is just luck of the draw, but research is still ongoing and you can find out more information by reading through some of the related threads in our Wii discussion forums.

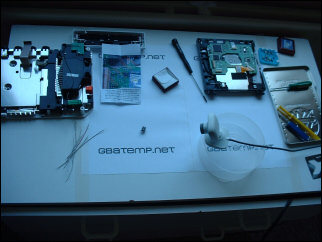
To install the Wiinja modchip, you will need the following:
We made a short video which shows you how to dismantle your Wii, we recommend you watch that before commencing.
Part 1
Taking the Wii apart is actually very easy to do. Just pay attention to what screws you remove and where they need to go when you put it back together. Some screws are hidden underneath small white plastic tabs and rubber feet so you need to lift these out carefully with a small thin blade to get access to the screws. There is a small CMOS battery compartment located underneath the unit. The battery holder is held in by a single screw, and you need to remove it to gain access to a necessary screw underneath it. When the majority of the screws are removed you will be able to remove the front bezel/fascia from the Wii. Carefully lift it straight up until the tabs are lifted out from within the Wii and then carefully disconnect the 2 pin wire/header that illuminates the blue light within the bezel, and place it to one side.
Now, if you removed all the necessary screws you should be able to remove the left hand side of the Wii casing straight up and off. If it doesn't seem to want to move, you probably missed a screw – don't force it. When the top half of the casing is removed, you can also remove the metal body covering the Wii DVD drive. No need to undo any additional screws, the metal frame should lift straight out.
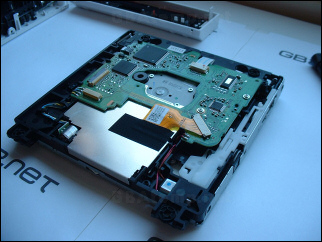
Now we only need to undo 4 remaining screws, and then we'll have enough access to install the Wiinja. Once the metal frame is removed, remove the 4 pan-head screws holding in the DVD drive, and then carefully lift the DVD drive upward, but be careful – the DVD drive is attached to the motherboard by a ribbon cable and another set of wires and white header. This cable is tucked away slightly underneath an opening close the motherboard heatsink. If you pull it gently, it will give you more slack to allow you to reach in easier and disconnect the 2 cables. The brown ribbon cable connector (DVD drive end) must be unlocked by lifting it upward, the ribbon cable should then fall out.
Now the DVD drive has been removed from the Wii completely, and you can begin the soldering part of the installation!
If you haven't already, strip the ends of the 5 wires by about 2-3mm and tin both ends with solder.
Part 2
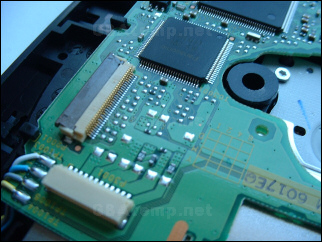
Refer to the schematics provided with the Wiinja. It will tell you exactly what points on the drives PCB you must solder the wires to. Make NO mistake here. Be careful when soldering not to bridge any connection, and always have a de-soldering pump at hand in case of any accidents. Once the 5 wires are soldered to the PCB, you can place your Wiinja into the drive.
The 2 larger soldering points are the power source for the Wiinja, the other 3 are data. The 2 larger points are easy to solder, but the 3 smaller ones are a lot more difficult. We don't recommend attempting this if you're inexperienced at soldering.

We placed our Wiinja in a large empty corner of the drive. As we said earlier, we recommend that if you haven't already, that you bend the legs of the Wiinja PIC chip outwards to enable it to lie flat in the DVD drive – just be careful when bending the legs, they're strong, but over bending them or using an improper tool could cause them to snap off. Next, use double sided adhesive to stick the Wiinja down into the corner of the drive. Pay attention to what orientation you place the Wiinja. Make sure you know where pin 1 is. Pin 1 is indicated by a small dot on the top of the PIC (probably covered by the Wiinja label), or; look for the indentation/notch on the end of the PIC chip. When looking at the indentation head-on with the Wiinja the right way up, pin 1 is the leg to the right and closest to you of the indentation/notch.
Now you need to tin (apply solder) to the 5 legs of the Wiinja. Refer to the schematics diagram to see what legs to tin.
Now, again, referring to the schematics diagram; connect and solder the wires you applied the drives PCB to the Wiinja. Make sure you connect the right wire to the right leg! This is crucial!
Once you're finished, that's it! Your Wiinja is installed. Now we recommend you carefully cover the Wiinja up, pin down the wires and cover up the solder joints you made in electrical tape to avoid any shorts, or the wires getting caught in the drive mechanism etc…
Overall, installation is rather simple and straight forward. A lot more so than say, compared to Gamecube. Opening the Wii is very simple, but to a soldering newbie we wouldn't recommend they try installation without a lot of practice beforehand. If you've soldered before (modchips, PCBs etc.) then you shouldn't have a problem here.
Setting Up & Using
Once the Wiinja is successfully installed, your Wii should recognize and play Wii and GCN backup discs. As simple as it may seem, you need to be quite cautious about the way you burn your games, especially regarding the following factors:
One last thing: it does not matter which burning software you use. Any burning software supporting .iso files will do just fine.
Compatibility Tests:
For review purposes, we have tested a bunch of Wii games. Let's see how the Wiinja performs in terms of compatibility:
Game name Media Burn Speed Region Result Avatar: The Legend of Aang NexxTech 4x PAL Call of Duty 3 NexxTech 4x PAL/GER Call of Duty 3 Verbatim 16x certified 4x PAL/ENG Cars Verbatim 16x certified 4x PAL Far Cry Vengeance NexxTech 4x PAL Gottlieb Pinball Classics NexxTech 4x PAL GT Pro Series NexxTech 4x PAL Ice Age 2: The Meltdown NexxTech 4x PAL Madden NFL 07 NexxTech 4x PAL Monster 4x4: World Circuit Verbatim 16x certified 4x PAL Need For Speed Carbon Verbatim 16x certified 4x PAL/ENG Need For Speed Carbon NexxTech 4x PAL/FR Rampage: Total Destruction Verbatim 16x certified 4x PAL Red Steel Verbatim 16x certified 4x PAL Super Fruit Fall NexxTech 4x PAL Super Monkey Ball Verbatim 16x certified 4x PAL The Legend of Zelda: Twilight Princess Verbatim 16x certified 4x PAL Tom Clancy's Splinter Cell Double Agent NexxTech 4x PAL Tony Hawk's Downhill Jam NexxTech 4x PAL WarioWare: Smooth Moves Verbatim 16x certified 4x PAL Marvel Ultimate Alliance NexxTech 4x NTSC-U
What conclusions can we draw from these results? Well...
Concerning disc read errors: these might happen randomly if you're using cheap/low quality media. The cheaper discs generally use a low quality dye such as CMC resulting in inferior burns AND increased difficulty for the laser reading the disc (thanks to Darkforce for the precisions):
External Links:
- Official Website
- Wiinja Official Forums
Where to buy:
- Official list of resellers
This review was written by shaunj66 and Costello for GBAtemp.net ONLY. The article and all included photos are property of GBAtemp.net.
If you see this review on any other site please let us know via e-mail - costello [@at@] GBAtemp [.dot.] net
Wiinja
aka: Wiinja, Wii Modchip.
Manufactured by: Team Ninja
By shaunj66 and Costello - 7th January 2007
Review Contents & Index:
- Introduction
- Official feature list - Packaging
- About the chip
- Installation
- Setting up & Using
- Compatibility tests
- Disc Read Errors - Conclusion
Welcome to another GBAtemp hardware review. This time; we're taking a step away from the normal realm of handhelds to review a console modchip.
The Wii has been available for approximately only 4 months at the time of this review, and we're already starting to see the first modchips produced to circumvent protection and allow the playing of game back-ups on regular DVD media.
Nintendo left the serial port connections open and available on the Wii DVD drive, much like they did with the Gamecube. All current Wii modchips "attack" the DVD drive via this serial connection. They override code on the drive to "trick" the Wii into believing a game burned onto any regular writable DVD disc is an original. This also allows for playing Gamecube backups on the Wii.
Unfortunately, right from the start (and this goes for all the other (3) current Wii modchips) the team have specifically said that this modchip does not implement region free functionality. Due to the methods used by the modchips, it currently seems impossible for them to allow for region free loading. And as the Wiinja is non-updateable, even if a method was found, the Wiinja would still not be able to implement it.
So this means you're only going to be able to boot backups from the same region as your Wii console. That means; PAL games on a PAL console, NTSC-U on an NTSC-U console and NTSC-J games on an NTSC-J console. This applies to both Wii games AND Gamecube games. Though, Gamecube game regions can be worked around by booting up a piece of homebrew software that will allow you to swap over discs to boot a foreign game.
Official Feature List:
- Non Swap / Direct Boot
- Boots Own Region WII Backups Directly
- Boots Own Region Gamecube Backups Directly
- Boots Imports Gamecube Backups by SWAP
- Yes,We've AudioFix

- MultiDisc/MultiGames
- Easy Soldering & Remove / 5 Wires
- 35€ Retail Price (Doesn't include taxes)
- Support DVD-R and DVD+R (Burn +R on DVDROM Booktype)
- Universal EUROPE/USA/JAPAN Wii Console Supported
- Stealth Mode
- NOT Upgradeable / ON SALES NOW!!
When we first opened the package the Wiinja was inside, we had thought that the team were perhaps trying to bribe us into writing a great review… Don't panic… Because inside was a small presentation box that you normally see jewellery sold in. But when we saw the Wiinja label slapped atop that box, we knew what was inside (and it wasn't jewellery!).
The Wiinja is packaged in a small red plastic box. Inside the box is a safe layer of fabric/cushion wrapped around the box and the Wiinja itself. The box is strong, and the added protection around the Wiinja is good piece of mind that your Wiinja will arrive undamaged. Even though it is free to rattle around the box, the box is sturdy enough to take any external damage.
Inside the lid of the box was a small piece of folded paper. This showed us the schematics of the Wii DVD drive and some short notes on how to install the Wiinja.
Both the label on the box and the small leaflet inside, look somewhat low quality. They look like they've been printed on a home inkjet printer and don't really give out a professional feel.
Not that this is a crucial criticism, just something we did notice and thought we'd share.
About the chip
The Wiinja modchip is a small chip called a PIC. This tiny microcontroller can hold a small amount of code, and has been used in the modding of games consoles and other consumer electronics for years. Its popularity for this is simple; PIC microcontrollers are extremely low cost. They are cheap to buy, are widely available and are very cheap to mass-manufacture.
Many people question this. If the chip is so cheap to produce then why are the modchips being sold for a higher price? Well, that's simple - You're not really paying for the chip, but for the code that is on the chip.
As the PIC chip isn't custom designed for installing into the Wii. The Wiinja requires you to solder 5 wires from the chip, and to the Wii DVD drives PCB.

The Wiinja PIC has 8 legs; you only need to use 5 of them. Our Wiinja arrived with its legs in the normal downward position. We recommend that you bend the legs outward so the chip could lay flat on a surface. This makes the installation later a lot easier. Just be careful when bending those legs! They are quite strong, but if you over bend them or use the wrong tool then you could snap them off, and that would make the Wiinja useless or make for a MUCH harder installation.
The Wiinja has a tiny little label stuck on the top with the Wiinja logo on it. The label, again, is low quality and looks like it could have been printed off on a home printer. We were surprised to see the logo wasn't printed directly on the chip, but weren't exactly disappointed either.
Installation
Before we begin with the installation we need to mention a few things. In recent days, as people have been installing their Wii modchips it has been discovered that one particular model of the Wii DVD drive is currently incompatible with any of the three current modchips. The Panasonic chipset on-board the drive varies between units, and there are currently three known chipsets: (You can find out what chipset your Wii has by disassembling the Wii to its DVD drive PCB and checking the Panasonic chipset).
GC2-DMS = Compatible
GC2R-D2A = Compatible
GC2-D2B = Not compatible


According to research by some teams, the latter chipset is more likely to be found in Wii units that shipped in late January and early February. It is unknown whether all future Wii units will have this chipset or if it is just luck of the draw, but research is still ongoing and you can find out more information by reading through some of the related threads in our Wii discussion forums.
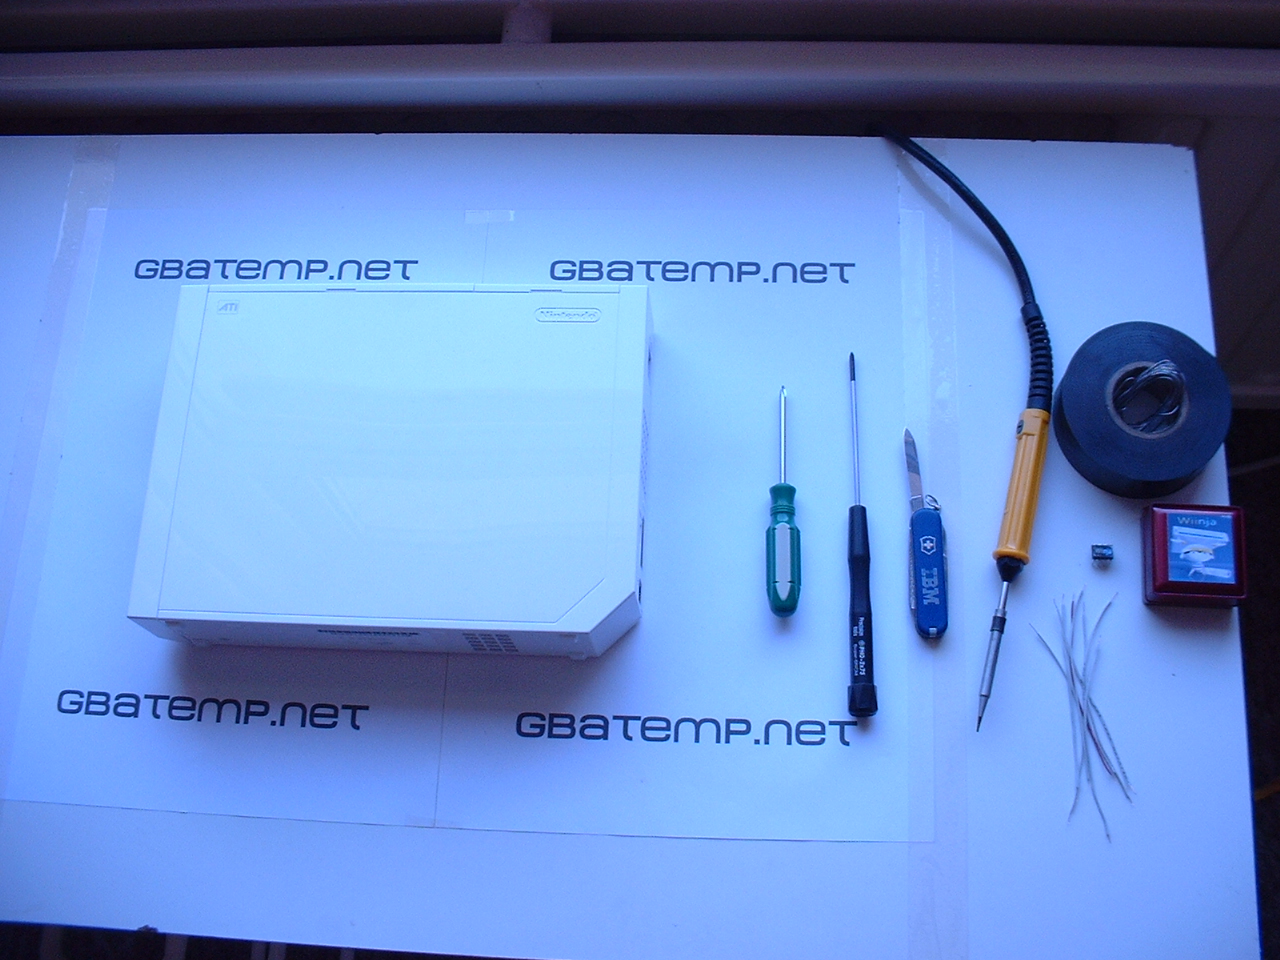
To install the Wiinja modchip, you will need the following:
- Wiinja
- Soldering iron with a small tip (15w-30w recommended)
- Solder
- 5 short lengths of insulated wire (approx 10cm/4inches in length) (Wires are not included with the Wiinja. We stripped some wire out of an old USB cable)
- Double sided adhesive/sellotape folded in half
- Electrical tape
- Regular Nintendo tri-wing screwdriver (not definite – an unknown number of Wii units don't use tri-wing screws at all)
- Small/precision Philips head screwdriver
- Small thin blade or something to carefully lever and remove labels
We made a short video which shows you how to dismantle your Wii, we recommend you watch that before commencing.
Part 1
Taking the Wii apart is actually very easy to do. Just pay attention to what screws you remove and where they need to go when you put it back together. Some screws are hidden underneath small white plastic tabs and rubber feet so you need to lift these out carefully with a small thin blade to get access to the screws. There is a small CMOS battery compartment located underneath the unit. The battery holder is held in by a single screw, and you need to remove it to gain access to a necessary screw underneath it. When the majority of the screws are removed you will be able to remove the front bezel/fascia from the Wii. Carefully lift it straight up until the tabs are lifted out from within the Wii and then carefully disconnect the 2 pin wire/header that illuminates the blue light within the bezel, and place it to one side.
Now, if you removed all the necessary screws you should be able to remove the left hand side of the Wii casing straight up and off. If it doesn't seem to want to move, you probably missed a screw – don't force it. When the top half of the casing is removed, you can also remove the metal body covering the Wii DVD drive. No need to undo any additional screws, the metal frame should lift straight out.
Now we only need to undo 4 remaining screws, and then we'll have enough access to install the Wiinja. Once the metal frame is removed, remove the 4 pan-head screws holding in the DVD drive, and then carefully lift the DVD drive upward, but be careful – the DVD drive is attached to the motherboard by a ribbon cable and another set of wires and white header. This cable is tucked away slightly underneath an opening close the motherboard heatsink. If you pull it gently, it will give you more slack to allow you to reach in easier and disconnect the 2 cables. The brown ribbon cable connector (DVD drive end) must be unlocked by lifting it upward, the ribbon cable should then fall out.
Now the DVD drive has been removed from the Wii completely, and you can begin the soldering part of the installation!


If you haven't already, strip the ends of the 5 wires by about 2-3mm and tin both ends with solder.
Part 2
Refer to the schematics provided with the Wiinja. It will tell you exactly what points on the drives PCB you must solder the wires to. Make NO mistake here. Be careful when soldering not to bridge any connection, and always have a de-soldering pump at hand in case of any accidents. Once the 5 wires are soldered to the PCB, you can place your Wiinja into the drive.
The 2 larger soldering points are the power source for the Wiinja, the other 3 are data. The 2 larger points are easy to solder, but the 3 smaller ones are a lot more difficult. We don't recommend attempting this if you're inexperienced at soldering.

We placed our Wiinja in a large empty corner of the drive. As we said earlier, we recommend that if you haven't already, that you bend the legs of the Wiinja PIC chip outwards to enable it to lie flat in the DVD drive – just be careful when bending the legs, they're strong, but over bending them or using an improper tool could cause them to snap off. Next, use double sided adhesive to stick the Wiinja down into the corner of the drive. Pay attention to what orientation you place the Wiinja. Make sure you know where pin 1 is. Pin 1 is indicated by a small dot on the top of the PIC (probably covered by the Wiinja label), or; look for the indentation/notch on the end of the PIC chip. When looking at the indentation head-on with the Wiinja the right way up, pin 1 is the leg to the right and closest to you of the indentation/notch.
Now you need to tin (apply solder) to the 5 legs of the Wiinja. Refer to the schematics diagram to see what legs to tin.
Now, again, referring to the schematics diagram; connect and solder the wires you applied the drives PCB to the Wiinja. Make sure you connect the right wire to the right leg! This is crucial!
Once you're finished, that's it! Your Wiinja is installed. Now we recommend you carefully cover the Wiinja up, pin down the wires and cover up the solder joints you made in electrical tape to avoid any shorts, or the wires getting caught in the drive mechanism etc…
Overall, installation is rather simple and straight forward. A lot more so than say, compared to Gamecube. Opening the Wii is very simple, but to a soldering newbie we wouldn't recommend they try installation without a lot of practice beforehand. If you've soldered before (modchips, PCBs etc.) then you shouldn't have a problem here.
Setting Up & Using
Once the Wiinja is successfully installed, your Wii should recognize and play Wii and GCN backup discs. As simple as it may seem, you need to be quite cautious about the way you burn your games, especially regarding the following factors:
- The file you are burning. When you somehow get ahold of a Wii dump, you first need to make sure that it is unscrambled. By default, Wii dumps/ISOs are generally "raw", meaning the data is dumped 'as is' and no decryption was applied. To make the dump readable by the Wii, you need to use an unscrambling tool (for more information, read this topic). If you are unsure about whether your iso file is already unscrambled, no worries: you can still use the unscrambler on it; if the iso was already unscrambled it will have no effect.
- The DVD media you're burning the game on. First, it is highly recommended that you use DVD-R media, and not DVD+R (DVD+/- RW are unfortunately not supported). For our tests, we have been using two different types of DVD-R media: the Verbatim 16x certified, and some random no-name media (after googling the media code we found out the brand was NexxTech). Well, guess what? All our games burned on Verbatim media worked flawlessly, whereas one of the games burned on the no-name media produced DREs (Disc Read Errors). Although we only encountered one DRE with the cheap media so far, it doesn't mean there won't be more later as we try games more deeply. So in general, it's best to use good media, and Verbatim is probably the brand you'll want to go for.
- The speed you're burning at. It is well known that the slower you burn, the more reliable! For our tests we've only burned at 4x speed - which is relatively slow, to make sure our games are burned properly. The Wiinja team has however let us know that it is possible to burn games at 16x speed, but... we don't recommend that.
One last thing: it does not matter which burning software you use. Any burning software supporting .iso files will do just fine.
Compatibility Tests:
For review purposes, we have tested a bunch of Wii games. Let's see how the Wiinja performs in terms of compatibility:
Game name Media Burn Speed Region Result Avatar: The Legend of Aang NexxTech 4x PAL Call of Duty 3 NexxTech 4x PAL/GER Call of Duty 3 Verbatim 16x certified 4x PAL/ENG Cars Verbatim 16x certified 4x PAL Far Cry Vengeance NexxTech 4x PAL Gottlieb Pinball Classics NexxTech 4x PAL GT Pro Series NexxTech 4x PAL Ice Age 2: The Meltdown NexxTech 4x PAL Madden NFL 07 NexxTech 4x PAL Monster 4x4: World Circuit Verbatim 16x certified 4x PAL Need For Speed Carbon Verbatim 16x certified 4x PAL/ENG Need For Speed Carbon NexxTech 4x PAL/FR Rampage: Total Destruction Verbatim 16x certified 4x PAL Red Steel Verbatim 16x certified 4x PAL Super Fruit Fall NexxTech 4x PAL Super Monkey Ball Verbatim 16x certified 4x PAL The Legend of Zelda: Twilight Princess Verbatim 16x certified 4x PAL Tom Clancy's Splinter Cell Double Agent NexxTech 4x PAL Tony Hawk's Downhill Jam NexxTech 4x PAL WarioWare: Smooth Moves Verbatim 16x certified 4x PAL Marvel Ultimate Alliance NexxTech 4x NTSC-U
What conclusions can we draw from these results? Well...
- We knew it right from the start: NTSC backups won't work on a PAL Wii, no surprise there.
- Cheap media (NexxTech/noname) should play as fine as good quality media (Verbatim), as long as you burn at a slow speed. However, a disc read error occured during the intro of "Avatar".
- The Wiinja definitely offers 100% 1:1 compatibility, at least for the games from your region.
Concerning disc read errors: these might happen randomly if you're using cheap/low quality media. The cheaper discs generally use a low quality dye such as CMC resulting in inferior burns AND increased difficulty for the laser reading the disc (thanks to Darkforce for the precisions):
No score was given. A score reflects a product in comparison to another. We will add scores as soon as we review more products.QUOTE(http://en.wikipedia.org/wiki/Dvd-r) said:DVD-R discs are composed of two 0.6 mm polycarbonate discs, bonded with an adhesive to each other. One contains the laser guiding groove and is coated with the recording dye and a silver alloy or gold reflector. The other one (for single-sided discs) is an ungrooved "dummy" disc to assure mechanical stability of the sandwich structure, and compatibility with the compact disc standard geometry which requires a total disc thickness of about 1.2 mm. The sandwich structure also helps protecting the data containing layer from scratches by a thick "dummy" disk, a problem with CD's that lack that structure. Double-sided discs have two grooved, recordable disc sides, and require the user to flip the disc to access the other side. Compared to a CD's 1.2 mm of polycarbonate, a DVD's laser beam only has to penetrate 0.6 mm of plastic in order to reach the dye recording layer, which allows the lens to focus the beam to a smaller spot size to write smaller pits.
A Disc Read Error (DRE) on the Wii is no big deal. When a DRE occurs, you can simply eject the disc and put it back in which should let you continue playing (unlike the GameCube on which you had to reboot whenever a DRE occured).
With the NexxTech/noname brand only one DRE occured to us, during the spinning Nickelodeon logo.
Overall, the compatibility is excellent so far and the only major drawback is the lack of support for games from other regions.
Conclusion
First generations of backup devices or modchips often happen to be rather dodgy, unfinished. Does this apply to the Wiinja? In some extent yes: it is obvious that the design was rushed (what design? oh yeah, the tiny sticker), and no extra features were added. But still, it does the job and it does it perfectly. It is relatively easy to install, has perfect compatibility, and comes with the "audio fix" for GameCube games. If you consider the current technical possibilities of the 1st-gen modchips, you can hardly do better than the Wiinja (to date, no other modchip can bypass the region lock). However, if a way to bypass the region lock were to be found later, you would have no other option than removing the chip as it is not upgradable. The good thing is, removing it shouldn't be too hard if you soldered the 5 wires properly.
In conclusion, the Wiinja is a good solution - at least, good for a first solution.
Pros:
+ Perfect Wii & Gamecube game compatibility
+ Relatively easy to install (and to remove)
+ No side effect at all (original games still play, you can still use the online channels, etc.)
+ "Audiofix" is supported
+ "Stealthy" modchip: the Wiinja team claims it can't be detected.
Cons:
- Does not bypass region lock
- A bit overpriced
- Not upgradable
Score: n/a
External Links:
- Official Website
- Wiinja Official Forums
Where to buy:
- Official list of resellers
This review was written by shaunj66 and Costello for GBAtemp.net ONLY. The article and all included photos are property of GBAtemp.net.
If you see this review on any other site please let us know via e-mail - costello [@at@] GBAtemp [.dot.] net