

Tutorial
Updated
[TUTORIAL] DIY PCB etching / Arduino controller shield
This tutorial showcases my entry for the bounty. I wanted to show others how to create their own custom PCBs and used the creation of my project to do so. Note that there are hazardous chemicals involved so safety is needed.
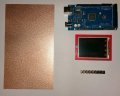
PCB developing hardware-
Building hardware-
PCB developing supplies-
Safety supplies-
Optional supplies-

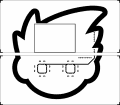
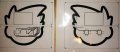
Creating your masks
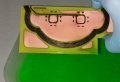
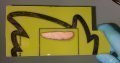
First you must create a mask for the copper that you want to keep on your board. This can be done with EAGLE or other PCB design software (or even by hand in image editing software). You can then export the mask as an image to print out. The top layer must be flipped horizontally because it needs to be a mirror reflection. The bottom layer is already mirrored. Creating the PCB design is outside the scope of the tutorial and many can be found online. You want to make sure that the DPI of the image is the highest that your laser printer can handle and that the printer is set up to print at the darkest setting so the copper you want to be saved is thoroughly covered. It is important to have guides in the corners of your image that match up to at least 2 corners of the board if you are doing a double sided board. Also small lines connecting these guides will help you with the cutting and aligning of the masks. Small differences in alignment between the front and back can result in drilling problems and missing contacts. Place the transparencies of both sides of the board on top of each other and make sure the holes line up. Also use a component line a row of pins to make sure the images are scaled correctly. Trust me on this - It is horrible to discover only after the acid bath that the board is useless because it was shrunk.
Mask images

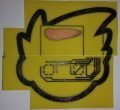
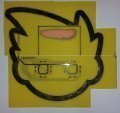
Printed
Cut that #$@# (mask) out
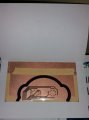
Hold the transparency up so there is light behind it to show you the guides. Cut as close to them as possible because you will encounter a problem aligning to the side(s) of the board if there is too much excess on the outside of them. Try not to touch any area that is printed on because it will impede the transfer of toner to your board. Place it/them printed side down onto a clean piece of paper to prevent dust or fuzzies from landing on the mask(s).
Clean that dirty board of yours!
Wash the board as much as you can with warm water and soap. Now use a rag to wipe it down with rubbing alcohol (idealy a microfiber cloth is best). Until you are done applying the masks only touch the board on the sides. Set it aside in a dust-free area while you get everything ready to tape the masks in place.
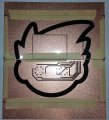
Applying masks
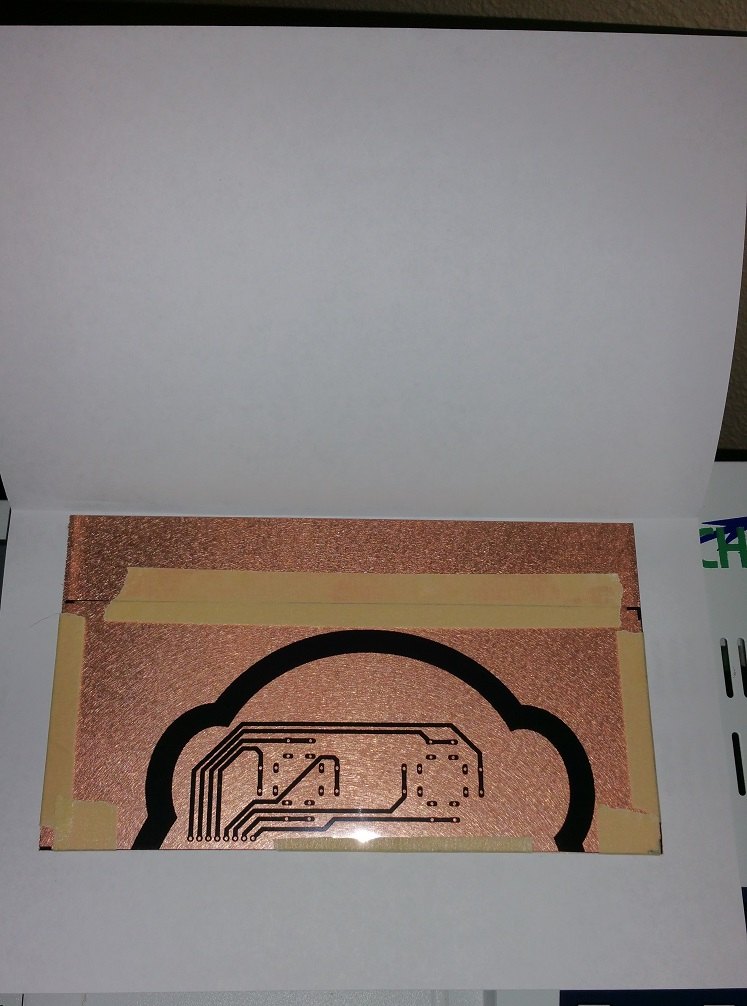
First, tear off a piece of masking tape that will fit on one side without obscuring the guides on the corners. It is a lot easier to see if you need to realign the mask this way. I always tape one of the longer sides first for better accuracy. Put the duller side of the print face down. Apply the tape when you feel like you have it placed well and wrap it just around the side of the board. Now take the mask for the other side of the board and make sure that you are putting it onto the board in the right orientation. When you feel comfortable with the placement then fold the piece of tape on the edge of the board down onto it. Now that you have the hardest part of taping down continue on with the remaining sides. Make sure to smooth out the film from the taped areas so it is as smooth as possible. Note that there will still be some flex in the film where it seems that it can be smoothed out further but as long as the guides align to the edges it will be fine. The film will be smoothed out in the laminating phase. Once you are done taping, make sure that everything is still aligned and double check to make sure the masks are in the right orientations again.

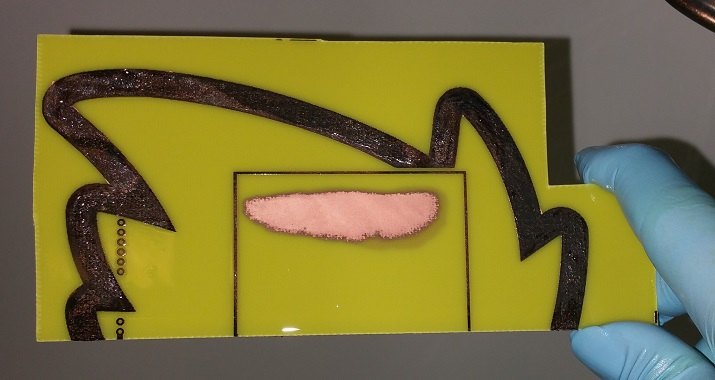
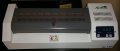
Lamination
Why a laminator? Laser jets don't use ink. The toner in them is little plastic beads that melt onto the surface that is heated up with all those pixels you sent to the printer. Once the copper is heated up enough the plastic from the beads lets go from the transfer media (transparency film, paper) and is transferred to its surface.

Start up your laminator and crank the heat up. Let it run at least 5 minutes to heat thoroughly. The AL13P has a display that shows the temperature and notifies you when it reaches the heat level you have set (usually 369 F). Fold a piece of printer paper in half height-wise to make a copper clad board burrito. This will prevent the masking tape from coming off of your transparencies and wrapping themselves around the rollers and for an easier way to grab the hot board. You might want to have an oven mitt or similar handy before you test the bare-handed approach. Also, you might want to have a drink, smoke, what-not nearby because it will take a while to run through the laminator and you will want to do the whole process in one shot to prevent possible transfer problems. I rotate/flip the board after each run through the laminator and avoid running it through near the edges for possible hangups of the board as it is coming out the other side. I should note right now that here is the huge advantage in using the wax coated printer paper instead of the transparency film. You can be done in 4-6 runs through the laminator if you use it instead. With the transparency film you want to run it through many more times to make sure it adheres as much as possible. By many I mean mid-20s to mid-30s. This can vary wildly with different models. I run my boards through 16-20 times in the normal way and then turn on the modchip that reverses a bit after every ~3 seconds. I run it through 6-8 times in this mode. When you are done then set the board aside for a minute to let it cool down. Now to reveal your handywork... Grab a corner of the transparency and pull it away slowly but surely. You want to make sure you are getting a clean release from the board. If you start noticing a lot of tearing of the transferred plastic then you can either retape the sides that you tore or go ride the fail whale back to the cleaning stage again (this time you have to scrub the toner off with steel wool before you clean the board).
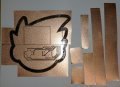
Just a little trim
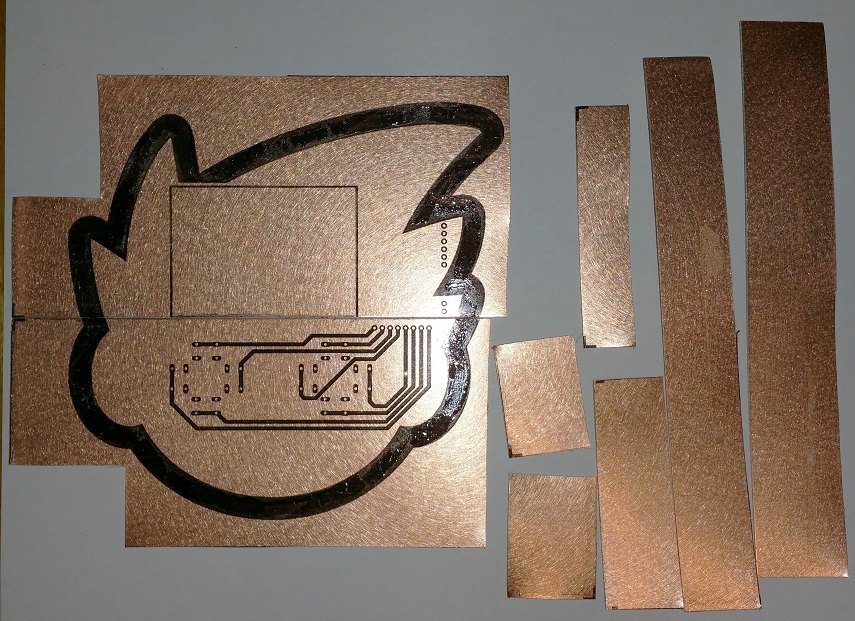
I like to trim my boards of large unused areas now. This is to save scraps for other projects and to save etching time/supplies by having to remove less copper. This isn't recommended if the board is thicker than a mm because it could seperate the copper from and/or crack the board. I use a regular pair of scissors for this and as a bonus it sharpens the scissors. Take a look at the boards under bright light to see if you should apply some shellac/nail polish and/or permanent marker to cover up more. Marker is much easier to use but it doesn't do as well of a job.
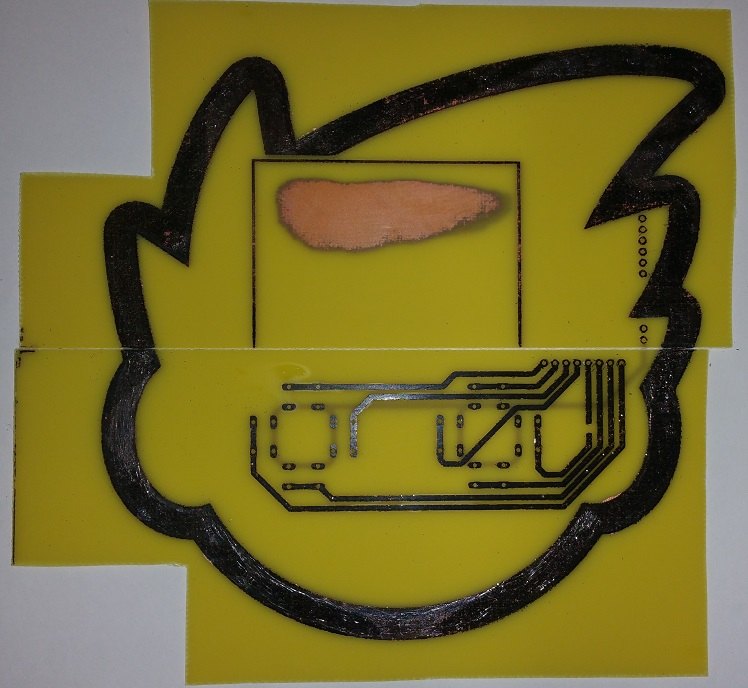
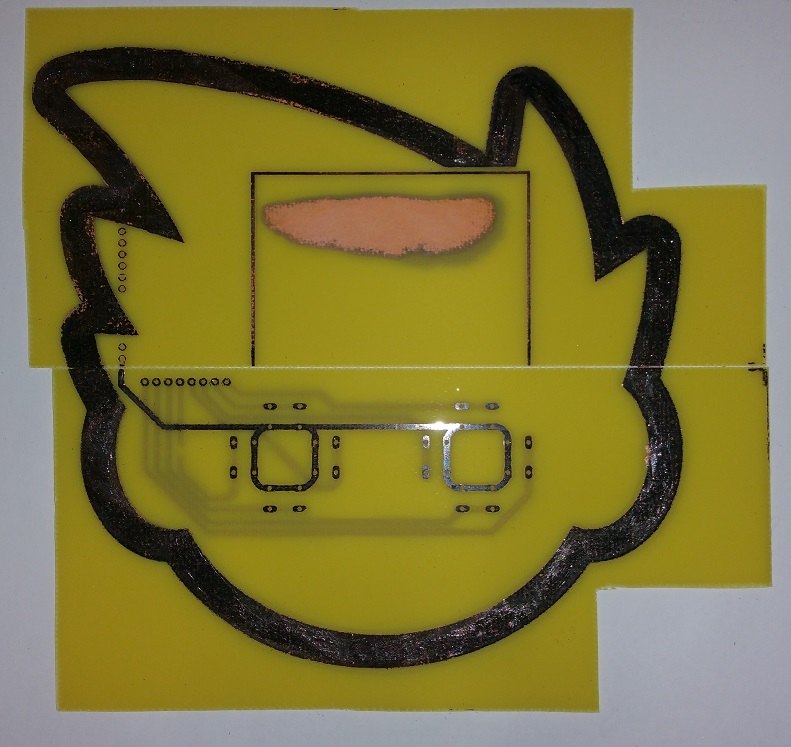
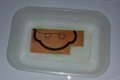
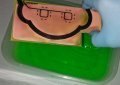
Things are developing
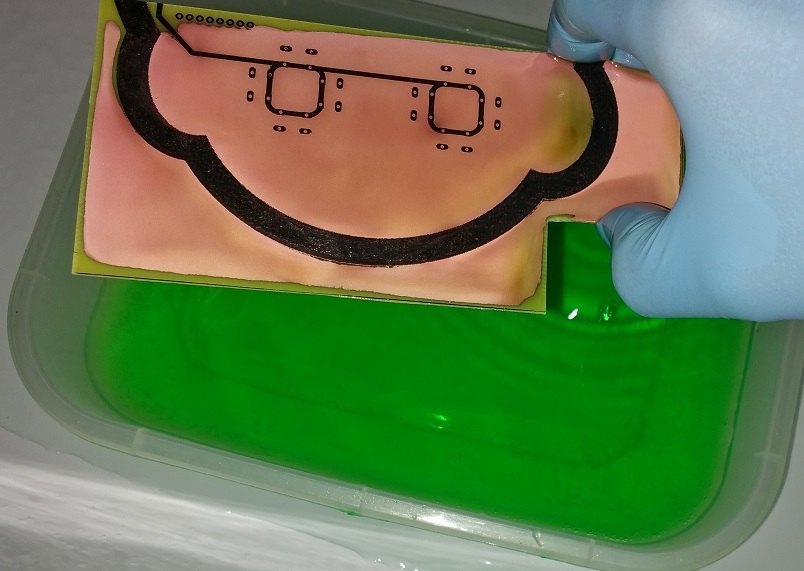
Make sure you are etching your board(s) in a safe area with enough ventilation. Keep animals, kids, exes (well maybe not) away from this area while you are working. Put on your gogs and gloves before you do anything. If you are working in a bathtub like I did then fill the bottom of the tub with a few inches of water to dilute any acid that splashes over the sides of your etching container. I also have a side container that I fill with water so I can place the boards that are done etching into it to stop the process. If you aren't using a tub then make sure that anything that can be corroded in the vicinity is covered up. It doesn't etch too quickly but if you will get an earful the rest of your life then it is a small price to pay. Measure out 8-12 fl oz. of muriatic acid and slowly pour it into the empty etching container. Ease in your board. If you expected something cool to happen then you must feel let down right now. The reason why there doesn't seem to be much of anything happening is because there isn't. Muriatic acid only eats away oxidized copper. This is where the hydrogen peroxide comes in. Slowly pour in an equal amount of peroxide. Immediately you will see the copper turning dark in the areas it was poured. What happens is the acid interacts with the hydrogen peroxide and the oxygen molecules get bonded to the copper molecules. Grab the board with a gloved hand and constantly wiggle the board back and forth in the solution. The bottom of the board will start developing faster than the top because the oxygen bubbles will be on the bottom. After a while flip the board over and keep wiggling it. After a while you will see the solution becoming pretty blue-green. This is a hint that there is not much more copper that can be taken off the boards. If you don't notice much happening for a while then now is time to add equal parts of both liquids to the mixture. Depending on how much copper wasn't covered by the masks it can take a few times of adding more to fully etch the board. Once the board is free of copper in areas that aren't going to get cut off then give them a bath in a lot of water to make sure the etching stops. Once you are done with all of your boards then put away the chemicals in a safe place and clean up. Run a bunch of cold water in the tub if that is where you worked and spray it down in case there was a splash you didn't see. What to do with the mixture of chemicals in your etching container? You can mix it with baking soda and discard of it in the garbage or you can do something really cool with it which I will write about later on.


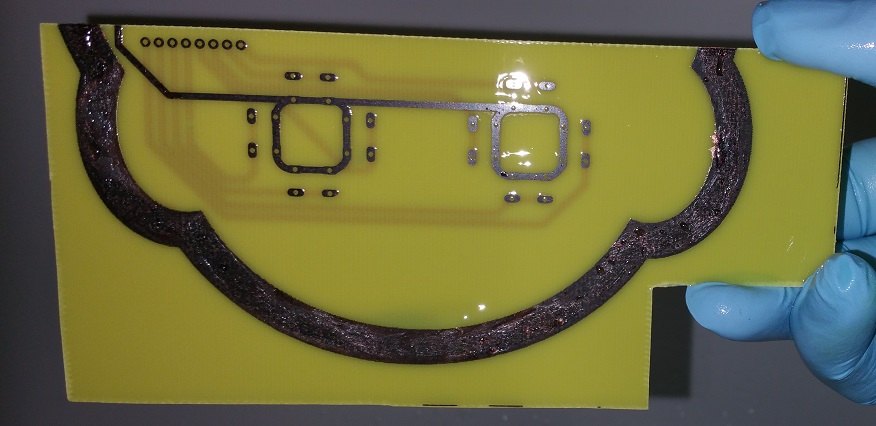
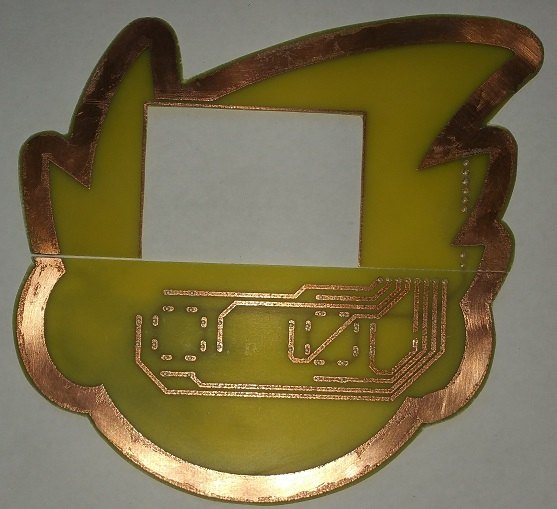
Now's the time for the final reveal. Dry your board completely and start scrubbing with the steel wool. After all of the copper is cleaned off wash the board with soap and water. Now you can hold the board up to a light to see how well you did with alignment if you made a double sided board. Hopefully it lines up to an unnoticeable amount of a difference but small alignment differences usually aren't too much of a problem.
Cutting corners
If you used a board no thicker than a mm then you will have a much easier time here. Using your scissors/shears cut no closer than a mm around the outside of the area of the board that you want to keep. Remember that you can always subtract but can't add. The rest can be sanded off. If the board is thicker then you will need to use a utility blade or similar to score the board many times on both sides before you should attempt to into it.
Drill, baby, drill
Put on your dust mask. You don't want to be inhaling fiber glass from the board. Some people might want to use eye protection too but I've never gotten itchy eyes from drilling. I modified my drill to plug into a 12v 1A power supply for maximum speed and easier drilling. I set up a cardboard box to drill on so nothing gets inadvertently drilled and drill bits don't get broken. With steady pressure push straight down into the board and pull straight out. The drill bits are pretty fragile if torqued and they will break. If you are drilling many holes then you should take a break after a dozen or so and let the bit cool down so it doesn't break more easily.
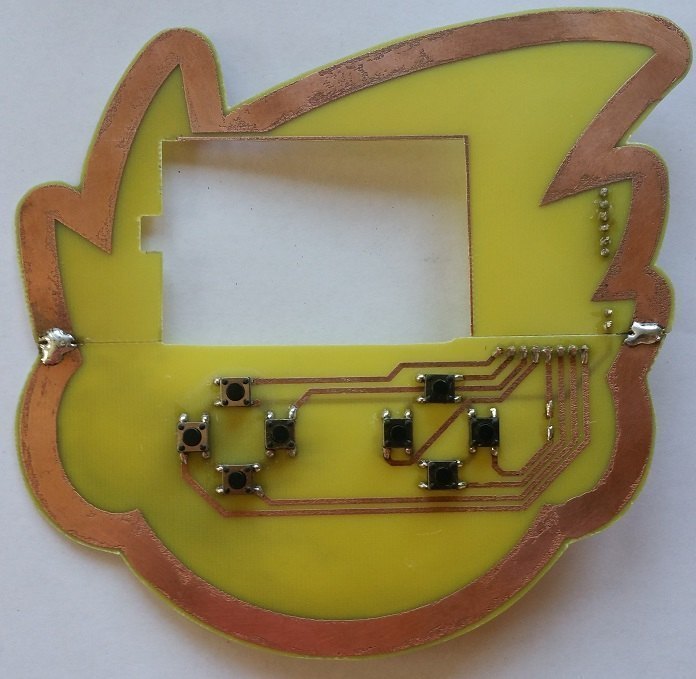
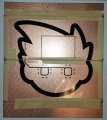
What's the population?
Clean the board one more time with soap and water. Then once again with alcohol so the solder will have a good surface to attach to. Soldering the components onto the board is called population. Now is the final stage of the build. It is common that the drilled holes will be a little too small for the pins to fit through. I have a pair of precision tweezers that I push into the holes to widen them out a little. A little rocking on the components usually lets you push through the rest of what is blocking the pins. Once you have your components in place then it is time to start soldering. Again, there are many tutorials online to learn this so go check them out if you need to brush up. After you are done test with a continuity test/multimeter to make sure everything is connected.
Finish him!
If you want to keep the copper free from oxidation then cover it in a thin layer of clear shellac/nail polish. Also you may want to add some hot glue around the frame of your shield to keep everything intact.
The rest of the story
I only realized after creating the board layout that I didn't have any board with a bigger width than 4". So I decided I would still do this project and solder the two halves together by tempy's hair. I also had an alignment problem with the LCD as you might have been able to tell with the finished project vs the mask images. There was some pitting on the copper where the resist wasn't thick enough and a broken trace that I needed to repair with a piece of wire. I didn't have nearly as much time to work on the programming side as I would have wanted (since I only realized a few days ago that the competition was going on) but it's actually a somewhat decent minigame. I am cleaning up the code and hoping to add more to it before I upload.
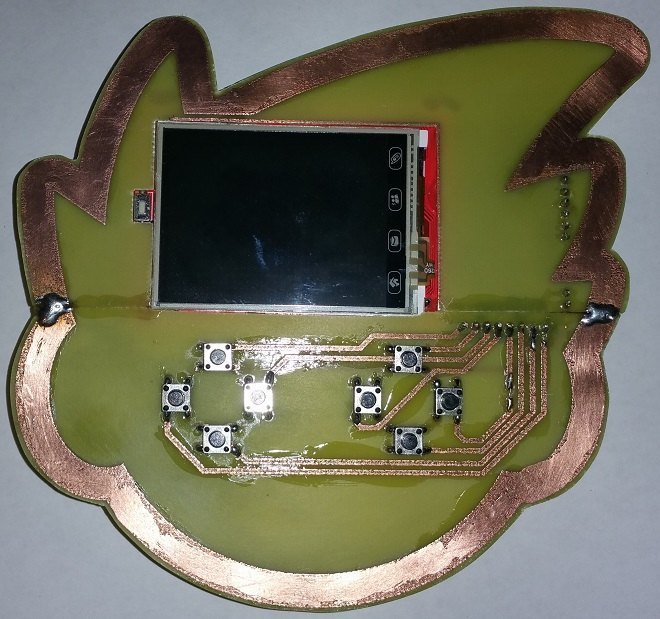

Note that the colors in the video are bled out like you see many times when trying to record video of a display. :/ I will see if video editing software can help at all to correct the colors.
I hope you enjoyed this tutorial and entry to the bounty.
P.S. You can place the mixture into a heat-safe glass container and add in aluminum foil. The reaction will be a lot different than when you etched the copper. Do not do this inside as it releases toxic gas and a good amount of heat. Drop in a piece of foil and go away a few feet until it stops boiling. What is happening is the copper chloride molecules are getting torn apart and the aluminum is bonding with the chlorine. This results in the copper falling to the bottom of the container. After you let it settle a while after it is done pour off as much of the liquid as you can and then pour some water into the container and mix it up. Let it settle again and then pour off the liquid again. Let it dry out for a while and then pour into a bag with a paper towel inside. This will make a copper/copper oxide coated paper towel that you can put into a fire for blue/green flames. Alternately, you can put the powder into a ceramic bowl and put a torch on it to melt it into a copper ingot.
PCB developing hardware-
- Laser printer (I used the Brother HL-L2320D)
- Laminating machine that can reach a temp of 350 F at least (I used a modified APACHE AL13P. The modification allows for a longer period of heating each part of the board by automatically reversing every few seconds. You can use a clothes iron but it is hard to get consistent heat to transfer onto the board.)
- Decent scissors/shears
Building hardware-
- Soldering iron
- DC motor drill with jewelers bits (0.6mm is what I used)
- Continuity tester/multimeter
- Glue gun
PCB developing supplies-
- Double-sided copper clad board (I used FR4 1mm board)
- Transparency film (or wax coated paper but it is harder to align and the toner can scratch off easily)
- Rubbing alcohol
- Steel wool
- Sandpaper
- Muriatic acid (3% is fine but takes longer. It can be bought at hardware stores.)
- Hydrogen peroxide
- Plastic storage container that the PCB can fit into comfortably
- Masking tape
- Thin coated wire (single strand or multistrand)
- Solder
Safety supplies-
- Dust mask
- Waterproof gloves
- Protective eyewear
Optional supplies-
- Clear shellac/nail polish
- Permanent marker
- Arduino Mega 2560
- OPEN-SMART 2.4" touch display shield w/ microSD reader
- 6mm tactile button x 8
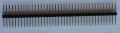
- A strip of 8, 6, and 2 of extra long 0.1"/2.54mm breakaway header pins
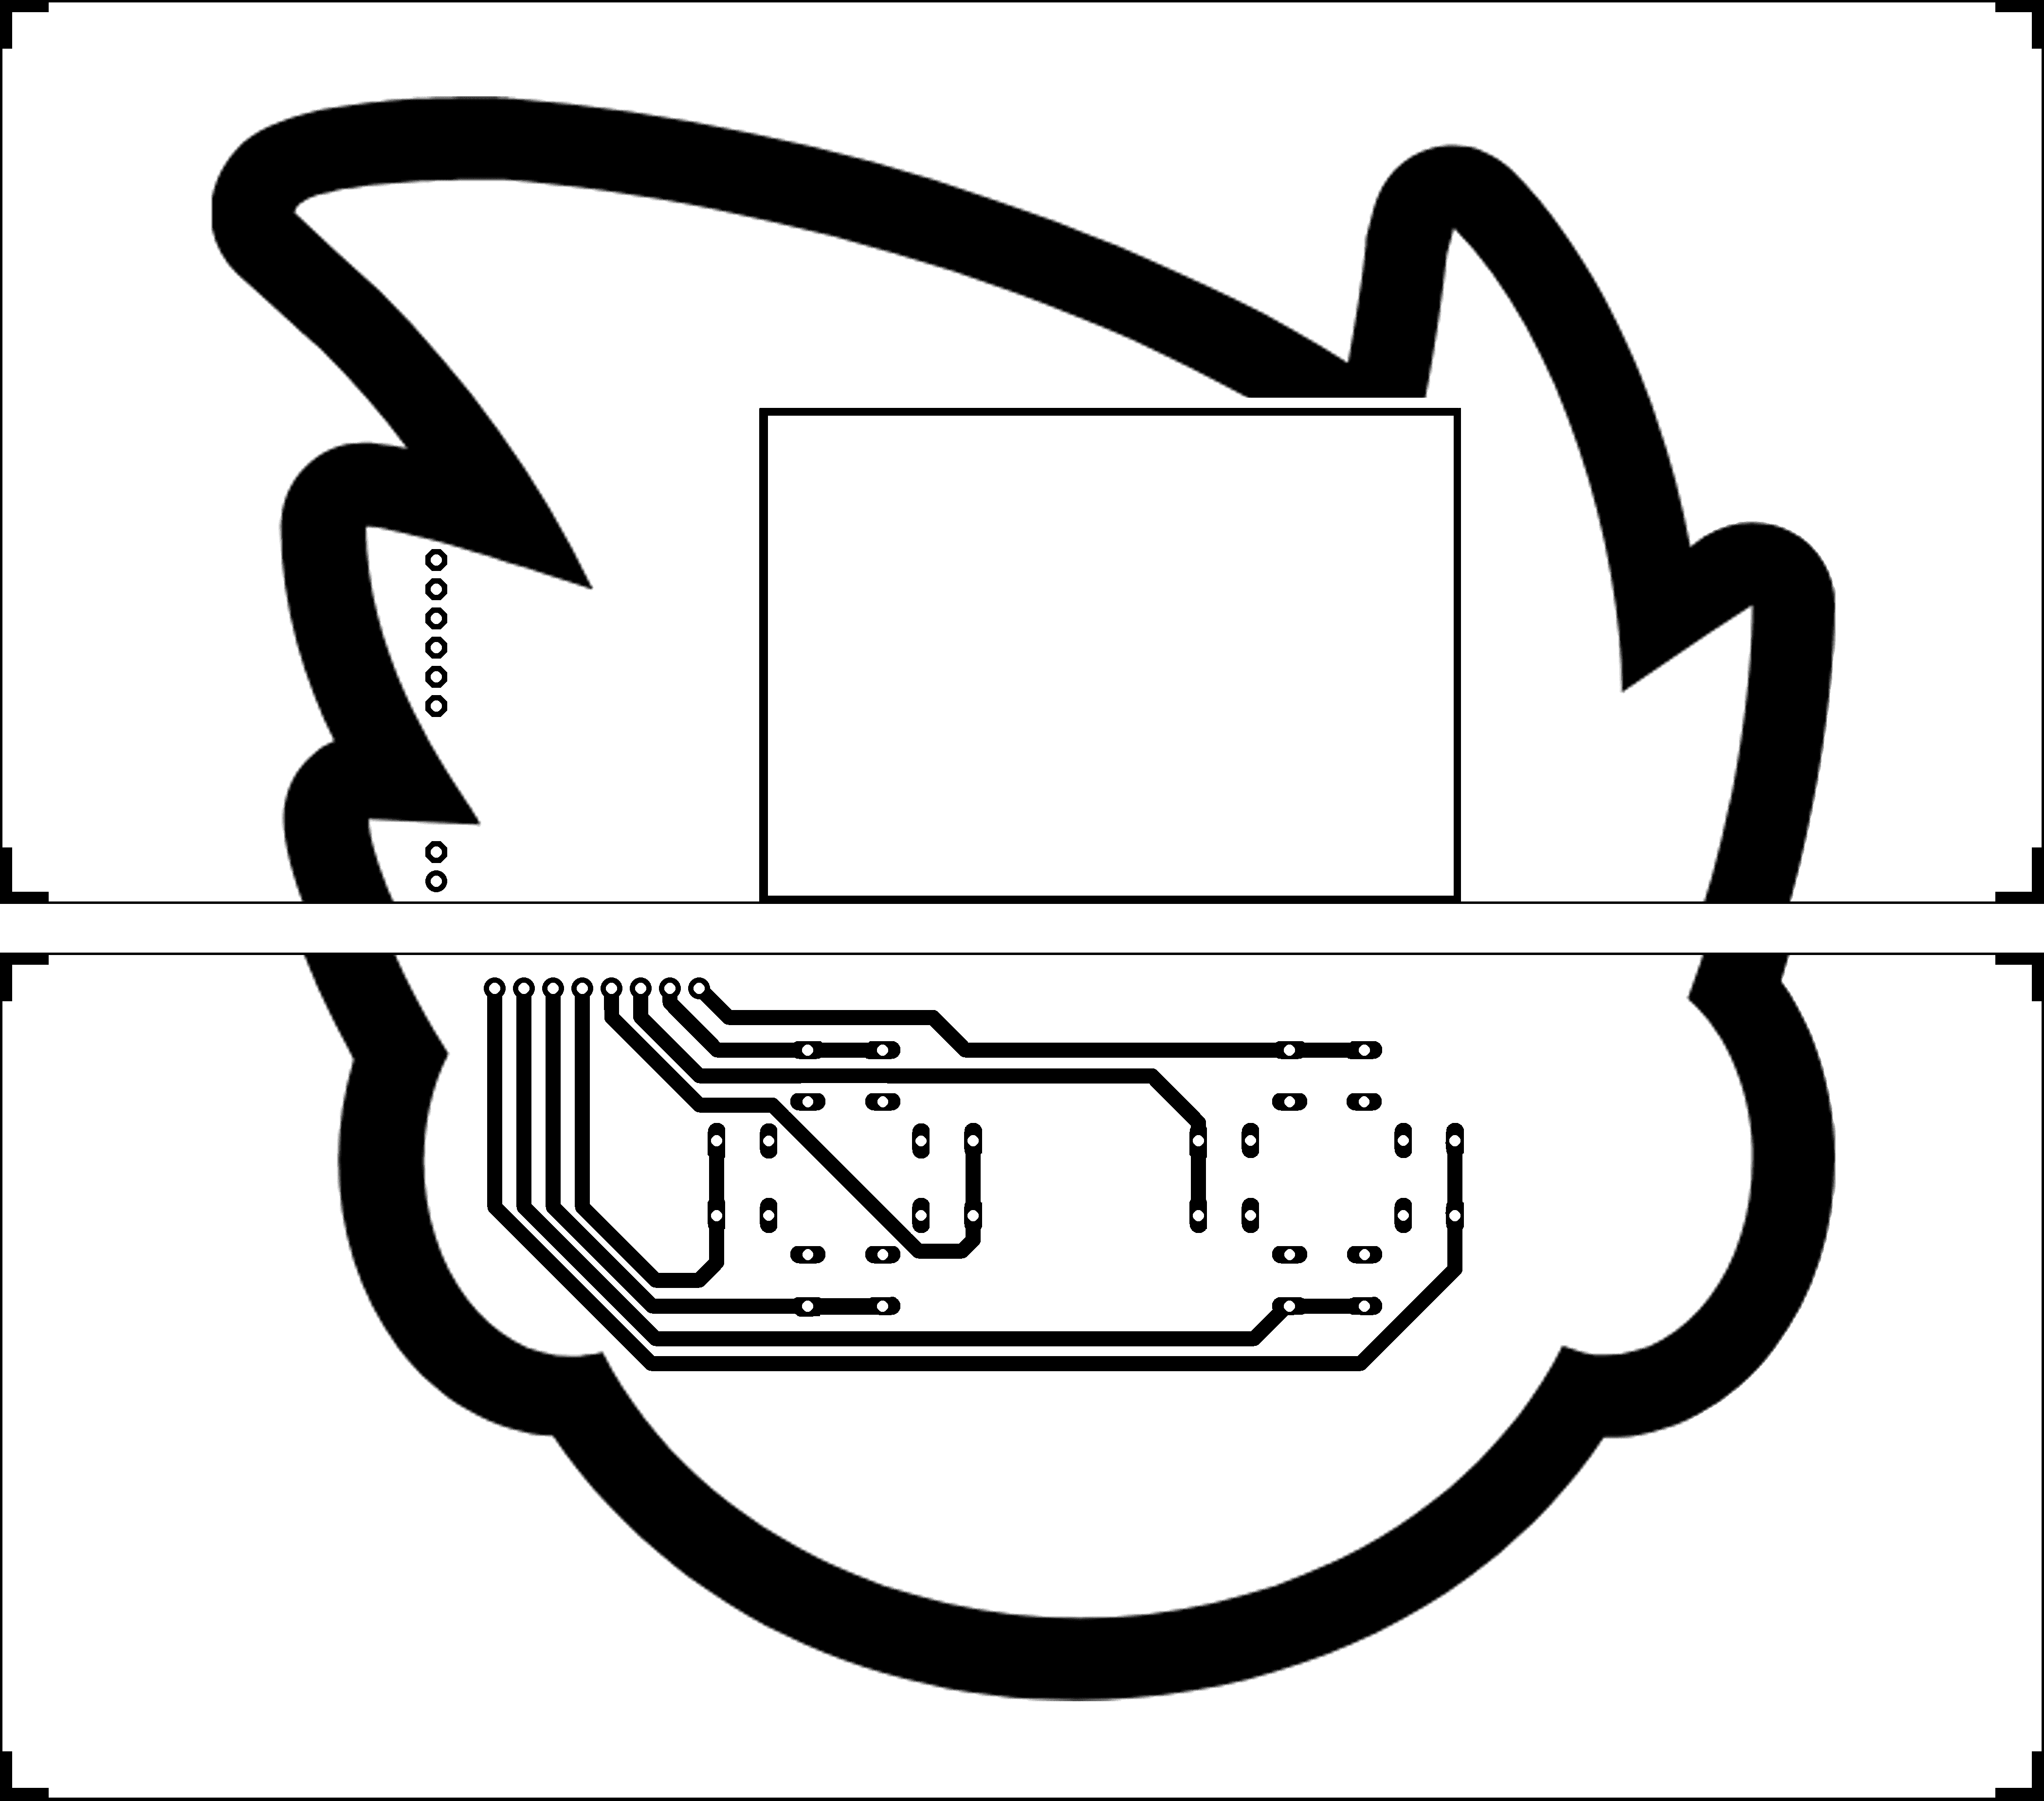
Creating your masks
First you must create a mask for the copper that you want to keep on your board. This can be done with EAGLE or other PCB design software (or even by hand in image editing software). You can then export the mask as an image to print out. The top layer must be flipped horizontally because it needs to be a mirror reflection. The bottom layer is already mirrored. Creating the PCB design is outside the scope of the tutorial and many can be found online. You want to make sure that the DPI of the image is the highest that your laser printer can handle and that the printer is set up to print at the darkest setting so the copper you want to be saved is thoroughly covered. It is important to have guides in the corners of your image that match up to at least 2 corners of the board if you are doing a double sided board. Also small lines connecting these guides will help you with the cutting and aligning of the masks. Small differences in alignment between the front and back can result in drilling problems and missing contacts. Place the transparencies of both sides of the board on top of each other and make sure the holes line up. Also use a component line a row of pins to make sure the images are scaled correctly. Trust me on this - It is horrible to discover only after the acid bath that the board is useless because it was shrunk.
Mask images
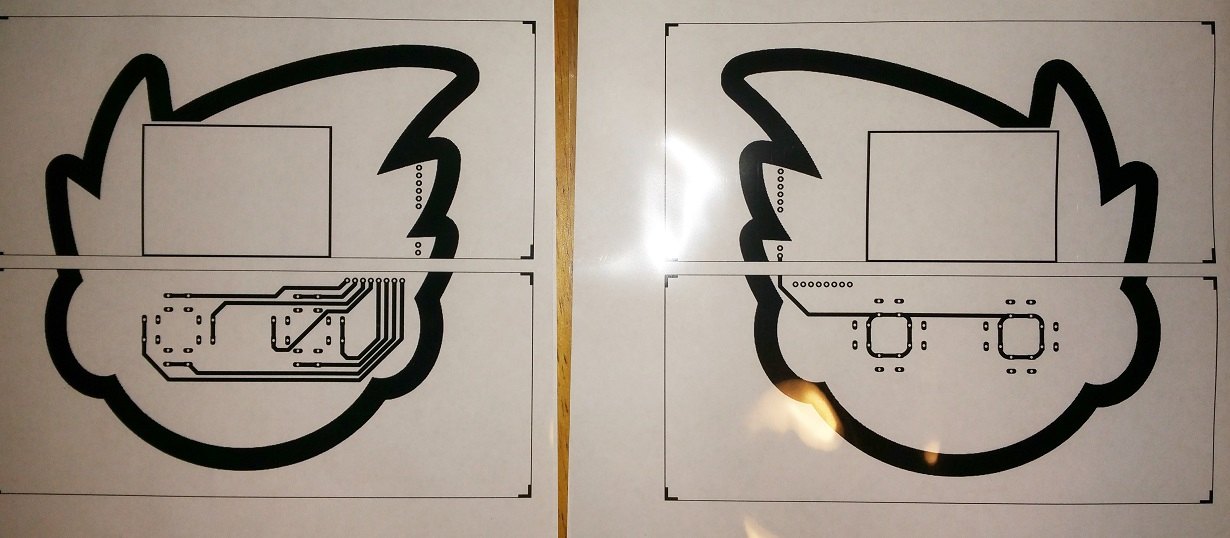
Printed
Cut that #$@# (mask) out
Hold the transparency up so there is light behind it to show you the guides. Cut as close to them as possible because you will encounter a problem aligning to the side(s) of the board if there is too much excess on the outside of them. Try not to touch any area that is printed on because it will impede the transfer of toner to your board. Place it/them printed side down onto a clean piece of paper to prevent dust or fuzzies from landing on the mask(s).
Clean that dirty board of yours!
Wash the board as much as you can with warm water and soap. Now use a rag to wipe it down with rubbing alcohol (idealy a microfiber cloth is best). Until you are done applying the masks only touch the board on the sides. Set it aside in a dust-free area while you get everything ready to tape the masks in place.
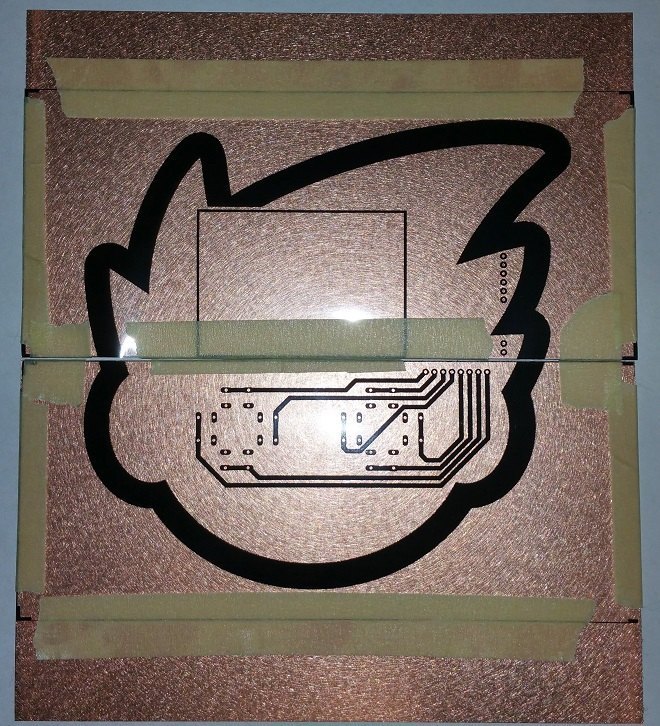
Applying masks
First, tear off a piece of masking tape that will fit on one side without obscuring the guides on the corners. It is a lot easier to see if you need to realign the mask this way. I always tape one of the longer sides first for better accuracy. Put the duller side of the print face down. Apply the tape when you feel like you have it placed well and wrap it just around the side of the board. Now take the mask for the other side of the board and make sure that you are putting it onto the board in the right orientation. When you feel comfortable with the placement then fold the piece of tape on the edge of the board down onto it. Now that you have the hardest part of taping down continue on with the remaining sides. Make sure to smooth out the film from the taped areas so it is as smooth as possible. Note that there will still be some flex in the film where it seems that it can be smoothed out further but as long as the guides align to the edges it will be fine. The film will be smoothed out in the laminating phase. Once you are done taping, make sure that everything is still aligned and double check to make sure the masks are in the right orientations again.
Lamination
Why a laminator? Laser jets don't use ink. The toner in them is little plastic beads that melt onto the surface that is heated up with all those pixels you sent to the printer. Once the copper is heated up enough the plastic from the beads lets go from the transfer media (transparency film, paper) and is transferred to its surface.
Start up your laminator and crank the heat up. Let it run at least 5 minutes to heat thoroughly. The AL13P has a display that shows the temperature and notifies you when it reaches the heat level you have set (usually 369 F). Fold a piece of printer paper in half height-wise to make a copper clad board burrito. This will prevent the masking tape from coming off of your transparencies and wrapping themselves around the rollers and for an easier way to grab the hot board. You might want to have an oven mitt or similar handy before you test the bare-handed approach. Also, you might want to have a drink, smoke, what-not nearby because it will take a while to run through the laminator and you will want to do the whole process in one shot to prevent possible transfer problems. I rotate/flip the board after each run through the laminator and avoid running it through near the edges for possible hangups of the board as it is coming out the other side. I should note right now that here is the huge advantage in using the wax coated printer paper instead of the transparency film. You can be done in 4-6 runs through the laminator if you use it instead. With the transparency film you want to run it through many more times to make sure it adheres as much as possible. By many I mean mid-20s to mid-30s. This can vary wildly with different models. I run my boards through 16-20 times in the normal way and then turn on the modchip that reverses a bit after every ~3 seconds. I run it through 6-8 times in this mode. When you are done then set the board aside for a minute to let it cool down. Now to reveal your handywork... Grab a corner of the transparency and pull it away slowly but surely. You want to make sure you are getting a clean release from the board. If you start noticing a lot of tearing of the transferred plastic then you can either retape the sides that you tore or go ride the fail whale back to the cleaning stage again (this time you have to scrub the toner off with steel wool before you clean the board).
Just a little trim
I like to trim my boards of large unused areas now. This is to save scraps for other projects and to save etching time/supplies by having to remove less copper. This isn't recommended if the board is thicker than a mm because it could seperate the copper from and/or crack the board. I use a regular pair of scissors for this and as a bonus it sharpens the scissors. Take a look at the boards under bright light to see if you should apply some shellac/nail polish and/or permanent marker to cover up more. Marker is much easier to use but it doesn't do as well of a job.
Things are developing
Make sure you are etching your board(s) in a safe area with enough ventilation. Keep animals, kids, exes (well maybe not) away from this area while you are working. Put on your gogs and gloves before you do anything. If you are working in a bathtub like I did then fill the bottom of the tub with a few inches of water to dilute any acid that splashes over the sides of your etching container. I also have a side container that I fill with water so I can place the boards that are done etching into it to stop the process. If you aren't using a tub then make sure that anything that can be corroded in the vicinity is covered up. It doesn't etch too quickly but if you will get an earful the rest of your life then it is a small price to pay. Measure out 8-12 fl oz. of muriatic acid and slowly pour it into the empty etching container. Ease in your board. If you expected something cool to happen then you must feel let down right now. The reason why there doesn't seem to be much of anything happening is because there isn't. Muriatic acid only eats away oxidized copper. This is where the hydrogen peroxide comes in. Slowly pour in an equal amount of peroxide. Immediately you will see the copper turning dark in the areas it was poured. What happens is the acid interacts with the hydrogen peroxide and the oxygen molecules get bonded to the copper molecules. Grab the board with a gloved hand and constantly wiggle the board back and forth in the solution. The bottom of the board will start developing faster than the top because the oxygen bubbles will be on the bottom. After a while flip the board over and keep wiggling it. After a while you will see the solution becoming pretty blue-green. This is a hint that there is not much more copper that can be taken off the boards. If you don't notice much happening for a while then now is time to add equal parts of both liquids to the mixture. Depending on how much copper wasn't covered by the masks it can take a few times of adding more to fully etch the board. Once the board is free of copper in areas that aren't going to get cut off then give them a bath in a lot of water to make sure the etching stops. Once you are done with all of your boards then put away the chemicals in a safe place and clean up. Run a bunch of cold water in the tub if that is where you worked and spray it down in case there was a splash you didn't see. What to do with the mixture of chemicals in your etching container? You can mix it with baking soda and discard of it in the garbage or you can do something really cool with it which I will write about later on.
Now's the time for the final reveal. Dry your board completely and start scrubbing with the steel wool. After all of the copper is cleaned off wash the board with soap and water. Now you can hold the board up to a light to see how well you did with alignment if you made a double sided board. Hopefully it lines up to an unnoticeable amount of a difference but small alignment differences usually aren't too much of a problem.
Cutting corners
If you used a board no thicker than a mm then you will have a much easier time here. Using your scissors/shears cut no closer than a mm around the outside of the area of the board that you want to keep. Remember that you can always subtract but can't add. The rest can be sanded off. If the board is thicker then you will need to use a utility blade or similar to score the board many times on both sides before you should attempt to into it.
Drill, baby, drill
Put on your dust mask. You don't want to be inhaling fiber glass from the board. Some people might want to use eye protection too but I've never gotten itchy eyes from drilling. I modified my drill to plug into a 12v 1A power supply for maximum speed and easier drilling. I set up a cardboard box to drill on so nothing gets inadvertently drilled and drill bits don't get broken. With steady pressure push straight down into the board and pull straight out. The drill bits are pretty fragile if torqued and they will break. If you are drilling many holes then you should take a break after a dozen or so and let the bit cool down so it doesn't break more easily.
What's the population?
Clean the board one more time with soap and water. Then once again with alcohol so the solder will have a good surface to attach to. Soldering the components onto the board is called population. Now is the final stage of the build. It is common that the drilled holes will be a little too small for the pins to fit through. I have a pair of precision tweezers that I push into the holes to widen them out a little. A little rocking on the components usually lets you push through the rest of what is blocking the pins. Once you have your components in place then it is time to start soldering. Again, there are many tutorials online to learn this so go check them out if you need to brush up. After you are done test with a continuity test/multimeter to make sure everything is connected.
Finish him!
If you want to keep the copper free from oxidation then cover it in a thin layer of clear shellac/nail polish. Also you may want to add some hot glue around the frame of your shield to keep everything intact.
The rest of the story
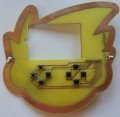
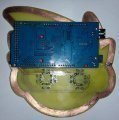
I only realized after creating the board layout that I didn't have any board with a bigger width than 4". So I decided I would still do this project and solder the two halves together by tempy's hair. I also had an alignment problem with the LCD as you might have been able to tell with the finished project vs the mask images. There was some pitting on the copper where the resist wasn't thick enough and a broken trace that I needed to repair with a piece of wire. I didn't have nearly as much time to work on the programming side as I would have wanted (since I only realized a few days ago that the competition was going on) but it's actually a somewhat decent minigame. I am cleaning up the code and hoping to add more to it before I upload.
Note that the colors in the video are bled out like you see many times when trying to record video of a display. :/ I will see if video editing software can help at all to correct the colors.
I hope you enjoyed this tutorial and entry to the bounty.
P.S. You can place the mixture into a heat-safe glass container and add in aluminum foil. The reaction will be a lot different than when you etched the copper. Do not do this inside as it releases toxic gas and a good amount of heat. Drop in a piece of foil and go away a few feet until it stops boiling. What is happening is the copper chloride molecules are getting torn apart and the aluminum is bonding with the chlorine. This results in the copper falling to the bottom of the container. After you let it settle a while after it is done pour off as much of the liquid as you can and then pour some water into the container and mix it up. Let it settle again and then pour off the liquid again. Let it dry out for a while and then pour into a bag with a paper towel inside. This will make a copper/copper oxide coated paper towel that you can put into a fire for blue/green flames. Alternately, you can put the powder into a ceramic bowl and put a torch on it to melt it into a copper ingot.
Attachments
-
 gbatempprj-front.png110.9 KB · Views: 2,261
 -
 gbatempprj-back.png106 KB · Views: 2,225
 -
 20170927_005945.jpg107 KB · Views: 2,241
 -
 20170927_005553.jpg180.1 KB · Views: 2,845
 -
 20170927_020902.jpg175.7 KB · Views: 2,199
 -
 20170927_021000.jpg155.2 KB · Views: 2,249
 -
 20170927_155540.jpg92.2 KB · Views: 2,197
 -
 20170927_155724.jpg118.5 KB · Views: 2,234
 -
 20170927_200013.jpg167.7 KB · Views: 2,197
 -
 20170927_231635.jpg56.1 KB · Views: 2,211
 -
 20170927_232642.jpg74.2 KB · Views: 2,193
 -
 20170927_233233.jpg61 KB · Views: 2,195
 -
 20170927_234121.jpg64.4 KB · Views: 2,190
 -
 20170927_234815.jpg67.4 KB · Views: 2,220
 -
 20170928_002832.jpg52.2 KB · Views: 2,195
 -
 20170928_003647.jpg88.8 KB · Views: 2,188
 -
 20170928_003720.jpg92.8 KB · Views: 2,228
 -
 20170928_121652.jpg62.1 KB · Views: 2,154
 -
 20170928_130256.jpg17 KB · Views: 2,176
 -
 20170928_142437.jpg80.7 KB · Views: 2,180
 -
 20170929_001253.jpg137.6 KB · Views: 2,161
 -
 20170929_001050.jpg104.2 KB · Views: 2,182
Last edited by cracker,


