

Linux command line Beginners guide
This is an interactive learning tutorial. Feel free to try any of the commands and stuff listed in the tutorial and experiment a bit with them yourself.
Getting Linux to run
First of all, you should go here and download the iso using your favourite torrent client. We'll be using Arch Linux for this tutorial to test command line Linux. After the download has finished, burn it to a disc or to a USB stick using this utility. Another option is to boot it as a Virtual Machine. (look up VirtualBox) I recommend either printing this tutorial or downloading it to your smartphone, because once you boot the Linux disc, you won't have access to the internet anymore. If you're already running Linux or have a LiveCD lying around, regardless of the distribution, boot it, hit Ctrl-Alt-F1 and start the tutorial. There'll be some minor differences, but it should be fine for the most part.
After your PC has finished burning the image, pop in your disc/USB drive and boot from that. If it doesn't boot by itself when you restart your PC, make sure the device you are trying to boot is tried before the hard disk in your BIOS settings. You could also try to press F9 as soon as you turn on your PC to see if that will give you the option to boot from disc. Once it's booted, select “Boot Arch Linux”.
Once you do, you'll get some text and after a bit of waiting you should see this:
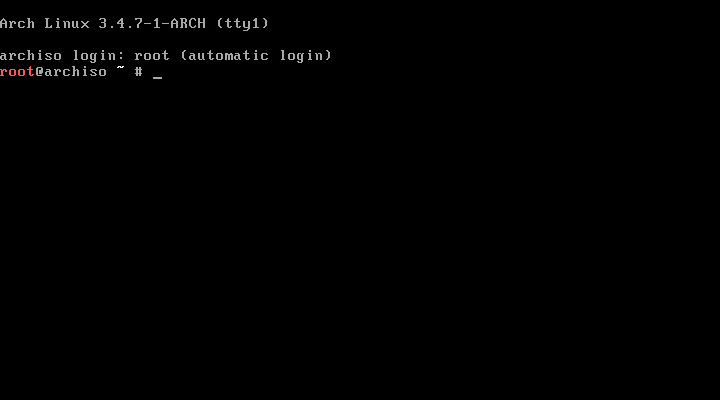
Once you do, you're ready to start the tutorial itself.
The tutorial
This creepy-looking black thing is the command line. You can do pretty much anything from here, you just need to know how – and that's what you'll be learning here. You can use it by typing a command and pressing enter to execute.
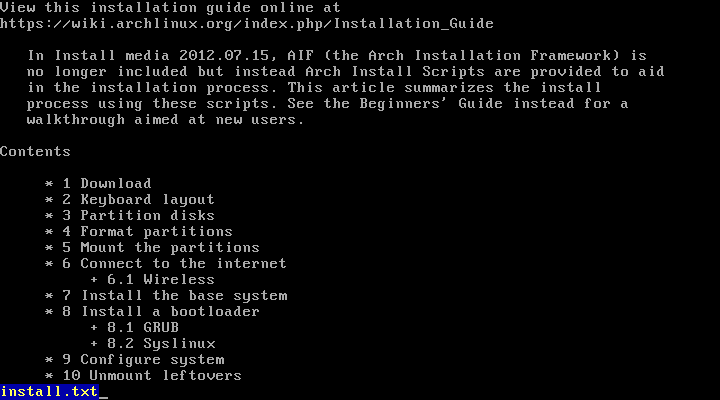
First, the “ls” command. Ls is used to display all files in the current folder. Try using it. You should see a single file called install.txt. However, you don't know how to open it.
That's what the “cat” command is for. You can use it to display the contents of a simple text file. Try using it on the install.txt file by typing “cat install.txt” and hitting Enter. “cat” is the command, the stuff after that is called an argument.
Whoops... Looks like that was a bit too much text for your screen. I suppose we'll have to teach you how to show it in parts. This is where the “less” command comes in handy. Type “less inst” and hit Tab. Did you see what happened? Using Tab autocompletes your command. It's very useful for long filenames. If there's multiple possibilities, pressing Tab will show all of them below the command line. Now, execute the command. You should now only see the first page of the file. Hit Enter, j or arrow down to move the text one line down, k or arrow up to move it up one line and Spacebar for moving it down one screen. You can exit by pressing q. Exit out of less now. As a sidenote, the command “more” does pretty much the same thing, but less is a bit more powerful. More closes itself when you reach the end of the file, though.
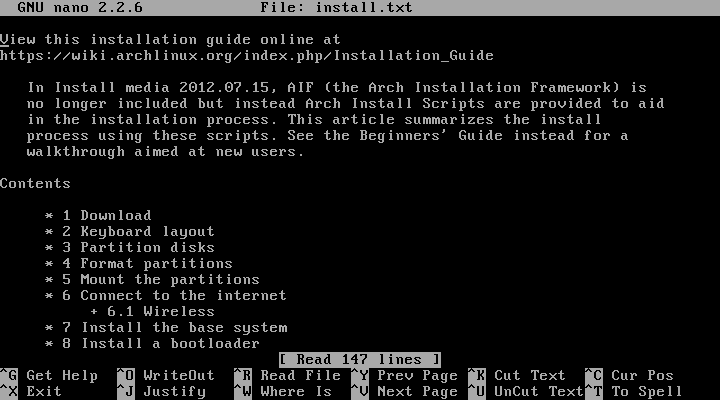
Another useful command for text file manipulation and one that you will use many times in this tutorial is “nano”. Nano is basically a command line text editor. Try opening the install.txt file with it by using “nano install.txt”. You can edit stuff like Notepad, move the cursor using the arrow keys and save your files by pressing Control+O. Try editing and saving, then exit out of the program by pressing Control+X.
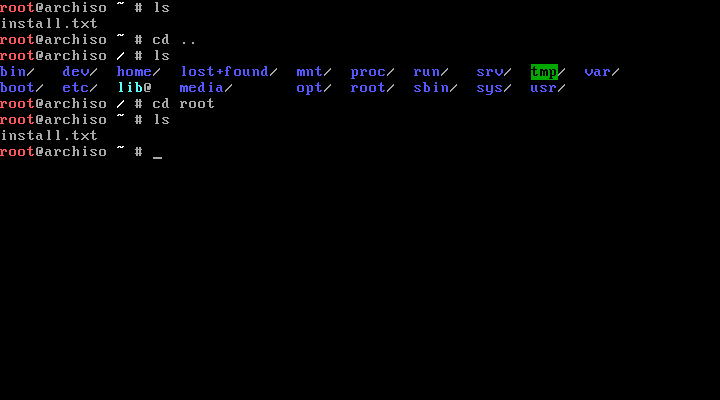
One of the most important commands you will be needing is the “cd” command. Cd stands for Change Directory and you can use it to change the folder you are in. If you followed the tutorial up to this point, you should be in the directory “/root”. That's right, not C:/root, just plain /root. This is because Linux does not use drives like Windows does. Instead, every file is located on / somewhere. / is basically your main folder. Anyway, if you want to use cd to go one directory up (/ instead of /root) use “cd ..”. “..” is basically command line speak for “the folder that this one resides in”. Once you've done that, you can go back to the folder you were just in by typing “cd root”. Additionally, /root is set as your home folder and cd will go to your home folder by default. This means that you can execute cd without any arguments to return to your home folder quickly.
You may have noticed before, but when you were in / instead of /root just now, the symbol in root@archiso ~ # changed. I will now explain what this text exactly means: root is the username you are currently logged on as, archiso is the name of your system, ~ is your current folder (~ is terminal-speak for home) and # means you have administrator rights; regular users will see a $ instead. In Linux, having root access means you can do anything you want. You can even change the passwords of other users without having to know their old password.
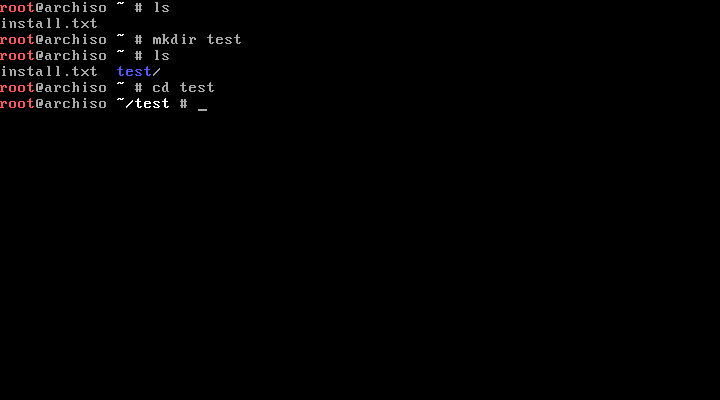
Make sure you're in your home folder now; if you're not, run “cd”. The next command is “mkdir”. You may have guessed, but it's used to create new directories. Create one named “test” now by executing “mkdir test”. Next, go into it with the cd command. (cd test) The text to the left of the command line should have changed to “root@archiso ~/test #. After you've done this, we'll teach you some basic commands for handling files.
First up is a command to search for files. It's called “find” and it's pretty useful. It can look for files with a given name through your system. For example, if you wanted to see all .txt files, you would use “find / -name *.txt”. The first / tells the program where to look (it will also look in all subfolders), the -name tells the program what attribute to look for (the name in this case) and the *.txt tells the program what that name is. The * means: anything can go here. That means this command will find all files that end in .txt on your entire system. Please note that there is one exception: If a file in your current folder meets the criteria, it will only list that instead of looking through your whole system.
So, you already know how to edit text files, right? Well, you don't know how to create them. A very useful way is to pipe the output of a command to a text file. For example, we will now create a text file with the location and name of every file on the liveCD environment. Execute “find / > files.txt”. (this may take some time on slower PCs) The find / will list every file it comes across and the > essentially means: write the output (what gets shown on your screen) of the command before it to a text file. So now, you have a file called files.txt that contains a list of all files. Open it with less or nano to check if you want. This and most other file operations won't give a message when they execute successfully, so you might want to check if everything happened correctly using the ls command.
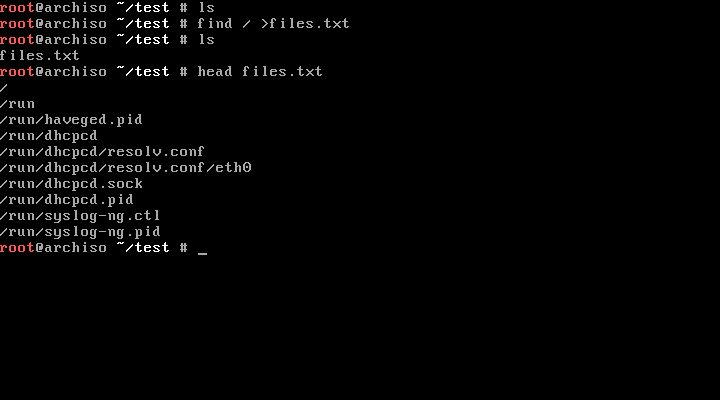
Quick note: "head" displays the first 10 lines of a text file while "tail" displays the last 10.
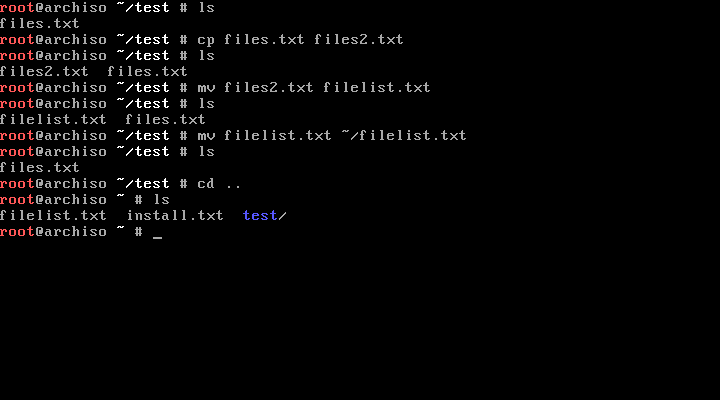
Now, we will copy that file so we have two of it. Why, you ask? Because we can, obviously. If you want to copy or backup something, the “cp” command is your best friend. Just type “cp [old file] [new file]” and you'll have two of the same thing! Try it out by copying files.txt to files2.txt. If you need help: “cp files.txt files2.txt”.
But, well, files2 is kind of a silly name... So let's call it something else. For renaming and moving files, you're gonna want the “mv” command. So to rename the file to, say, filelist.txt you would use “mv files2.txt filelist.txt”. You can also move files like this. If you want to move the new file to ~ instead of ~/test, use “mv filelist.txt ~/filelist.txt” OR “mv filelist.txt ../filelist.txt”. Don't forget about Tab for autocompletion!
Now that we have another copy of the file list sitting in our home folder, we might just as well delete the first one, right? Well, you can do this by using the “rm” command. So if you want to delete the original, just type “rm files.txt”. It's that easy! Removing folders, however, takes a bit more work. Let's go one directory up and try to delete our now-empty test folder. You should get “rm: cannot remove test: Is a directory”. The rm command CAN delete folders, though, you just need to force it to. It won't by default as a safety mechanism. What you'll need to do here is add an additional argument to your command. This is usually done by using the – key once or twice plus one or more letters – for example, -h or --help usually provides help on how to use the program. You can force rm to delete folders by using rm -r [folder name]. This will delete everything in that directory, including subdirectories. This is why you should never listen to trolls on the Internet telling you to use “rm -rf /”, as it will simply remove all files (rm) including folders ® without asking for permission on errors and stuff (f) from your whole system (/).

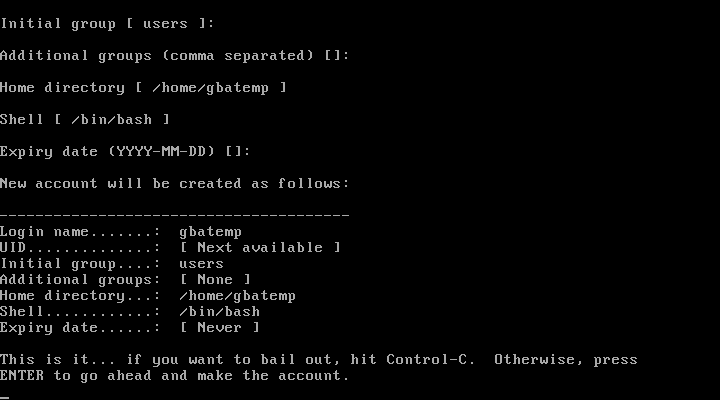
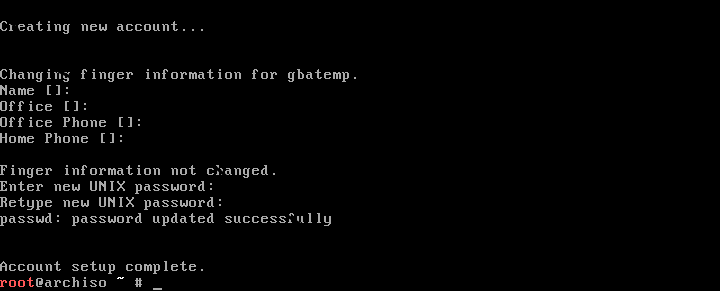
Please note that this entire tutorial so far was done as the root account (remember the #?) It's not a good idea to do stuff that does not NEED root access as root because of how easily you can mess things up. So now we'll be creating a new account for you and use that instead. First, invoke the command “adduser”. This does exactly what the name implies it does. It will present you with a pretty basic form for entering info about the new user. We'll use the login name “gbatemp” to make this easier. Leave everything else empty. It will ask you if you're sure (just hit enter again) and ask for some more info. You can leave these empty as well. Now, enter a password; since this is just a live CD, you don't need to worry about picking a safe one. After you've done that, the account will be set up and ready for use.
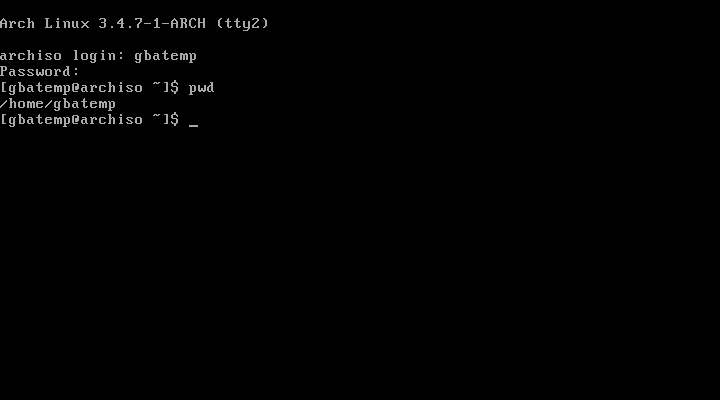
Another useful feature of the Linux terminal is that you can log in to multiple terminals at once. The virtual terminal you are currently logged into is called tty1. You can switch between them (there are 6) by pressing Ctrl+Alt+F#. Press Ctrl+Alt+F2 now to switch to tty2 and log in using your new username. You should see that the symbol next to the command line is now a $ instead of #. What's also worth noting is that each account has its own home folder. You can find out the full name of the folder you are currently in by using the “pwd” command. If you run it, you'll see that your home folder is now /home/gbatemp. In fact, all regular home folders will be in /home/[account name] by default, unless specified otherwise during user creation. (remember you had the option to set the home folder?)
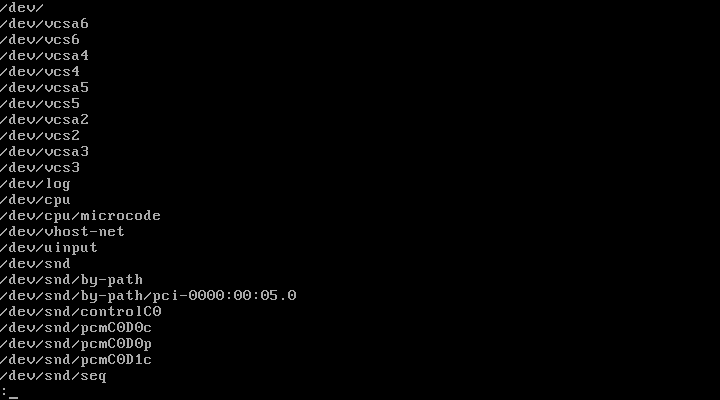
Let's teach you some piping basics. You already know you can redirect output of programs to text files using “>”, but you can send output to other programs as well. For example, try using “find /dev/”. This will most likely output way too much information to fit on your screen. Now, you could save this data as a text file and then read it using nano or less... But where's the fun in that? There's a way to read this without saving it as a file first – and it's called piping. Technically, > is a pipe as well, but whatever. Try using “find /dev/ | less”. This will run the command before the pipe and send the output to the program after it. This can be very useful for programs that output a lot of text.
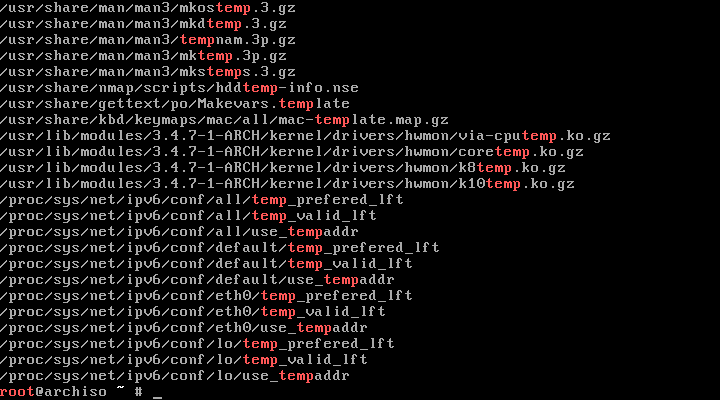
Now, switch back to tty1; you'll need a .txt file for the next step. This next step is called “grep”, and it's here to kick your ass. Wait, actually, it won't do that, but it will let you search .txt files. Let's use our filelist.txt as an example to display only the lines that have “temp” in them. You can do this by running “grep temp filelist.txt”. Nice, huh? Yeah, I thought so too.
Ctrl-C will terminate any running program. If you run “find /”, for example, it'll take LONG to finish because it needs to display over 60,000 lines of text. Hit Ctrl-C while it's doing this to cut it off prematurely.
Use “top” to view all running commands and how much RAM and CPU they take. Not really useful unless you're doing some heavy processing, but it can help to see if a program is actually still doing something or if it just froze altogether. Use Ctrl-C to exit it.

You may have figured this out by now, but the up arrow goes back through your command history. Useful if you want to run a command you ran earlier again. Down arrow goes forward. If you want to use the command you executed last, you can also use the shortcut “!!”.
On most Linux distributions, the “sudo” command is installed by default. It's not installed on this Live CD, though, so you can't test it here. Basically, it allows you to run a command as root, even if your account is not an administrator account. You do need permission to use sudo, though. For example, when logged in as gbatemp, “pwd” will return “/home/gbatemp”. However, “sudo pwd” will return /root.
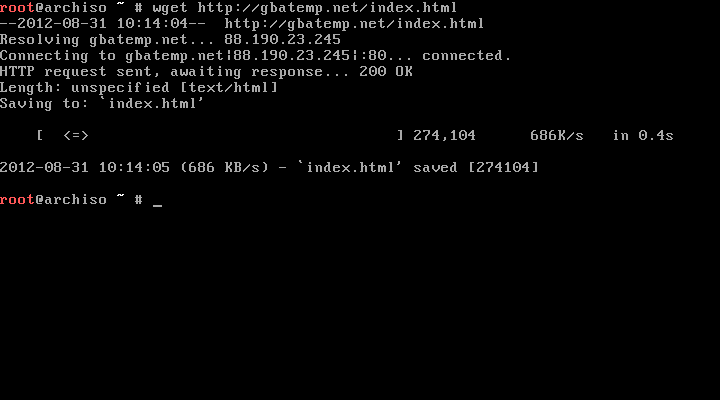
“wget” is a command that will download files. For example, “wget http://gbatemp.net/index.html” will download the main page of GBAtemp.
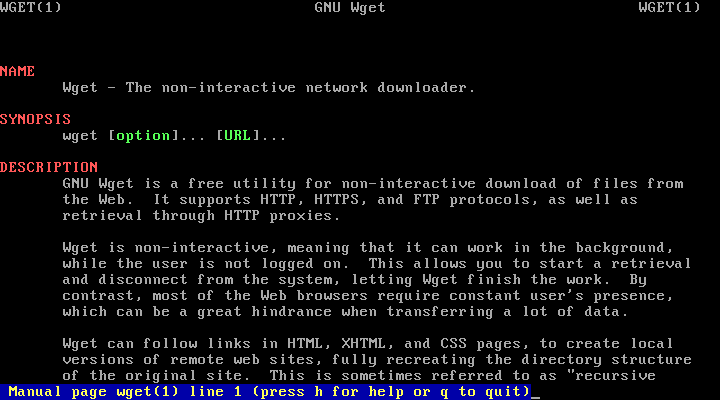
"man" is the Linux manual command: "man [program]" will give you a detailed explanation of how that program works and what it does. Control it the same way you control less.
Hmm... I think that was it for this tutorial. Bye folks, and I hope this helped someone. Feel free to post or PM any comments, questions or criticism.
Getting Linux to run
First of all, you should go here and download the iso using your favourite torrent client. We'll be using Arch Linux for this tutorial to test command line Linux. After the download has finished, burn it to a disc or to a USB stick using this utility. Another option is to boot it as a Virtual Machine. (look up VirtualBox) I recommend either printing this tutorial or downloading it to your smartphone, because once you boot the Linux disc, you won't have access to the internet anymore. If you're already running Linux or have a LiveCD lying around, regardless of the distribution, boot it, hit Ctrl-Alt-F1 and start the tutorial. There'll be some minor differences, but it should be fine for the most part.
After your PC has finished burning the image, pop in your disc/USB drive and boot from that. If it doesn't boot by itself when you restart your PC, make sure the device you are trying to boot is tried before the hard disk in your BIOS settings. You could also try to press F9 as soon as you turn on your PC to see if that will give you the option to boot from disc. Once it's booted, select “Boot Arch Linux”.
Once you do, you'll get some text and after a bit of waiting you should see this:
Once you do, you're ready to start the tutorial itself.
The tutorial
This creepy-looking black thing is the command line. You can do pretty much anything from here, you just need to know how – and that's what you'll be learning here. You can use it by typing a command and pressing enter to execute.
First, the “ls” command. Ls is used to display all files in the current folder. Try using it. You should see a single file called install.txt. However, you don't know how to open it.
That's what the “cat” command is for. You can use it to display the contents of a simple text file. Try using it on the install.txt file by typing “cat install.txt” and hitting Enter. “cat” is the command, the stuff after that is called an argument.
Whoops... Looks like that was a bit too much text for your screen. I suppose we'll have to teach you how to show it in parts. This is where the “less” command comes in handy. Type “less inst” and hit Tab. Did you see what happened? Using Tab autocompletes your command. It's very useful for long filenames. If there's multiple possibilities, pressing Tab will show all of them below the command line. Now, execute the command. You should now only see the first page of the file. Hit Enter, j or arrow down to move the text one line down, k or arrow up to move it up one line and Spacebar for moving it down one screen. You can exit by pressing q. Exit out of less now. As a sidenote, the command “more” does pretty much the same thing, but less is a bit more powerful. More closes itself when you reach the end of the file, though.
Another useful command for text file manipulation and one that you will use many times in this tutorial is “nano”. Nano is basically a command line text editor. Try opening the install.txt file with it by using “nano install.txt”. You can edit stuff like Notepad, move the cursor using the arrow keys and save your files by pressing Control+O. Try editing and saving, then exit out of the program by pressing Control+X.
One of the most important commands you will be needing is the “cd” command. Cd stands for Change Directory and you can use it to change the folder you are in. If you followed the tutorial up to this point, you should be in the directory “/root”. That's right, not C:/root, just plain /root. This is because Linux does not use drives like Windows does. Instead, every file is located on / somewhere. / is basically your main folder. Anyway, if you want to use cd to go one directory up (/ instead of /root) use “cd ..”. “..” is basically command line speak for “the folder that this one resides in”. Once you've done that, you can go back to the folder you were just in by typing “cd root”. Additionally, /root is set as your home folder and cd will go to your home folder by default. This means that you can execute cd without any arguments to return to your home folder quickly.
You may have noticed before, but when you were in / instead of /root just now, the symbol in root@archiso ~ # changed. I will now explain what this text exactly means: root is the username you are currently logged on as, archiso is the name of your system, ~ is your current folder (~ is terminal-speak for home) and # means you have administrator rights; regular users will see a $ instead. In Linux, having root access means you can do anything you want. You can even change the passwords of other users without having to know their old password.
Make sure you're in your home folder now; if you're not, run “cd”. The next command is “mkdir”. You may have guessed, but it's used to create new directories. Create one named “test” now by executing “mkdir test”. Next, go into it with the cd command. (cd test) The text to the left of the command line should have changed to “root@archiso ~/test #. After you've done this, we'll teach you some basic commands for handling files.
First up is a command to search for files. It's called “find” and it's pretty useful. It can look for files with a given name through your system. For example, if you wanted to see all .txt files, you would use “find / -name *.txt”. The first / tells the program where to look (it will also look in all subfolders), the -name tells the program what attribute to look for (the name in this case) and the *.txt tells the program what that name is. The * means: anything can go here. That means this command will find all files that end in .txt on your entire system. Please note that there is one exception: If a file in your current folder meets the criteria, it will only list that instead of looking through your whole system.
So, you already know how to edit text files, right? Well, you don't know how to create them. A very useful way is to pipe the output of a command to a text file. For example, we will now create a text file with the location and name of every file on the liveCD environment. Execute “find / > files.txt”. (this may take some time on slower PCs) The find / will list every file it comes across and the > essentially means: write the output (what gets shown on your screen) of the command before it to a text file. So now, you have a file called files.txt that contains a list of all files. Open it with less or nano to check if you want. This and most other file operations won't give a message when they execute successfully, so you might want to check if everything happened correctly using the ls command.
Quick note: "head" displays the first 10 lines of a text file while "tail" displays the last 10.
Now, we will copy that file so we have two of it. Why, you ask? Because we can, obviously. If you want to copy or backup something, the “cp” command is your best friend. Just type “cp [old file] [new file]” and you'll have two of the same thing! Try it out by copying files.txt to files2.txt. If you need help: “cp files.txt files2.txt”.
But, well, files2 is kind of a silly name... So let's call it something else. For renaming and moving files, you're gonna want the “mv” command. So to rename the file to, say, filelist.txt you would use “mv files2.txt filelist.txt”. You can also move files like this. If you want to move the new file to ~ instead of ~/test, use “mv filelist.txt ~/filelist.txt” OR “mv filelist.txt ../filelist.txt”. Don't forget about Tab for autocompletion!
Now that we have another copy of the file list sitting in our home folder, we might just as well delete the first one, right? Well, you can do this by using the “rm” command. So if you want to delete the original, just type “rm files.txt”. It's that easy! Removing folders, however, takes a bit more work. Let's go one directory up and try to delete our now-empty test folder. You should get “rm: cannot remove test: Is a directory”. The rm command CAN delete folders, though, you just need to force it to. It won't by default as a safety mechanism. What you'll need to do here is add an additional argument to your command. This is usually done by using the – key once or twice plus one or more letters – for example, -h or --help usually provides help on how to use the program. You can force rm to delete folders by using rm -r [folder name]. This will delete everything in that directory, including subdirectories. This is why you should never listen to trolls on the Internet telling you to use “rm -rf /”, as it will simply remove all files (rm) including folders ® without asking for permission on errors and stuff (f) from your whole system (/).
Please note that this entire tutorial so far was done as the root account (remember the #?) It's not a good idea to do stuff that does not NEED root access as root because of how easily you can mess things up. So now we'll be creating a new account for you and use that instead. First, invoke the command “adduser”. This does exactly what the name implies it does. It will present you with a pretty basic form for entering info about the new user. We'll use the login name “gbatemp” to make this easier. Leave everything else empty. It will ask you if you're sure (just hit enter again) and ask for some more info. You can leave these empty as well. Now, enter a password; since this is just a live CD, you don't need to worry about picking a safe one. After you've done that, the account will be set up and ready for use.
Another useful feature of the Linux terminal is that you can log in to multiple terminals at once. The virtual terminal you are currently logged into is called tty1. You can switch between them (there are 6) by pressing Ctrl+Alt+F#. Press Ctrl+Alt+F2 now to switch to tty2 and log in using your new username. You should see that the symbol next to the command line is now a $ instead of #. What's also worth noting is that each account has its own home folder. You can find out the full name of the folder you are currently in by using the “pwd” command. If you run it, you'll see that your home folder is now /home/gbatemp. In fact, all regular home folders will be in /home/[account name] by default, unless specified otherwise during user creation. (remember you had the option to set the home folder?)
Let's teach you some piping basics. You already know you can redirect output of programs to text files using “>”, but you can send output to other programs as well. For example, try using “find /dev/”. This will most likely output way too much information to fit on your screen. Now, you could save this data as a text file and then read it using nano or less... But where's the fun in that? There's a way to read this without saving it as a file first – and it's called piping. Technically, > is a pipe as well, but whatever. Try using “find /dev/ | less”. This will run the command before the pipe and send the output to the program after it. This can be very useful for programs that output a lot of text.
Now, switch back to tty1; you'll need a .txt file for the next step. This next step is called “grep”, and it's here to kick your ass. Wait, actually, it won't do that, but it will let you search .txt files. Let's use our filelist.txt as an example to display only the lines that have “temp” in them. You can do this by running “grep temp filelist.txt”. Nice, huh? Yeah, I thought so too.
Ctrl-C will terminate any running program. If you run “find /”, for example, it'll take LONG to finish because it needs to display over 60,000 lines of text. Hit Ctrl-C while it's doing this to cut it off prematurely.
Use “top” to view all running commands and how much RAM and CPU they take. Not really useful unless you're doing some heavy processing, but it can help to see if a program is actually still doing something or if it just froze altogether. Use Ctrl-C to exit it.
You may have figured this out by now, but the up arrow goes back through your command history. Useful if you want to run a command you ran earlier again. Down arrow goes forward. If you want to use the command you executed last, you can also use the shortcut “!!”.
On most Linux distributions, the “sudo” command is installed by default. It's not installed on this Live CD, though, so you can't test it here. Basically, it allows you to run a command as root, even if your account is not an administrator account. You do need permission to use sudo, though. For example, when logged in as gbatemp, “pwd” will return “/home/gbatemp”. However, “sudo pwd” will return /root.
“wget” is a command that will download files. For example, “wget http://gbatemp.net/index.html” will download the main page of GBAtemp.
"man" is the Linux manual command: "man [program]" will give you a detailed explanation of how that program works and what it does. Control it the same way you control less.
Hmm... I think that was it for this tutorial. Bye folks, and I hope this helped someone. Feel free to post or PM any comments, questions or criticism.


