Got my Cards yesterday and flashed them with a Samsung Galaxy S7 and TagMo 2.3.2 http://imgur.com/a/BdFxB
They are quite nice IMHO and work with the Switch and the WiiU - Big Thanks @Random11 for the Card-Covers and Backsides
How are these made up of you don't mind me asking? Did you use stickers or print straight onto the cards? Trying to work out the simplest way to do myself
Got my Cards yesterday and flashed them with a Samsung Galaxy S7 and TagMo 2.3.2 http://imgur.com/a/BdFxB
They are quite nice IMHO and work with the Switch and the WiiU - Big Thanks @Random11 for the Card-Covers and Backsides
Unfortunately I haven't got a Printer to print directly onto the Cards so I had to choose the complicated way by Printing on Stickers. ^^
It takes a little bit of effort to glue the stickers if You have two left Hands like I do.
I printed with a Laser Printer, attached the Stickers on the Cards and cut the Edges with a sharp Knife. That is why the edges are a little bit frayed.
I first measured the cards. The stickers are on a DIN A4 sheet. Then I transferred everything in PowerPoint and adjusted the size and position of the images.
So I have 8 Stickers / Images per Sheet.
Unfortunately I haven't got a Printer to print directly onto the Cards so I had to choose the complicated way by Printing on Stickers. ^^
It takes a little bit of effort to glue the stickers if You have two left Hands like I do.
I printed with a Laser Printer, attached the Stickers on the Cards and cut the Edges with a sharp Knife. That is why the edges are a little bit frayed.
No, I used a Brother Laser Printer and yes, I had to position the Images.
Positioning was easy in Power Point.
The paper is divided like into 8 parts. We had no other paper at work - took some sheets from there, cost me nothing. ^^
Take a look here:
Personally I used Indesign and exported the cards to pdf then printed the pdf with 6 cards per page... But you can use Microsoft paint if you dont have any other software. Go to page setup in paint and select "Adjust to: 100% normal scaling". If you want to print two per page you should print in landscape and game the top and bottom margins to 6.3mm, then go into properties and set the width to at least 2580 and height to 2300, it will be a big pain in the ass to place all the images but it is doable that way. Also make sure you edit one of the card images to make a page of 6 so that the DPI will be set to 300.
I took my stuff to Staples and had them print it on glossy card stock. Then I cut everything out and used double sided tape to stick the front of a card onto a back, making sure to stick the nfc sticker in between. I'v experimented with laminating them. I've used adhesive vinyl lamination and 5 mill heat lamination both seam ok.
glossy card stock on the left, laminated using heat 5 mil, laminated using adhesive vinyl sheets.
(the guardian was printed on my home ink jet printed on non glossy card stock so its a little less saturated)
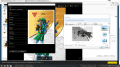
Here is the cards after they are printed
(again the cards that are already cut out are the ones I printed at home, they look faded in comparison)
--------------------- MERGED ---------------------------
Here are some alternate designs for the BOTW cards. They incorporate more of the box art.
Personally I used Indesign and exported the cards to pdf then printed the pdf with 6 cards per page... But you can use windows paint if you dont have any other software. Just make sure you tell it to print without any image scaling. I took my stuff to Staples and had them print it on glossy card stock. Then I cut everything out and used double sided tape to stick the front of a card onto a back, making sure to stick the nfc sticker in between. I'v experimented with laminating them. I've used adhesive vinyl lamination and 5 mill heat lamination both seam ok.
glossy card stock on the left, laminated using heat 5 mil, laminated using adhesive vinyl sheets. View attachment 81746
(the guardian was printed on my home ink jet printed on non glossy card stock so its a little less saturated)
I'm sorry I'm not sure I understand your question (its early in the morning still). Are you asking if I mind that you asked me a question? I don't mind you asking questions.
When you say "these images" I assume you are talking about the images as oppose to the pictures I took of my cards. I technically used tif image files when I was creating my pdf. I used png on here because the file sizes are smaller. The png compression is lossless though (the png files are decompressed automatically, you don't have to do anything), so the png files will be the same quality as the tif files I printed. (The tif files were too big to upload and wouldn't have made thumbnails.) This also assumes you are saving the image and not the thumbnail. The thumbnails are only 120 pixels tall so I think you would know if you accidentally saved those.
Things to know when printing:
Printer and paper quality are going to factor into the quality of the final result. If you are using a home laser printer it is going to look better then the ones I printed on my ink jet printer, but maybe not as good as the professional printers at Staples. Different papers have different grit (the tooth of the paper) which can also affect print quality. Normal computer paper as a bit of grit to it, where as I used a glossy paper which has a lot less grit. When the page is being printed the grit could be affecting the final outcome.
Staples charges me $7 CAD to print 5 pages on glossy card stock. With 3 cards per page (3 fronts and 3 backs), that only works out to about 50 cents per card. I don't have a laser printer or glossy card stock sitting around at home so I think it's completely worth it.
If your country doesn't have Staples, I'm sure there are other places you can get professional prints done.
I hope that answers your question. If not, let me know.
I'm sorry I'm not sure I understand your question (its early in the morning still). Are you asking if I mind that you asked me a question? I don't mind you asking questions.
When you say "these images" I assume you are talking about the images as oppose to the pictures I took of my cards. I technically used tif image files when I was creating my pdf. I used png on here because the file sizes are smaller. The png compression is lossless though (the png files are decompressed automatically, you don't have to do anything), so the png files will be the same quality as the tif files I printed. (The tif files were too big to upload and wouldn't have made thumbnails.) This also assumes you are saving the image and not the thumbnail. The thumbnails are only 120 pixels tall so I think you would know if you accidentally saved those.
Printer and paper quality are going to factor into the quality of the final result. If you are using a home laser printer it is going to look better then the ones I printed on my ink jet printer, but maybe not as good as the professional printers at Staples. Different papers have different grit (the tooth of the paper) which can also affect print quality. Normal computer paper as a bit of grit to it, where as I used a glossy paper which has a lot less grit. When the page is being printed the grit could be affecting the final outcome.
Staples charges me $7 CAD to print 5 pages on glossy card stock. With 3 cards per page (3 fronts and 3 backs), that only works out to about 50 cents per card. I don't have a laser printer or glossy card stock sitting around at home so I think it's completely worth it.
If your country doesn't have Staples, I'm sure there are other places you can get professional prints done.
I hope that answers your question. If not, let me know.
Hello I'm new to the form. Random11 thank you for your hard work, but I have a question what did you use to glue or adhesive the cards together thank you?
Hello I'm new to the form. Random11 thank you for your hard work, but I have a question what did you use to glue or adhesive the cards together thank you?
I used a high quality double sided tape. I have no clue what brand it is or where I bought it unfortunately. It kind of looks like masking tape but you can peal off the back of the tape and make it double sided.
I also tried super glue. The thicker "gel control" kind by lepage. That seamed to work just as good and didn't leave any discoloration or warping (I used small drops across the whole card). But super glue can get messy even with gel control so I stick with the double sided tape. Whatever you do, don't use normal school glue it will warp the card and causes discoloration
Could you create a variant of the first Midna & Wolf Link front that doesn't include the Legend of Zelda logo, Twilight Princess text and the black line under Wolf Link, with the Wolf Link text then centered to the middle of the card? The card designs you've created are really stellar, my only gripe with them is that they're just barely avoiding the official Nintendo card design by having the logos and such on the front. Wolf Link is the only one I actually want to print, though, so a quick variant would be really cool.
EDIT: Actually, Fierce Deity would also be appreciated, if possible. Thanks!
@Random11 thanks for your templates i'm able to print them for my custom amiibo cards, just went to a Kodak machine and i cut them myself. i then placed them inside a card sleeve. Still waiting for my blank nfc stickers and will get a top loader to protect the cards..thanks again!!
@Random11 thanks for your templates i'm able to print them for my custom amiibo cards, just went to a Kodak machine and i cut them myself. i then placed them inside a card sleeve. Still waiting for my blank nfc stickers and will get a top loader to protect the cards..thanks again!!
It's the first Nintendo Switch firmware update of 2024. Made available as of today is system software version 18.0.0, marking a new milestone. According to the patch...
After a couple days of Nintendo releasing their 18.0.0 firmware update, @SciresM releases a brand new update to his Atmosphere NX custom firmware for the Nintendo...
Today, April 8th, 2024, at 4PM PT, marks the day in which Nintendo permanently ends support for both the 3DS and the Wii U online services, which include co-op play...
Hello, GBAtemp members! After a prolonged absence, I am delighted to announce my return and upgraded form to you today...
Introducing tempBOT AI 🤖
As the embodiment...
Yet another casualty goes down in the never-ending battle of copyright enforcement, and this time, it hit a big website which was the host for many fangames based and...
With Apple having recently updated their guidelines for the App Store, iOS users have been left to speculate on specific wording and whether retro emulators as we...
The highly popular and accurate FPGA hardware, MisterFGPA, has received today a brand new update with a long-awaited feature, or rather, a new core for hardcore...
The time has finally come, and after many, many years (if not decades) of Apple users having to side load emulator apps into their iOS devices through unofficial...
The romhacking community is always a source for new ways to play retro games, from completely new levels or stages, characters, quality of life improvements, to flat...
Retro handheld manufacturer Anbernic is releasing a refreshed model of its RG35XX handheld line. This new model, named RG35XX 2024 Edition, features the same...
It's the first Nintendo Switch firmware update of 2024. Made available as of today is system software version 18.0.0, marking a new milestone. According to the patch...
Today, April 8th, 2024, at 4PM PT, marks the day in which Nintendo permanently ends support for both the 3DS and the Wii U online services, which include co-op play...
Hello, GBAtemp members! After a prolonged absence, I am delighted to announce my return and upgraded form to you today...
Introducing tempBOT AI 🤖
As the embodiment...
With Apple having recently updated their guidelines for the App Store, iOS users have been left to speculate on specific wording and whether retro emulators as we...
The time has finally come, and after many, many years (if not decades) of Apple users having to side load emulator apps into their iOS devices through unofficial...
After a couple days of Nintendo releasing their 18.0.0 firmware update, @SciresM releases a brand new update to his Atmosphere NX custom firmware for the Nintendo...
Yet another casualty goes down in the never-ending battle of copyright enforcement, and this time, it hit a big website which was the host for many fangames based and...
Nintendo has recently announced through their social media accounts that a new Indie World stream will be airing tomorrow, scheduled for April 17th, 2024 at 7 a.m. PT...
The highly popular and accurate FPGA hardware, MisterFGPA, has received today a brand new update with a long-awaited feature, or rather, a new core for hardcore...
Apple has long been known for jailing off several off from its App Store according to their guidelines, and one such type of applications was video-game emulators...