

MultiMAN beginner's guide
This guide is not complete yet considering what I want to cover. it's currently explaining how to setup multiMAN and how to use the game manager.
I'll add the other part of multiMAN little by little when I have the time.
The purpose of this guide is to explain how everything is working, why doing something instead of another, explaining what the user have to do instead of telling him "do it blindly".
Maybe I'm writing too much text, but I like explaining things correctly so newbie can understand what they are doing instead of following a guide like a lemming's instruction.
I hope you will appreciate the work I put into it and find it useful
Official release forum: http://www.ps3hax.net/
Old release forum: http://psx-scene.com
Official Website: http://www.tortuga-cove.com/
Also Known As: Multi Manager, AVCHD/Game manager/File manager (old name).
Tutorial by Cyan, for GBATemp.net. Please ask me before using it or part of it on another website.
Last updated on 2013-03-03 (added version compatibility with PS3 firmware)
This tutorial cover only some functionalities up to: v02.02.00.
Disclaimer:
This is a "starter guide" based on multiMAN 2.x to understand how the manager is working. multiMAN has been updated and improved a lot of times since this guide (now at version 4.x), some menus might be different or fully missing. I hope you will understand how to "translate" the guide's content to the new multiMAN versions.
Compatible versions:
multiMAN 4.19 = latest version compatible with 3.41
multiMAN 4.20 = supports only 3.55 CEX/DEX/4.21 CEX/DEX/4.30 CEX/4.31 CEX
multiMAN 5.0+ = 4.30+ CEX
(sources)
2- Do not accept any update, from the console, the network or the original games. If you want to play a game which require an update, you need to dump the game to HDD and use multiMAN to launch the game. Not all games are compatible with Custom Firmwares, so you need to refer to this section first. If you update your console, you will loose all your hacks!
Tutorial Contents & Index:
<span style="font-size:0.8em; line-height:1em;">
Red= Chapter not written yet. Sorry
Feel free to ask on this thread for help, I'll answer uncovered chapter's questions individually.
<div class="reviewbreak"><a name="chap1"></a>Chap. 1 - Tutorial introduction <a style="text-decoration:none;" href="#chap1">¶</a></div>
MultiMAN is a homebrew for PS3 developed by Dean Kasabow, from PSX-scene.com, and author of multiAVCHD (software used to create compatible video files for PS3).
On his first release, the Homebrew was called "AVCHD/Game manager/File manager" and included both an AVCHD Video folder mounter to be read on PS3 video menu and a Games Manager.
Along its development, the author added many new functionalities gathered from other homebrew, and finally the name got changed for multi-Manager.
MultiMAN shares all this features:
To install multiMAN you will need a FAT32 USB device (external HDD, or flashdrive) of anything size, but a big one is better if you want to backup your games to the external HDD.
The FAT32 USB device will be referred to as "USB drive" along this tutorial.
<div class="reviewbreak"><a name="chap2"></a>Chap. 2 - MultiMAN setup <a style="text-decoration:none;" href="#chap2">¶</a></div>
<span style="padding:10px;color:#2B465B;background-color:#E2E6E8;font-size:14pt;"><a name="chap2.1"></a>Chap. 2.1 - Download <a style="text-decoration:none;" href="#chap2.1">¶</a></span>
MultiMAN is compatible with any PS3 from firmware 3.4x to firmware 3.55 supporting execution of unsigned homebrew.
Previous multiMAN versions were also compatible with older PS3 firmwares, like 3.10 or 3.15.
If your PS3 has an old firmware, for example to keep OtherOS, you can download multiMAN v01.16.11 (latest compatible version as of this writing).
MultiMAN distribution can be found in different formats:
Note 1: They are not always included and can be find separately on the official website.
Note 2: BDEMU is not provided by the developer, but may be included inside other website's archives distribution.
BDEMU informations:
BDEMU.BIN is a "payload" (an active program in memory) based on the original PSGroove payload to allow access to the PS3 Syscall36.
The System_Call_36 is used to redirect /app_home/ to launch a mounted games without a disc in the drive, and redirect /dev_bdvd/ path to mount DVD/BDMV folders to emulate a Blu-ray drive. The PS3 think the new path is a Blu-ray reader.
There is no more payload included in multiMAN since v1.16.00, because:
- Allowing the reading of Blu-ray movies not using the actual BD-disc can be considered as "DRM protection circumvention device" in some countries, the decision to use this feature is left to the final user.
- Depending on your jailbreak method (Dongle, or Custom Firmware), you may already have a Payload and BDEMU is not needed.
If your jailbreak method doesn't include a payload, you can enable the Blu-ray emulation and paths redirection by either installing BDEMU.bin back in multiMAN, or patching the PS3 in memory using a homebrew (Lv2 Patcher, by Kmeaw) after booting your console. Remember to launch Lv2 patcher before using multiMAN, as the console memory is cleared when the PS3 is switched off.
BDEMU is provided in two different installation packages: One for custom firmwares accepting unsigned packages like Kmeaw cfw, and a signed one for custom firmwares requiring installation of signed packages like Wutangrza cfw.
Alternatively, advanced users can also install it manually by using the FTP or the file manager: Browse to multiMAN /dev_hdd0/game/BLES80608/USRDIR/ and copy BDEMU.BIN into that folder.
On the May 12th 2011, a version 2 of BDEMU has been released with added support for Hermes Syscall8.
The unsigned package is now named BDEMU-341.pkg (use it for "Modified firmware" created with MFW Maker, with Kmeaw custom firmware or any firmware accepting installation of unsigned packages)
The signed package is now named BDEMU-355.pkg (use this one if you are using a firmware requiring signed packages, like GeoHot or Wutangrza cfw, or with any other firmware 3.55 accepting signed packages like Kmeaw cfw)
List of Custom Firmware without a native payload:
Download the files here:
 You can find links to the latest release of multiMAN on http:/ps3hax.net.
BDEMU v2.
Lv 2 Patcher.
<span style="padding:10px;color:#2B465B;background-color:#E2E6E8;font-size:14pt;"><a name="chap2.2"></a>Chap. 2.2 - Files preparation <a style="text-decoration:none;" href="#chap2.2">¶</a></span>
Step 1. Extract the downloaded archives to your computer.
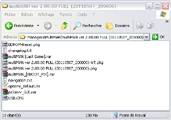
Fig1. The extracted archive.
Step 2. Connect your USB drive to your computer.
Step 3. Copy the correct multiMAN pkg file, according to the firmware you are using on your PS3, to the root of your USB drive.
Step 4. If you are using a "Modified firmware" created by MFWMaker, extract and copy BDEMU-341.pkg to the root of your USB.
If you are using Kmeaw cfw, extract and copy BDEMU-341.pkg or BDEMU-3.55 to the root of your USB.
If you are using Wutangrza cfw or GeoHot cfw, extract and copy BDEMU-355.pkg to the root of your USB.
If you want to use Kmeaw's Lv2 patcher instead of BDEMU, extract Lv2-v9.pkg from lv2_patcher.rar and copy the file to the root of your USB, but BDEMU is recommended for multiMAN.
Step 5. On your USB, create a new folder named games. This is the folder where your Blu-ray game's dumps will be stored when copied to the external HDD.
Step 6. [Optional] Extract and copy BDROM-Reset.pkg and copy the file to the root of your USB.
Step 7. [Optional] Extract and copy Last_game_3xx.pkg (select the one corresponding to your firmware version) and copy the file to the root of your USB.
Step 8. [optional] If you changed the options, rename options_default.ini to options.ini and copy this file to the root of your USB device. It will be automatically transfered into multiMAN internal folder upon launch.
See the Paths information's chapter to modify the paths stored in this options file.
Update: Since v2.08.01, the options.ini or option_default.ini files are not transfered anymore to the internal HDD automatically, you will have to copy it yourself using multiMAN file's manager if you want to modify the file's content on your computer.
Step 9. [optional] If you want NTFS support, create your own USB.CFG file and copy it to the root of your USB device too. It will be automatically transfered into multiMAN internal folder upon launch.
See NTFS support to create your own file.
Your USB drive should now look like this:

The USB drive with the pkg, ready to install. (v2.00.00)
You can create the games folder if you want, but it will be created automatically when you will backup your first game to external USB drive.
<span style="padding:10px;color:#2B465B;background-color:#E2E6E8;font-size:14pt;"><a name="chap2.install"></a>Chap. 2.3 - Installation <a style="text-decoration:none;" href="#chap2.install">¶</a></span>
Step 1. Launch your PS3 in jailbreak mode. (Either with dongles or custom firmwares).
Step 2. Plug your USB drive into your PS3 (any USB slot, they are all working the same way) and go into the "★ Install Package Files" menu under the "Games" column of your XMB(tm).
Step 3. Select MultiMan v2.xx.xx and press
 to install the package to your internal HDD.
Once done, proceed with BDEMU or Lv2 Patcher if you need it.
Optionally, you can now install Last_Game.
All these files are now installed in your PS3 internal HDD, press
 to go back to XMB(tm).
Step 4. Select the multiMAN icon under the "Game" columns and press
to launch the homebrew.
<span style="padding:10px;color:#2B465B;background-color:#E2E6E8;font-size:14pt;"><a name="chap2.update"></a>Chap. 2.4 - Updating multiMAN <a style="text-decoration:none;" href="#chap2.update">¶</a></span>
To update multiMAN you don't need to delete the currently installed/old version from your PS3. Install the new version over the old one.
You can update multiMAN manually or use the included update menu from multiMAN.
Manual: Follow the procedure from the installation chapter.
multiMAN:
Step 1. Ensure that you have a working internet connexion for your PS3. (Don't use a proxy, multiMAN won't detect a working internet connexion)
Step 2. Enter multiMAN main settings by pressing
 , or go to the "Home" column in the XMMB layout.
Step 3. Select the "Update" menu and let multiMAN download the new package.
The downloaded file is stored in /dev_hdd0/game/BLES80608/USRDIR/TEMP/
Step 4. When prompted, accept to exit multiMAN to return to XMB(tm) and install the pkg from the "★ Install Package Files" menu under the "Games" column of your XMB(tm).
If you don't exit multiMAN when prompted, the path containing the downloaded .pkg won't be set in the PS3 memory as a correct installable path and your .pkg won't be listed in the "★ Install Package Files" menu on your XMB(tm).
Use the File manager mode to manually move the downloaded .pkg file from the TEMP folder to the root of your USB device if needed.
Information: When updating, your old options_default.ini is overwritten with the new one. If you want to keep your old settings, make your changes in options.ini file instead.
<span style="padding:10px;color:#2B465B;background-color:#E2E6E8;font-size:14pt;"><a name="chap2.presentation"></a>Chap. 2.5 - First steps and layouts presentation <a style="text-decoration:none;" href="#chap2.presentation">¶</a></span>
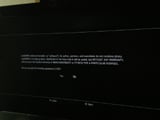
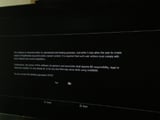
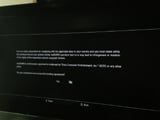
On the first launch, or after an update, multiMAN will show you three License and Warning screens.
Select yes to each of the screens to accept the license agreements and load the main screen.
Information: At the loading screen, multiMAN is putting new game's icons, game's background image, and different other files in a cache folder to speed up the process when navigating in the interface.
The cached files can be deleted manually if needed.
MultiMAN has 9 different screen layouts (or Display modes): 8 for games and medias, 1 for File's manager.
Press
 or
or
 to scroll through the display modes.
<table style="font-size: 80%;display:inline;"><tr><td>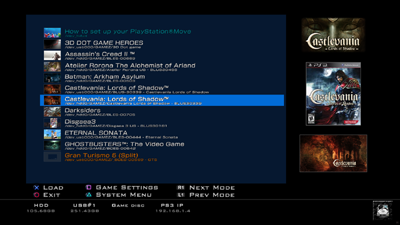 <div>Display mode 1 - Game list (plain)
</div></td></tr></table><table style="font-size: 80%;display:inline;"><tr><td>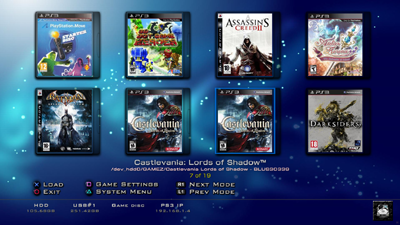 <div>Display mode 2 - 4x2 game list
</div></td></tr></table><table style="font-size: 80%;display:inline;"><tr><td>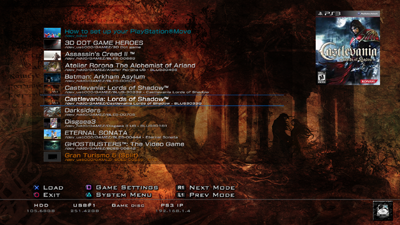 <div>Display mode 3 - Game list (Poster)
</div></td></tr></table><table style="font-size: 80%;display:inline;"><tr><td>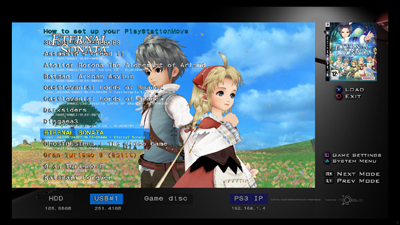 <div>Display mode 4 - Game list (user background)
</div></td></tr></table><table style="font-size: 80%;display:inline;"><tr><td>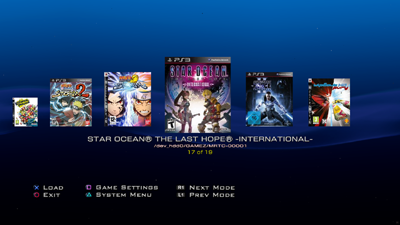 <div>Display mode 5 - Slice cover flow
</div></td></tr></table><table style="font-size: 80%;display:inline;"><tr><td>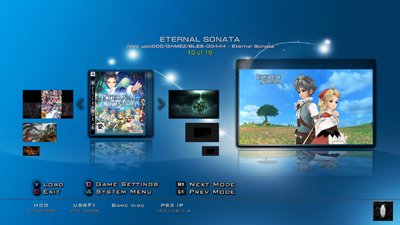 <div>Display mode 7 - Box-art
</div></td></tr></table><table style="font-size: 80%;display:inline;"><tr><td>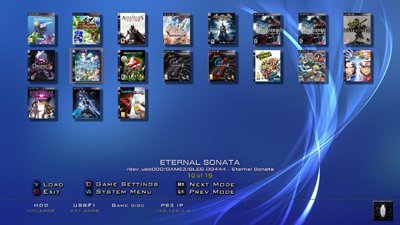 <div>Display mode 8 - 8x4 game list
</div></td></tr></table><table style="font-size: 80%;display:inline;"><tr><td>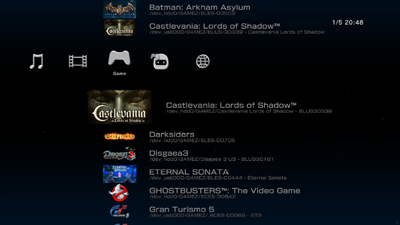 <div>Display mode 9 - XMMB (XMB(tm) clone) (Default mode)
</div></td></tr></table>
Informations:
- Display mode 6 (the File manager) is no longer part of the display mode list, to access it press Select+Start or select "File Manager" in the Home column of the XMMB Display mode 9.
- The default display mode (the one loaded at launch) can be changed in the user's settings.
If this is your first time using a game manager, you won't have any game listed except your Blu-ray disc. Insert a game in PS3 to show at least 1 game in all multiMAN modes.
The navigation can be done using different controller input : PS3 controller, keyboard+mouse, PSMove, BD REMOTE.
To see the navigation keys for a specific controller, open the navigation.txt found in the multiMAN released archive.
Using the PS3 controller, the main controls are:
Accept/open/launch/load the game in memory and return to XMB(tm).
Cancel/exit to XMB(tm).
 Open the game's sub-menu for the specified title.
Open the main settings / open the game's sub-menu in XMMB mode.
/
: scroll through display mode.
Some functionalities are triggered by pressing 2 buttons at the same time, the press order is important.
For example "Select+Start" means "press and hold Select, then press Start". It's a shortcut to open the File Manager's mode.
If you press Start+Select, it will instead restart multiMAN.
Start+
 Takes a screenshot (saved to root of USB device, or root to /dev_hdd0/)
Select+
show Games/Media files/Both
Select+
Refresh all devices content. Also available on the xMMb's Game column.
Other controls and button's combinations are specific to your current display mode.
- In display Mode 2x4 and 4x8: You can use
 and
to select previous/next screen.
and
to select previous/next screen.
<span style="padding:10px;color:#2B465B;background-color:#E2E6E8;font-size:14pt;"><a name="chap2.setup"></a>Chap. 2.6 - MultiMAN setup <a style="text-decoration:none;" href="#chap2.setup">¶</a></span>
There are two different options you can access, the "multiMAN Main Settings" screen lets you perform actions, like updating multiMAN, while the second set of options are used to define your own preferences for multiMAN interface.
<a name="chap2.setup.general"></a>multiMAN Main Settings <a style="text-decoration:none;" href="#chap2.setup.general">¶</a>
You can open the main preferences by pressing the
button.
On the XMMB layout (XMB(tm) style), the main preferences are directly available under the Home column.

I'll add the other part of multiMAN little by little when I have the time.
The purpose of this guide is to explain how everything is working, why doing something instead of another, explaining what the user have to do instead of telling him "do it blindly".
Maybe I'm writing too much text, but I like explaining things correctly so newbie can understand what they are doing instead of following a guide like a lemming's instruction.
I hope you will appreciate the work I put into it and find it useful
<font size="5"><font color="#000080">multiMAN beginner's guide</font></font>

Developed by: DeanOfficial release forum: http://www.ps3hax.net/
Old release forum: http://psx-scene.com
Official Website: http://www.tortuga-cove.com/
Also Known As: Multi Manager, AVCHD/Game manager/File manager (old name).
Tutorial by Cyan, for GBATemp.net. Please ask me before using it or part of it on another website.
Last updated on 2013-03-03 (added version compatibility with PS3 firmware)
This tutorial cover only some functionalities up to: v02.02.00.
Disclaimer:
This is a "starter guide" based on multiMAN 2.x to understand how the manager is working. multiMAN has been updated and improved a lot of times since this guide (now at version 4.x), some menus might be different or fully missing. I hope you will understand how to "translate" the guide's content to the new multiMAN versions.
Compatible versions:
multiMAN 4.19 = latest version compatible with 3.41
multiMAN 4.20 = supports only 3.55 CEX/DEX/4.21 CEX/DEX/4.30 CEX/4.31 CEX
multiMAN 5.0+ = 4.30+ CEX
(sources)
IMPORTANT - Things you must NOT DO in any cases.
1- Do not move or delete the "dev_hdd0/GAME" folder or any of it's content in your internal Hard Disk Drive. This folder, used by the Playstation 3, contains important files like all your installed game's data.2- Do not accept any update, from the console, the network or the original games. If you want to play a game which require an update, you need to dump the game to HDD and use multiMAN to launch the game. Not all games are compatible with Custom Firmwares, so you need to refer to this section first. If you update your console, you will loose all your hacks!
Tutorial Contents & Index:
<span style="font-size:0.8em; line-height:1em;">
- <a style="text-decoration: none;" href="#chap1">Tutorial introduction</a>
- <a style="text-decoration: none;" href="#chap2">multiMAN setup</a>
<a style="text-decoration: none;" href="#chap2.1">- Download</a>
<a style="text-decoration: none;" href="#chap2.2">- Files preparation</a>
<a style="text-decoration: none;" href="#chap2.install">- Install</a>
<a style="text-decoration: none;" href="#chap2.update">- Update</a>
<a style="text-decoration: none;" href="#chap2.presentation">- First steps and layouts presentation</a>
<a style="text-decoration: none;" href="#chap2.setup">- MultiMAN settings</a>
<a style="text-decoration: none;margin-left:20px;" href="#chap2.setup.general">● General settings</a>
<a style="text-decoration: none;margin-left:20px;" href="#chap2.setup.user">● User settings</a>
<a style="text-decoration: none;margin-left:20px;" href="#chap2.setup.language">● Change interface language</a> - <a style="text-decoration: none;" href="#chap3">Games Manager</a>
<a style="text-decoration: none;" href="#chap3.1">- Storing paths</a>
<a style="text-decoration: none;" href="#chap3.2">- Internal or external?</a>
<a style="text-decoration: none;" href="#chap3.3">- Dumping a game</a>
<a style="text-decoration: none;" href="#chap3.copymovedelete">- Copy/move/delete</a>
<a style="text-decoration: none;" href="#chap3.playinggame">- Playing a backup game</a>
<a style="text-decoration: none;" href="#chap3.lastgame">- Last game</a>
<a style="text-decoration: none;" href="#chap3.bdreset">- BD-ROM reset</a>
<a style="text-decoration: none;" href="#chap3.updatinggames">- Updating games</a>
<a style="text-decoration: none;" href="#chap3.games4gb">- Games with files bigger than 4GB</a>
<a style="text-decoration: none;" href="#chap3.probgames">- Problematic games</a>
<a style="text-decoration: none;margin-left:20px;" href="#chap3.probgames.retxmb">● Return to XMB at launch</a>
<a style="text-decoration: none;margin-left:20px;" href="#chap3.probgames.bsgdata">● Black Screen at game launch - 1 - Game data</a>
<a style="text-decoration: none;margin-left:20px;" href="#chap3.probgames.bsgperm">● Black Screen at game launch - 2 - Files permission</a>
<a style="text-decoration: none;margin-left:20px;" href="#chap3.probgames.bsg">● Black Screen at game launch - 3 - The Black Screen Games</a>
<a style="text-decoration: none;margin-left:20px;" href="#chap3.probgames.ebootmod">● Games requiring a newer firmware - Eboot mod</a>
<a style="text-decoration: none;margin-left:20px;" href="#chap3.probgames.nokeyfirm">● Games requiring a 3.60+ firmware</a>
<a style="text-decoration: none;margin-left:20px;" href="#chap3.probgames.afterupdate">● Games working after an update</a>
<a style="text-decoration: none;margin-left:20px;" href="#chap3.probgames.controller">● Controller issue</a>
<a style="text-decoration: none;margin-left:20px;" href="#chap3.probgames.psn">● Installing games as PSN package - Eboot Fix</a>
<a style="text-decoration: none;margin-left:20px;" href="#chap3.probgames.fixes">● Specific games fixes</a>
<a style="text-decoration: none;margin-left:20px;" href="#chap3.probgames.links">● Specific games fixes - Links</a> - <a style="text-decoration: none;" href="#chap.ntfs">NTFS Support</a>
- <a style="text-decoration: none;" href="#chap.ftp">FTP server</a>
- <a style="text-decoration: none;" href="#chap.homebrew">Launching homebrew</a>
- <a style="text-decoration: none;" href="#chap.fileman">File Manager</a>
<a style="text-decoration: none;" href="#chap.fileman.nethost">- Network share (NetHost)</a> - <a style="text-decoration: none;" href="#chap.media">Media player</a>
<a style="text-decoration: none;" href="#chap.media.picture">- Pictures</a>
<a style="text-decoration: none;" href="#chap.media.audio">- Music</a>
<a style="text-decoration: none;" href="#chap.media.video">- video</a>
<a style="text-decoration: none;" href="#chap.media.avchd">- Video - mounting AVCHD</a>
<a style="text-decoration: none;" href="#chap.media.dvd">- Video - mounting DVD</a>
<a style="text-decoration: none;" href="#chap.media.bdmv">- Video - mounting BDMV</a>
<a style="text-decoration: none;" href="#chap.media.showtime">- Showtime</a> - <a style="text-decoration: none;" href="#chap.theme">multiMAN Themes</a>
- <a style="text-decoration: none;" href="#chap.retro">Retro consoles emulators</a>
- <a style="text-decoration: none;" href="#chap.appendices">Appendices</a>
<a style="text-decoration: none;" href="#chap.appendices.1">- Log cleaner</a>
<a style="text-decoration: none;" href="#chap.appendices.2">- Dev Flash mounter</a>
<a style="text-decoration: none;" href="#chap.appendices.3">- Lv2 memory dumper</a>
<a style="text-decoration: none;" href="#chap.appendices.4">- Remote play (psp)</a>
<a style="text-decoration: none;" href="#chap.appendices.5">- Play PS3 backup games from a DVD-R</a>
<a style="text-decoration: none;" href="#chap.appendices.6">- PSN game's demos download</a>
<a style="text-decoration: none;" href="#chap.appendices.8">- Shadow Copy</a> - <a style="text-decoration: none;" href="#chap.faq">FAQs</a>
- <a style="text-decoration: none;" href="#chap.thanks">Thanks</a>
Red= Chapter not written yet. Sorry
Feel free to ask on this thread for help, I'll answer uncovered chapter's questions individually.
<div class="reviewbreak"><a name="chap1"></a>Chap. 1 - Tutorial introduction <a style="text-decoration:none;" href="#chap1">¶</a></div>
MultiMAN is a homebrew for PS3 developed by Dean Kasabow, from PSX-scene.com, and author of multiAVCHD (software used to create compatible video files for PS3).
On his first release, the Homebrew was called "AVCHD/Game manager/File manager" and included both an AVCHD Video folder mounter to be read on PS3 video menu and a Games Manager.
Along its development, the author added many new functionalities gathered from other homebrew, and finally the name got changed for multi-Manager.
MultiMAN shares all this features:
- Games manager
- Game's updates checker and download feature
- Web browser, used to download game demos
- Homebrew launcher
- Retro Console's ROM lister and emulator's launcher with selected ROM passed as argument.
- PS1 game launcher in CD-rom format. (Works only on cfw 3.55)
- Read from or Dump any media disc (CD/DVD/BD-movie/PS1/PS2/PS3) both in ISO or Files System. (Works only on cfw 3.55)
- FTP server
- Files manager
- Media player, using Showtime homebrew integration (picture/audio/video).
- MP3 player
- Mount AVCHD video folder
- Mount DVD video folder
- Mount Blu-ray movie folder to convert the structure to AVCHD format
- Log cleaner
- File permission fixer
- Writable dev_flash mounted as dev_blind
- Lv2 memory dumper
To install multiMAN you will need a FAT32 USB device (external HDD, or flashdrive) of anything size, but a big one is better if you want to backup your games to the external HDD.The FAT32 USB device will be referred to as "USB drive" along this tutorial.
<span style="padding:10px;color:#2B465B;background-color:#E2E6E8;font-size:14pt;"><a name="chap2.1"></a>Chap. 2.1 - Download <a style="text-decoration:none;" href="#chap2.1">¶</a></span>
MultiMAN is compatible with any PS3 from firmware 3.4x to firmware 3.55 supporting execution of unsigned homebrew.
Previous multiMAN versions were also compatible with older PS3 firmwares, like 3.10 or 3.15.
If your PS3 has an old firmware, for example to keep OtherOS, you can download multiMAN v01.16.11 (latest compatible version as of this writing).
MultiMAN distribution can be found in different formats:
- BASE : This package includes all the minimum necessary files to use multiMAN. Use this package if you are updating, or if this is your first installation.
- FULL : Same as the BASE, but include all the game's covers.
- MEGA : Same as the FULL, but also include a lot of different Themes.
- UPDATE : This package is released when there are little changes, for testers only. The package includes only the modified files, so you need the previous complete version already installed before installing any UPDATE version. Always use one of the other packages if you are not a tester and want a stable version.
Note 1: They are not always included and can be find separately on the official website.
Note 2: BDEMU is not provided by the developer, but may be included inside other website's archives distribution.
BDEMU informations:
BDEMU.BIN is a "payload" (an active program in memory) based on the original PSGroove payload to allow access to the PS3 Syscall36.
The System_Call_36 is used to redirect /app_home/ to launch a mounted games without a disc in the drive, and redirect /dev_bdvd/ path to mount DVD/BDMV folders to emulate a Blu-ray drive. The PS3 think the new path is a Blu-ray reader.
There is no more payload included in multiMAN since v1.16.00, because:
- Allowing the reading of Blu-ray movies not using the actual BD-disc can be considered as "DRM protection circumvention device" in some countries, the decision to use this feature is left to the final user.
- Depending on your jailbreak method (Dongle, or Custom Firmware), you may already have a Payload and BDEMU is not needed.
If your jailbreak method doesn't include a payload, you can enable the Blu-ray emulation and paths redirection by either installing BDEMU.bin back in multiMAN, or patching the PS3 in memory using a homebrew (Lv2 Patcher, by Kmeaw) after booting your console. Remember to launch Lv2 patcher before using multiMAN, as the console memory is cleared when the PS3 is switched off.
BDEMU is provided in two different installation packages: One for custom firmwares accepting unsigned packages like Kmeaw cfw, and a signed one for custom firmwares requiring installation of signed packages like Wutangrza cfw.
Alternatively, advanced users can also install it manually by using the FTP or the file manager: Browse to multiMAN /dev_hdd0/game/BLES80608/USRDIR/ and copy BDEMU.BIN into that folder.
On the May 12th 2011, a version 2 of BDEMU has been released with added support for Hermes Syscall8.
The unsigned package is now named BDEMU-341.pkg (use it for "Modified firmware" created with MFW Maker, with Kmeaw custom firmware or any firmware accepting installation of unsigned packages)
The signed package is now named BDEMU-355.pkg (use this one if you are using a firmware requiring signed packages, like GeoHot or Wutangrza cfw, or with any other firmware 3.55 accepting signed packages like Kmeaw cfw)
List of Custom Firmware without a native payload:
- Kmeaw Custom Firmware 3.55
- Wutangrza Custom Firmware 3.55
- GeoHot Custom Firmware 3.55
- Modified Firmware 3.41 (mfw, Not to confound with 3.41 jailbreak dongles or Hermes cfw3.41)
For these firmwares, you will need either BDEMU or Lv2 patcher to access the PS3's Blu-ray emulation functions.
Download the files here:
Step 1. Extract the downloaded archives to your computer.

Fig1. The extracted archive.
- In the folder, you will find:
- BDrom-reset : Unmount the virtual Blu-ray drive from memory to restore real blu-ray disc playback on XMB(tm).
- multiMAN[Last Game] : This homebrew is a shortcut to reload the last played game without launching multiMAN. In the archive, there is one for firmware 3.4x and one for 3.55.
- multiMAN v2.xx.xx BASE (date and time).pkg : This is the main multiMAN installation package for your PS3.
- option_default.ini : The file containing the paths preferences for multiMAN. You can edit the file in notepad or any text editor.
- multiMAN_[EBOOT_FIX] : Windows application to re-sign and create PSN-like games for XMB(tm).
- PS3Serv_GUI : A windows application to enable multiMAN to access your computer folders through your network.
- USB.CFG : A config file used to enable NTFS support in multiMAN.
- multiMAN packages are provided in two different versions:
- multiMAN ver 2.00.00 FULL (20110507_200000) WT.pkg : The WT package is a signed version of multiMAN and is the one you need if you are on Wutangrza or GeoHot custom firmware 3.55.
- multiMAN ver 2.00.00 FULL (20110507_200000).pkg : This package is for PS3 firmware 3.4x with Dongle, and for Waninkoko v1, v2, Kmeaw custom firmware 3.55, or any firmware not requiring a signed installation package.
Step 2. Connect your USB drive to your computer.
Step 3. Copy the correct multiMAN pkg file, according to the firmware you are using on your PS3, to the root of your USB drive.
Step 4. If you are using a "Modified firmware" created by MFWMaker, extract and copy BDEMU-341.pkg to the root of your USB.
If you are using Kmeaw cfw, extract and copy BDEMU-341.pkg or BDEMU-3.55 to the root of your USB.
If you are using Wutangrza cfw or GeoHot cfw, extract and copy BDEMU-355.pkg to the root of your USB.
If you want to use Kmeaw's Lv2 patcher instead of BDEMU, extract Lv2-v9.pkg from lv2_patcher.rar and copy the file to the root of your USB, but BDEMU is recommended for multiMAN.
Step 5. On your USB, create a new folder named games. This is the folder where your Blu-ray game's dumps will be stored when copied to the external HDD.
Step 6. [Optional] Extract and copy BDROM-Reset.pkg and copy the file to the root of your USB.
Step 7. [Optional] Extract and copy Last_game_3xx.pkg (select the one corresponding to your firmware version) and copy the file to the root of your USB.
Step 8. [optional] If you changed the options, rename options_default.ini to options.ini and copy this file to the root of your USB device. It will be automatically transfered into multiMAN internal folder upon launch.
See the Paths information's chapter to modify the paths stored in this options file.
Update: Since v2.08.01, the options.ini or option_default.ini files are not transfered anymore to the internal HDD automatically, you will have to copy it yourself using multiMAN file's manager if you want to modify the file's content on your computer.Step 9. [optional] If you want NTFS support, create your own USB.CFG file and copy it to the root of your USB device too. It will be automatically transfered into multiMAN internal folder upon launch.
See NTFS support to create your own file.
Your USB drive should now look like this:

The USB drive with the pkg, ready to install. (v2.00.00)
You can create the games folder if you want, but it will be created automatically when you will backup your first game to external USB drive.
Step 1. Launch your PS3 in jailbreak mode. (Either with dongles or custom firmwares).
Step 2. Plug your USB drive into your PS3 (any USB slot, they are all working the same way) and go into the "★ Install Package Files" menu under the "Games" column of your XMB(tm).
Step 3. Select MultiMan v2.xx.xx and press
Once done, proceed with BDEMU or Lv2 Patcher if you need it.
Optionally, you can now install Last_Game.
All these files are now installed in your PS3 internal HDD, press
Step 4. Select the multiMAN icon under the "Game" columns and press
To update multiMAN you don't need to delete the currently installed/old version from your PS3. Install the new version over the old one.
You can update multiMAN manually or use the included update menu from multiMAN.
Manual: Follow the procedure from the installation chapter.
multiMAN:
Step 1. Ensure that you have a working internet connexion for your PS3. (Don't use a proxy, multiMAN won't detect a working internet connexion)
Step 2. Enter multiMAN main settings by pressing
Step 3. Select the "Update" menu and let multiMAN download the new package.
The downloaded file is stored in /dev_hdd0/game/BLES80608/USRDIR/TEMP/
Step 4. When prompted, accept to exit multiMAN to return to XMB(tm) and install the pkg from the "★ Install Package Files" menu under the "Games" column of your XMB(tm).
If you don't exit multiMAN when prompted, the path containing the downloaded .pkg won't be set in the PS3 memory as a correct installable path and your .pkg won't be listed in the "★ Install Package Files" menu on your XMB(tm).Use the File manager mode to manually move the downloaded .pkg file from the TEMP folder to the root of your USB device if needed.
Information: When updating, your old options_default.ini is overwritten with the new one. If you want to keep your old settings, make your changes in options.ini file instead.
On the first launch, or after an update, multiMAN will show you three License and Warning screens.
Select yes to each of the screens to accept the license agreements and load the main screen.


Information: At the loading screen, multiMAN is putting new game's icons, game's background image, and different other files in a cache folder to speed up the process when navigating in the interface.
The cached files can be deleted manually if needed.
MultiMAN has 9 different screen layouts (or Display modes): 8 for games and medias, 1 for File's manager.
Press
<table style="font-size: 80%;display:inline;"><tr><td>
 <div>Display mode 1 - Game list (plain)
</div></td></tr></table><table style="font-size: 80%;display:inline;"><tr><td>
 <div>Display mode 2 - 4x2 game list
</div></td></tr></table><table style="font-size: 80%;display:inline;"><tr><td>
 <div>Display mode 3 - Game list (Poster)
</div></td></tr></table><table style="font-size: 80%;display:inline;"><tr><td>
 <div>Display mode 4 - Game list (user background)
</div></td></tr></table><table style="font-size: 80%;display:inline;"><tr><td>
 <div>Display mode 5 - Slice cover flow
</div></td></tr></table><table style="font-size: 80%;display:inline;"><tr><td>
 <div>Display mode 7 - Box-art
</div></td></tr></table><table style="font-size: 80%;display:inline;"><tr><td>
 <div>Display mode 8 - 8x4 game list
</div></td></tr></table><table style="font-size: 80%;display:inline;"><tr><td>
 <div>Display mode 9 - XMMB (XMB(tm) clone) (Default mode)
</div></td></tr></table>
Informations:
- Display mode 6 (the File manager) is no longer part of the display mode list, to access it press Select+Start or select "File Manager" in the Home column of the XMMB Display mode 9.
- The default display mode (the one loaded at launch) can be changed in the user's settings.
If this is your first time using a game manager, you won't have any game listed except your Blu-ray disc. Insert a game in PS3 to show at least 1 game in all multiMAN modes.The navigation can be done using different controller input : PS3 controller, keyboard+mouse, PSMove, BD REMOTE.
To see the navigation keys for a specific controller, open the navigation.txt found in the multiMAN released archive.
Using the PS3 controller, the main controls are:
Some functionalities are triggered by pressing 2 buttons at the same time, the press order is important.
For example "Select+Start" means "press and hold Select, then press Start". It's a shortcut to open the File Manager's mode.
If you press Start+Select, it will instead restart multiMAN.
Start+
Select+
Select+
Other controls and button's combinations are specific to your current display mode.
- In display Mode 2x4 and 4x8: You can use
There are two different options you can access, the "multiMAN Main Settings" screen lets you perform actions, like updating multiMAN, while the second set of options are used to define your own preferences for multiMAN interface.
<a name="chap2.setup.general"></a>multiMAN Main Settings <a style="text-decoration:none;" href="#chap2.setup.general">¶</a>
You can open the main preferences by pressing the
On the XMMB layout (XMB(tm) style), the main preferences are directly available under the Home column.

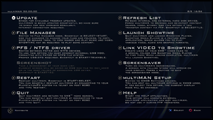
- Here are the available options:
► Update : If your PS3 has a working internet connection, you can check and download new multiMAN released.
► Refresh List : Re-Scan internal and external hard disk drives to reload new content.
► File Manager : Switch to the File Manager mode. You can press Select+Start too.
► Launch Showtime : Launch the internal version of Showtime media player. To quit Showtime, select the exit icon on the top-right corner.
► PFS / NTFS Driver : Switch between FAT32 and NTFS mounting method for the external HDD. You need to create your own USB.CFG file first.
► Link VIDEO to Showtime : Creates links of your video files present on your XMB(tm) into a video folder to be readable while using Showtime.
► Screenshot : Takes a screenshot of the current Mode. You can use Start+to take a screenshot almost anytime. You can also use telnet to connect to your PS3 IP on port 8080, and send "screenshot" command to capture any screen.
Screenshots are saved on the root of the internal or external HDD. Use the file manager to copy the files to your external USB Drive if saved internally. The images are saved as RAW, use a compatible pictures viewer to load them (like gimp or Photoshop).
► Screensaver : Launch a screensaver. Press any button to quit the screensaver mode.
► Restart : Close and restart multiMAN.
► multiMAN Setup : Switch to XMMB mode to change the multiMAN settings.
► Quit : Exit multiMAN and go back to XMB(tm).
► Help : Launch a homebrew developed by Condorstrike that shows all the controllers and buttons combination used by multiMAN.
Press the directional pad buttons or use the left analog stick to move the cursor, then pressto select an option.
Pressto cancel and close the settings page.
Additional options available on the XMMB mode only:
Themes : Show a list of installed themes to apply a new theme to multiMAN.
The themes will be covered later in the Themes chapter.
<a name="chap2.setup.user"></a>User Settings <a style="text-decoration:none;" href="#chap2.setup.user">¶</a><a name="chap2.setup.language"></a>Change interface language <a style="text-decoration:none;" href="#chap2.setup.language">¶</a>
Since multiMAN v2.00.00, user settings can be changed directly from the XMMB layout, under the Settings column.
These settings are stored in a file (options.bin) and are automatically reloaded at launch.

Each of theses settings will be covered here.
[titleetailed user settings]
System Information
Display these informations:
- multiMAN version
- PS3 firmware and current payload in memory
- PS3 IP address
- Available memory and HDD space.Clear Game Cache Data
Delete all the reconstructed files stored in multiMAN cache folder which were created when launching a game with split files from the external HDD.Download Game Covers
Adjust whether to automatically download the missing PS3 game covers.
- Yes: Automatically download missing PS3 game covers when internet connexion is available.
- No: Will not try to download missing PS3 game covers.FTP Service
Sets FTP startup mode.
- Auto Start: Starts the FTP server when multiMAN is launched.
- No: Doesn't start the FTP server at launch.XMMB Sparks
Sets the sparks effect in the XMMB Foreground.
- Show always: Sparks effect always visible.
- Auto Hide: Stop the sparks effect when displaying a game in the XMMB games column.
- Disable: No sparks effect at all.
XMMB Game Poster
Select whether to display the game posters when selecting a game in the XMMB games column.
- Enable
- DisableXMMB Game Cover
Select whether to display the game covers when selecting a game in the XMMB games column.
- Enable
- DisableXMMB Game Icon Swap
Switch display between Game icon and Game cover in the XMMB games column.
- Show Icon
- Show CoverXMMB Info Pop-up
Select whether to display the information pop-up box in the lower right of the XMMB mode.
- Enable
- DisableParental Control PIN Code
Sets the parental control level PIN code. Default PIN code is 0000Parental Control Level
Sets the parental Control level for rated titles.
Lets the user launch games from the defined level and bellow.
- Disable: (level 12), Allows launching of all games.
- Level 1: Allows only the launching of level 1 games.
- Level 2: Allows only the launching of level 1 and level 2 games.
- etc. up to lv11
If you try to launch a game with a higher level, multiMAN will inform you about the current game's level and will ask the Parental Control PIN to launch it.Function Control
Adjust which functions will be enabled or disabled for the game's sub-menu.
- Enable Copy and Delete
- Disable Delete
- Disable Copy
- Disable Copy and Delete
The option will still be present but will have no effect if selected.
Note: It doesn't affect the File Manager's copy & delete option, it's only for the game's backup folder.
File Manager Access
Sets Whether to restrict access to File Manager.
- Allow
- DenyVerify USB Games
Sets whether to check titles on USB for compatibility.
- Auto: ???
- Always: Always perform the check.
- No: Don't check the folder content.
This setting is used to scan the game's folder before launching it to detect if it contain split files.
Setting this setting to Auto or Always allows you to name the folder without the starting underscore usually used to mark it as 'split game'.
Set this setting to Auto or Always if you want multiMAN to reconstructed and cache the split files to the internal HDD. See the split files chapter for more informations.Scan for Homebrew Applications
Sets whether to scan for applications with RELOAD.SELF boot file.
- Yes: Add the compatible installed homebrew to the game list, like Snes9x, FCEU etc.
- NoScan for AVCHD(tm) and Blu-ray(tm)
Sets whether to scan USB devices for AVCHD(tm) and Blu-ray(tm) content.
- Yes
- NoExpand Contents of AVCHD(tm)
Sets whether to show one entry per title of all AVCHD(tm) playlists.
- Expand
- Do not expandHide BD-ROM Disc from Game List
Sets appearance of BD-ROM disc entry in the game list.
- Yes: hides it.
- NoContent Filter
Select which file type you want to see in multiMAN.
- No filtering: Shows PS3 titles and video titles.
- PS3 titles only
- AVCHD(tm) titles only
shortcut Select+
Clean activity logs
Adjust whether to remove push list and boot history.
- Yes: Automatically clean the PS3 activity log when exiting multiMAN (games and homebrew played history)
- NoDate Format
Sets the date format for the year, month and day.
- DD/MM/YYYY
- MM/DD/YYYY
- YYYY/MM/DDTime Format
Sets the time display to either a 12-hour or 24-hour clock.
- 24-Hour Clock
- 12-Hour ClockButton Assignment
Sets Which buttons are used for Accept/Enter and Cancel/Back.
- Cross is [Accept]
- Circle is [Accept]Default Display Mode
Sets the default startup display mode.
- XMMB (default) - File Manager Mode
- Game list (plain) -Game list (Poster)
- Game list (user background)
- Slide cover flow - Box-art
- 4x2 game list- 8x4 game listDisplay Mode Lock
Lock multiMAN to the default Display mode.
- Disable
- Enable
If you lock the mode, you can't return to XMMB usingor
, press
and select ►multiMAN Setup to come back to XMMB settings menu.
Font Preference
Sets current display Font.
Shortcut: Pressto change the font in any display mode. Theme Audio
Sets Whether to play theme music in the background.
Theme Audio
Sets Whether to play theme music in the background.
- Enable: If there's a SOUND.BIN file (mp3 renamed to .bin) it will be played automatically at launch and when loading a different theme.
- DisableTV Overscan
Sets TV overscan zone in percents.
Allows you to resize and zoom-out the multiMAN display.
Shortcut: Press Select+/
to change the overscan setting in any display mode.
Title name Appearance
Changes size and appearance of game title names and game paths in non XMMB display mode.
- Medium size title
- Large size title
- Title and pathTitle details
Adjusts level of display details for non XMMB display modes.
- Full
- None
- Title Only
- Title and IDAnimation
Adjusts animation options for some display modes.
- All animations On
- Disable all animations
- Disable background slide
- Disable icon animationPoster Overlay
Sets whether to show poster in "Game list (poster)" display mode.
- Yes
- NoPoster and Cover Alteration
Sets whether to grayscal game poster and cover if the game folder starts with an _underscore
- Auto: Games which have his game folder name starting with an underscore (containing split files) will be showed in grayscale.
- Never: Don't grayscale any game.
Note: Do not forget to set the "Verify USB Games" setting to "Auto" or "Always" in order to check if the games contain split files.Progress Bar
Sets whether to show progress bar during copy operations.
- Yes
- NoInactivity Timeout
Sets the amount of time before hiding the unselected items on the XMMB display mode.
- Disable
- 5 to 10 secondsScreensaver
Sets the amount of time before launching the screensaver.
- Disable
- 1 to 10 minutesMouse sensitivity (X)/(Y)
Sets analogue sticks horizontal (X) and vertical (Y) deadzone sensitivity
- Disable
- 10% to 90%
Note: If your mouse cursor is moving while you not moving the analog stick, increase the percentage.Cache Partition
Enable or disable 2GB of temporary partition (/dev_hdd1/)
- Enable
- DisableBD-ROM Emulator
Change emulator type (payload). A system restart is required to apply the changes.
- Unavailable: You will have this setting if you don't have BDEMU v2 installed or if you are using a dongle/cfw with a forced payload.
- None: Don't load a payload in memory at multiMAN launch.
- PSGroove (Syscall 35): Load the default PSGroove payload in memory. (same as BDEMU v1)
- Hermes (Syscall 8): Load Hermes Payload in memory (require BDEMU v2)
Note: You need BDEMU v2 to activate this menu and unlock Hermes payload entry.
Since multiMAN v02.01.0, you can change the interface's language.
multiMAN v02.02.00 already includes 22 different languages.
Adding or modifying language files manually:
Step 1. Download a language file text, for example you can find the French language file LANG_FR.TXT on ps3-addict.fr
Step 2. Place the LANG_FR.TXT file on the root of your USB device and connect it to your PS3.
Step 3. Go to the File manager (Access it from multiMAN setting screen, or go to the Home column on the XMMB layout)
Step 4. Copy the LANG_FR.TXT file to /dev_hdd0/game/BLES80608/USBDIR/lang/
You should now have your file here : /dev_hdd0/game/BLES80608/USBDIR/lang/LANG_FR.TXT
You can also use the FTP server to copy the file from your computer to the PS3.
Language selection
Now you need to select the language used by multiMAN interface:
Step 1. Go to multiMAN's Settings column on the XMMB layout
Step 2. Set the language option to the desired language file.

<div class="reviewbreak"><a name="chap3"></a>Chap. 3 - Game's manager <a style="text-decoration:none;" href="#chap3">¶</a></div>
<span style="padding:10px;color:#2B465B;background-color:#E2E6E8;font-size:14pt;"><a name="chap3.1"></a>Chap. 3.1 - Storing paths <a style="text-decoration:none;" href="#chap3.1">¶</a></span><span style="padding:10px;color:#2B465B;background-color:#E2E6E8;font-size:14pt;"><a name="chap3.2"></a>Chap. 3.2 - Internal or External? <a style="text-decoration:none;" href="#chap3.2">¶</a></span>
A game manager allows you to store and play your games directly from the internal PS3 HDD or on a FAT32 external USB drive.
The folder where the games are stored has change few times since the beginning of the PS3 jailbreak.
multiMAN can read all those paths at the same time, but it's recommended that you move all your games into the same folder.
multiMAN's default paths are:
Internal HDD : /dev_hdd0/GAMES
External HDD : device_root:/GAMES
Your dumped games will be placed in one of these folders by the manager's dumping tool.
If you store your games on your computer and want to put them back, note that the path must be as follow:
- /dev_hdd0/GAMES/Folder's name you want/PS3_GAME/USRDIR/EBOOT.BIN
or - USB drive:/GAMES/Folder's name you want/PS3_GAME/USRDIR/EBOOT.BIN
If your game doesn't appear in the game manager, check that you don't have an additional folder's level before your PS3_GAME folder.
/GAMES/Folder's name you want/too many folder, remove this one/PS3_GAME/USRDIR/EBOOT.BIN
If you used another manager before multiMAN, your games were stored in all those folders:
Original backup Manager: /dev_hdd0/game/LAUN12345/GAMEZ
Backup Manager 1.x: /dev_hdd0/game/LAUN12345/GAMEZ
Open Manager & OM2.x: /dev_hdd0/game/OMAN46756/GAMEZ
Open Manager & OM2.x: /dev_hdd0/game/OMAN01234/GAMEZ
Gaia Manager_gamez: /dev_hdd0/GAMEZ
Gaia Manager_games: /dev_hdd0/GAMES
Gaia Manager_bdrips: /dev_hdd0/BDRIPS
Common to all the managers: usb:/GAMEZ/
When the first game Manager was released by Team PSJailBreak, the internal storing folder was under the Game manager's own path.
If you deleted the manager from the XMB(tm) menu, all the sub-folders were also deleted and you lost all your dumped games.
On the same way, if you were using a different manager, your previous games were not accessible, because they were not stored in the same sub-folder.
Gaia Manager's developer started to store the games on an external folder, located at the root of the internal HDD, but allows the user to choose from 3 different folders: GAMEZ, GAMES or BDVD.
Gaia Manager is released in 3 different package, one for each folder.
multiMAN's developer decided to create an options.ini file which allows the user to list all his wanted folders.
The 5 most used folders are already defined, but you can change them if you want.
<a name="chap3.options"></a>
Follow these steps to change the paths: <a style="text-decoration:none;" href="#chap3.options">¶</a>
Step 1. Rename the options_default.ini file from the multiMAN archive you extracted on chap2 to options.ini
Step 2. Open options.ini in a text editor (notepad).
Step 3. Edit the paths as you want.
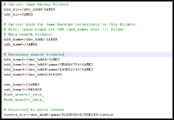
"Game Backup Folders" are the ones used when dumping a game from blu-ray to HDD.
"Main search folders" should match the ones define in backup folder, because it's the first that will be loaded (but you can set another one if you want).
"Secondary search folders", this is where you add all your additional paths that multiMAN will search for dumped games.
Step 4. Save and copy options.ini to the root of your USB drive.
Step 5. Launch multiMAN and the file will be copied to the internal HDD, in multiMAN's USRDIR.
If you want to move it manually, you need to place it here: /dev_hdd0/game/BLES80608/USRDIR/options.ini
Update: Since v2.08.01, the options.ini or option_default.ini files are not transfered anymore to the internal HDD automatically, you will have to copy it yourself using multiMAN file's manager if you want to modify the file's content on your computer.
If you still have games stored in LAUN12345 or OMANxxxxx, it's recommended that you move the folders into /dev_hdd0/games/ or /dev_hdd0/gamez/ folder, that way you won't loose your games dumped using older backup managers. To move the games to another folder, see the File Manager chapter.
Attention : Do not move your games to the /dev_hdd0/game/ folder, the one without the S is used by the console to install game's data and game's updates.
<span style="padding:10px;color:#2B465B;background-color:#E2E6E8;font-size:14pt;"><a name="chap3.3"></a>Chap. 3.3 - Dumping a game <a style="text-decoration:none;" href="#chap3.3">¶</a></span>
Most games can be stored either on internal or external without differences, they work the same way and don't suffer any loading speed if they are located on an external USB drive.
Unfortunately, this is not the case for all the games.
While some will work only on internal, others will work only on external.
Internal only:
Some games have very big files and can't be stored on external device because the FAT32 has a file size limit of 4GB.
To be able to move these games with individual files bigger than 4GB, you have 3 solutions.
- The easier solution is to split the files into multiple 4GB chunks.
Pro: It's supported by most managers and Comgenie's awesome file manager. While doing a game transfer the files are split/un-split automatically.
Con: You can't play the game in a split form. You MUST copy a split game into the internal PS3 HDD to re-construct the files and play the game.
See the Split games chapter for more informations about the split process on a computer and how to manage these games on multiMAN.
A game containing split files will have his folder's name renamed with a starting underscore "_BLESxxxx - Gran Turismo 5", and will be shown in black and white in multiMAN.
Update: v2.00.01 allows the launch of games with split files directly from the external USB drive. Up to 10 reconstructed files can be cached to internal hdd. - The second solution is to use the included FTP server in multiMAN.
Launch an FTP client on your computer and connect to your PS3 IP to browse the internal HDD content.
After adding a game to internal HDD using the FTP, you will need to run multiMAN's "fix permission" function available in the sub-menu options of the selected game.
See the FTP chapter for more informations. - The last solution is to use NTFS external HDD to copy a game into the internal PS3 HDD.
Pro: It's faster than FTP and you don't need to split the files.
Con: You can only copy from NTFS to internal. You can't play the game in NTFS, you can't dump or copy a game from PS3 to NTFS.
It can only be used to copy to internal!
See the NTFS chapter to enable NTFS drive.
External only:
There's two kind of games working on external only.
- Normal Games
This category has very few games, if not only 1: 3D Dot Game Heroes.
While this game works sometime on internal, the user may encounter many freeze. It's best to play on external. - Black Screen Games (BSG).
Black screen games require the external USB drive. If they are launched from the internal drive the game lock on a black screen.
For more informations on these games, check the Black screen games section on the problematic games chapter.
You can find a list of Black screen games on Wikitemp.
<span style="padding:10px;color:#2B465B;background-color:#E2E6E8;font-size:14pt;"><a name="chap3.copymovedelete"></a>Chap. 3.4 - Copy/Move/Delete a game <a style="text-decoration:none;" href="#chap3.copymovedelete">¶</a></span>
Dumping a game will make a copy of your retail Game Disc to your internal or external HDD.
The dump/backup process copy all the Game Disc's files and folders to the HDD, it doesn't create an iso. The speed is around 4GB for 10Minutes.
multiMAN can only create a dump of a PS3 games. You can't use multiMAN to dump DVD, Blur-Ray movie or PS2/PS3 game disc.
Step 1. Insert your PS3 game disc in your console.
Step 2. Select the game and enter the game's sub-menu by pressing, or
if you are using the XMMB layout.

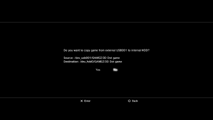
Step 3. Select the "Backup / Copy" menu and pressto start the backup process.

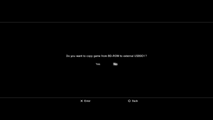
When asked if you want to copy to internal, select yes.
If you select no and you have a FAT32 USB drive connected, it will ask if you want to copy to external.
Step 4. Just wait (10min for 4~5GB) until the backup process is done and pressto go back to multiMAN game's sub-menu.
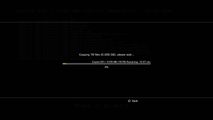

If your game contains files bigger than 4GB, it will be stored on the external drive with split files and will appear in black & white on multiMAN. You need to copy the backup to your internal HDD in order to play the game.
Update: v2.00.01 allows games with split files to be launched directly from the external HDD. See the Split files chapter.
Every PS3 games contain a 256MB firmware update files which is copied along the dump process. You can delete this file manually using the File manager to save space on your HDD.
/dev_hdd0/GAMES/Game folder name/UPDATE/PS3_UPDAT.PUP
usb:/GAMES/Game folder name/UPDATE/PS3_UPDAT.PUP
<span style="padding:10px;color:#2B465B;background-color:#E2E6E8;font-size:14pt;"><a name="chap3.playinggame"></a>Chap. 3.5 - Playing a backup game <a style="text-decoration:none;" href="#chap3.playinggame">¶</a></span>
You can make a copy from internal to external, and external to internal.
You can't move a game, so you need to make a copy and then delete the one you don't want anymore.
Step 1. Select the game and enter the game's sub-menu by pressing, or
if you are using the XMMB layout.
Step 2. Select "► Backup / Copy" menu to make a copy to another device. (USB000, USB001, HDD), or "► Delete" menu to delete the game from its current location's device.
When the copy or deletion process is done pressto go back to multiMAN game layout.
<span style="padding:10px;color:#2B465B;background-color:#E2E6E8;font-size:14pt;"><a name="chap3.lastgame"></a>Chap. 3.6 - Last Game <a style="text-decoration:none;" href="#chap3.lastgame">¶</a></span>
There's 2 different method to play a backup game.
- Launch the game directly from the Game Manager.
- Load the game in the PS3 memory and exit the game manager. Launch the game from the XMB(tm) as if it was a real game inserted in the blu-ray drive.
The first one is known as "Direct Boot", but have many inconveniences.
First, it works only for very few games (less than 10%), so you will have to try yourself and see if it works.
Secondly, the GameID of the game Manager (multiMAN ID is BLES80608) is used to check the updates, trophies and saves data. If your game already has an update on the PS3 it won't be used.
It's not recommended to use this mode, but some users are too lazy to go back to XMB(tm) (which takes ~1.5 additional seconds) to boot the game, so this option is available if you want to use it.
The second launching option is a "mounting" method. It tricks the PS3 by placing game's backup folder path in memory instead of the one of the Blu-ray drive. Once done, the Game Manager exit itself to let you return to XMB(tm). You can't then launch the game by inserting a blu-ray game in the PS3, and the backup path will be read instead of the real inserted Blu-ray game.
If you have a payload installed (dongle, cfw, BDEMU or Lv2 patcher), the "★ /app_home/PS3_GAME/" menu will be patched and redirected to the game path, it will allows you to launch the game without inserting a game in the drive.
A lot of games will work without a disc in the drive, but some games need a disc to make proper disc insertion checking. The best thing to do is to always leave a game disc inserted in the blu-ray drive.
Mounting a game in memory
Step 1. Select one of the games layout from multiMAN available layouts. (Any layout except the file manager), eg:

On every layout, you can see where the game you are selecting is located, internal HDD, USB or Blu-ray, along with the full backup folder's path.
Step 2. Select the game you want to mount in memory and press.
The manager will exit itself and the PS3 returns to XMB(tm).
Step 3. In the "Games" column on the XMB(tm), select the Disc icon to launch the mounted game.
If you have a payload, you can launch the game from the "★ /app_home/PS3_GAME/" menu.
Direct Boot
To direct boot a game, you need to access the game's sub-menu options.
Step 1. Select the game and enter the game's sub-menu by pressing, or
if you are using the XMMB layout.
Step 2. Select the "Direct boot" option on the bottom left and pressto enable the option.
Step 3. Press Start to launch the game from the sub-menu, or pressto save and return to the game layout.
The options are memorized for each games, you don't need to do it every time.
Step 4. when you are on a game layout, pressto launch the game.
If the game is not compatible with the Direct boot it will reboot the PS3 or freeze to a black screen. If it's the case, return to the game's sub-menu and remove the "direct Boot" option.
Other game's options
The game's sub-menu contains different options and functions you can use to play your games.
At the top, you can see the name and the current installed version&update of your game, and the required firmware.
At the right, you see the location of the game, either External, internal or Blu-ray.
The memo group is used for you to remember that a particular game needs to be on internal HDD in order to work, or need a disc in a drive.
Just enable one of these options and if you try to launch the game without complying to your choices multiMAN will give you an alert.
Direct boot: Try to launch the game directly from the game Manager without returning to the PS3 XMB(tm). Very few games are working with the direct Boot mode. It's best if you don't use it.
BD Mirror: This option allow the redirection of the blu-ray device to the USB device. Some games require this option, and works only from a FAT32 external USB drive.
Check the BD mirror section in the Problematic games chapter.
USB Patch: This mode is used for very few games. It's a fix for the controller issue on 3 different games.
Check the Controller issue section in the Problematic games chapter.
Favorite: The games with the Favorite option set will be listed in a separated column on the XMMB layout.
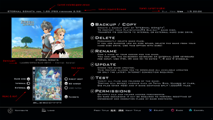
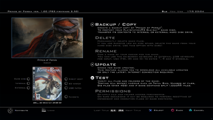
► Backup / Copy: Backup a blu-ray game to internal or external HDD, and copy the game from/to external/internal.
► Delete: Delete the current game at its current location (internal or external).
► Rename: Rename the display name for that game.
► Update: Check for official game's updates (An internet connection is required to use this function). See the Updating Games chapter.
► Test: Launch a test of integrity and readability on the game's file and print a detailed report.
► Permissions: Fix the file's execution permission after transferring the game from external or FTP to internal HDD. Check the BD mirror section in the Problematic games chapter.
Update: v2.00.01 added a new option in the sub-menu. Ext Game Data allows the installation of "Game Data" to the FAT32 external USB drive instead of using the /dev_hdd0/game/ folder to store the game's file installation and downloaded updates. This feature require BDEMU v2 and hermes payload selected as BD emulation mode in the XMMB settings column.
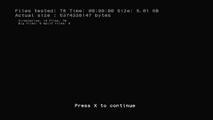
The "► Test" menu used on a Blu-ray game disc reports the number of files and folders, and if big files are present.
<span style="padding:10px;color:#2B465B;background-color:#E2E6E8;font-size:14pt;"><a name="chap3.bdreset"></a>Chap. 3.7 - BD-rom Reset <a style="text-decoration:none;" href="#chap3.bdreset">¶</a></span>
If you installed the "multiMAN [Last Game]" package on your PS3, you can mount the last played game in memory without launching multiMAN interface.
It's a multiMAN's shortcut to the "mount" function to put the game in the PS3 memory.
Last Game is not compatible with the "BD Mirror" option.
Step 1. After booting your PS3, launch the "Last game" homebrew from your "Games" column on the XMB(tm).
Step 2. wait until it returns to XMB(tm).
Step 3. Launch the mounted game from the Disc icon.
<span style="padding:10px;color:#2B465B;background-color:#E2E6E8;font-size:14pt;"><a name="chap3.updatinggames"></a>Chap. 3.8 - Updating games <a style="text-decoration:none;" href="#chap3.updatinggames">¶</a></span>
If you installed the "BDROM Reset.pkg" package on your PS3, you can un-mount the current loaded game from the memory.
While a game is mounted, you can't use your Blu-ray drive to read the inserted disc as the blu-ray drive is mapped to another folder.
Step 1. Launch BDROM Reset homebrew from the "Games" column of the XMB(tm).
When launching BDROM Reset homebrew, it will:
- Remove the path redirection to unload the current game in memory and give blu-ray drive access back.
- Clear BD Mirror by:
- Unmount the emulated USB device (clear BD Mirror).
- Remount the USB device as /dev_usb000x/.
- Remount the Blu-ray device as /dev_bdvd/.
- Move the PS3_GAME folder located at the root of the USB drive back to its original game's folder.
<span style="padding:10px;color:#2B465B;background-color:#E2E6E8;font-size:14pt;"><a name="chap3.games4gb"></a>Chap. 3.9 - Games with files bigger than 4GB <a style="text-decoration:none;" href="#chap3.games4gb">¶</a></span>
You have 3 available methods to update your games.
- Let the PS3 check for new updates, download it and install it automatically when you launch the game from your XMB(tm). (You need internet access on your PS3)
- Use multiMAN to check if there's an available update and select the one you want to download. (You need internet access on your PS3)
- Download the update files manually from your computer using a web-browser or a specific application. (No internet access needed on your PS3)
Update a game using multiMAN's update function
MultiMAN can check if your game have an update available on Sony's update server.
Step 1. Verify that your PS3 have internet access. (XMB(tm)/Settings/network Settings)
Step 2. Select the game you want to update and enter the game's sub-menu by pressing, or
if you are using the XMMB layout.

Step 3. Select the "► Update" menu and press
If the internet connection is detected, it will prompt you that one or more updates are available and will ask you if you want to download only the latest or all the available versions.

Step 4. Select yes to start the download. The files will be stored in this path on your internal HDD : /dev_hdd0/game/BLES80608/USRDIR/PKG/
Step 5. When the download is completed, it will show you a screen with the path and filename and you will be prompted to quit to XMB(tm) right now.
Select Yes and press.


If you don't exit multiMAN when prompted, the path containing the uploaded .pkg won't be set in the PS3 memory as a correct installable path and your .pkg won't be listed in the "★ Install Package Files".
Use the File manager mode to manually move the downloaded .pkg files from the PKG folder to the root of your USB device, then you can use the Installation menu from XMB(tm).
Step 6. On the XMB(tm), go to the "★ Install package files" menu, select your update file and pressto install the game update.
Some games require that you install all the update in the released order, and other games only require the latest available update version only.
To know if the game needs all the versions or not, you can launch the game with a working internet connection and accept the update process. It will show you the number of download needed. If it shows only one, then you need only the latest. You can then pressto cancel the official update process.
Update a game manually
To update a game manually, you will need to verify if a game has an update, download it and install it from the "★ Install package files" menu on the XMB(tm).
There are different websites and applications available to do that.
Step 1. Select and download your update using your preferred method:
- Websites:
- http://www.ps3pkg.de.vu : Enter the game ID and it will show you the available updates.
- http://psxstore.com : PSN-like graphical navigation. Also available directly from multiMAN website menu (most right on XMMB). Quit to XMB(tm) when asked, or copy the downloaded file from /dev_hdd0/game/BLES80608/USRDIR/DOWNLOADS to the root of your USB device.
- http://www.ps3news.com/subdomain.php?pagename=psn : Search by name.
- http://bombsomedodongos.com/pz3/ : Search by Game ID on all update servers.
Applications: - Another New Update Software
- Awesome Update Finder
- PS3 Game List : Windows, Linux and Mac
- PS3 Game Updater
Step 2. Place the downloaded .pkg file to the root of your USB device.
Step 3. Connect the USB device to your PS3 and go the "★ Install package files" menu on your XMB(tm), select the update you want to install and press.
Some application's screenshots:
<table style="font-size: 80%;display:inline; border: 0px solid black;"><tr><td> <div>Another New Update Software
</div></td></tr></table><table style="font-size: 80%;display:inline; border: 0px solid black;"><tr><td> <div>PS3 Game List
</div></td></tr></table><table style="font-size: 80%;display:inline; border: 0px solid black;"><tr><td>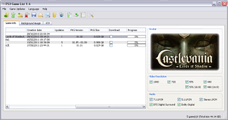 <div>PS3 Game List
</div></td></tr></table>
Some games contain files bigger than 4GB, but you can't store these files on a drive formated as FAT32.
To be able to transfer or dump a game to a FAT32 drive, the homebrew (Comgenie file Manager, Gaia Manager, multiMAN, etc.) are automatically splitting the big files into multiple 4GB files when copying or dumping a game to the external USB device. The split files are joined back automatically when copied from an external device to internal HDD.
To play these games, you can either:
- Reconstruct the split files by manually copying the entire game on internal HDD
- Reconstruct the split files automatically on the internal HDD when launching the game from external (Game Cache Data).
- If the big file is a Playstation Archive format (PSARC) you can extract the archive's content into multiple shorter files.
If you don't want to split the files, you can use the FTP server to transfer the game folder from your computer to internal HDD or use an external HDD with NTFS partition.
<a name="chap3.games4gb.splitfiles"></a>Splitting files <a style="text-decoration:none;" href="#chap3.games4gb.splitfiles">¶</a><a name="chap3.games4gb.reconstruct"></a>Manually reconstruct Split files <a style="text-decoration:none;" href="#chap3.games4gb.reconstruct">¶</a>
Games with big files are automatically split and reconstructed by multiMAN, but you can also use computer's applications to split or reconstruct the files.
You can find few Windows applications to split and un-split game's files automatically on your computer to create a FAT32 compatible files version.
Open split (java)
split4G, developed by Dean, multiMAN's author. Allow .666xx and .xx.part file extensions.
PS3spliter
The split files will be renamed with extension .666xx, where xx is part number.
A game containing split files will have his folder's name renamed with a starting underscore, for example "_BLESxxxx - Gran Turismo 5", and will be shown in black and white in multiMAN.
You can display these game's cover in color if you want by either deleting the underscore or setting an option in multiMAN:
Step 1. Go to multiMAN's Settings column on the XMMB layout.
Step 2. Set the "Poster and Cover Alteration" option to "Never".
If you remove the starting underscore from a game's folder containing split files, be sure to set multiMAN's option to verify the game's folder content before launching it.
Step 1. Go to multiMAN's Settings column on the XMMB layout.
Step 2. Set the "Verify USB Games" option to "Auto" or "Always".
OpenSplit
Open split is written in Java and is so multiplatform.
Step 1. Place your game's folder on an NTFS partition (you can't have a big file on a FAT32 partition).
Step 2. Download and extract Open split anywhere on your computer.
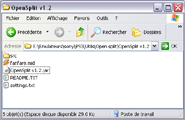
Step 3. Double click on the OpenSplit v1.2.jar file to launch it.

Step 4. Click on the 3rd button if you want to keep the original BIG or split files instead of deleting them after the process. (You usually don't want to keep them).
Step 5. Click on the button "Split BIG files to .666xx" and select the game folder you need to split files from. For example "X:\games\BCES-00569 - GT5"
Step 6. Wait until the process is complete and the application will rename the game folder with a starting underscore "X:\games\_BCES-00569 - GT5" if the game contains split files.
Pro: The program automatically search for big files in all the folders and sub-folders. It Splits and reconstructs files.
Cons: The program's window is very big and can't be resized, not a big problem though.
Split4G
Split4G is an application developed by multiMAN's author.
It allows the split of files in two different formats:
• <filename.ext>.666xx
• <filename.ext>.xx.part
Only .666xx is compatible with multiMAN.
Step 1. place your game folder on an NTFS partition (you can't have a big file on a FAT32 partition).
Step 2. Download and extract Split4G anywhere on your computer.
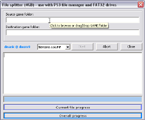
Step 3. Launch Split4G.exe and click on the first input field. Select your game folder, for example For example "X:\games\BCES-00569 - GT5".
Step 4. Click on the second input field and select the destination folder, for example "X:\games\".
Step 5. Select the "666xx" format from the drop down menu and click on Start button.
If you selected the destination folder where the original game folder is located, it will only create (add) the new split files. You will have to delete the big files manually.
If you selected another folder, all the files will be copied to the new destination, so if you select your fat32 device as destination, the game will be copied directly with split files.
Pro: Split4G can create/copy the game with split files directly to the FAT32 destination drive. You can select 666xx or xx.part files format.
Cons: Split4G can't reconstruct split files to Big files. It doesn't delete the big files and doesn't add the underscore automatically when saved to the same folder? (please let me know, I currently don't have a game with big files on my HDD to test).
PS3spliter
I never used it. I'll add it to the tutorial after I try it, or if someone want to write this part.
<a name="chap3.games4gb.cachesplit"></a>Cached Split files <a style="text-decoration:none;" href="#chap3.games4gb.cachesplit">¶</a>
To manually reconstruct a game with split files you only need to copy the game from your External USB device to the internal HDD.
All split files will be reconstructed.
Step 1. Select the game located on your USB device and enter the game's sub-menu by pressing, or
if you are using the XMMB layout.
Step 3. Select the "Backup / Copy" menu and pressto start the transfer process.
When asked if you want to copy to internal, select yes.
<a name="chap3.games4gb.psarc"></a>Extracting PSARC files <a style="text-decoration:none;" href="#chap3.games4gb.psarc">¶</a>
To cache split files automatically, you will need at least multiMAN v2.00.01, and either BDEMU v2 or any jailbreak dongle method with Hermes v4 payload.
Caching split files will only work with a Hermes syscall8 payload, so remember that if you are using a custom firmware with an included payload (for example Waninkoko cfw3.55), then multiMAN will not load BDEMU v2 because you already have a payload in memory.
If you are using such a cfw, re-install Kmeaw cfw or any other cfw not including a native payload.
Step 1. Go to multiMAN's Settings column on the XMMB layout.
Step 2. Set the "BD-ROM Emulator" option to "Hermes (Syscall8)".
If you are not using BDEMU v2 you will only have "Unavailable" as a choice. If you are not using a Dongle, you need to install BDEMU v2 to use this functionality.
Step 3. Set the "Verify USB Games" option set to "Always" or "Auto".
This is used to verify is the game you are loading contains split files even if the game folder name doesn't start with an underscore _
Step 4. IMPORTANT : REBOOT your PS3 now
Your PS3 is currently running with a patched memory set to syscall36 since you launched multiMAN with BD-ROM Emulator set to "PSGroove (syscall36)".
If you run multiMAN without switching the power OFF, then it will detect an already patched memory and won't apply the new Hermes payload patch.
Switch the power off to clear the memory.
Step 5. Reload multiMAN (now the PS3 memory will be patched with Hermes Syscall8)
Step 6. Launch a game with split files and multiMAN will reconstruct and cache the split files into the internal HDD before mounting the game and will exit to XMB.
The cache files will be stored in this folder: /dev_hdd0/game/BLES80608/USRDIR/game_cache/[TITLE_ID]/
Info : You can store up to 10 reconstructed files per games.
Step 7. Launch the game from the disc icon from the XMB, or from the ★ /app_home/PS3_GAME/
Note that games with reconstructed files have a different compatibility than games fully stored on internal HDD.
Some game only works from the shortcut while other games will only work from the disc icon with a PS3 Game disc in the drive.
Some games don't work at all!
Check the compatibility list to know if you can launch your game from external with cached file or if you need to place it on your internal HDD.
Deleting Game Cache:
The reconstructed files are deleted automatically when launching a game if there's no more space available on internal HDD.
In that case another game's cached files will be deleted.
If no other game's cached files can be deleted, a message will tell you that you don't have enough place on your internal HDD.
You can also manually delete ALL cached files from all games:
Step 1. Go to multiMAN's Settings column on the XMMB layout.
Step 2. Select the "clear games cache" and pressto delete all the reconstructed files stored in multiMAN cache.
If the big files have a .psarc file extension, then they are Playstation Archives files and can be extracted like a .zip or .rar.
If the files have another file extension, use the split method.
PSARC extractor.
This program require .Net framework 4.0
Step 1. Download and extract PSARC extractor.
Step 2. Search files bigger than 4GB from all your game's folders and sub-folders, and copy the files to the PSARC extractor folder.
Step 3. Drag and drop the bigfile.PSARC into PSARC.exe
Note: Sometime the program is not working. Maybe a bad Net framework version, or the file is not compatible.
Step 4. When the process is complete, you will have a new folder named after the archive filename.
Go into that folder and copy/move all the content into your game's folder, at the location of the bigfile, and delete the bigfile.PSARC
(replace the big file with the extracted content, don't copy the created folder but only its content).
Step 5. Place your game on a FAT32 USB device and load the game with multiMAN.
Some games request the ".PSARC" file instead of the file's content. (for example to install the game data to HDD on the first launch).
If it's the case, you can try to place the game with all the big files on internal first, let the game install the game's data when launching it for the first time, then delete the game from your internal HDD and use the game with its big files replaced by the extracted archive on your external USB device.
- /dev_hdd0/GAMES/Folder's name you want/PS3_GAME/USRDIR/EBOOT.BIN


